


Planning to launch a new WooCommerce shop and begin selling services and products over the net? As you are able to find loads of advice on the web, the whole procedure of making a store that truly seems to be good can usually appear a bit overwhelming.
In this article, we are going to show you the specific measures you want to take to wake up your store and run it as quick as possible.
Together with Elementor and WooCommerce Builder, you hit a flawless custom designed shop. This fresh, compact and visual process simply require out the majority of the disturbances which professionals face when establishing a store on WordPress.
If you're simply planning on establishing a small internet shop, this article is the ideal guide for you.
Today, we'll help you step by step on how to create an ecommerce website with Elementor & WooCommerce.
However, before we get down to business, allow me to explain a few authentic truths.
With technological breakthroughs over all these years, it has become much simpler and quicker to invest in and sell services and products through an ecommerce site.
Your physical store ought to have an internet platform to keep on business development. It's vital to cultivate your web strategy to keep within this competitive environment. Otherwise, you may lose a high numbers of possible prospects for your company.
On the flip side, in case you've got no physical shop, you are still able to start your online business and sell your services and products to your visitors. All you need is a professional website.
The rising amount of shoppers demonstrably demonstrates that there has never been a better time for you to begin an ecommerce business than now.
However, here the issue is how to construct an ecommerce website design with no coding knowledge. Well, WordPress with its helpful tool-kits solved this dilemma many decades ago.
WooCommerce is the plug-in to display your WordPress site as an ecommerce business platform. All just in a blink of an eye. No programming, no HTML, merely a couple clicks.
And what’s more interesting is that it is totally free. For these reasons, many users have moved their stores from other eCommerce platforms such as Shopify to WooCommerce.
Today, we are going to turn the spotlight on Elementor. This drag-and-drop page builder has made website designing as easy as ABC. Simply move your cursor and make your website ready to be launched. With no prior information or skilled assistance, you have all the ideal options to create a more gorgeous site just like a specialist.
Here are the prerequisites to develop your internet store:
- A WordPress Blog
- WooCommerce plugin (Free)
- Elementor plugin (Free)
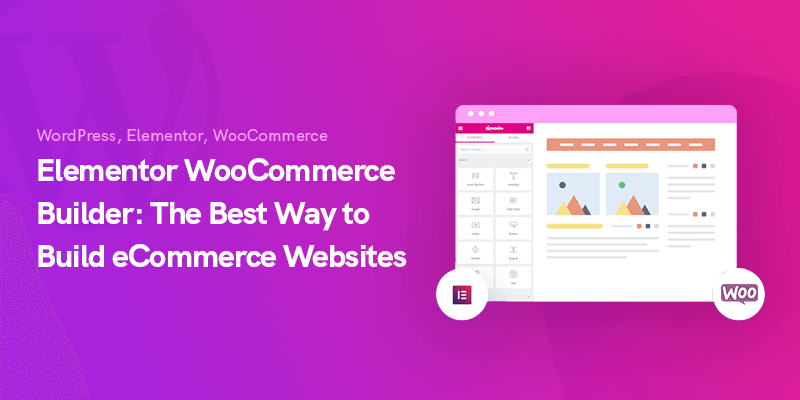
Elementor WooCommerce Builder


Let us assume that you have previously had your proper domain name hosting and hosting plan for your site. Then configure your own WordPress website and install all of the essential plugins including WooCommerce and Elementor.
The setup and also triggering procedure for WooCommerce resembles every WordPress plugins. Let’s reveal the best way to configure the basic WooCommerce pages and settings.
Step One: Begin with Installing WooCommerce Plugin

To set up and trigger WooCommerce Plug-in:
- Navigate into the WordPress Admin Dashboard → Plugins → Insert New
- Look for ‘WooCommerce'
- Then, install and activate the plugin
- Click on “Activate now”
Then you'll find an installation wizard. It is possible to bypass this part. It is also possible to skip this part and apply all the changes manually. Nonetheless, it's much far better to feel the procedure and the settings regarding customization. So let's move on to the installation wizard.
Providing Basic Information
In the beginning, the wizard asks you some questions regarding your shop's initial data including store location, commodity type, the currency you use, and also the types of goods you're intending to market (whether they are physical, electronic, or both).
You can also ascertain here if you wish to allow WooCommerce to track your usage for the store's progress.
Fill this form suitably and then click on “Let’s go” button in the bottom to get to the next steps.
Establishing WooCommerce Payment Gateways
Here you may configure the payment choices for your internet store. The options in this section regards your store location and the product types that you would like to sell online.
You can also choose the “offline Payments” and select a payment option such as check, bank transfer, or cash from the drop down menu.
After you are done with part, click on “Continue” to get to the next step.
Establishing WooCommerce Shipping
This section is about your product details shipping. WooCommerce supports two shipping zones:
One is USA and Canada, and the other is the rest of the world.
If you are in USA or Canada, you have the live shipping rate option. However, you also have the option to set a flat shipping rate.
Also, concerning the actual delivery speed, you must mention weight and measurements of your product.
Before clicking on “Continue”, make sure to print your credentials using the ‘Print shipping labels at home” option.
Configuring Some Additional Options
In this step, WooCommerce asks you to set up a number of plugins, such as Jetpack for automated taxes, Facebook for WooCommerce and MailChimp for email marketing.
Choose what you may presume crucial for your eCommerce site. Simply check each one or some or all of these options and they automatically add up to your internet website. Also, you can manually install them if you'd like.
Connecting WooCommerce and Jetpack & Finalize the Setup
Now, the installation wizard asks you to connect your site with Jetpack. With this plugin, you will not need to worry about the security for the automatic taxation process. Also, Jetpack works incredibly together with most of the functionalities regarding taxation. Again, you can install it manually from WordPress directory.
Click “Continue with Jetpack”.
It’s nearly the end.
Using this page, you're able to produce, export, check your dashboard, or review all the settings. Simply check and proceed ahead.
Fantastic job! You've done all of the essential settings for the WooCommerce shop. You can now add products to it.
Step Two: Adding Products to Your WooCommerce Store

Well, well, well. Now it's time to fill your internet eCommerce shop with the services and products which you want to provide for the users to buy.
Let us go through it step by step so you won’t miss a thing!
Inserting a Product
Using your WordPress dashboard, go to Products → Add new.
There you'll see that you can add information regarding the goods you want to add to your website.
Here you can insert your product details, such as product name, type, image, label, gallery, description etc. You need to include the entire products you want on your website one by one.
Configuring Product Data

Beneath the primary editor window, so can see a panel in which you can place up your product data. It is mandatory to customize this info attentively because it affects the smoothness of your website.
At first, choose the data types of your available goods from the drop-down menu. These types can be:
- Simple products
- Grouped products
- External/Affiliate products
- Variable products
This selection affects your configuration options. Thus, choose this data based on your business forte, business type, product groupings, etc.
Once you're done, you can access the items from “All Products”.
Checking the Front-End View of Your Products
Now you can see the front-end view of your shop and the way your services and products are displayed. However, you should be aware that much of this appearance depends on the theme you've chosen.
Step Three: Designing with Elementor

In order to design your online store with Elementor you will need to go to WordPress Dashboard → Plugins → Add New, then Look for ‘Elementor' and then install and activate it.
The activation process is the same as we did for WooCommerce.
As an alternative, it is also possible to manually download Elementor and upload its file with the Upload plugin option.
Now, Elementor is in your control. Start designing your pages.
Building a Product Page Using Elementor

Dynamic features and widgets of Elementor let you customize every inch of your internet store. If you are not familiar with Elementor, you can also use this step by step guideline.
Now, let us develop an item page together so you can see the exact specifics of such a process.
Go to WordPress Dashboard → Pages → Add New.
Then, enter a page name and choose Elementor Canvas option from the right-side template drop-down menu.
In the end, click on “Edit with Elementor” and get down to designing with this WordPress builder.
Using a pre-built template is also an option.
In order to extend your template library can install third-party add-ons too.
Elementor provides you completely free basic tools to enable you to build a professional web store. It helps you to create different kinds of categories and a specific class for each of your products.
Finalize the Design
After you are done with all the customizations, you should publish the page. But hang on! Before doing so, you need to set a specific category for your page to display under.
Well, using the same process you can customize other pages too. Nothing limits you here. Whatever that comes to your mind can be done and displayed using various widgets from the left editor panel.
A Number of Must-Have Pages & Features for Your eCommerce Website
The key to online store is to keep customers engaged enough to use your website for a longtime. Otherwise they go a mall and purchase whatever they need.
In order to reach such a status, your website must have an organized arrangement.
It is crucial that visitors find their needs effortlessly. Your web store should be so easily reachable that users get to their desired services and products fast and easy. Now that you are an internet shop-owner you should know what pages your website requires. Let’s have a tour!
- Homepage: This is actually the storefront of your shop. It is the most important attraction place to catch your viewers' eyes. It gives the visitors an overall display of your business.
- Product Page: this page is for displaying the Information of a specific product along with an “add to cart” button. Also, you have the option to suggest similar or other relevant products in this page.
- Category Page: This is actually the list-view of your products.
- Category Overview: using this page, you can display all the categories and sub-categories. It enables the visitors to see what it is that you are attempting to sell and instantly check what they need. It is also possible to skip this part if your store contains just a single group of products.
- Search: Providing a search options is a must for an internet store.
- Login/Create Account Page: it is a fantastic opportunity to get the information of your visitors. You can later use it for offering promotions and discounts.
- Guest Checkout: if you dedicate a page for guest users who do not want to share their information with you, you are actually respecting them.
- My Purchase: A purchase history helps your customers to look at their preceding orders from your store.
- Cart: Here digital shoppers can see what they have added to their cart, along with the total price, shipping fee, a field for coupons, etc.
- Refund: If you give your customers a chance to return/exchange what they have bought under certain conditions, you are giving them an excellent confidence to keep shopping from your website.
- Location: Some customers may check the address of your shop. Make sure to provide this information to them.
- Live-chat: Experiments show that a large numbers of clients prefer human interaction. So add a live chat option to your store.
- Reviews: This one is crucial! Enable your clients to share their own perspectives, requirements, questions, and shopping experience in your own e commerce website. Favorable feedback functions as an excellent influencer for your to-be-customers.
Do not look at the above mentioned pages as rigid ones. You can subtract or add to them in any way you prefer based on the products you provide.
To sum it up, don’t forget that online hopping isn't just a luxury anymore.
A huge number of people are engaging in online businesses to offer their services or products. To stick out from the audience, you will need a proper plan and small enterprise program. It gives you the ability to attract the ideal audience towards your own brand.