Using the PublishPress Revisions – Best Plugin to Update Your WordPress Posts
If you run a WordPress site, your content is your most valuable asset.
Your content helps sell your products or services. Your content makes you money.
So it makes you spend a long time writing, editing and proofing your content to make it as good as possible.
However, WordPress doesn’t have any easy way to protect your published content. Once your content is live on your site, there are a few ways to prevent unwanted updates. It’s not possible to “lock” your posts.
Fortunately, there is a solution available in WordPress thanks to “PublishPress Revisions”. Using this plugin, you can decide which users are allowed to update your published content.
PublishPress Revisions is a reliable plugin that has been around for over ten years now: it was previously called “Revisionary”.
In this tutorial, I’m going to give you an overview of how to configure and use PublishPress Revisions on your sites.
Part #1. Getting Started with PublishPress Revisions
To get started, download and install the PublishPress Revisions Free plugin from WordPress.org.
PublishPress Revisions will work out-of-the-box without any extra configuration. This is possible because PublishPress automatically provides permissions for all the default WordPress user roles:
- “Contributors” can submit revisions to their published posts.
- “Revisors” can submit revisions to posts and pages published by others.
- “Authors”, “Editors” and “Administrators” can approve revisions or schedule their own revisions.
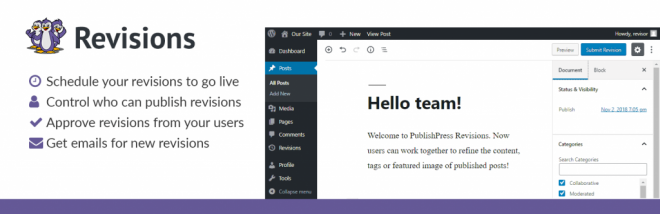
However, PublishPress Revisions will also create a new user role called “Revisor”. This role is designed to only create revisions to existing content.
For the first part of this tutorial, I’m going to use that “Revisor” role. Let’s start by creating a user in the “Revisor” role:
- Go to the “Users” link in your WordPress admin menu.
- Click the “Add New” button.
- Create a new user account.
- Choose the “Revisor” role.
- Click “Add New User”.

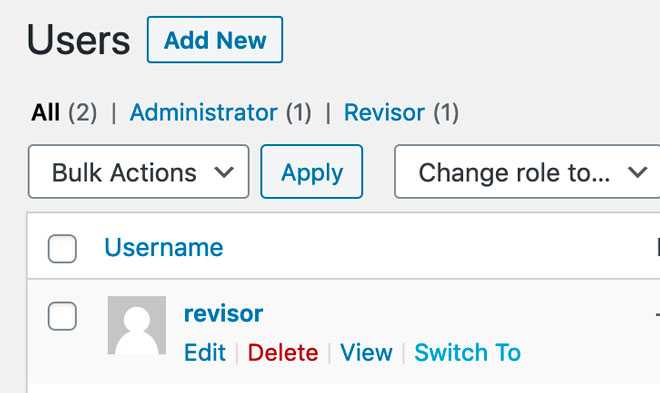
At this point, I’m going to give a strong recommendation for a second plugin. If you’re testing a plugin like PublishPress Revisions, I highly recommend having the User Switching plugin on your site as it makes it very easy to test different user accounts. In this situation, you can click “Switch To” on the “Users” screen and test the Revisor account. This next image shows the “Switch To” link:
After clicking “Switch To”, we can now a Revisor see when they log into WordPress and edits a post.
- Go the “Post” screen in your WordPress admin menu.
- Edit a post that is marked as “Published”.
Normally, you will see a big blue “Update” button in the top-right corner. However, PublishPress Revisions has hidden that option. Instead, a Revisor will see a “Submit Revision” button, as in the image below. This means that a “Revisor” will not be able to make unwanted updates. They can only submit a revision for others to approve.
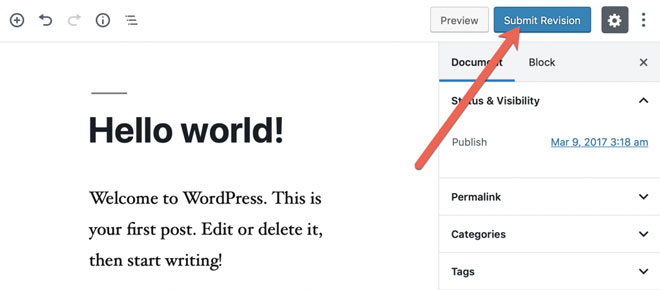
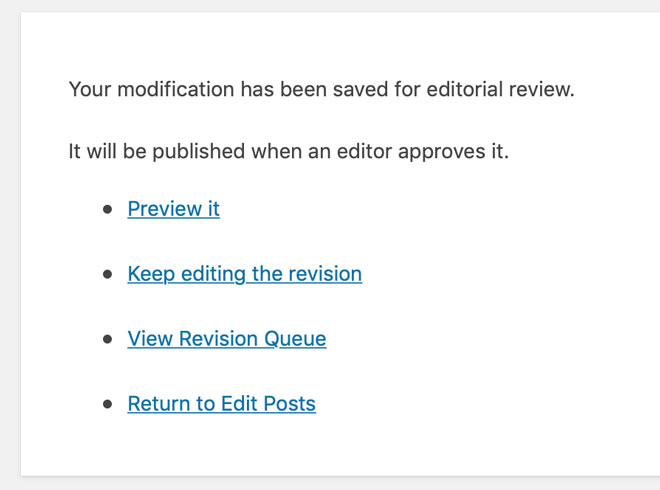
When the Revisor clicks the “Submit Revision” button, they’ll see this message: “Your modification has been saved for editorial review.” The Revisor can keep on submitting new revisions but they will never be able to publish them without a higher-level user approving those changes.
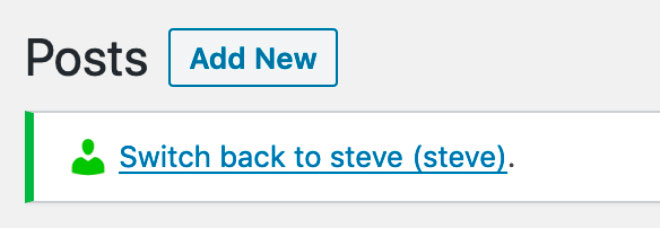
Let’s take a look at the approval process for this submitted revision. You can switch back to your admin user using the “Switch back to” message you can see below:
As an administrator, you’ll be able to see all submitted revisions in the “Revision Queue”. This is one screen that you can use to moderate and approve all those revisions.
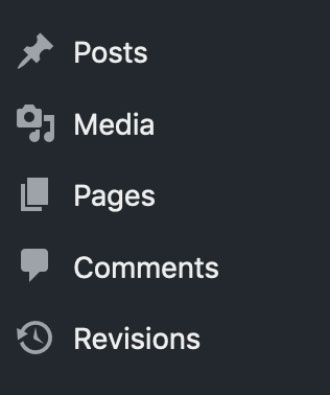
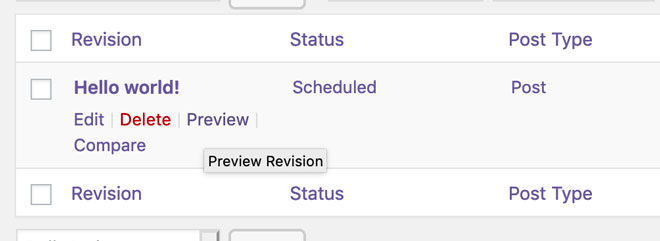
You can find the “Revision Queue” by clicking “Revisions” in your WordPress admin area:
This next image below shows the “Revision Queue”. All of the submitted revisions are visible here. In this image, you can see two revisions for the “Hello World!” post. One revision is “Pending” and waiting for your feedback. The other revision is “Scheduled” and due to be published on 2020/03/09.

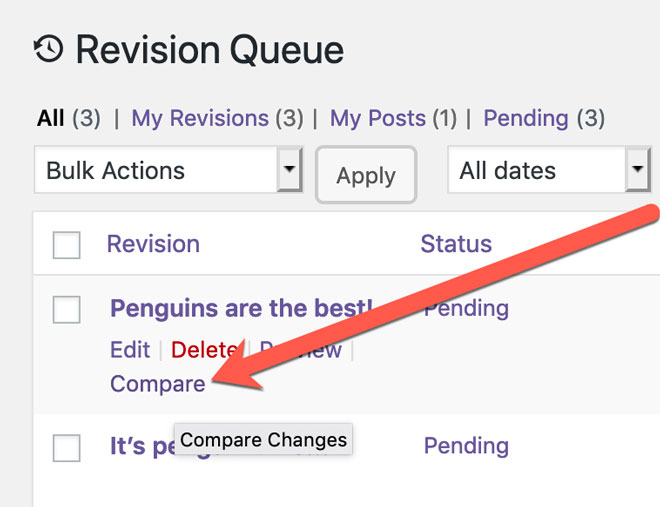
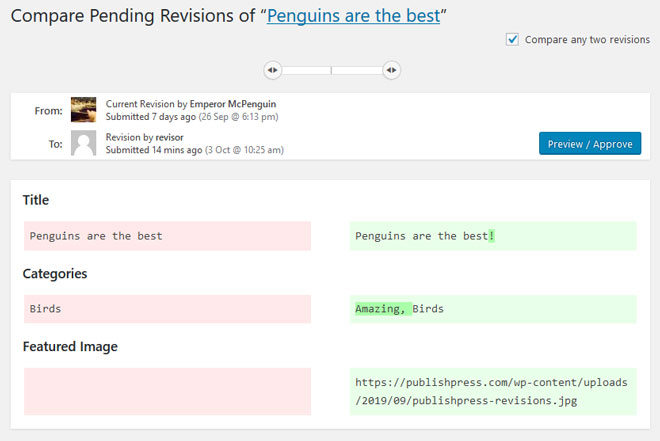
If you see a revision, you will want to know what has changed in this new version. PublishPress Revisions makes it easy to analyze the changes in revisions.
On the “Revision Queue” screen, you can compare the pending revision to the current post. Click the “Compare” link that you can see below:
You will now be able to see a side-by-side comparison of the pending and current versions. You won't have to guess what has changed in the latest revision – the plugin will show you all the changes. The old version is shown in red and the new version is in green.
You can also preview the new version live on your site. Instead of clicking the “Compare” link, click the “Preview” link.
You will see a green banner across the top of your site. This green color shows that you’re looking at a revision that’s waiting for approval. As an administrator, you will see four buttons:
- Compare: See the differences between this version and the currently published revision.
- View Published Post: See the currently published revision.
- Edit: Make changes to this revision.
- Publish now: Make this the currently published revision.

Now we get the most important part of this tutorial.
On the previous screen, you can click “Compare” and see what’s new with this post. On this current screen, you can see exactly what the updated post will look like.
If you’re ready to approve this update, click the “Publish now” button. The update that was submitted by the “Revisor” user is now live on your site.
Before we move, it’s worth giving you a little more information about this frontend approval process. This colored banner will change depending on the situation. For example, if the banner is red, this shows that the revision is no longer live. You can see a “Restore” button so you can make this revision live again.

If the banner is purple, this shows that you’re looking at a post that’s currently live on the site.

If the banner is grey, this indicates that you’re looking at a revision that’s scheduled for automatic publication in the future.

Part #2. How to Schedule Revisions
In the first part of this tutorial, we showed you how to approve revisions to published content. We created a revision as a “Revisor” user. We then published that revision.
However, it is also possible to approve the revision and schedule it to publish later. This is very useful if you want to automatically update a post on a certain date.
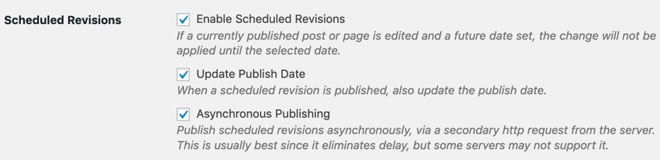
First, let’s check that this feature is enabled:
- Go to Revisions > Settings.
- Make sure the “Scheduled Revisions” box is checked.
Here’s how to create a future revision:
- Edit a Post that has the “Published” status.
- Start by making some changes to your content.
- Then, in the right sidebar, find the “Publish” date. In the image below, this post was originally published in 2017.
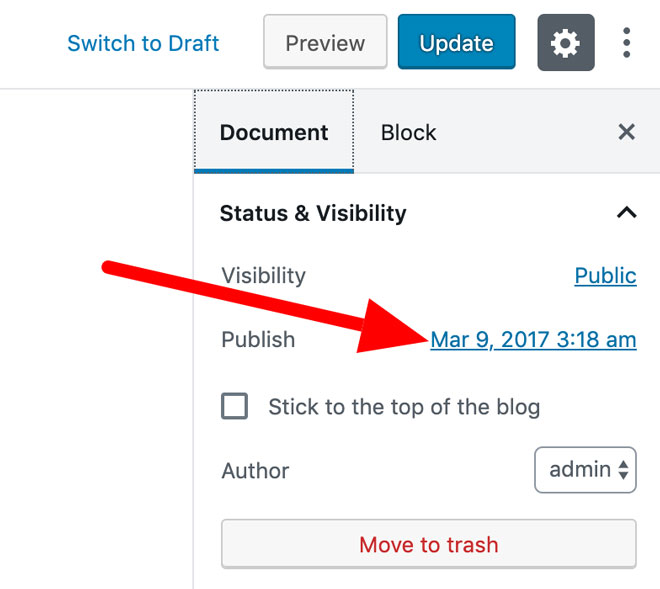
- You can change this to date in the future. This new date will be when your scheduled revision goes live. In the image below, I’ve chosen a date in July 2020.
- If you choose a future date, the “Update” button will change to “Schedule Revision”.
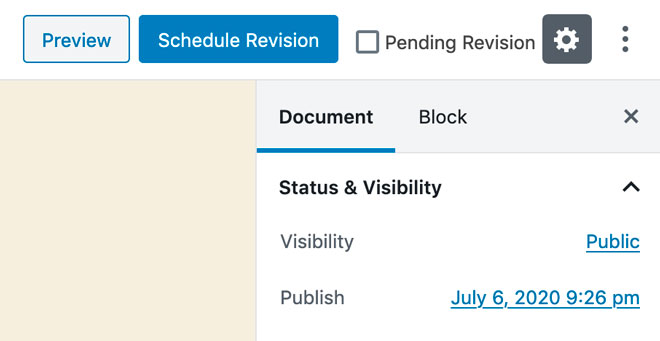
- Click “Schedule Revision”
- You will now see a message, “Your modification was saved as a Scheduled Revision.”
- Click the “View Revision Queue” link.
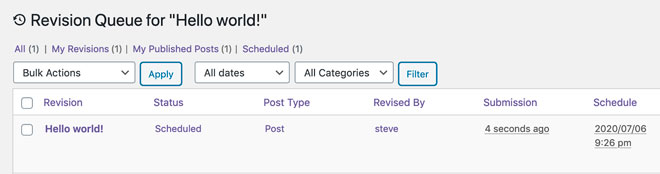
- You will now be on the “Revision Queue” screen and can see your scheduled revision.
- In the “Status” column you can see “Scheduled”.
- In the “Schedule” column you can see the new publication date.
If you click the “Preview” link on the “Revision Queue”, you will see a moderation toolbar. If this toolbar has a grey color, the revision is scheduled. You will also see the message, “This is a Scheduled Revision”.
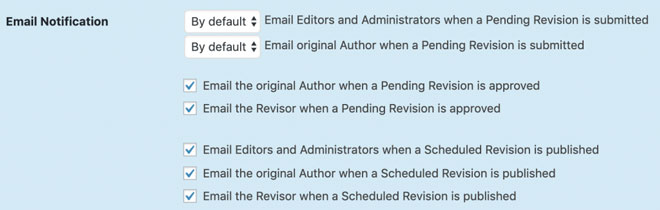
Do you want to get notified when the scheduled revisions go live?
- Go to Revisions > Settings.
- Here you will find options to email Editors and Administrators about submitted revisions and approved revisions. Click here for more on notifications.
Part #3. Permissions with PublishPress Revisions
So far in this tutorial, we’ve shown you how to submit, approve and schedule revisions. We’ve used the Administrator and Revisor user roles.
In this next part, I’m going to show you how to use PublishPress Revisions to decide who can create and edit revisions.
- Install the Capability Manager Enhanced plugin.
- Go to Permissions > Role Capabilities.
- In the sidebar, choose the role you want to edit under “Select Role to View/Edit”. I’ve chosen “Editor” in the image below.
- Click “Load”.
- Look for the “Editing Capabilities” area in the center of the screen:
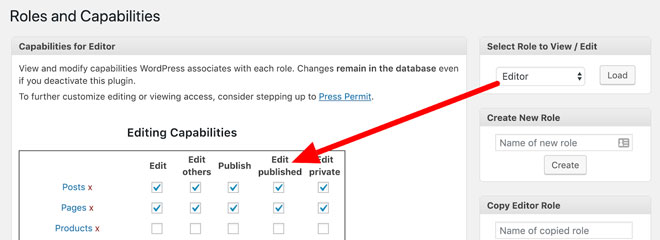
Here’s what those permissions mean for this user role:
- Edit Published: If this is checked, can edit published content. However, this permission alone doesn’t allow them to publish their changes.
- Publish: if this box is checked, users can make their changes live without moderation.
So if you want to create a role that can create revisions, but not publish them, here’s what to do:
- Edit Published: Yes / green checkmark
- Publish: No / red X
If you use the PressPermit Pro plugin it is also possible to customize revision permissions on a much more granular basis. You can set revision permissions on a per-post, per-category or per-tag basis. With PressPermit, you can customize permissions using the “Revision Exceptions” box under each post, page, category or tag.
PublishPress Revisions Summary
PublishPress Revisions is an excellent choice if you want to control updates to published content on your site. With this plugin, you can create, approve and schedule content updates.
You worked hard on your content – don’t let other users make unnecessary changes.
You can get the Free version of PublishPress Revisions on WordPress.org. There's also a Pro version available on PublishPress.com.
Webnus WordPress Maintenance – Services for Blogging

Webnus which is a WordPress theme and plugin production company has a long history in this field. It has created 2 of the best WP products on the market.
Deep multipurpose WordPress theme and Modern Events Calendar that is the best WordPress event calendar are themes 2 products. Webnus has gathered all this experience and offers all the WordPress maintenance and customization services at an affordable price.
Including in this maintenance package is a blogging package in which Webnus editorial team writes a professional, in-depth article on your chosen topic.
The topic can also be chosen by our team. The niche should be selected by the client, however.
Webnus offers this service alongside lots of other services like Access to All Themes, Plugins & Addons, Logo Design, Website Design (Based On Templates), Fix & Resolve WP Errors, Custom Website Design, Build & Setup WordPress Website, Mobile & Tablet Optimization and etc.
Webnus has more than 10 years of experience in this field, and we have an expert team in design, develop and digital marketing.
Recommended Posts

Marketing Tactics for WordPress Excellence in 2024
January 22, 2024
12 Reasons to Consider WordPress for Your First Website in 2024
January 17, 2024

Enhancing WordPress Sites with Computer Vision Capabilities
December 27, 2023
