
Gutenberg vs WPBakery: Which Page Builder is Best for You in 2024?
Today we got a comparison for you.
The two plugins we are going to compare are Gutenberg and WPBakery plugin.
We hope you can choose wisely between these two after reading this blog post.
| Factors | Gutenberg | WPBakery |
|---|---|---|
| Ease of Use & Interface | Simple blocks | Drag-and-drop, front/back-end editors |
| Customization & Flexibility | Limited without custom CSS | Extensive customization options |
| Performance & Speed | Lightweight, faster | Slower, shortcode-heavy |
| Compatibility with Themes & Plugins | Works with most themes/plugins | WooCommerce-ready, wide compatibility |
| SEO-Friendly | Clean code, SEO-friendly | Shortcodes can affect SEO |
| Responsive Design | Automatic, basic controls | Advanced responsive controls |
| Pre-built Templates & Blocks | Basic reusable blocks | Large library of templates/blocks |
| Developer-Friendly Options | Limited, needs custom CSS | Advanced, supports CSS/JS |
| Support & Documentation | Basic support, forums | Extensive support and tutorials |
| Pricing | Free, built into WordPress | Paid ($69 regular, lifetime) |
| Regular Updates | Updated with WordPress core | Frequent updates with new features |
Gutenberg vs WPBakery
So with no further hesitation, let’s dive in.
Gutenberg vs WPBakery: Introduction
About Gutenberg

When WordPress 5.0 was released on November 27, 2018, the most important feature it contained was Gutenberg. The name comes from Johannes Gutenberg, the inventor of the mechanical printing press.
When it was introduced, everyone was hyped about it, to an extent that some of the developers called Gutenberg “the future of WordPress”.
You can create a unique look for your website using this plugin. There are awesome features in this plugin which we will discuss in this article, but to make a long story short, Gutenberg has come to simplify the process of website creation and to boost user experience to another whole level.
To get to know this plugin better, we should keep on with this article and find out. So let’s find out!
About WPBakery

As one of the most famous page builder plugins in the world, WPBakery has been installed more than 4 million times. Previously called Visual Composer website builder, WPBakery Page Builder plugin gives you access to unique content blocks to design your webpages. These blocks are called content elements.
These content elements function with the drag and drop system, and you can use them everywhere, with maximum ease. They contain text blocks, video players, social media buttons, etc. enabling you to make the most out of it.
Gutenberg vs WPBakery: Installation
Gutenberg
Installing Guttenberg is so easy that you can do within a few minutes. First of all, you should go to your WordPress dashboard, go to the plugins heading and then click on ‘add new’. You’ll then see a search box. Just type ‘Gutenberg’ and the plugin will appear in the list.
The only things left to do are to install and to activate the plugin.
WPBakery
Installing WPBakey is not so much diiferent from Gutenberg. The only difference is that you should purchase the plugin in the first place and then from the Plugins -> Add New, click on Upload and browse to the plugin's zip file. Head for the installation and activation next. That’s all.
Gutenberg vs WPBakery: Feature Comparison
Gutenberg
- WYSIWYG Editing
WYSIWYG stands for “what you see is what you get”. Regarding Gutenberg, it means whenever you edit something, you can see the exact result right then.
This way, you will face less confusion comparing to an editor that does not let you see what is going on.
- Block System
Blocks are the signature signs of Gutenberg. If you have worked with WordPress, even once, you definitely know what these blocks are. This block system is something you can easily create your website with. Regardless of the elements you need to add to your website, it should be done using the same blocks.
- Anchor Support
Anchor support lets you add various HTML links and anchors to your content. This will come in handy when, for example, you decide to add a specific title to your page.
- Layout and Formatting
In Gutenberg, you can easily give style to your website elements; however, there are restrictions regarding your number of choices. For further options, you’ll need to apply custom CSS and codes.
You can almost customize everything, from gradients, fonts, and line height, to styles and background color of blocks.
- Dynamic Options
Those were the days when you had a static toolbar to display you everything. Now, a dynamic toolbar will do everything for you. This toolbar has been designed to be sensitive to any change in your content and this way, you will be more efficient when editing and stuff.
WPBakery
- Front- and Back-end editor
WP Bakery Page Builder has both a front and a backend editor. The front-end editor can be improved quite a bit if I compare it with other editors like Divi or Elementor. The dragging of elements and certainly between the different columns is sometimes a bit stiff, I noticed.
The back-end editor, on the other hand, is a very nice tool for building the pages well and quickly. By the way, you can switch between front and backend as often as you like. It is important to save everything before the switch or you will lose the work you have done.
- Various addons
WPBakery has lots of addons in its repository. You can make a great use of them for your content blocks and customizing the website further.
- WP Bakery Page Builder Elements
You will have access to a world of different elements in WPBakery. There are various plugins available for WPBakery which you can use easily and effectively.
- WP Bakery Page Builder + Woocommerce
WPBakery Pagebuilder works seamlessly with Woocommerce, the popular web shop plugin. Besides, there are many elements in the editor, designed especially for the WooCommerce.
- Demo lay-outs and templates
Demos are integrated in the page builder with which you can create all kinds of pages. Very handy not to have to start from scratch. Most themes already offer ready-made demo sites but one can never have enough starting material.
Which one, after all?
You see, both WPBakery and Guttenberg have a ton of useful, awesome features and tools. So passing a verdict is not an easy task. In our opinion, let’s say they are somehow get the equal score in a way.
Gutenberg vs WPBakery: User Interface
Gutenberg
Gutenberg features a very user-friendly user interface. There are useful prompts that will help you display where to go and what to do next.
When adding blocks, there is a plus sign on which you should click and add the element you need.
Take notice that the user interface may get a bit confusing sometimes, but you can surely find your way around using the help signs and stuff.
WPBakery
Many believe that a page builder is just for designing and running your website. This is false common belief, as you always need you tweak your website along the way. Always!
This is where the importance of a feature-full page builder comes to foreground. You need to choose a page builder that is easy-to-navigate, enabling you to design and maintain your website in way that leads to conversion.
WPBakery is magnificent regarding its user interface. It has a plus icon that will help you find elements you need.
A great feature of WPBakery that is related to its user interface is that it lets you change both the frontend and the backend of your website. So if backend editing is a pillar for you, then you should definitely go with it.
Gutenberg vs WPBakery: Speed and Performance
A website’s speed has always been an important factor.
This is even more important for your visitors, because if your website loads slowly, you may lose a considerable number of visitors/clients. According to a number of tests applied, overall, Gutenberg is faster than WPBakery. This is probably due to the simplicity and efficiency of design.
However, don’t forget that these two, along with Elementor, are among the fastest page builders available on the market.
Gutenberg vs WPBakery: Pricing Plans
Gutenberg Pricing
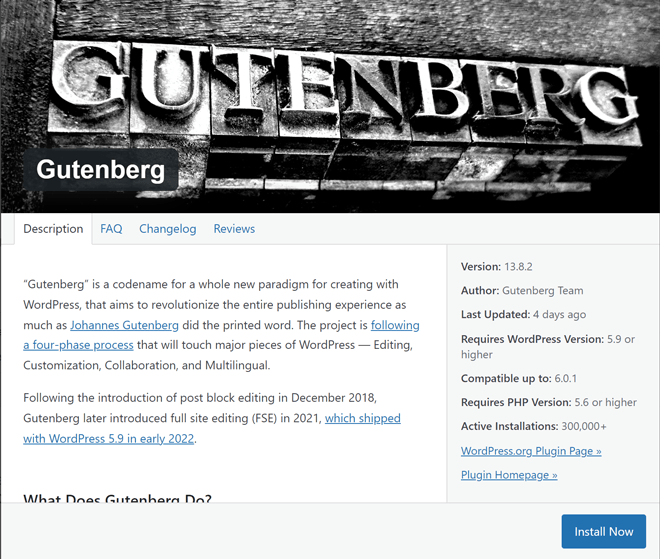
GUTENBERG is completely free. You can easily add this plugin and start using it.
WPBakery Pricing

Unlike Gutenberg, WPBakery is not free of charge. It has two separate plans: one is the Regular one, which costs $56, and the other is the Extended one, costing you $299. You can see the details of the differences between these two here. The good thing about it is that it is a one-time payment.
Gutenberg vs WPBakery: Pros and Cons
Now let’s take a look at a number of pros and cons of WPBakery and Gutenberg.
Gutenberg
| Pros | Cons |
| Block system visualizing | Not so much powerful customer support |
| User-friendly | Including fewer themes |
| Cost-free | |
| Drag and drop interface |
WPBakery
| Pros | Cons |
| High level of customization options | Confusion in choosing from all customization options |
| Extensive collection of assets in the template library | Leaving too many shortcodes after deactivating the plugin
|
| A little slower because of the number of shortcodes | |
| No inline editing |
Why use a page builder over WP default editor?
Page builders were made to give you more customization and get you more creative while making things easier for beginners. They give you way more options and things to play with than the default editor. So it is always recommended to use a page builder if you want to have a unique website.
Which page builder is better for beginners?
Gutenberg is generally easier for beginners due to its block-based simplicity and integration with WordPress. It’s free and requires no additional plugins. WPBakery offers more advanced options, but its extensive features might overwhelm new users.
Does WPBakery slow down your website?
Yes, WPBakery can affect your website’s speed, especially due to its use of shortcodes and more complex elements. However, with proper optimization, you can minimize the impact on performance.
Can I switch from WPBakery to Gutenberg without losing content?
Switching from WPBakery to Gutenberg can leave behind shortcodes that need to be cleaned up manually. It’s important to plan the migration carefully and test before switching on a live site.
Which page builder is better for SEO?
Gutenberg is considered more SEO-friendly out of the box since it produces clean code and doesn’t leave behind shortcodes. WPBakery requires more attention to ensure the shortcodes don’t negatively impact SEO.
Gutenberg vs WPBakery: Conclusion
So, who’s the winner? Gutenberg or WPBakery?
You should always consider that above everything, your personal preference is a big motive for choosing any product.
In terms of styling and speed, Gutenberg is by far a definite winner. Based on our observations, WPBakery turned out to be a little glitchy sometimes.
Regarding the updates, they release updates almost with the same frequency; so no winner here.
However, regarding the number of elements, WPBakery offers way more elements than WPBakery.
A major issue with WPBakery page builder is that you will be left with a huge mess of shortcodes after deactivating it. Besides, they are hard to clean, and will diminish the speed of your website.
So if you are looking for a final verdict for these two page builder, ours goes to Gutenberg.
If you have any experience regarding using these two, we would be more than delighted to hear you in the comments section.
Thank you for reading this article. We hope we could have been some help.
Recommended Posts

The Ultimate Guide to Effortlessly Automate SMS Notifications on Your WordPress Website in 2025
April 4, 2025

How to Create an Event Booking WordPress Website in 2025
February 24, 2025

How to Add an RSVP to Your WordPress Site in 2025
February 23, 2025