MEC Integrations
In MEC, there are various options available for integrating with the most commonly used tools in the market. In this article, we will walk you through all MEC Integrations.
Mailchimp
With Modern Events Calendar MailChimp integration, you can add existing submission data to your newsletter list. To enable this feature, you should get an API Key and List ID from your MailChimp account. MailChimp Documentation
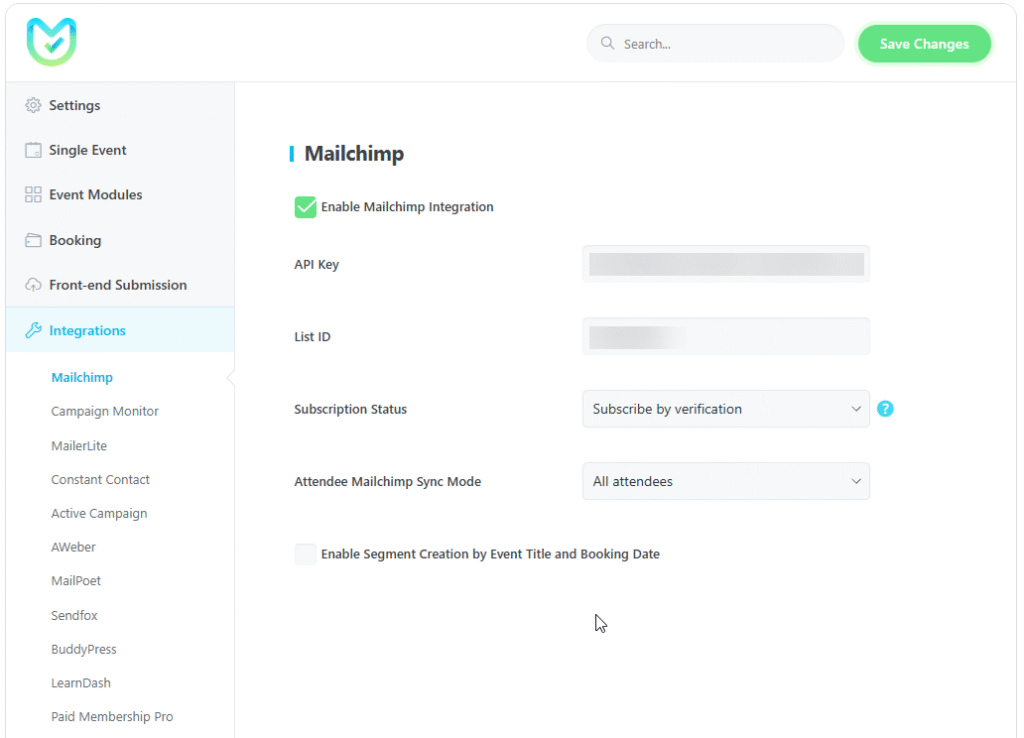
MailChimp API Key
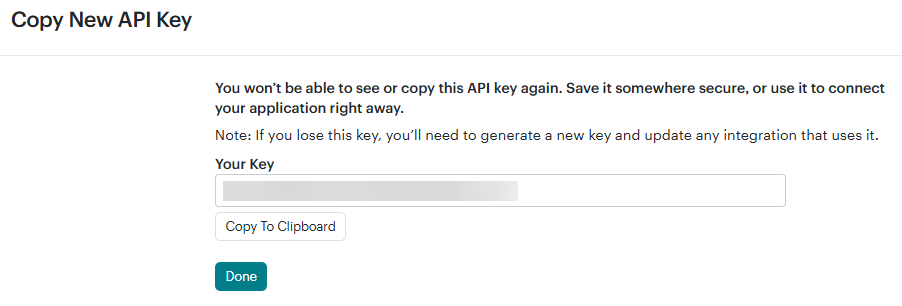
To get an API key for MailChimp, follow these steps:
- Click on your account link in the top right corner of the page (in the avatar dropdown menu).
- Select “Profile” from the dropdown.
- On the profile page, navigate to “Extras” and then click on “API Keys.”
- Finally, select “Create A Key.”
MailChimp List ID
To find your audience ID, follow these steps.
- Click “Audience” from the menu on the left sidebar.
- Click the More options drop-down menu, then select Audience settings.
- This page displays a table of settings for Audience, including one labeled Audience ID. Click the copy icon to copy the Audience ID to your clipboard.

Subscription Status
Subscribe automatically: By selecting this option, attendees will be subscribed to your mailing list automatically after each booking.
Subscribe by verification: By selecting this option, attendees must refer to the email they used to book the event(s) and confirm the email subscription to be added to your mailing list.
Note: Regarding the integration of MEC and MailChimp, you need to know that only the users who have made a reservation can be transferred to MailChimp campaigns.
Attendee Mailchimp Sync Mode
All attendees: By selecting this option, all attendees will be subscribed to your mailing list after each booking.
Only primary attendee: By selecting this option, only the primary attendee (the main attendee who made the booking) will be subscribed to your mailing list after each booking.
Enable Segment Creation by Event Title and Booking Date
By enabling this option, in the Audience list under the tags section, the Event Title and Booking Date will display.

Campaign Monitor
Grow your newsletter list automatically by syncing your Modern Events Calendar submissions with Campaign Monitor. To activate this link, you simply need to enter the API Key and List ID from your Campaign Monitor account. Campaign Monitor Documentation
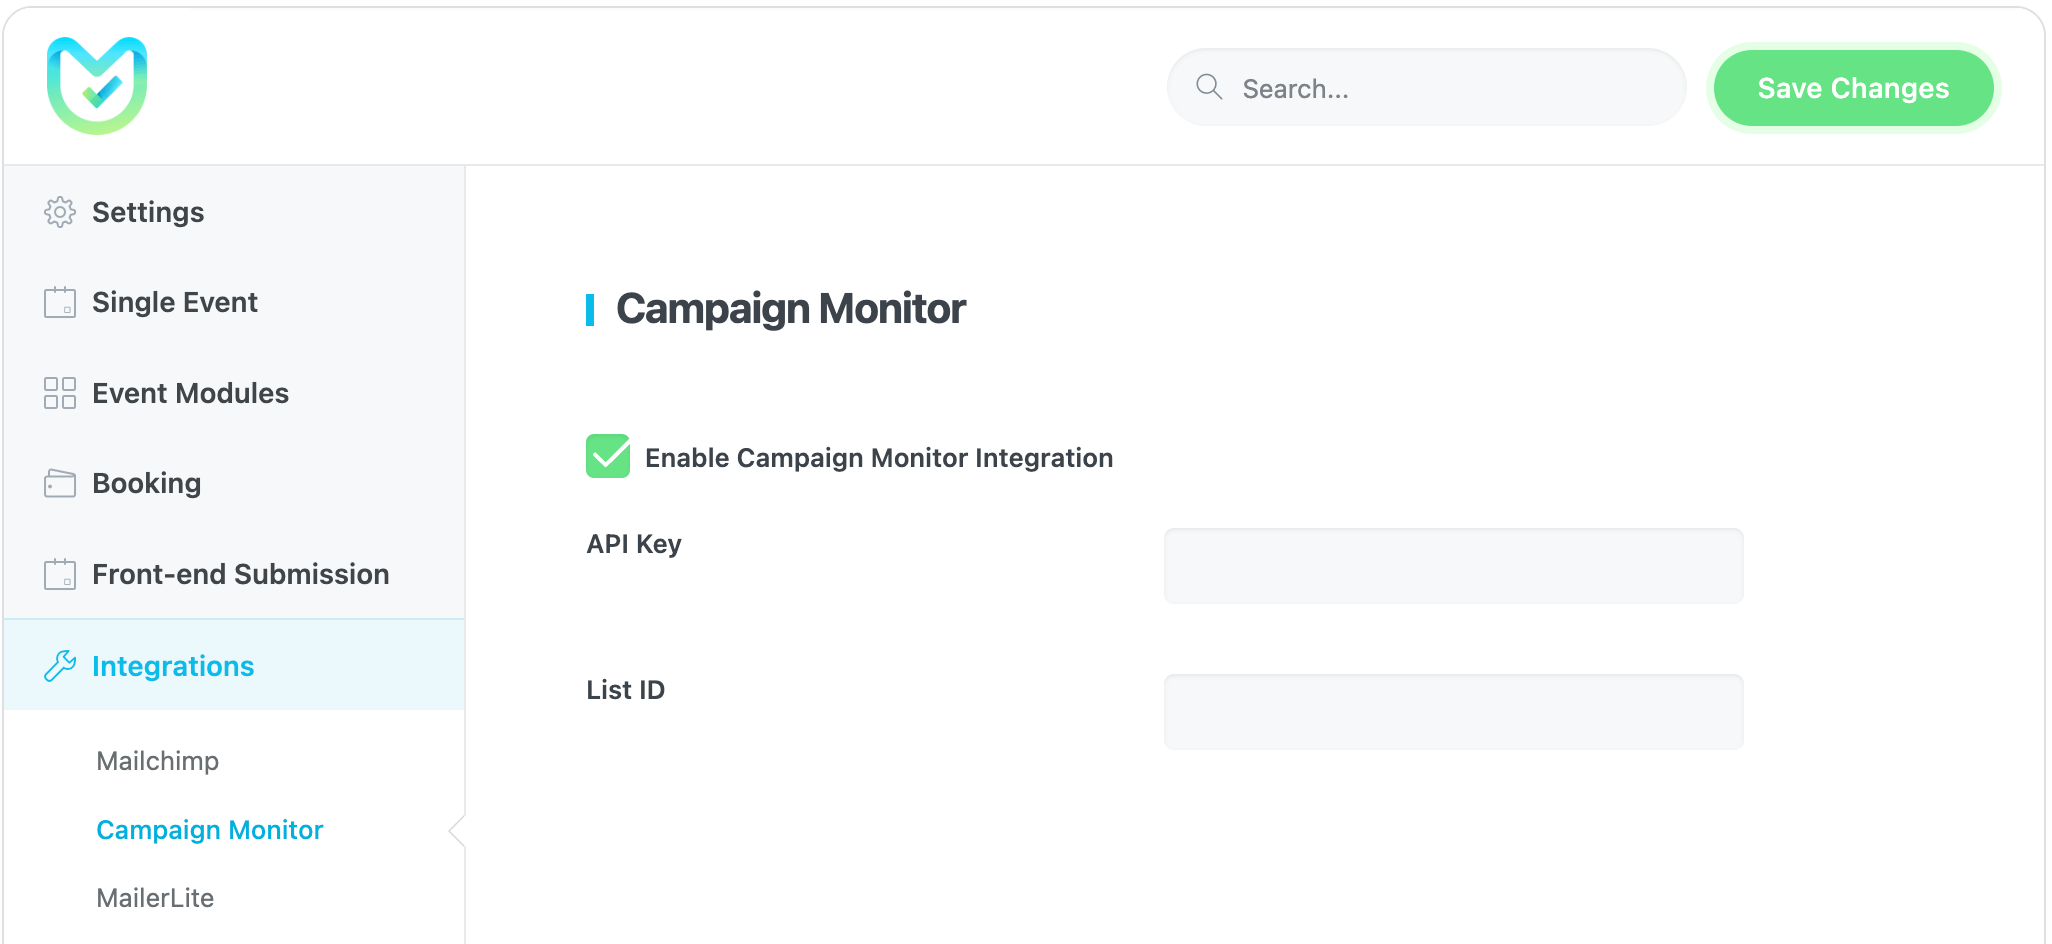
Campaign Monitor API Key
- In the Campaign Monitor dashboard page, navigate to the top right corner of the menu, and click on “Settings,” then select “API & Integrations“.
- On the API & Integrations page, click on “Generate API key” to get your API key.
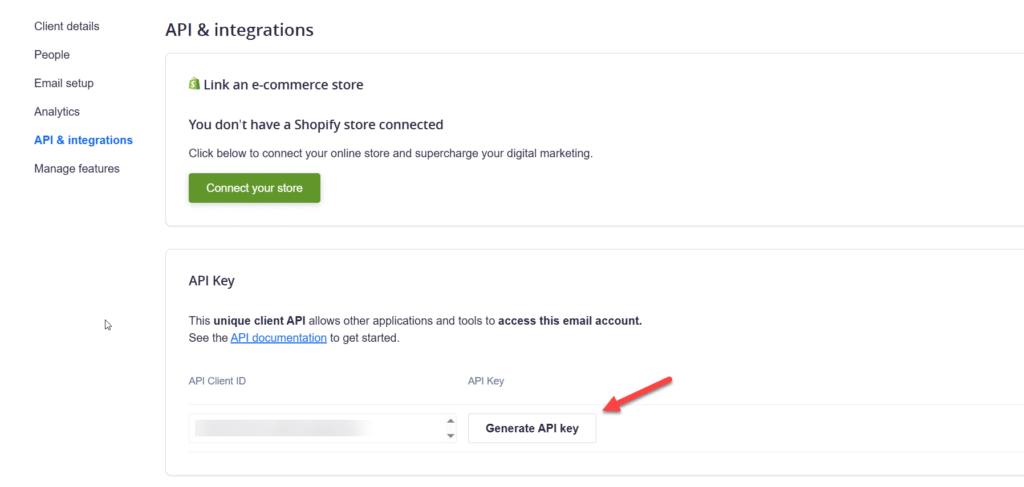
Campaign Monitor List ID
To get your List ID, go back to the menu and click on “Lists & Subscribers” and create a new list. Then, select “Settings” from the left menu, scroll down to the bottom of the page to find the List ID.

MailerLite
Connect Modern Events Calendar to your MailerLite account to grow your subscriber list. To activate this connection, you just need to enter the API Key and Group ID from your MailerLite account. MailerLite Documentation
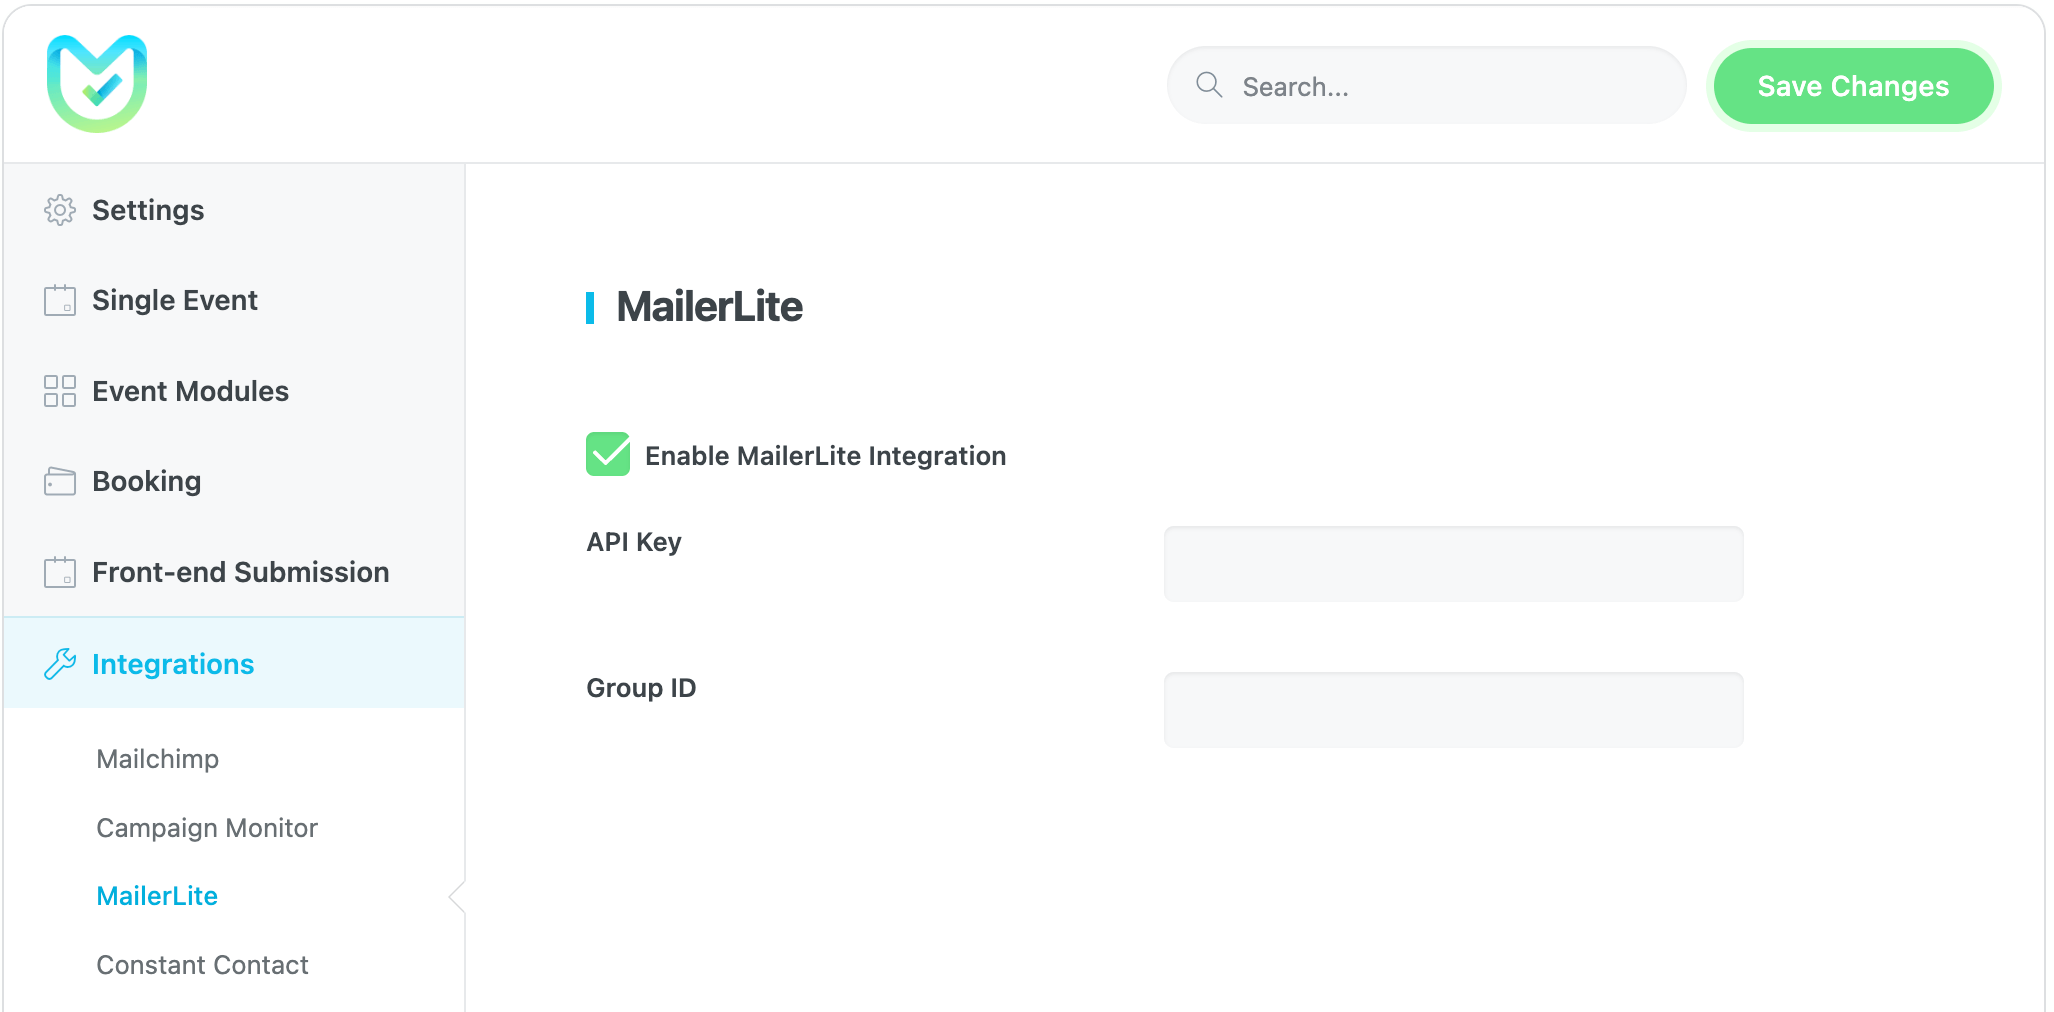
MailerLite API key
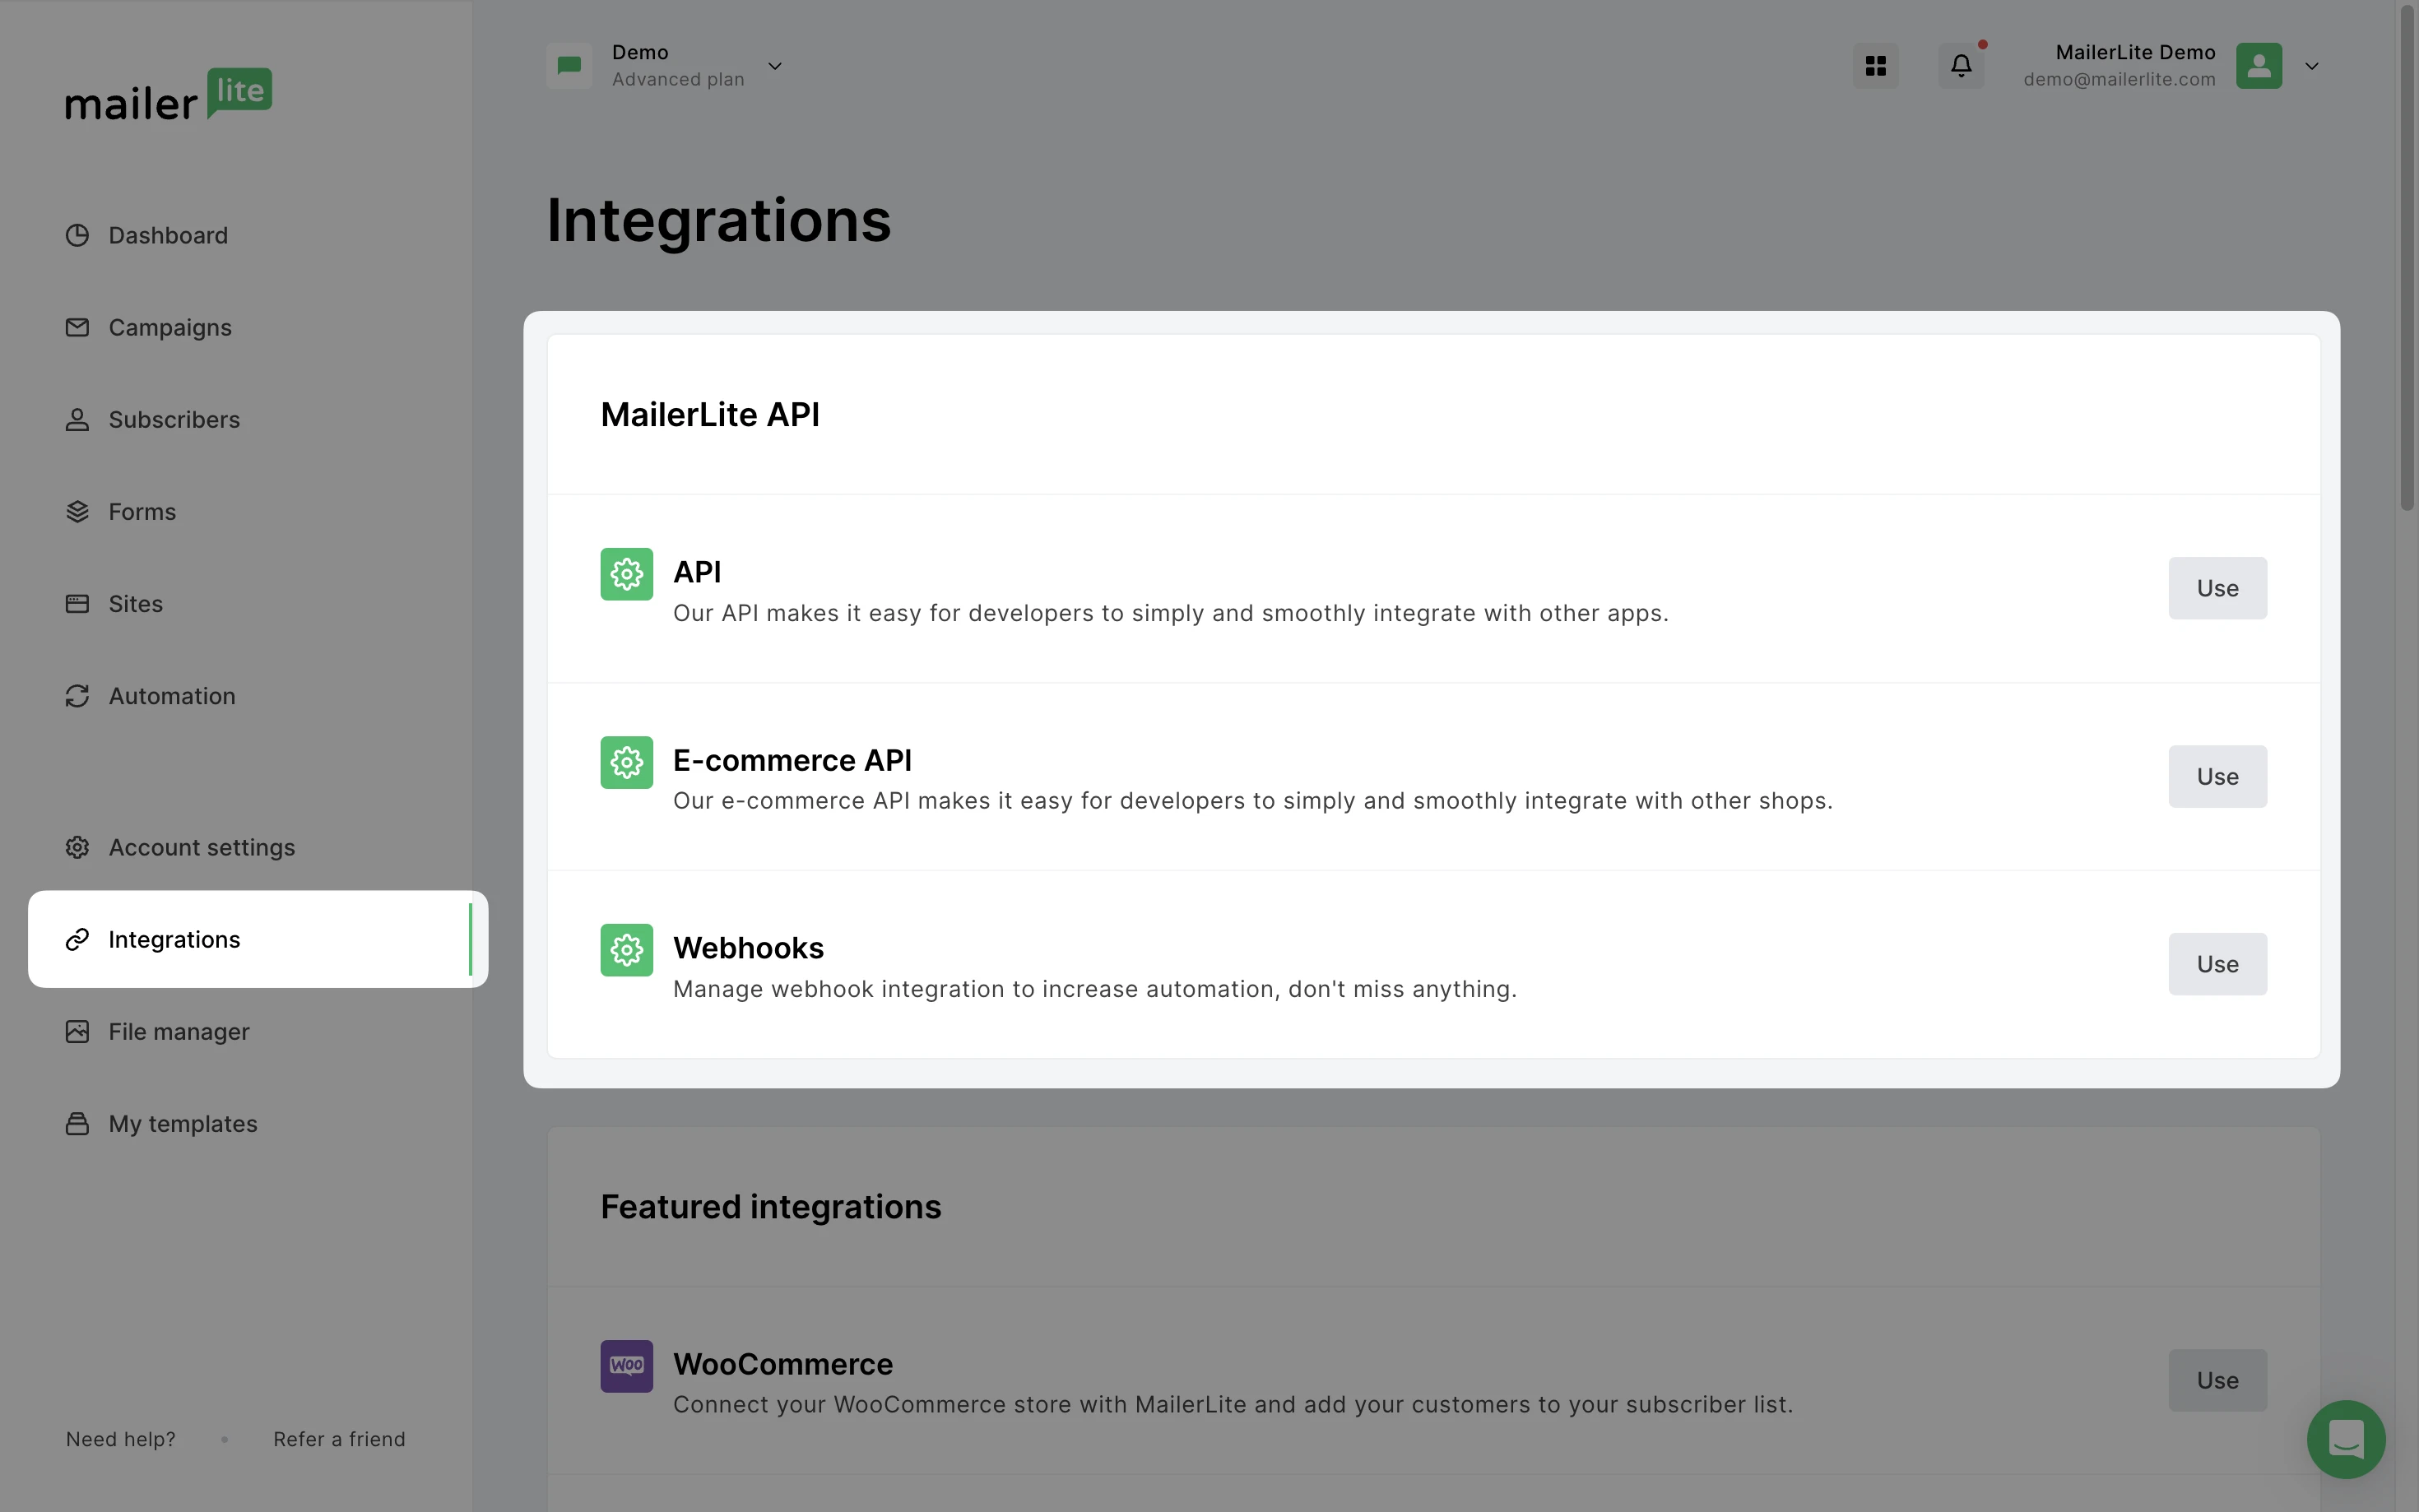
1. In the MailerLite dashboard page, navigate to the Integrations page, which you can find on the left-hand sidebar.
2. Under MailerLite API, Click Use for the API.
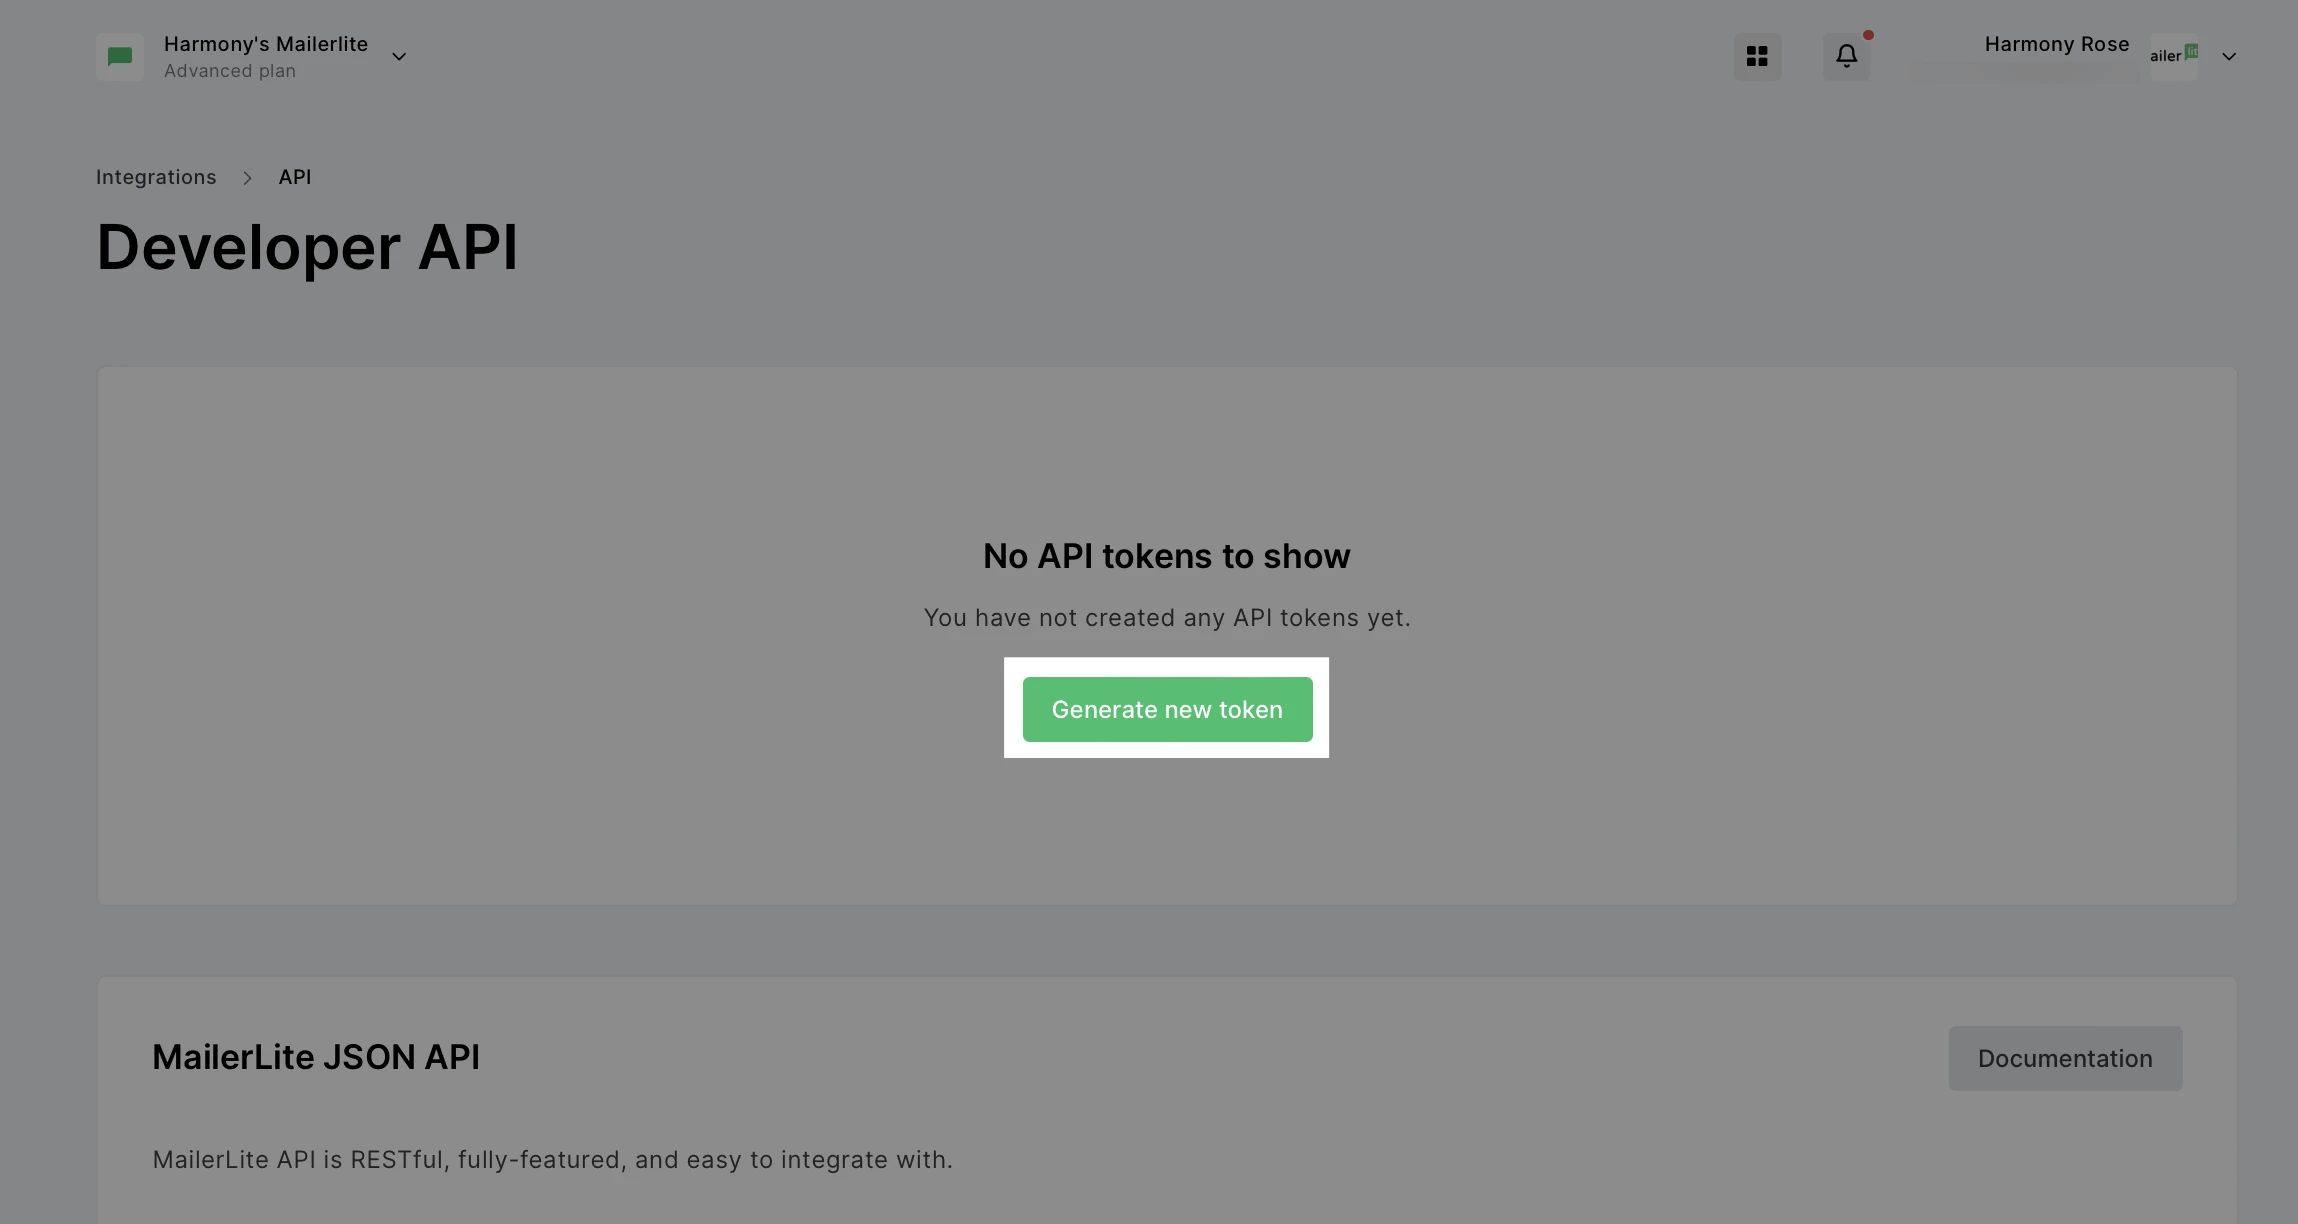
3. Then click on Generate new token.
4. Name the token. This can be any name, so you can easily recognize what the token is being used for.
5. Choose IP restrictions. Specify which IP addresses can access this API key.
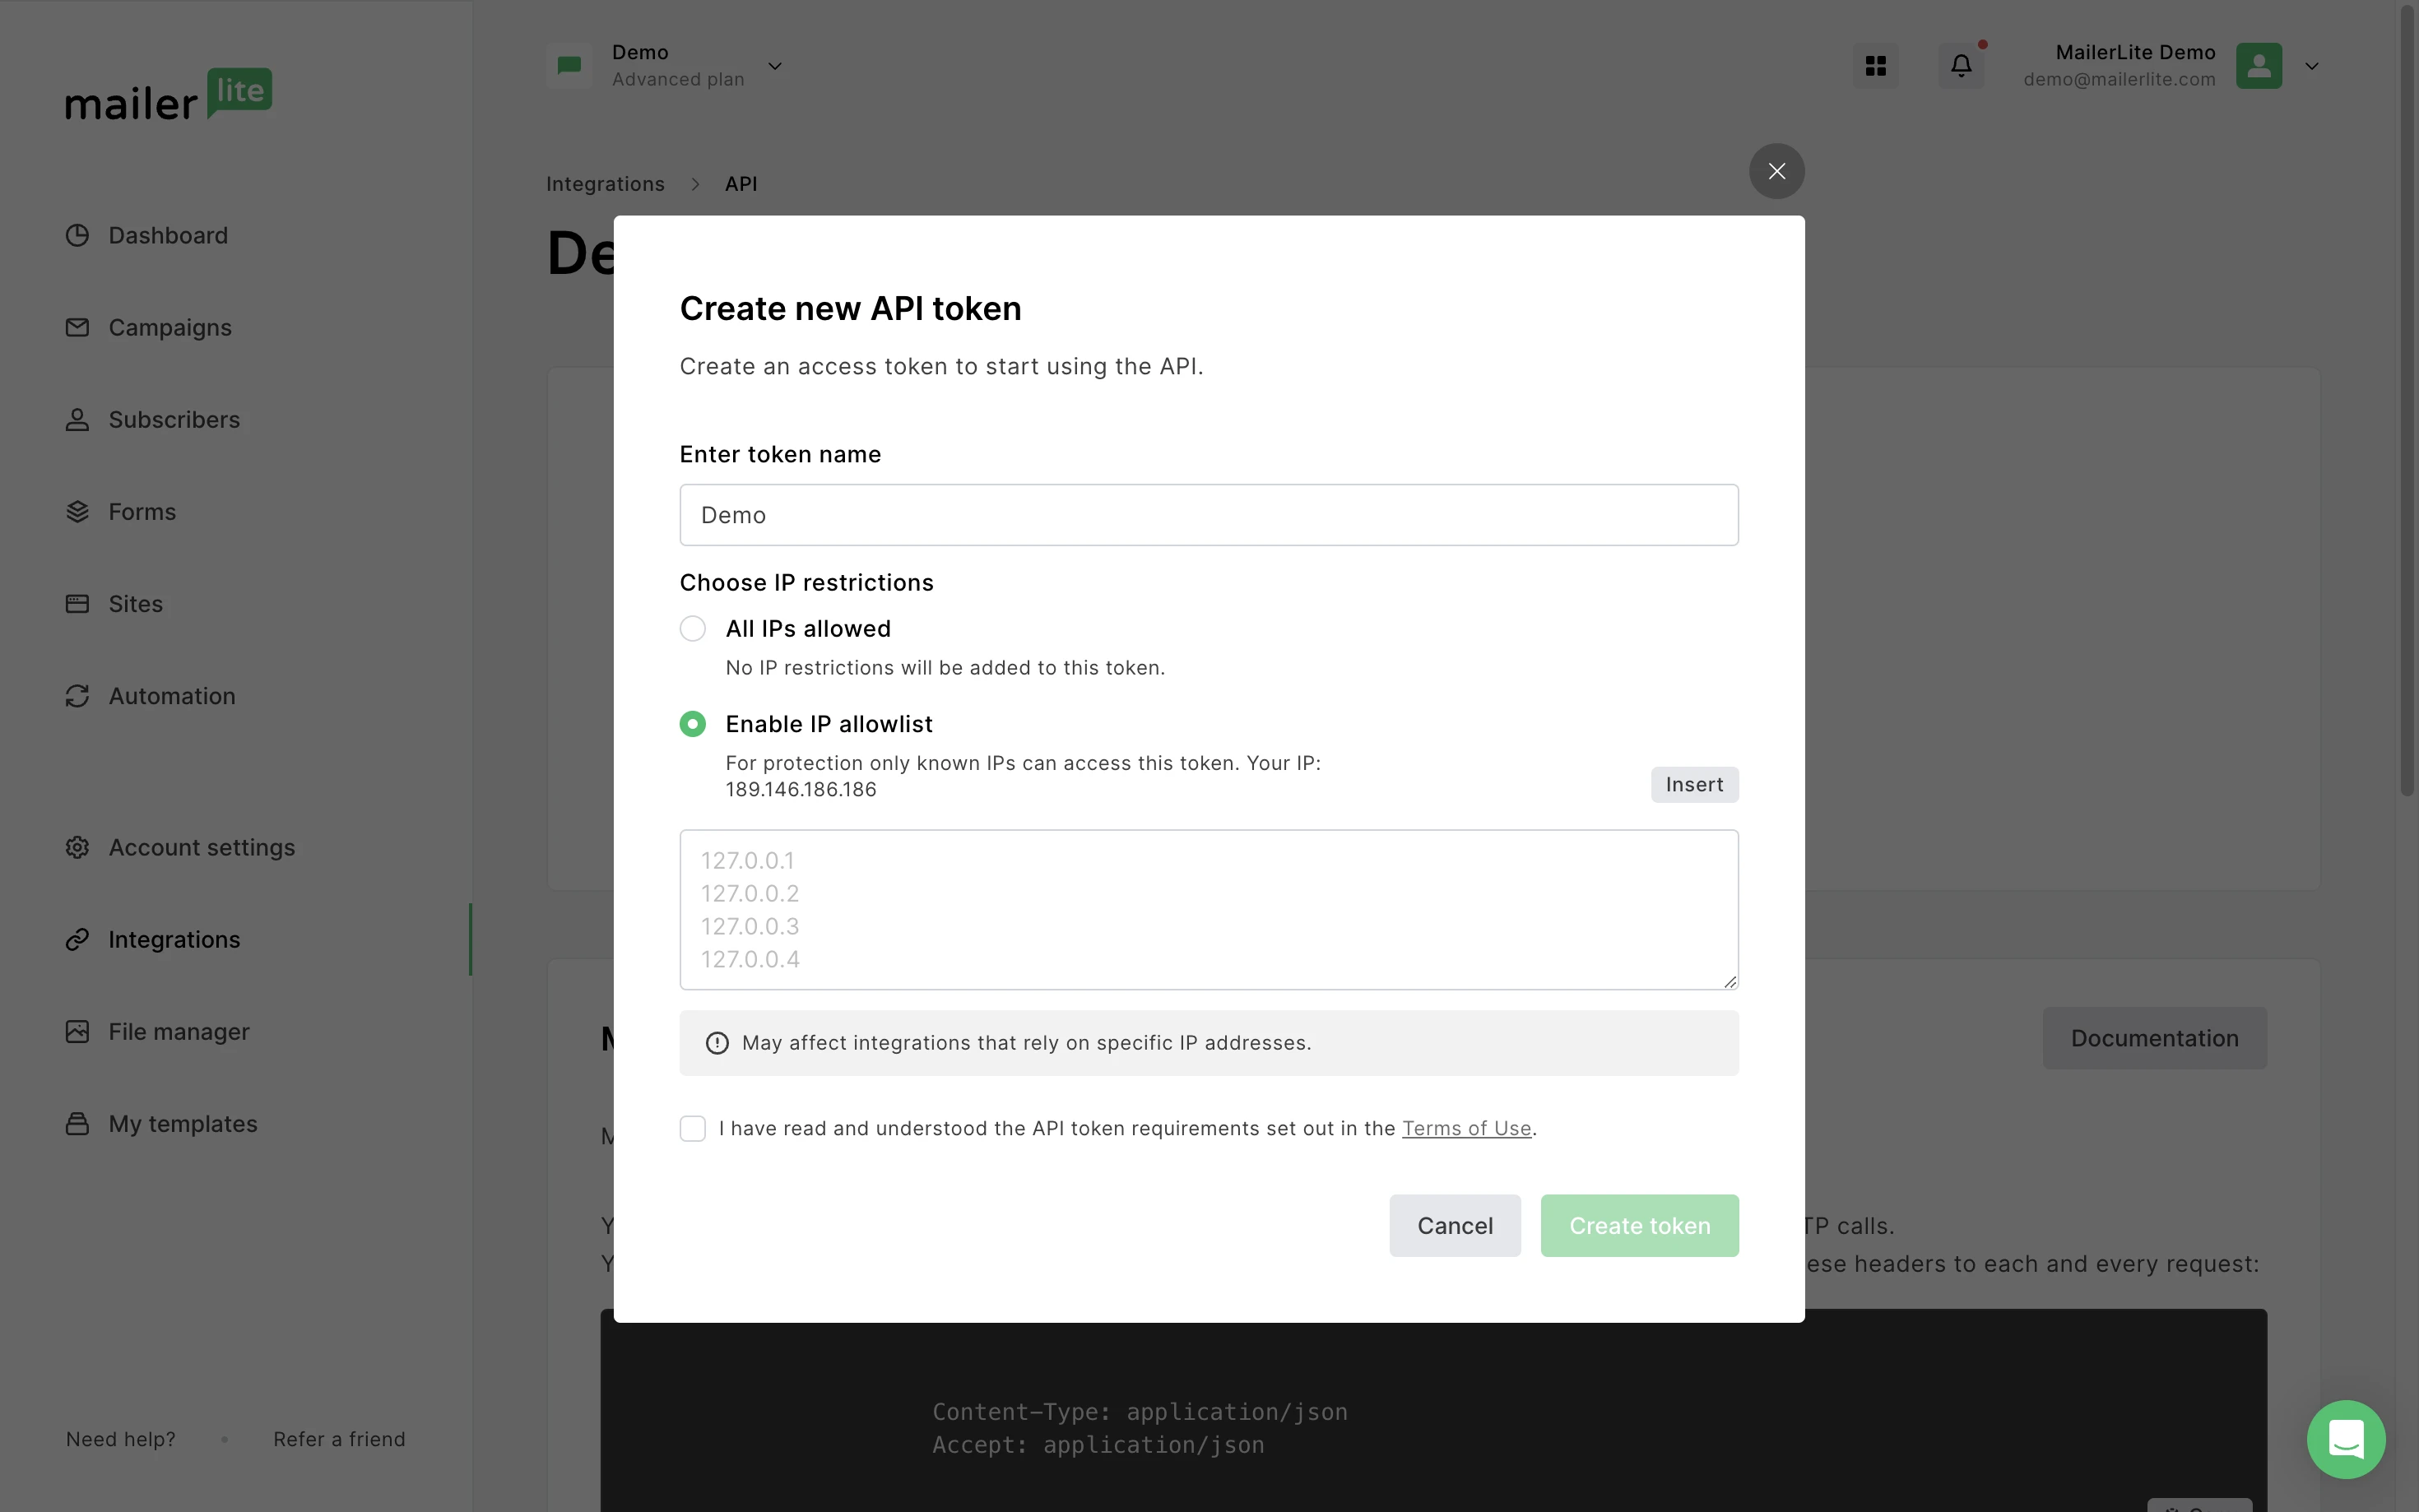
6. Click Create token and copy the key that is shown, or click Download to save the key as a TXT file.
MailerLite Group ID
To locate the Group IDs for your account:
- Navigate to the Integrations > API page.
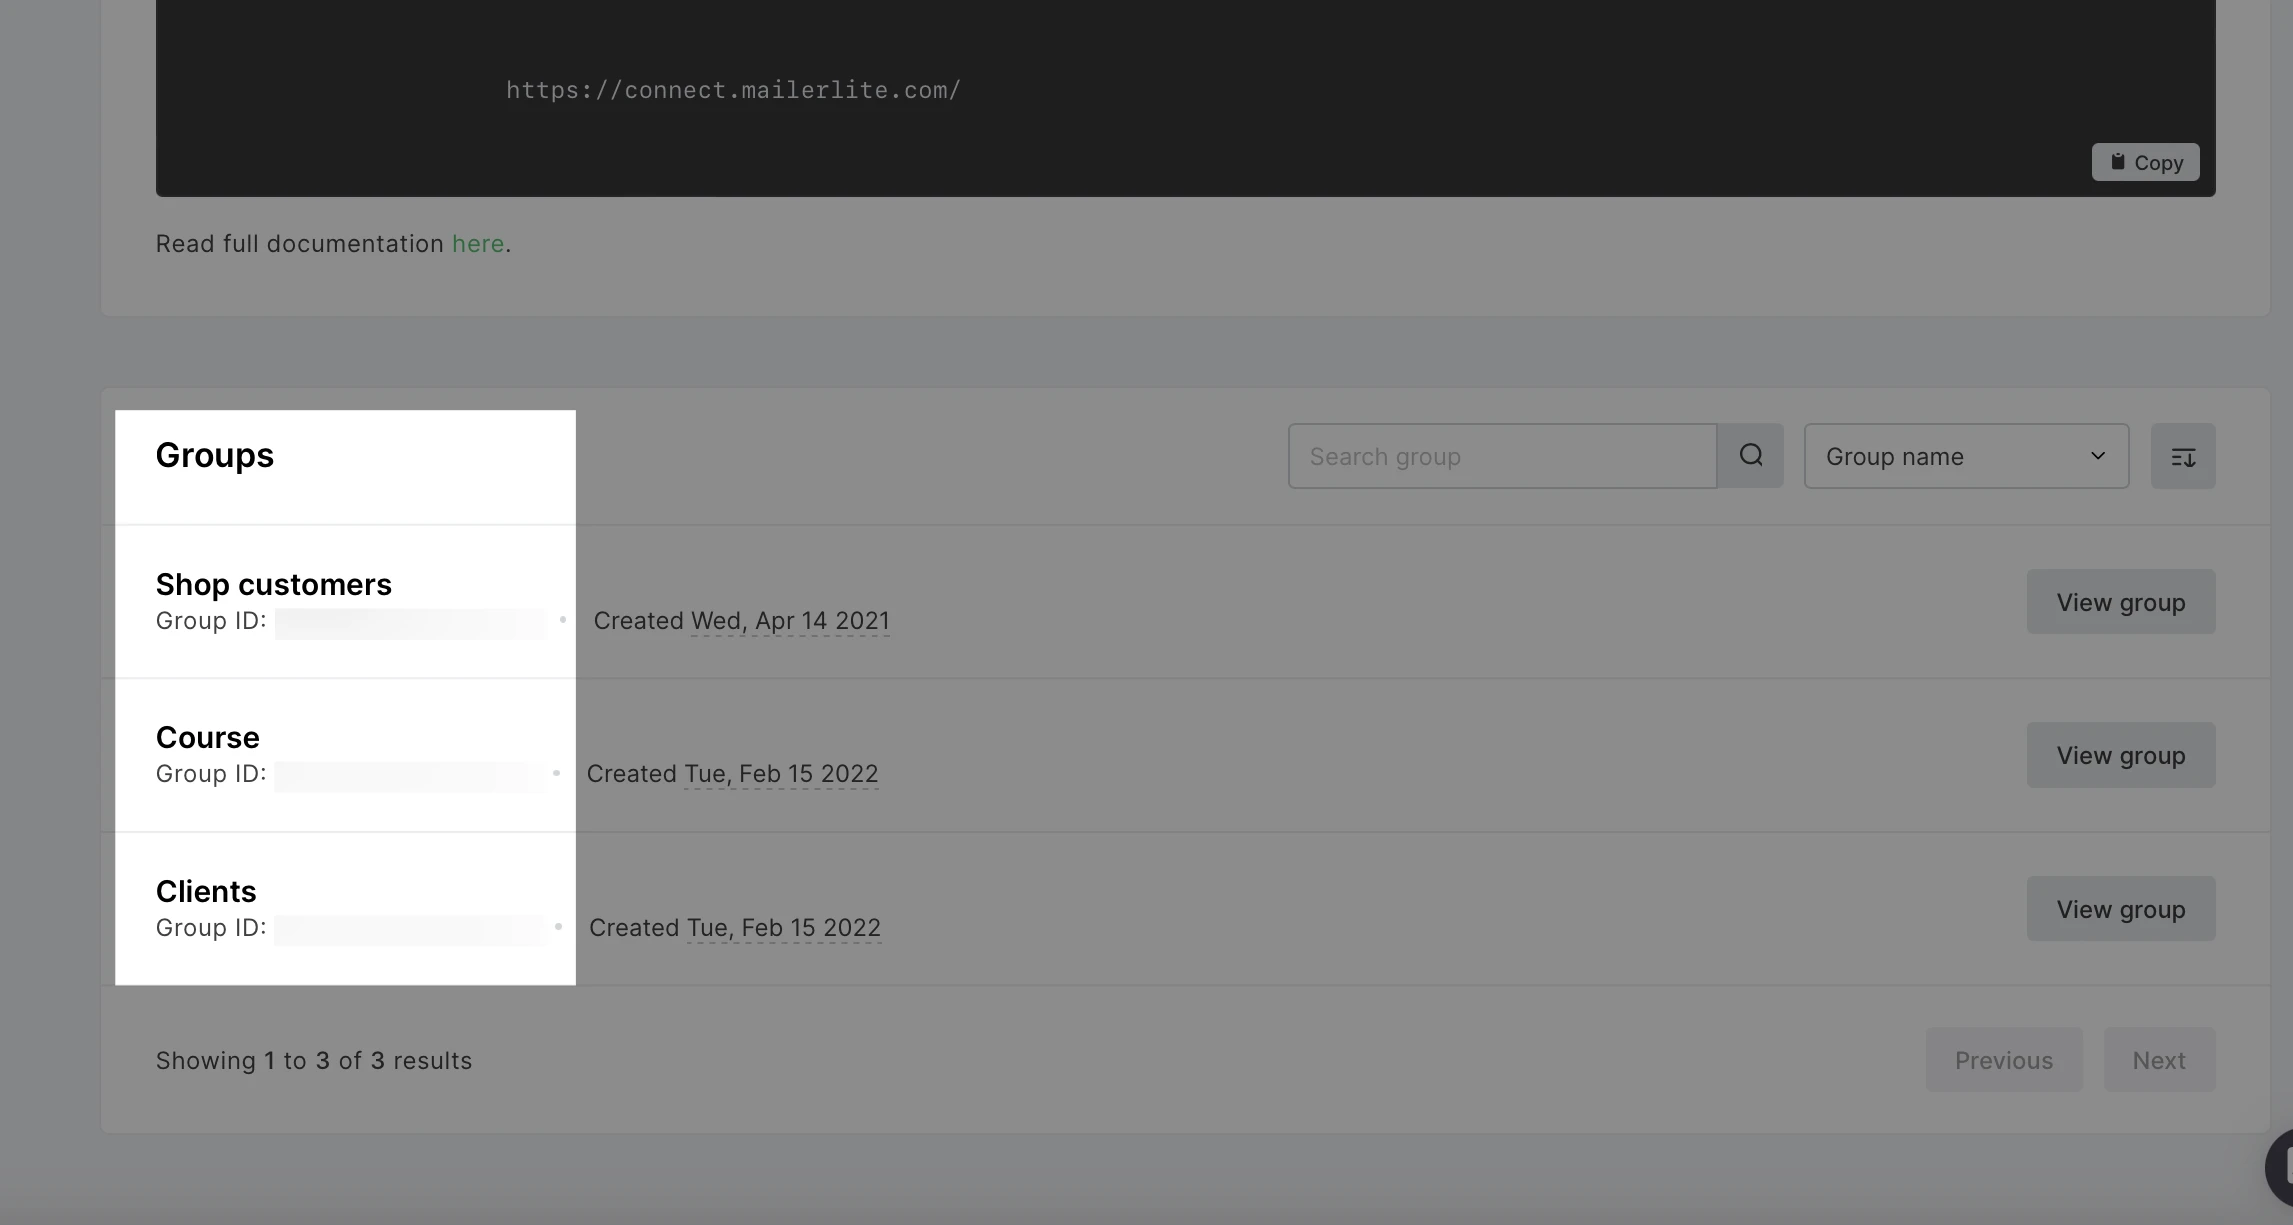
- Then scroll down to the Groups section to find the Group IDs for the groups in your account.
Constant Contact
Connect Modern Events Calendar to your Constant Contact account to grow your subscriber list. Constant Contact Documentation
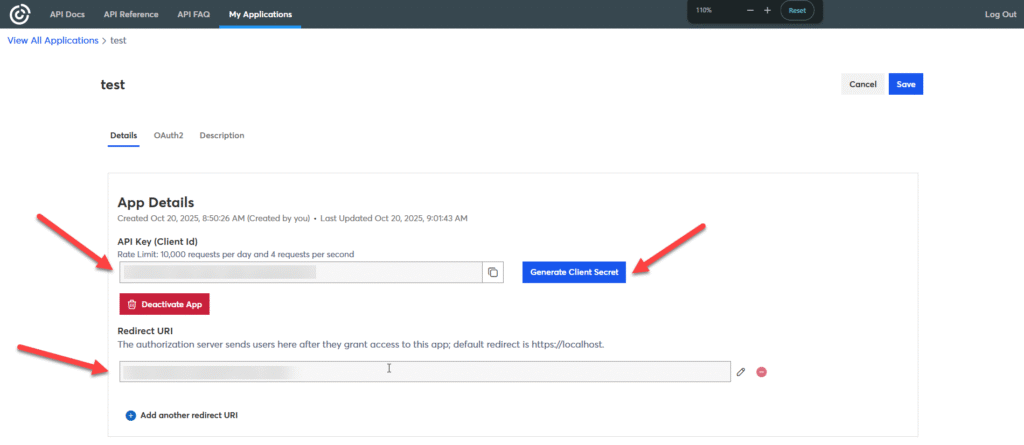
- First, go to developer.constantcontact.com and create an API Key and a Client Secret.
- Set the Redirect URI to https://yoursite.com/wp-admin (replacing yoursite.com with your actual domain).
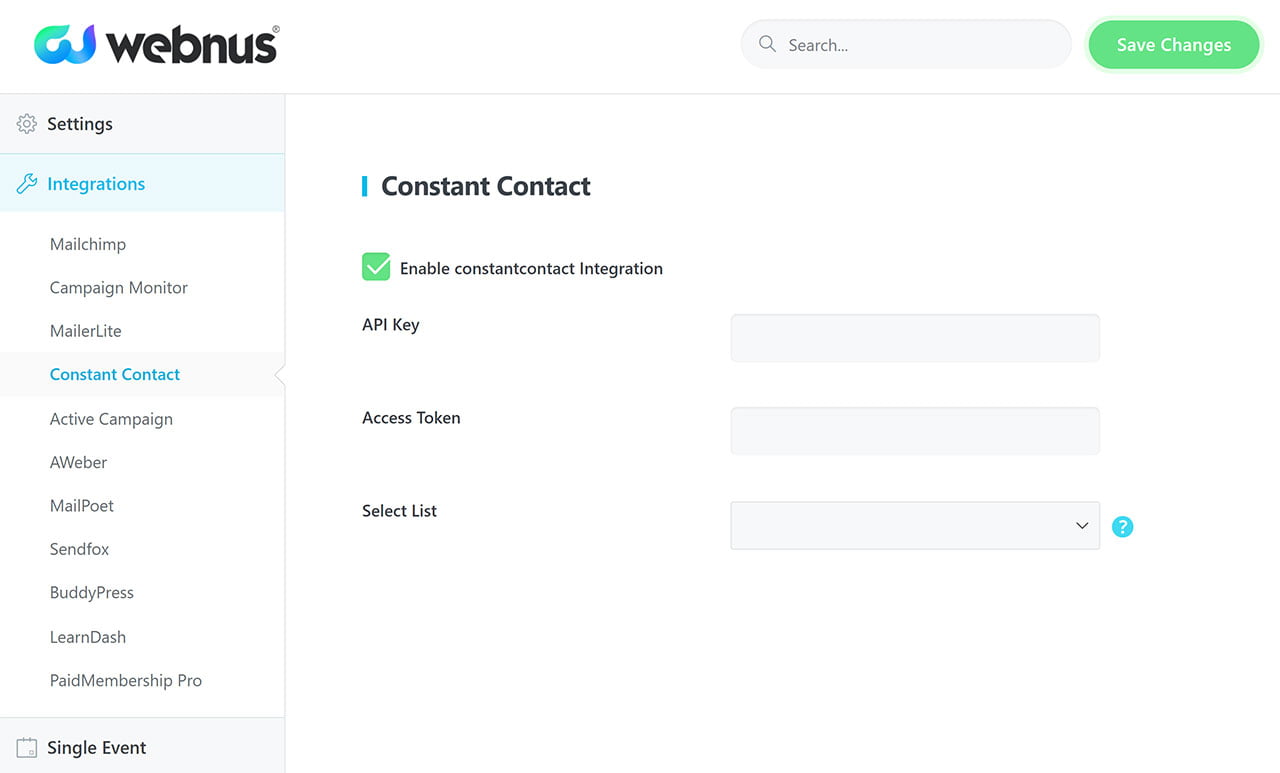
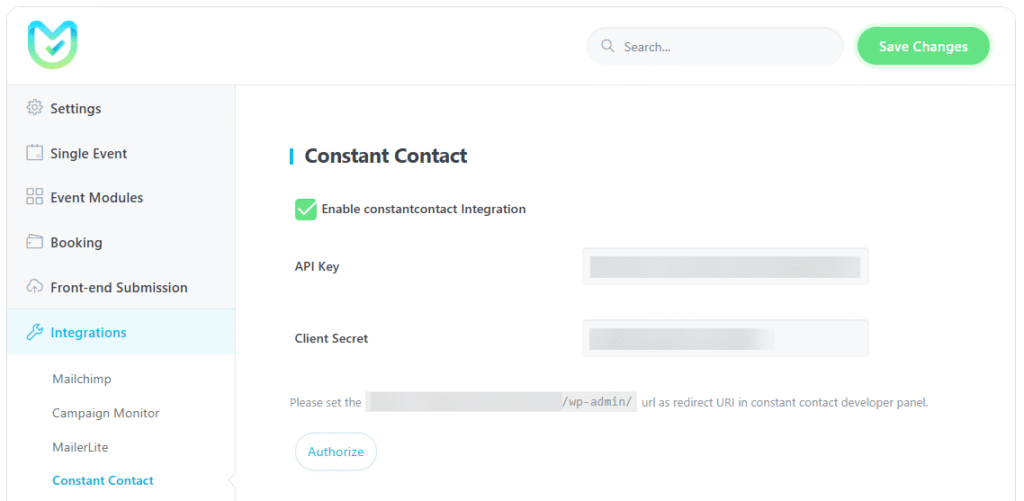
- Next, enter these two items (the API Key and Client Secret) into the MEC Constant Contact integration settings.
- After saving the settings, you should see an Authorize button appear in that same section.
- Click the “Authorize” button and complete the authorization process.
- If you have done the authorization successfully, your Constant Contact subscriber list should appear in the MEC Constant Contact integration section.
Active Campaign
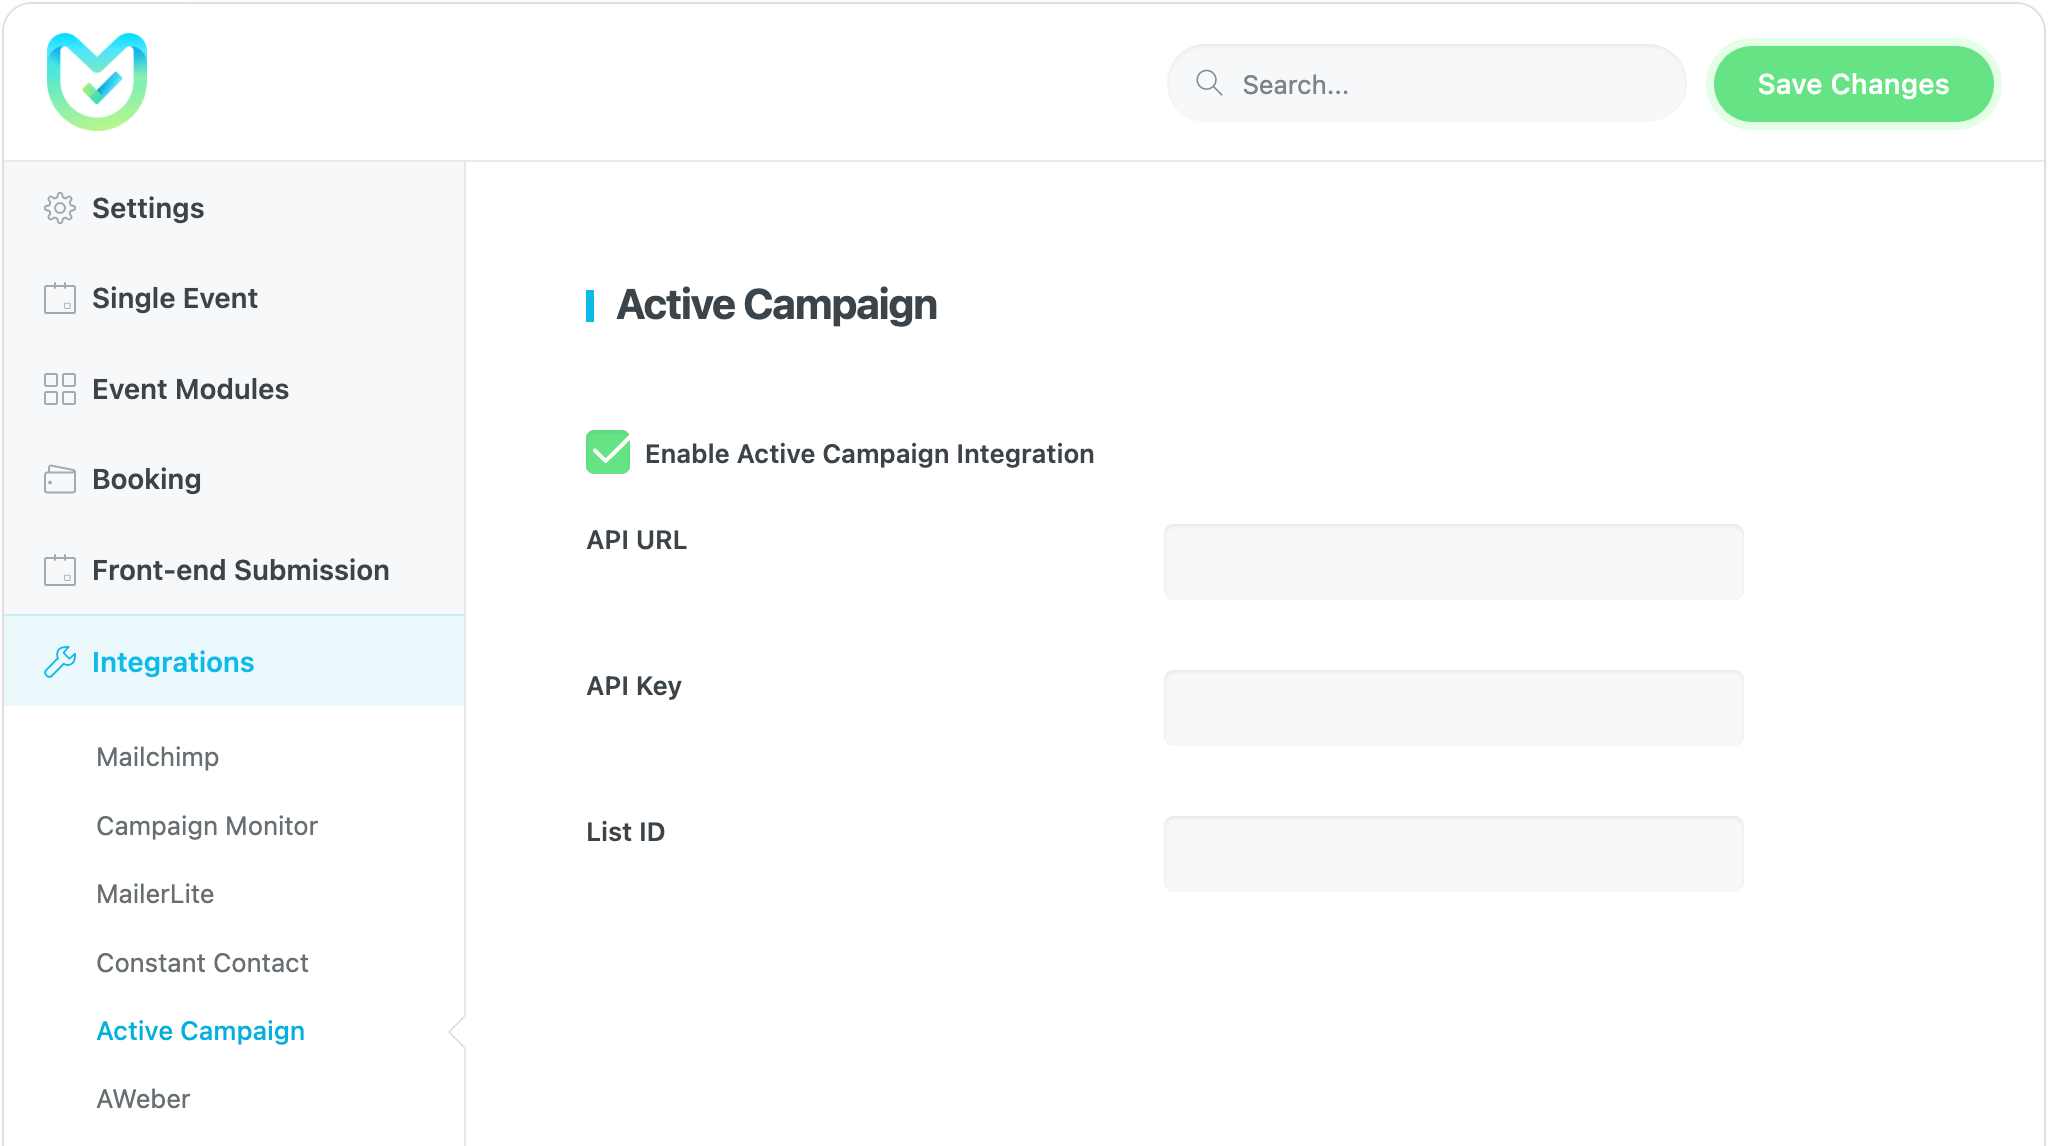
With Modern Events Calendar Active Campaign integration, you can add existing submission data to your contact list.
After activating the Enable Active Campaign Integration option in MEC Settings > Integrations > Active Campaign, you’ll encounter the following three new fields: API URL, API Key, and List ID.
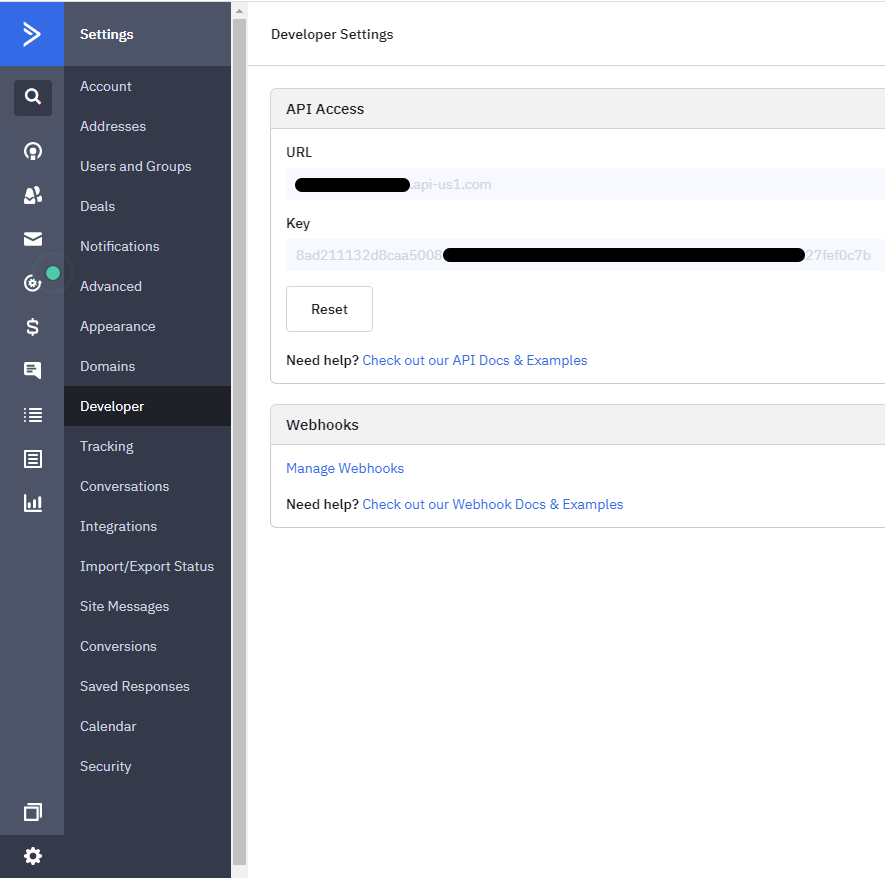
Navigate to your Active Campaign settings in the Developer section to find your API Key. Afterward, find the necessary information highlighted in the image below and enter them in the MEC Settings.
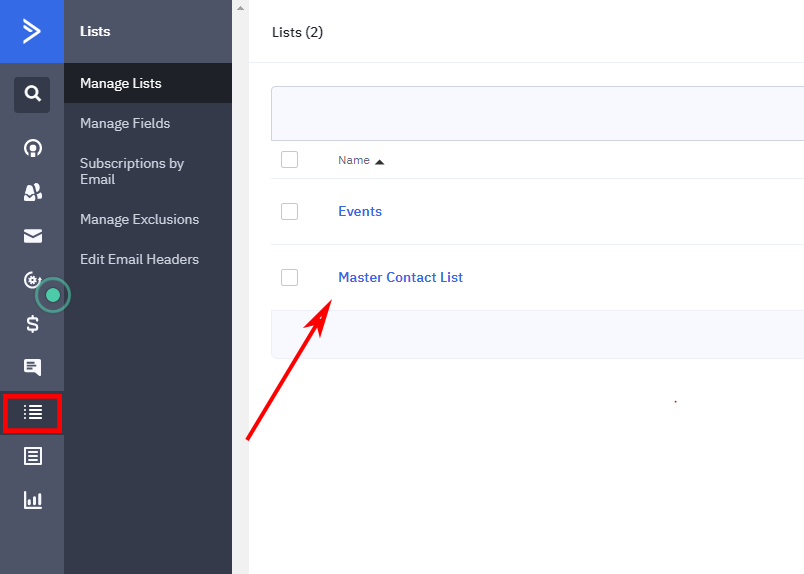
To receive your List ID, you’ll need to click on the list icon to view it:
By clicking on each list, you’re able to copy the List ID from its URL. This number can be single or double-digit or more:

AWeber
With the Modern Events Calendar AWeber integration, you can automatically add event submissions to your audience list. AWeber Documentation
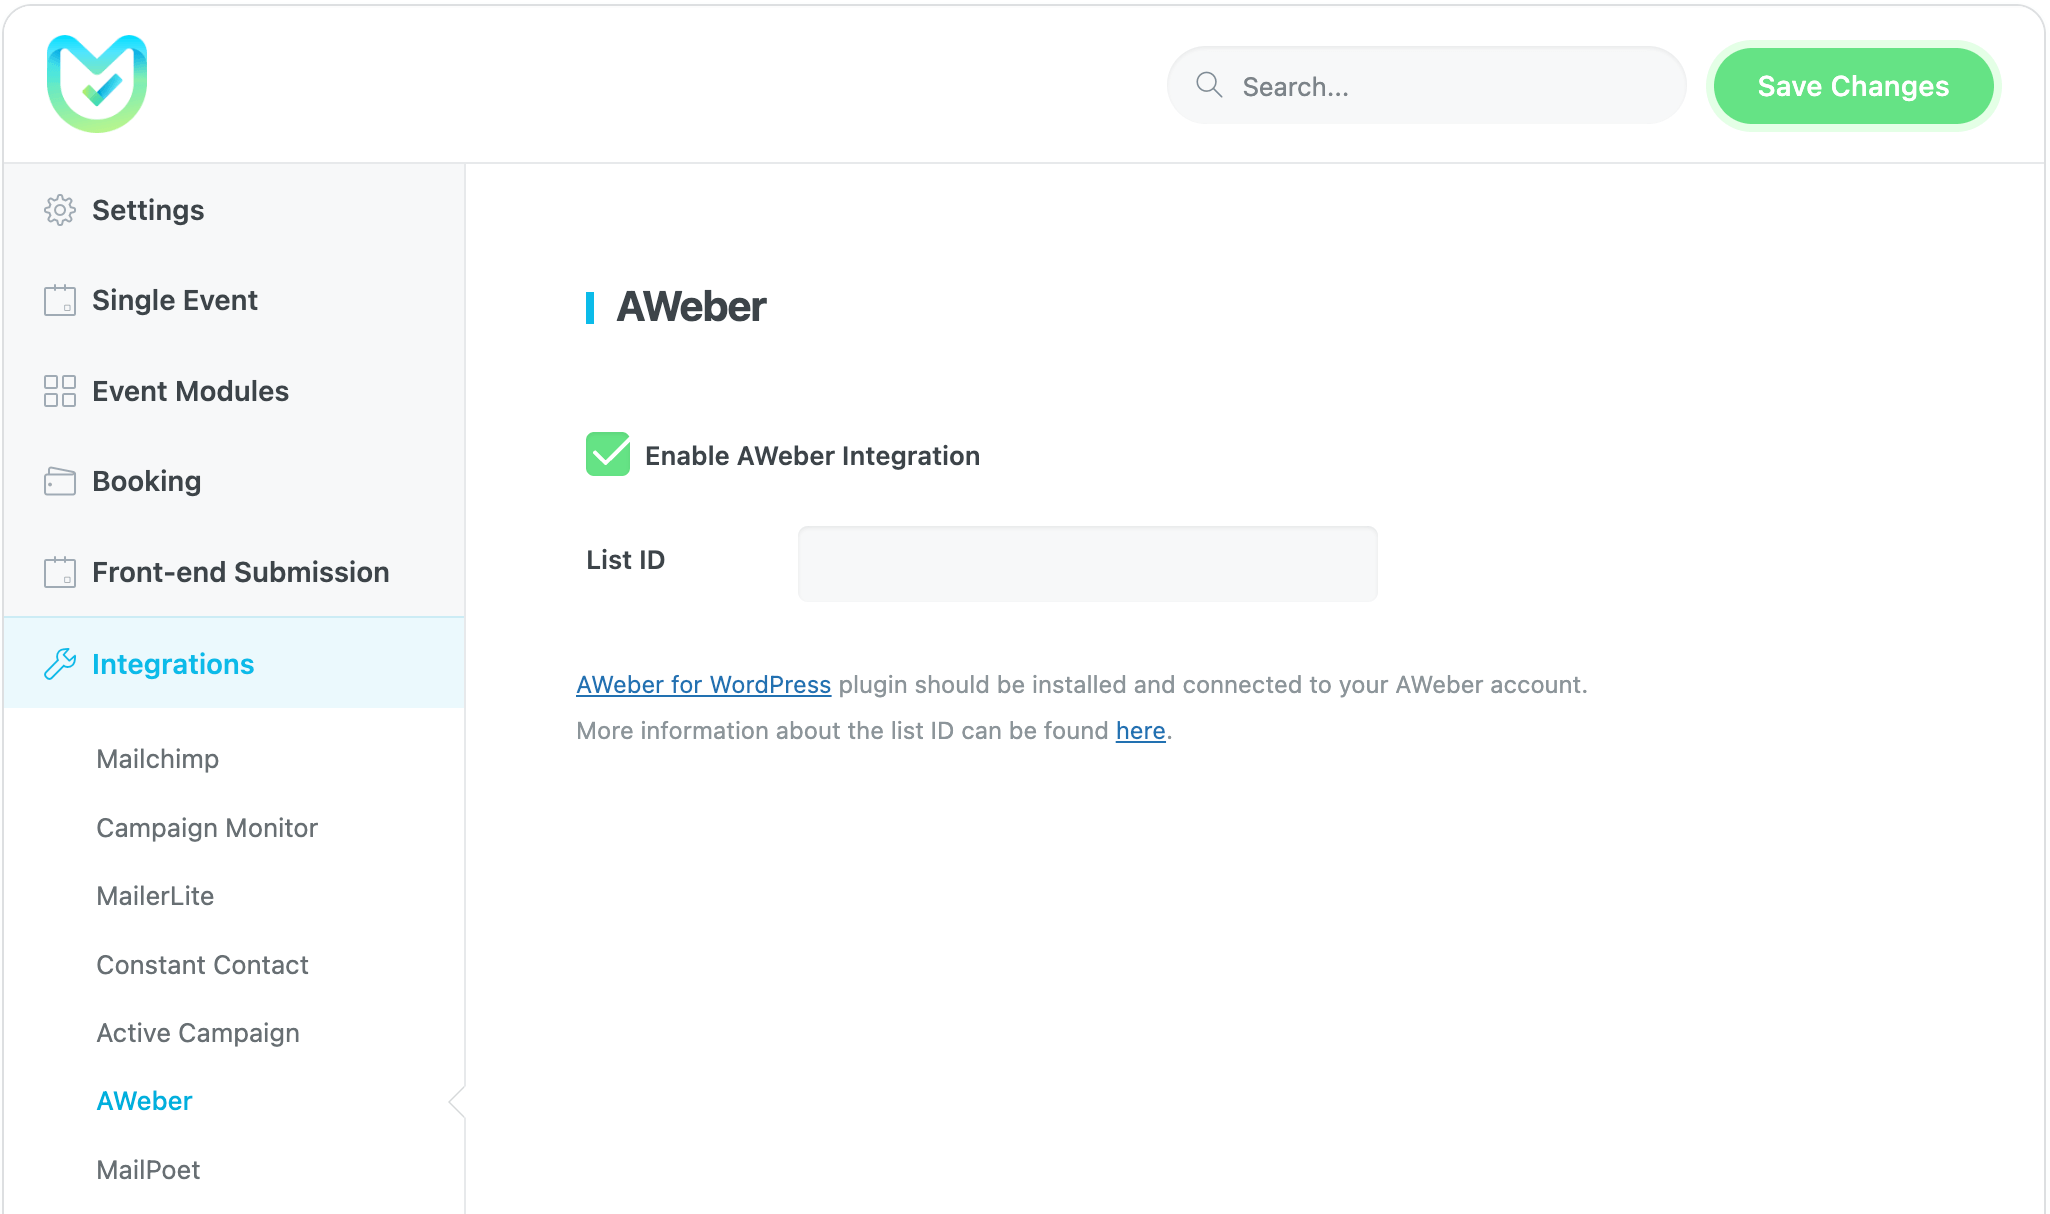
To connect AWeber to your site, first, you must install the AWeber plugin from the WordPress plugin repository. After installing and activating the AWeber plugin, navigate to its settings and click on the “Get Started” button.

Clicking this button will take you to AWeber’s authorization screen. This screen explains the access being requested and provides a space for you to enter your AWeber account username and password. Once you enter your login credentials, click “Allow access“.
After clicking “Allow access” with valid credentials, you will be redirected back to the AWeber WordPress plugin, and your authorization code will be generated automatically.
To locate your list ID in AWeber, go to your AWeber dashboard. Then, navigate to “List Options” and select “List Settings“. You will find the Unique List ID displayed above the “List Name and Description” heading.
MailPoet
To connect MailPoet to your site, first, you must install the MailPoet plugin from the WordPress plugin repository. MailPoet Documentation
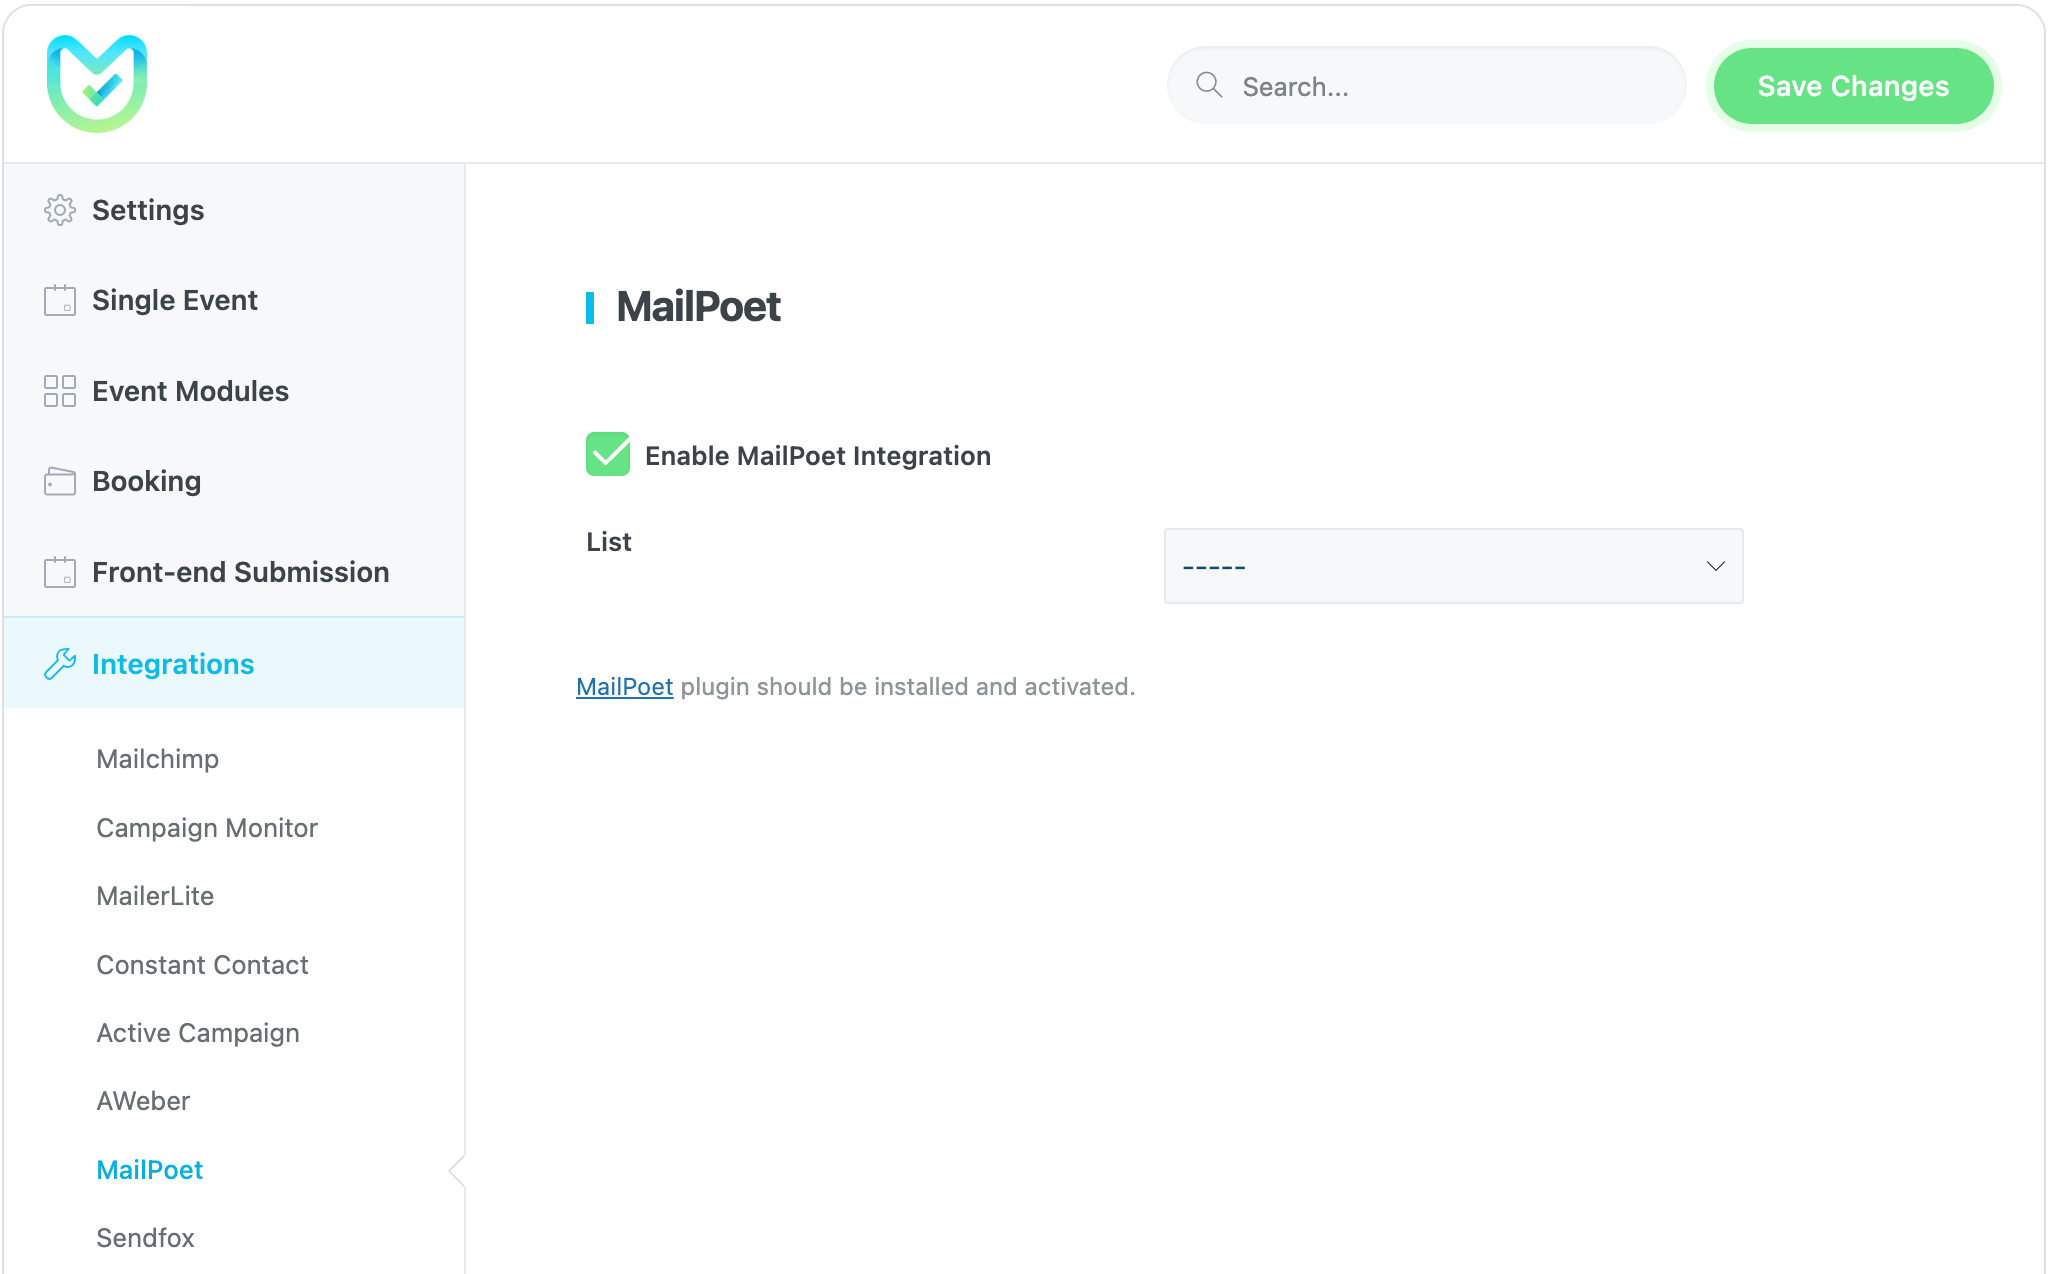
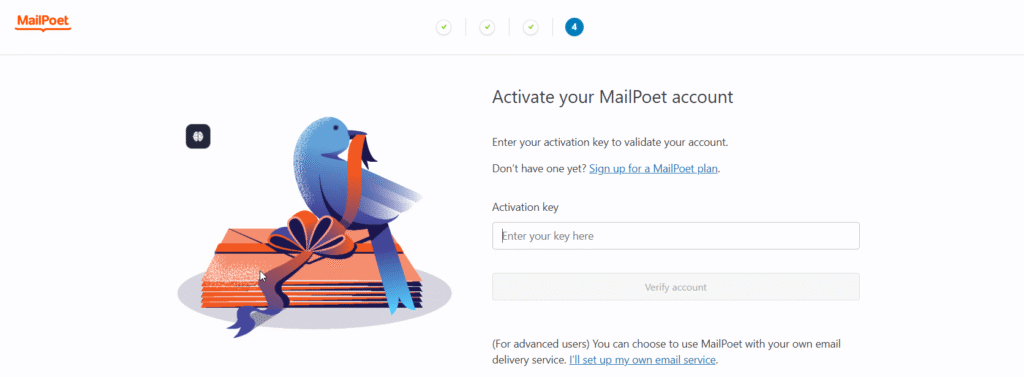
After installing and activating the MailPoet plugin, navigate to its settings and click on the “Begin setup” button. Then, continue through the setup steps until the end and activate your MailPoet account on your site with the Activation key.
If you correctly connect your MailPoet account to your site, your users’ list will be shown in the MailPoet integration settings of MEC.
Sendfox
The Sendfox plugin should be installed and activated to use this integration. Sendfox Documentation
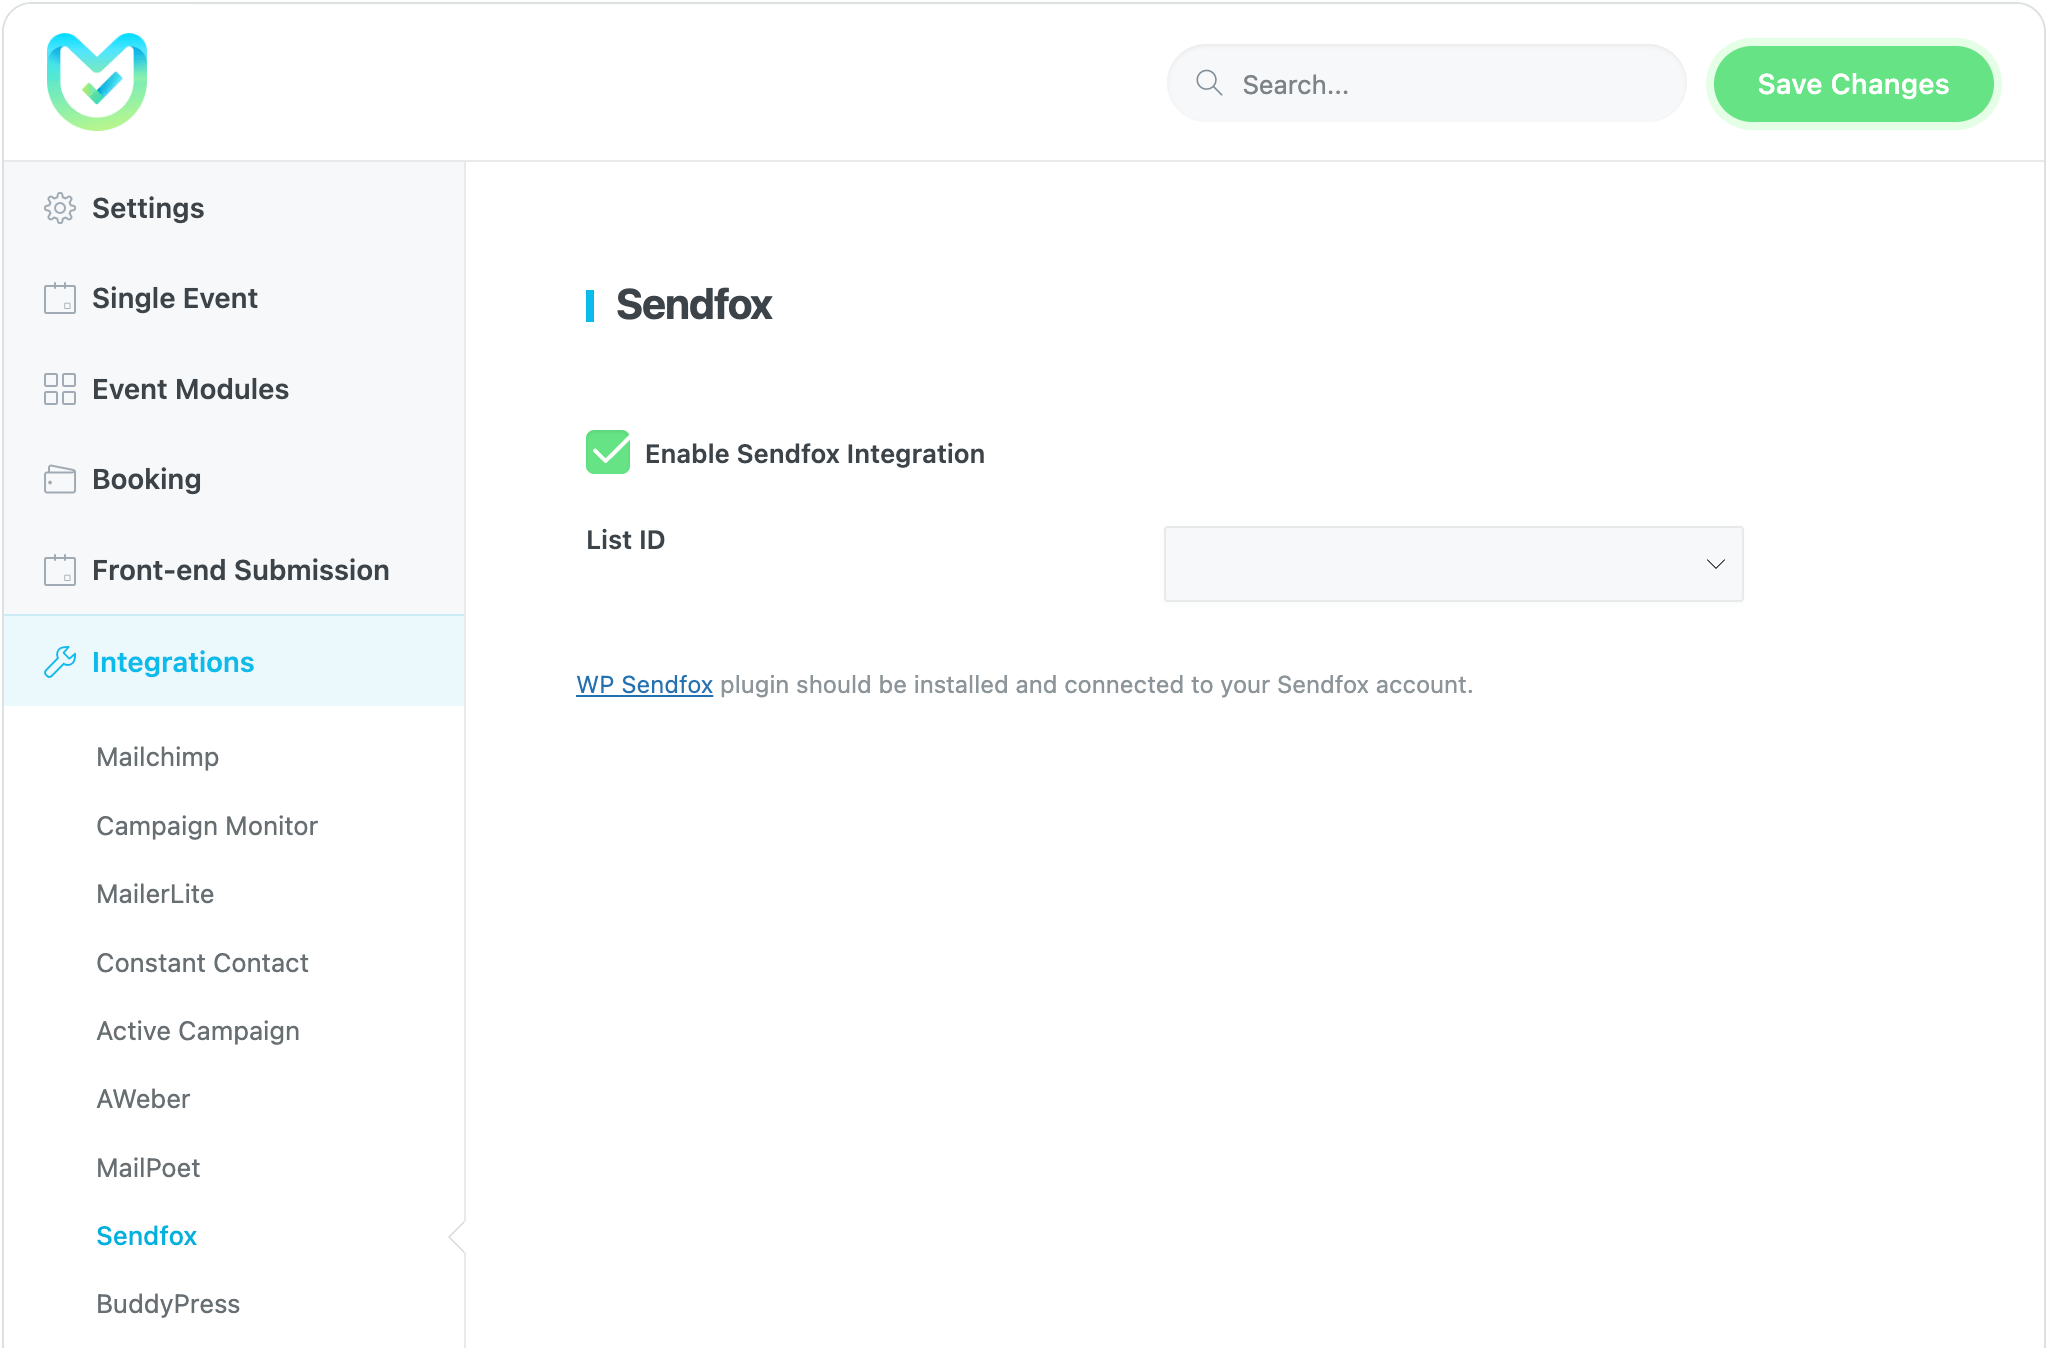
After installing and activating the Sendfox plugin, go to its settings and click on “Get your API key here“.
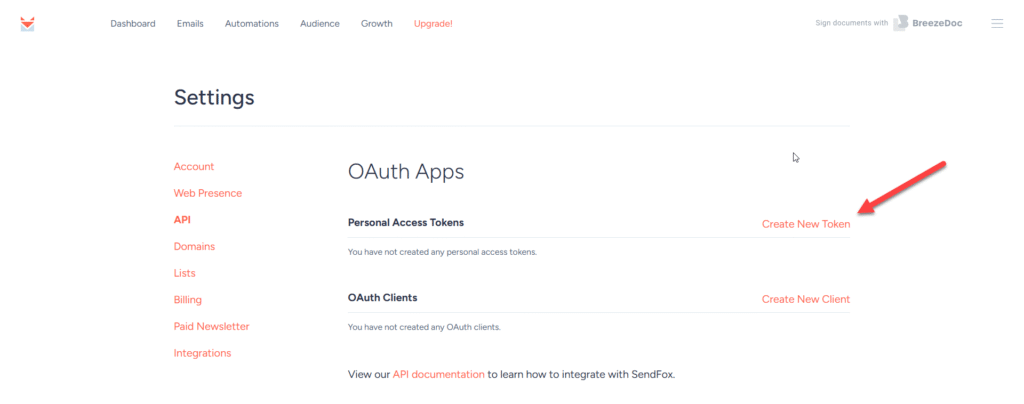
- Log in to your SendFox account, navigate to Settings in the top right corner, and click on API.
- Then click on Create New Token and add a name
- This will give you a Personal API token, so copy it from there, as this is the only time you will be able to see it.
- Then enter the API token in the Sandbox plugin API Token section, and you’re all set.
BuddyPress
The BuddyPress plugin assists you in building any type of community. Through this plugin, you can have groups and the option of private messaging between them, and many more related possibilities. BuddyPress Documentation
An event website can become more dynamic by gradually building a community of regular users. In this documentation, you can see how to integrate BuddyPress with the MEC plugin.
Note: To display the attendees in the event list, enable the “Show Attendees Module in event details page” option in the BuddyPress integration settings page.
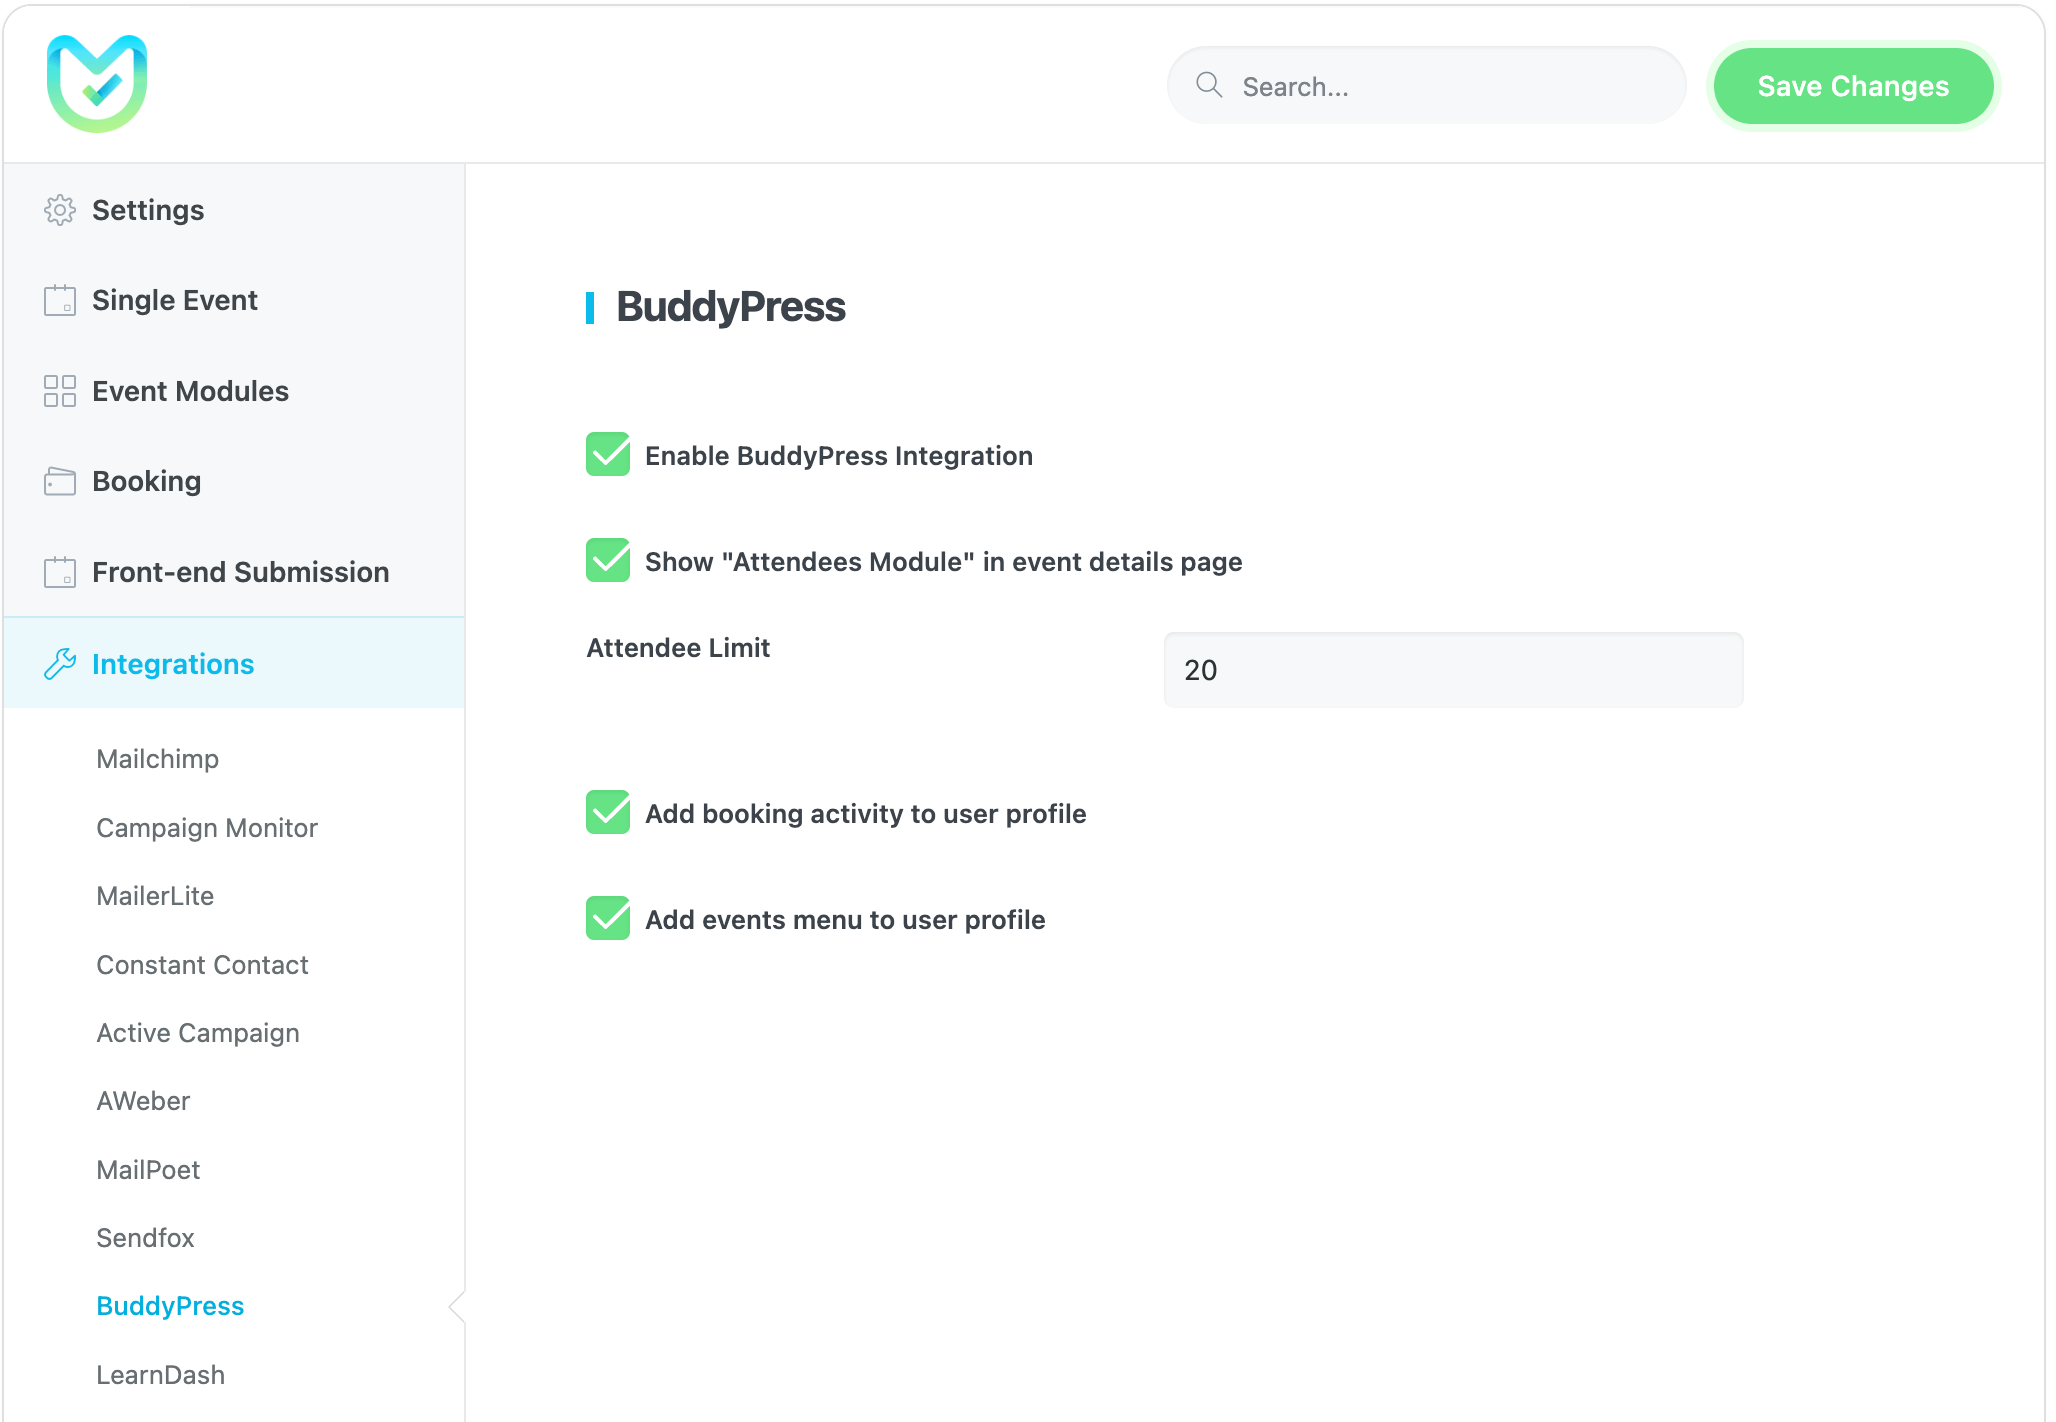
Watch the following video for more information on how to use BuddyPress in MEC:
LearnDash
With LearnDash integration, you can link a course to any ticket and enroll the user in the LearnDash course after booking. LearnDash Documentation
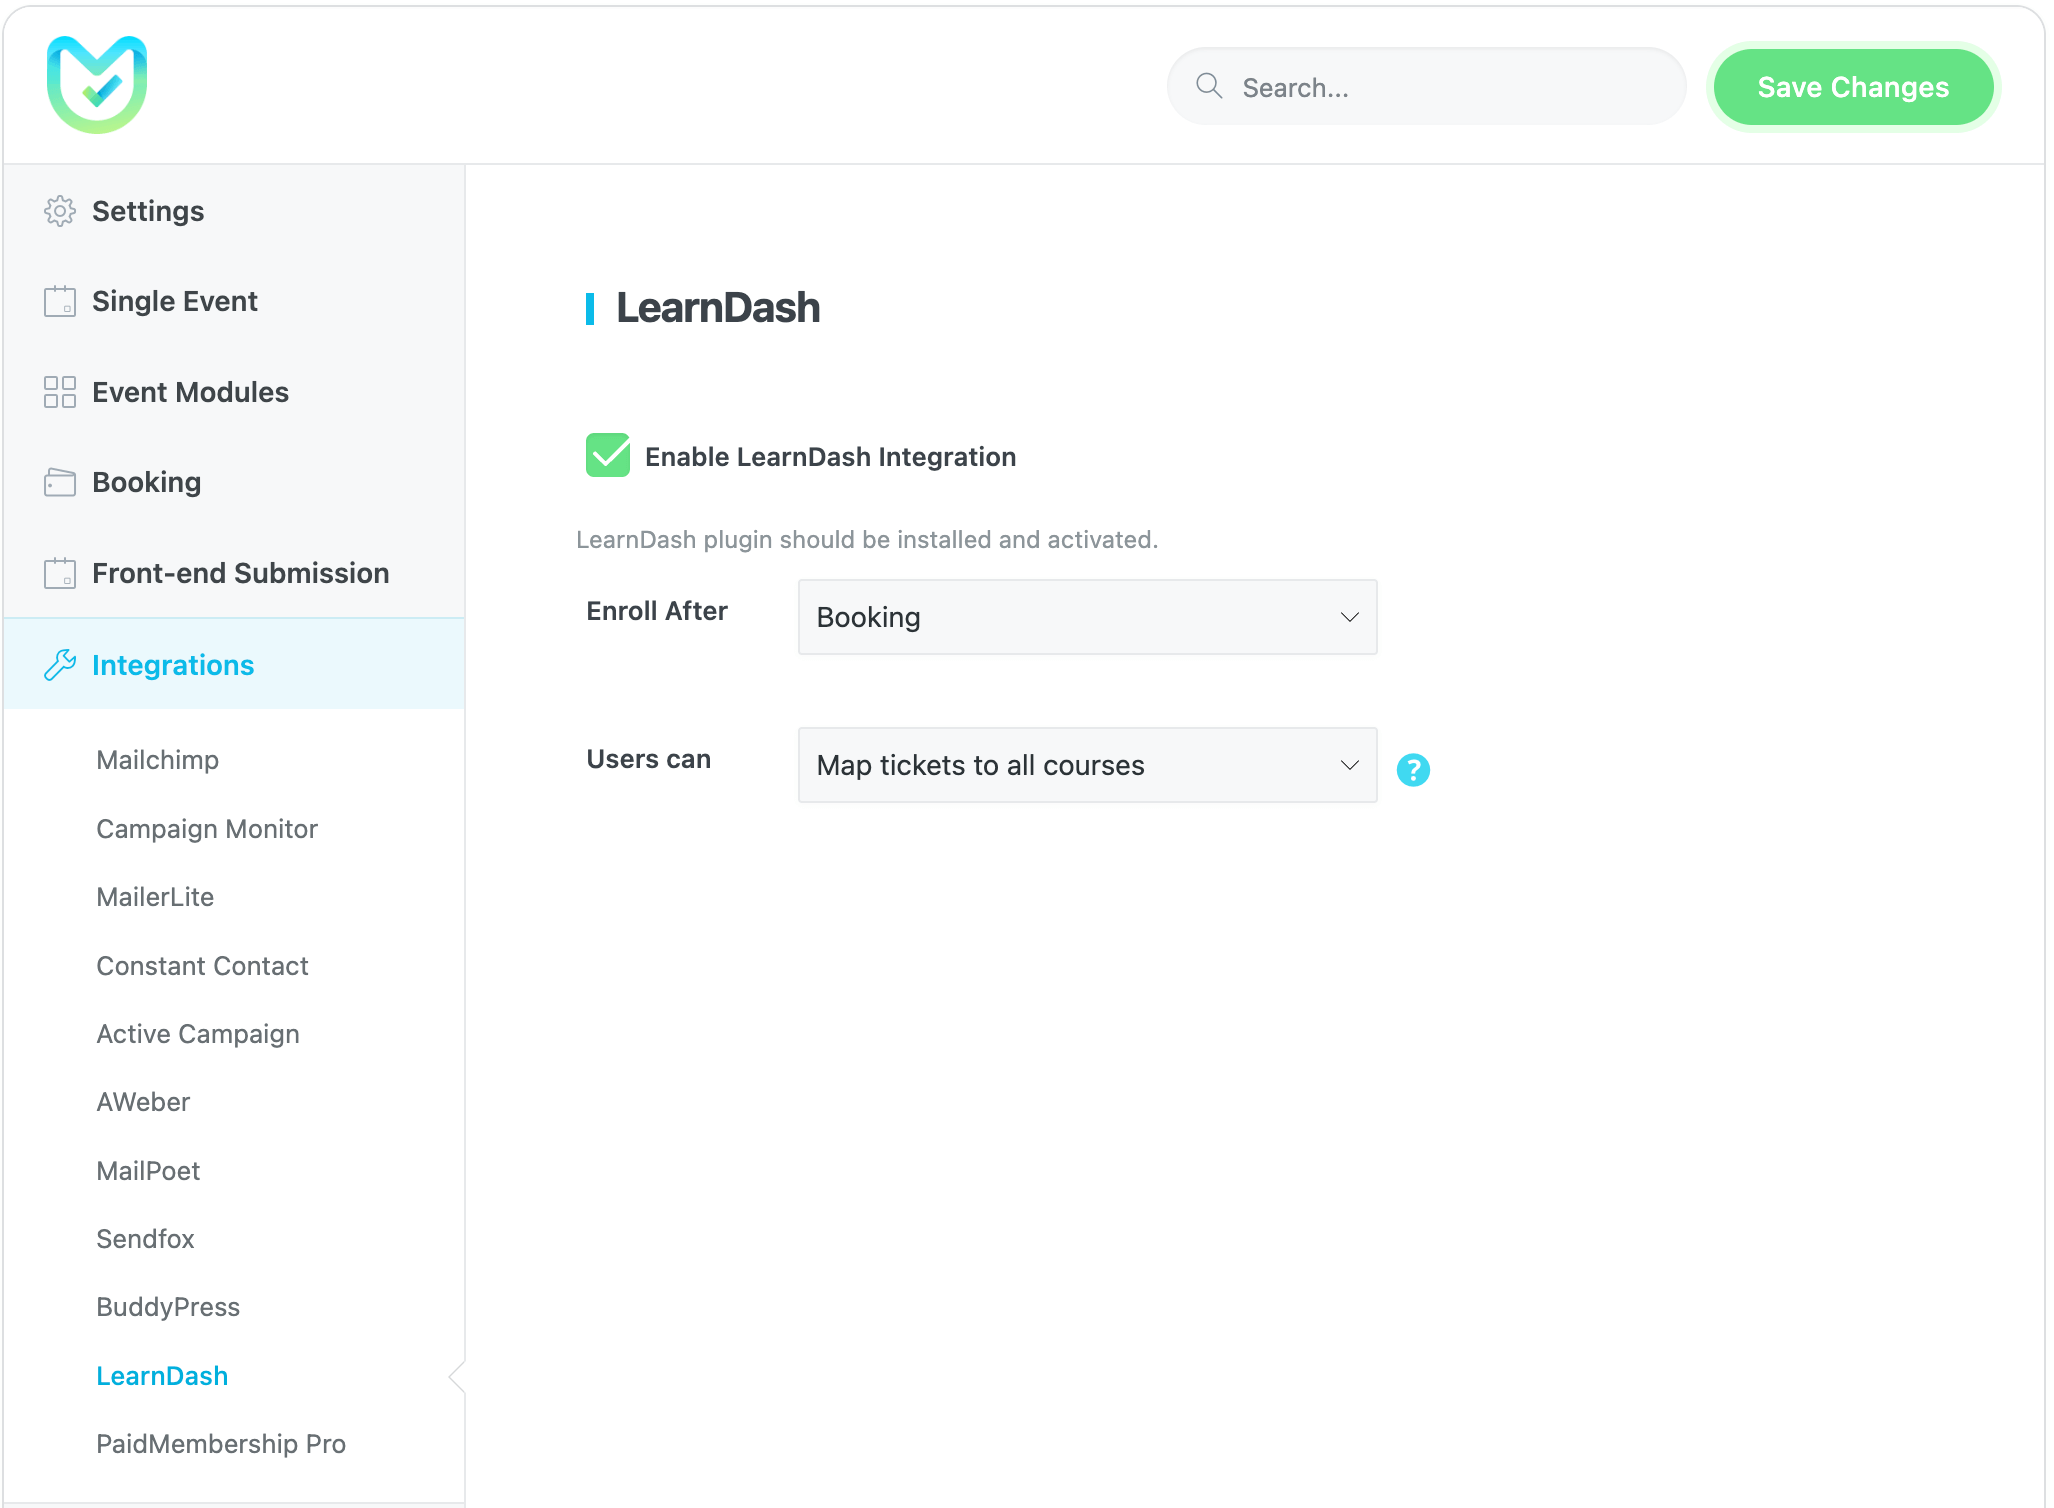
Once you create your course in LearnDash, select the course in the event’s ticket settings.
After booking this event by users, this course will be available to them.
Paid Memberships Pro
Paid Memberships Pro gives you all the tools you need to start, manage, and grow your membership site. If you are using this plugin, you can restrict a single event by user level by enabling this option. And after that, only members of those levels can access that event page.
To enable this option, you need to go to MEC Settings > Integrations > Paid Memberships Pro and check the following three checkboxes:
- Enable Event Restriction
- Enable Booking Restriction
- Enable Ticket Restriction
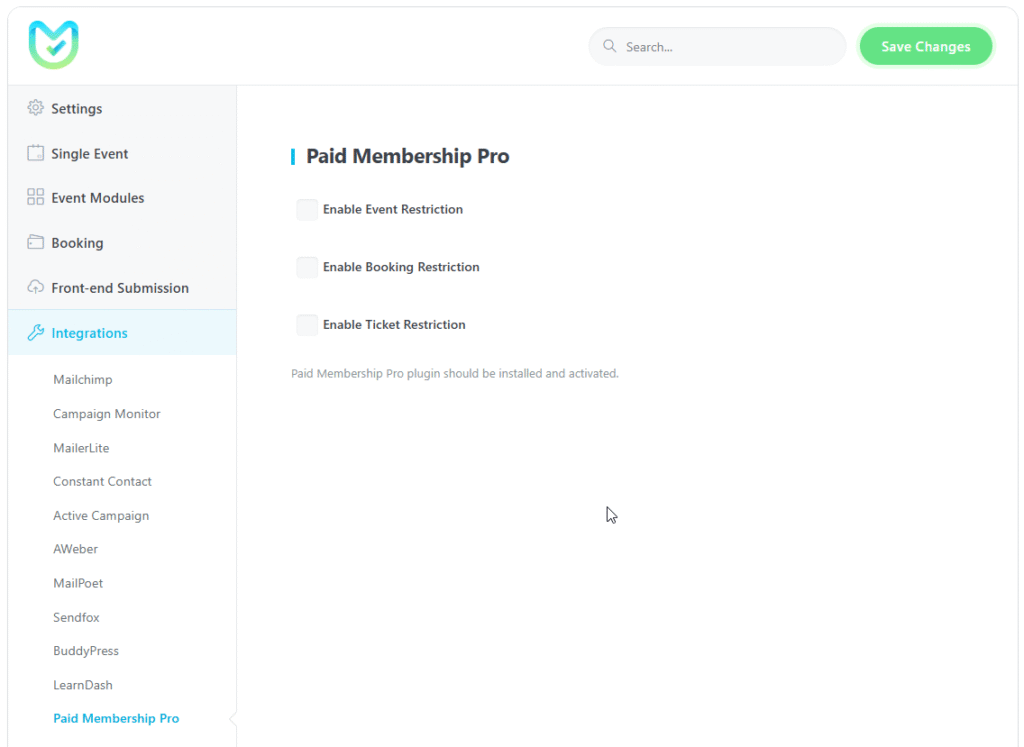
After that, you need to go to Paid Memberships Pro > Dashboard menu, then create desired levels on the Paid Memberships Pro plugin.
Navigate to WordPress Dashboard > Users > All Users, then edit the desired user and set the Level for the user.
Now, to restrict your event, you need to go to MEC > All Events and then edit the desired event. You can see this box on the single event edit page in Booking > Tickets > advanced section. Select the levels for which you want this event to be available. Then save your event.
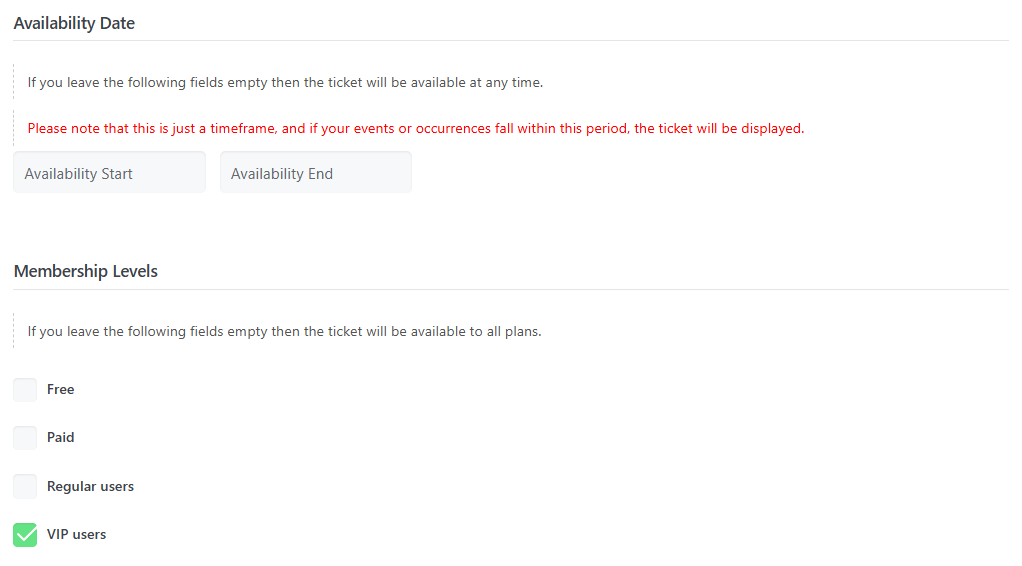
Try to access the page with different user levels. If the viewer is a guest or is not a member of the selected level.
Report Out Dated Content
If you think the content of this page does not reflect updated information, please let us know.
Hi everyone. All screenshots on this post is of “Active Campaign”, and not about “Campaign Monitor”.
Hello,
thanks for sending this. we will fix it ASAP.