Ticket and Invoice Addon
Ticket and Invoice Addon allows you to manage your attendees’ check-ins and send out tickets and invoices in email format. You can easily sell your events on your website using this addon.
The QR codes on the tickets enable you to check in attendees using the QR code scanner device. Using the Ticket and Invoice Addon, you manage your payments on your own website. There is no need to refer your customers to any other third-party websites.
Ticket and Invoice Addon Preparation
Installation
In the first step, Ensure that both MEC (Modern Events Calendar) and the Ticket and Invoice Addon are installed and activated.
Read Also:
How to install MEC and Addons?MEC Booking Activation
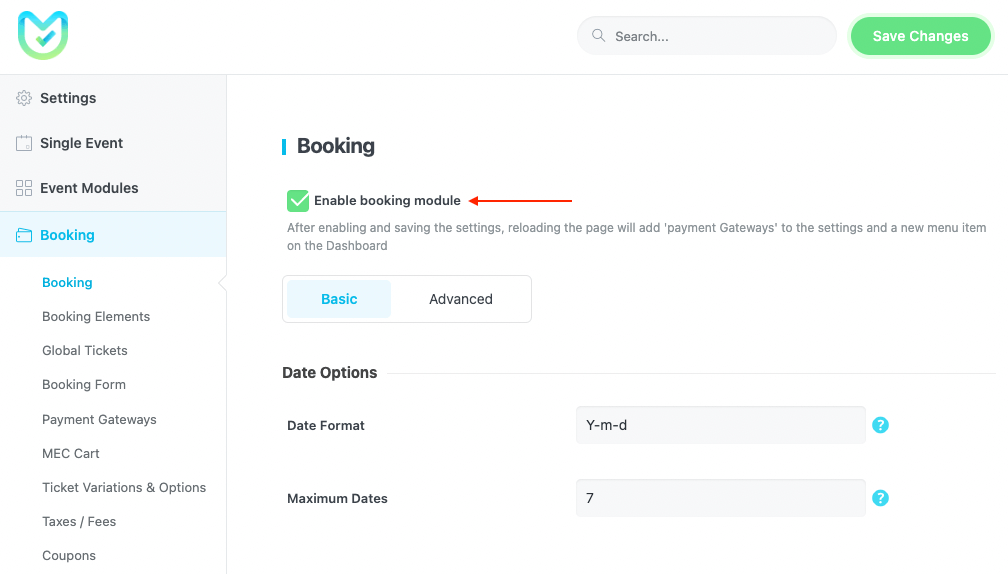
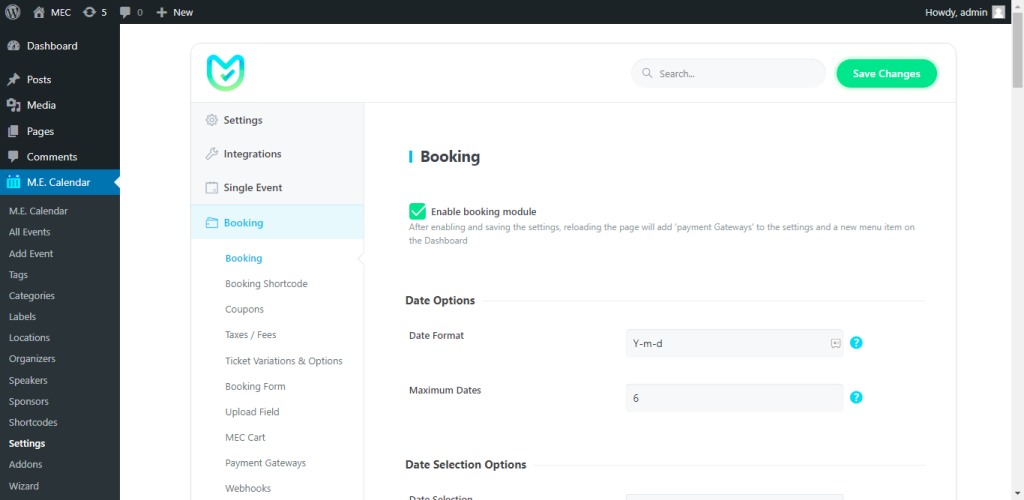
To configure the ticket and invoice addon, you need to activate the booking system. Please head over to MEC Settings > Booking and enable the booking module, save changes, and reload the page.
Read Also:
How to add a booking system?Ticket and Invoice Addon Options
Once you have made sure that your booking module is activated, head over to your WordPress Dashboard > M.E. Calendar > Settings > Invoice Options in order to configure your invoice.
Invoice Options
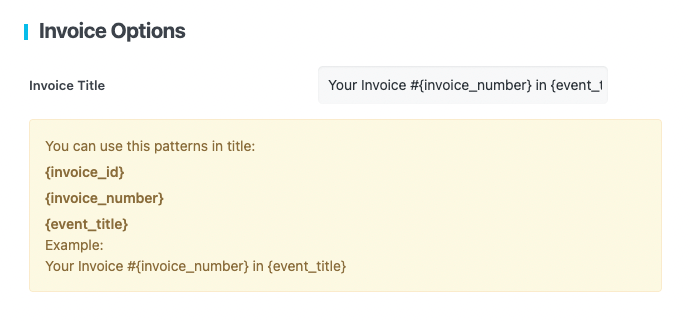
Invoice Title: Enter the title of your invoice here. You can use different placeholders to be displayed in the invoice title.
Company Information
In this section, you can add your company information to be displayed on the invoice.
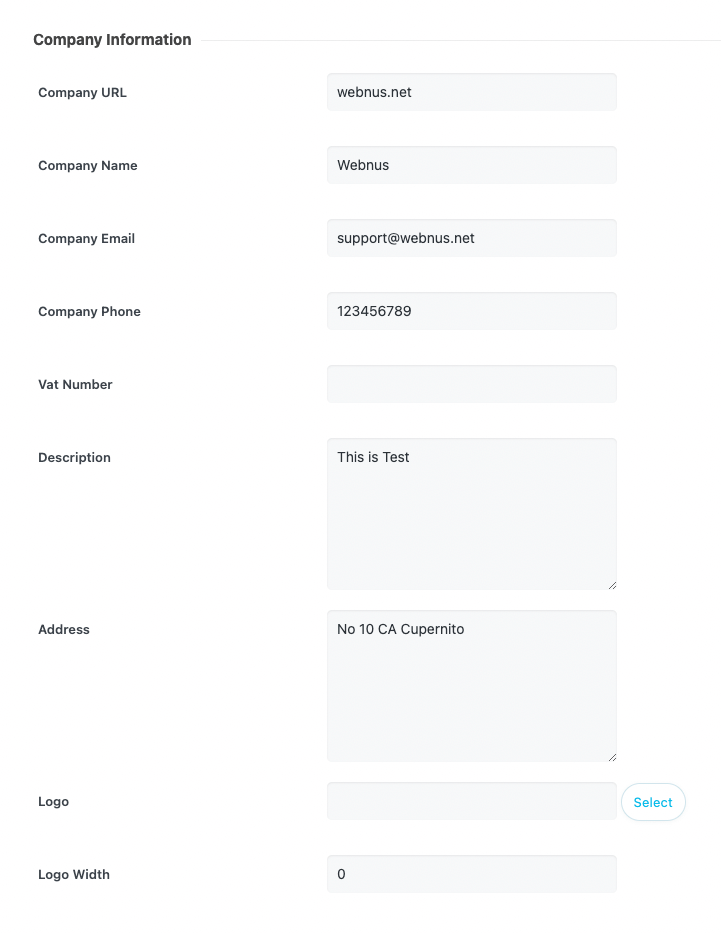
Company URL: Enter the URL of your company.
Company Name: Enter the name of your company.
Company Email: Enter the company’s email address.
Company Phone: Enter the company’s phone number.
VAT Number: Enter the VAT number here (optional).
Description: Enter a short description of your company.
Address: Enter your physical location.
Logo: Upload your logo or link an image (you can select media).
Logo Width: Here you can set the width of the logo.
Invoice Number Generation Settings
Ticket and Invoice Addon allows you to create your invoice number with your preferred pattern.
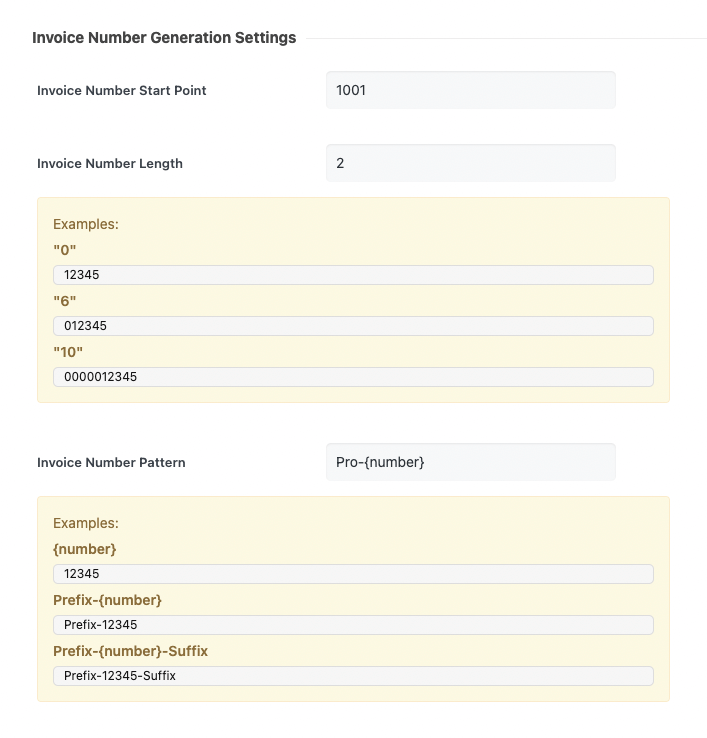
Invoice Number Start Point: set the start point of your invoice here.
Invoice Number Length: you can see an example below this field.
Invoice Number Pattern: you can see an example below this field.
PDF Generation Settings
In this section, you have many options to set to generate your invoice PDF.
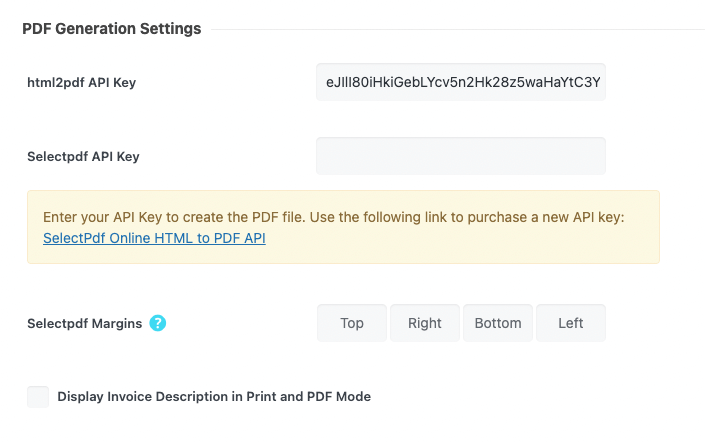
html2pdf API Key: PDF Rendering API Key: https://dash.html2pdf.app/registration (just register a key and get an API simply)
Selectpdf API Key: Enter your API Key to create the PDF file. Use the following link to purchase a new API key: SelectPdf Online HTML to PDF API.
Selectpdf Margins: Default margin is: 5 5 5 5. Please don’t use “px,” “%,” or “em” in the box field.
Display Invoice Description in Print and PDF Mode: You can choose whether the description will appear in the downloadable PDF file or not (If “Display Invoice Description in Print and PDF Mode” is disabled, it will be sent via email)
Live Attendees Settings
With the “Use Pusher API” option, you can see who registers events at the current time.
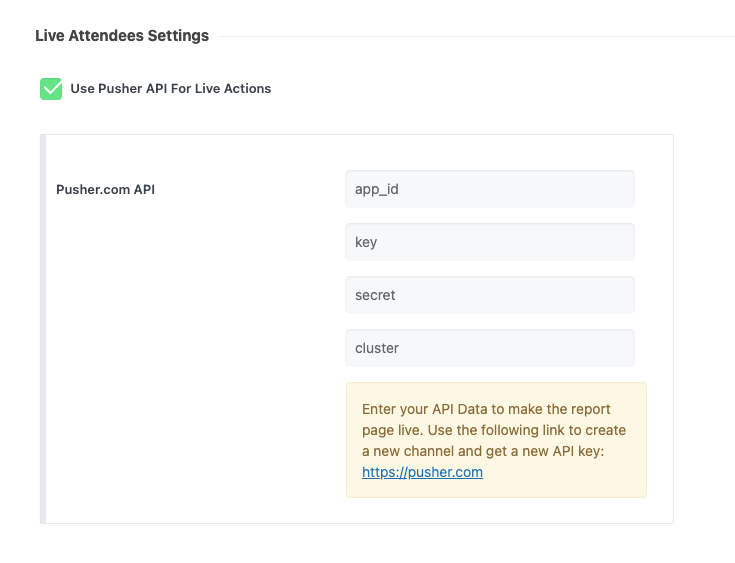
Use Pusher API For Live Actions: After using Pusher API, go to MEC > Report, find your event, and the date you want to track to see who registers.
Check-in & Notification Settings
In this section, you can customize the notification settings in the invoice.
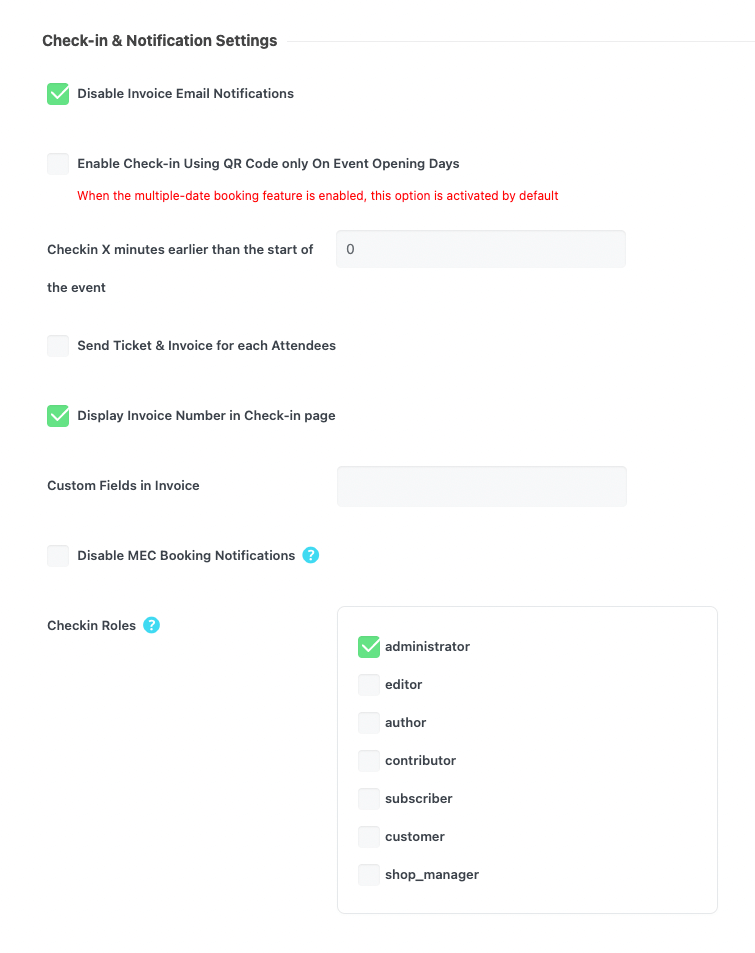
Disable Invoice Email Notifications: by enabling this option, you can disable invoice email.
Enable Check-in Using QR Code only On Event Opening Days: The option explains itself. When the multiple-date booking feature is enabled, this option is activated by default.
Checkin X minutes earlier than the start of the event: Set the time limit to check-in users before the event starts.
Send Ticket & Invoice for each Attendees: You can make it so that if a user enters multiple emails (that is multiple tickets are purchased for different people), then they also receive an invoice separate from the total sales.
Display Invoice Number in Check-in page: This option will display the invoice number on the check-in page.
Custom Fields in Invoice: You can define the customer field to be displayed in the invoice.
Disable MEC Booking Notifications: By enabling this option, the pre-defined booking confirmation sent to the customer by MEC is disabled. Addon’s email is sent in both disable/enable states. Check this if you want emails to be sent out from the Ticket and Invoice Addon rather than MEC.
Checkin Roles: You can assign which WordPress role can perform the check-ins.
Invoice Rendering Settings
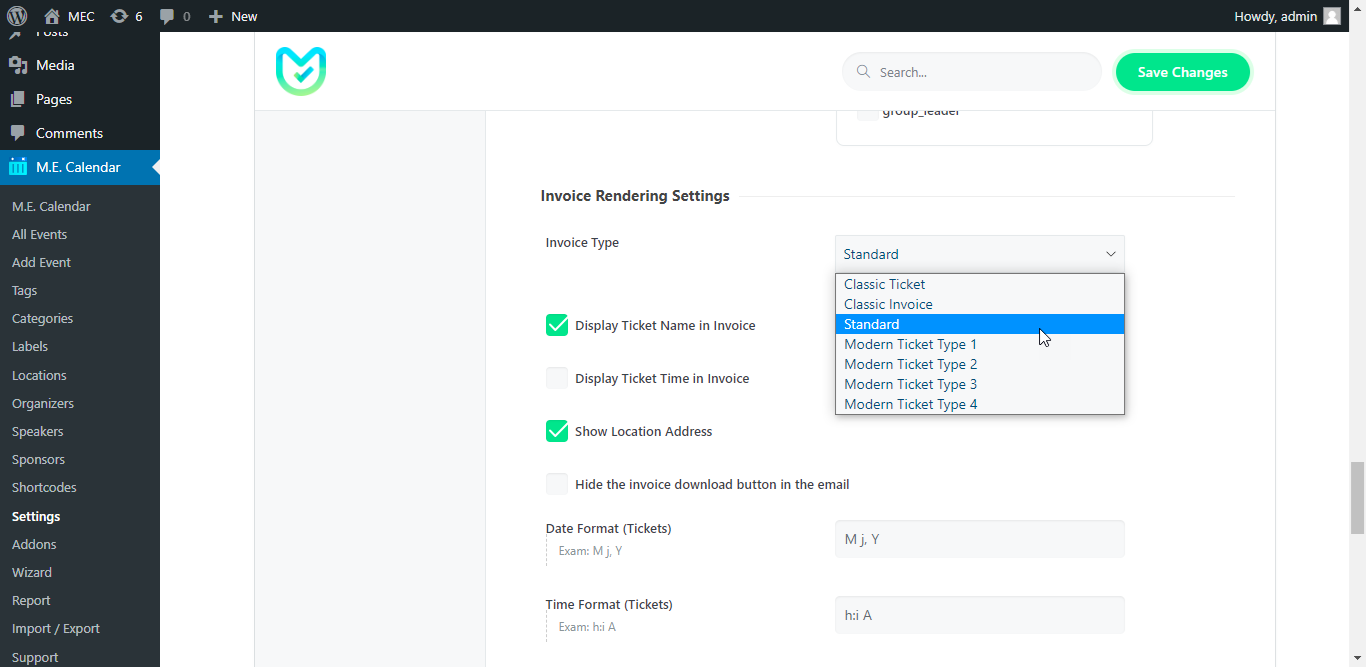
Invoice Type: You can select your invoice type from seven different styles that we have prepared.
Display Ticket Name(Type) in Tickets: By enabling this option, you can display the ticket type in tickets.
Display Ticket Time: By enabling this option, you can display the ticket time in tickets.
Show Tax Detail on invoice types: Display the tax details on the invoice.
Show Location Address: This option, displays the address on the ticket.
Show Invoice Time in Invoice Styles: Show Invoice Time in Invoice Styles.
Hide The Invoice Download Button in The Email: You can hide the download button in the emails by enabling this option.
Date Format (Tickets): You can set an order for displaying dates in tickets. For more information please refer to All Date Format.
Read Also:
Date Method in MEC pluginTime Format (Tickets): You can set an order for displaying times in tickets.
Default Date Format: You can define the default date format.
Event Date Format: You can set an order for displaying the event date. For more information please refer to All Date Format.
Invoice Descriptions: Write the description text here – HTML is also available.
Custom CSS
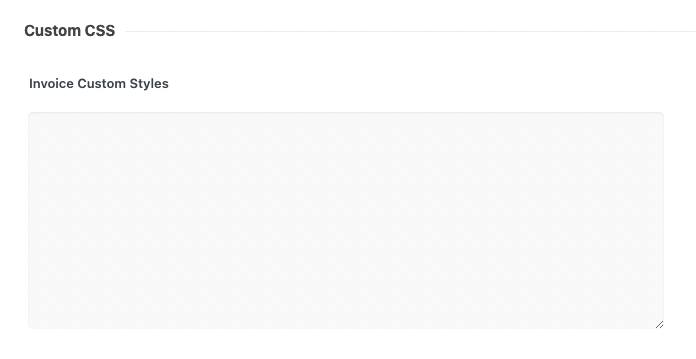
Invoice Custom Styles: If you’ve got any CSS codes for the tickets then make sure to place them here and it will also be implemented in the PDF file and the email sent to the user.
If you’d like to know more about CSS then make sure to take a look here.
Read Also:
Inspect ElementGenerate Invoice for Old Bookings
Import the old invoice to the new structure. This allows you to import/migrate any existing bookings to the Ticket and Invoice Addon so you can manage them right here.

Simply click on the button, and the whole process will be taken care of automatically within a few seconds
Note: In case you weren’t able to download PDFs after you’ve set up the Ticket and Invoice Addon, you need to make sure of two things:
- The PDF’s API needs to be correct.
- Update permalinks from the WordPress Settings > Permalinks even if they are correct.
Note: If you’ve made CSS changes and they haven’t been applied then we urge you to check your CSS code’s structure and then clear the cache.
We will continue the tutorial on how to work with the Ticket and Invoice Addon below, and will probably have to refer to the features listed above with their corresponding number.
Make sure to follow the instructions below and save the changes you make in the settings.
MEC Invoices
Once your invoice template is created and done, all you need to do is create an invoice. To do so go to your WordPress Dashboard > MEC Invoice > Invoices.
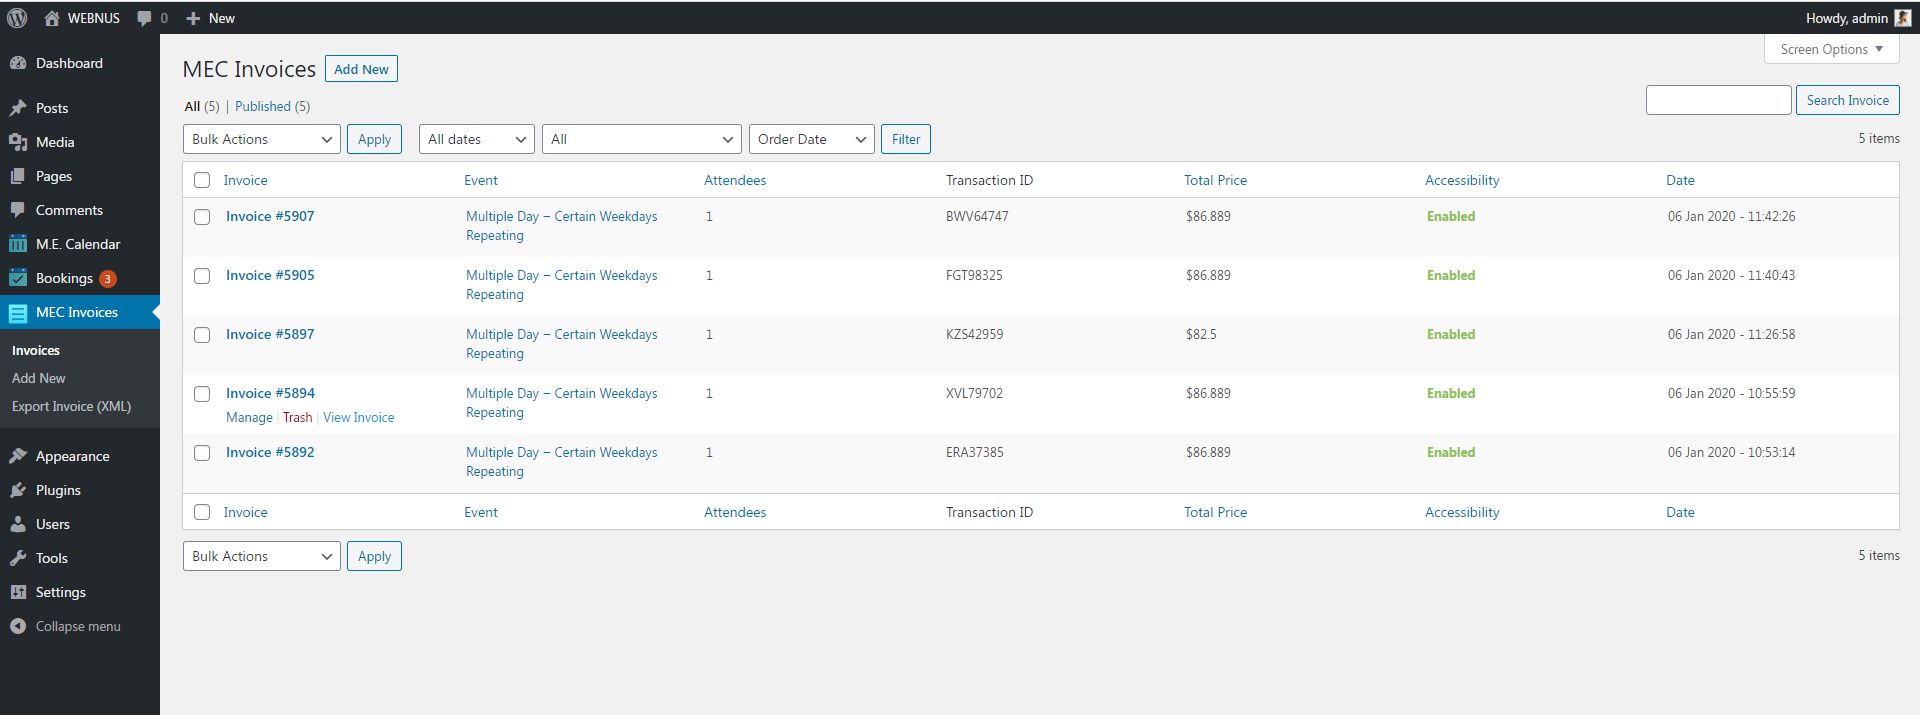
Here you can see all the bookings. This is similar to the Booking menu on MEC.
Invoice Page Options
- To manually add an invoice click on Add New
- You can use the Export Invoice option to export all your invoices.
- You can also use bulk action and filters during the selection.
- To check the invoice click on View Invoice
- To manage the invoice click on the link
QR Code Check-in
Checking-in can also be done via QR code scanning once the attendee shows you their QR code. This can also be done using a QR Reader or third-party apps for Android and iOS. Place the QR code in front of the camera, it will either check in the user or give you a warning if there is an issue.
Therefore, any chance of duplicates or fraud is eliminated since no one can simply create their own QR code and try to get in.
Once the attendee has checked in, it’ll show the invoice as green, and there will also be this icon.
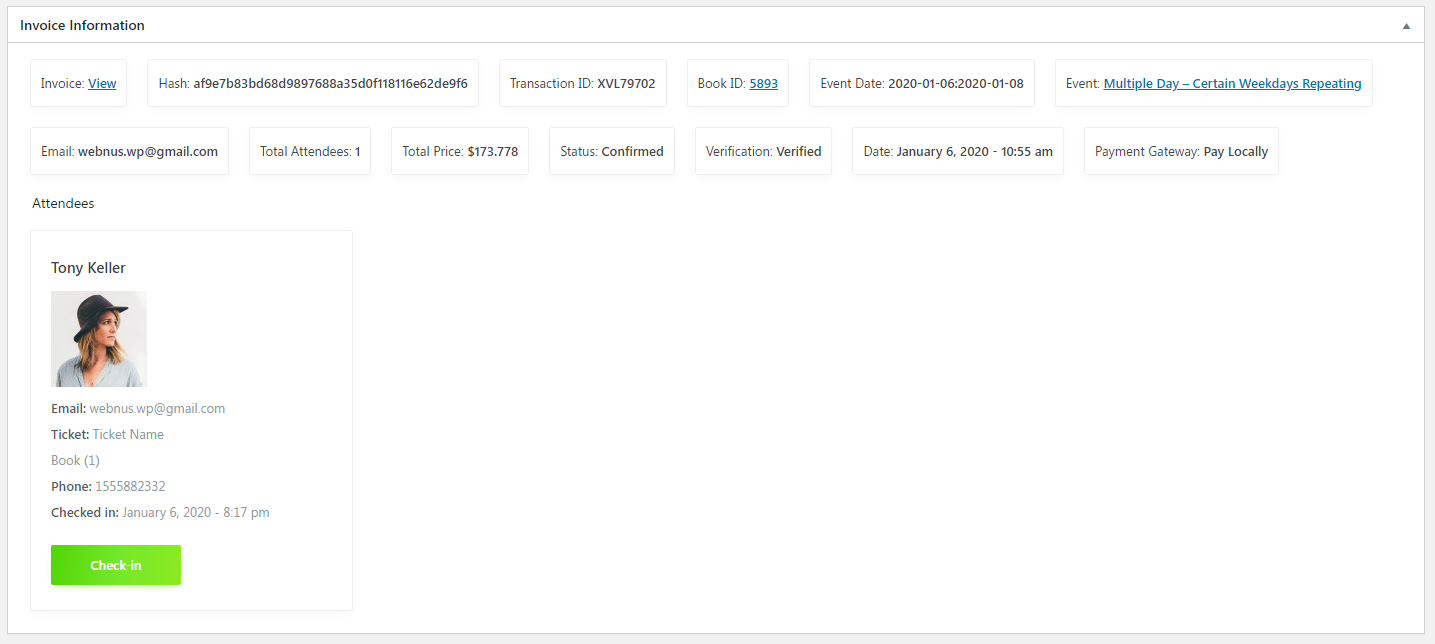
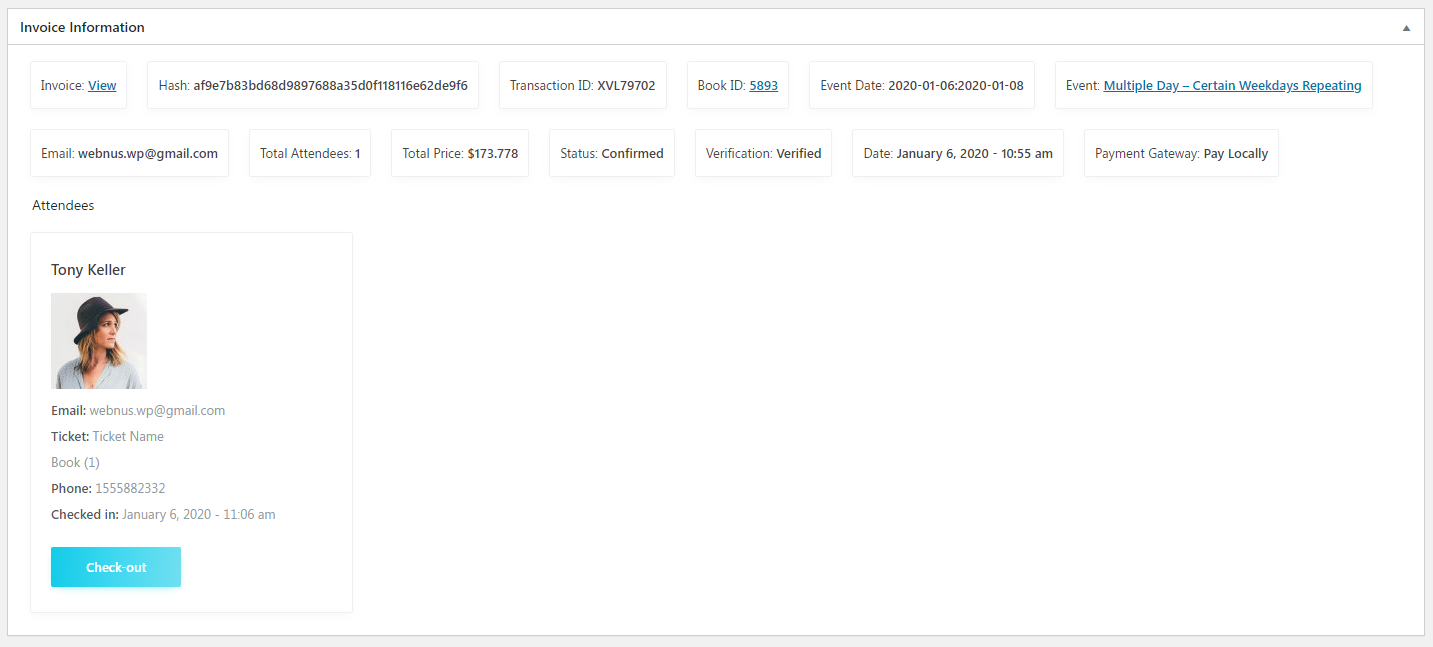
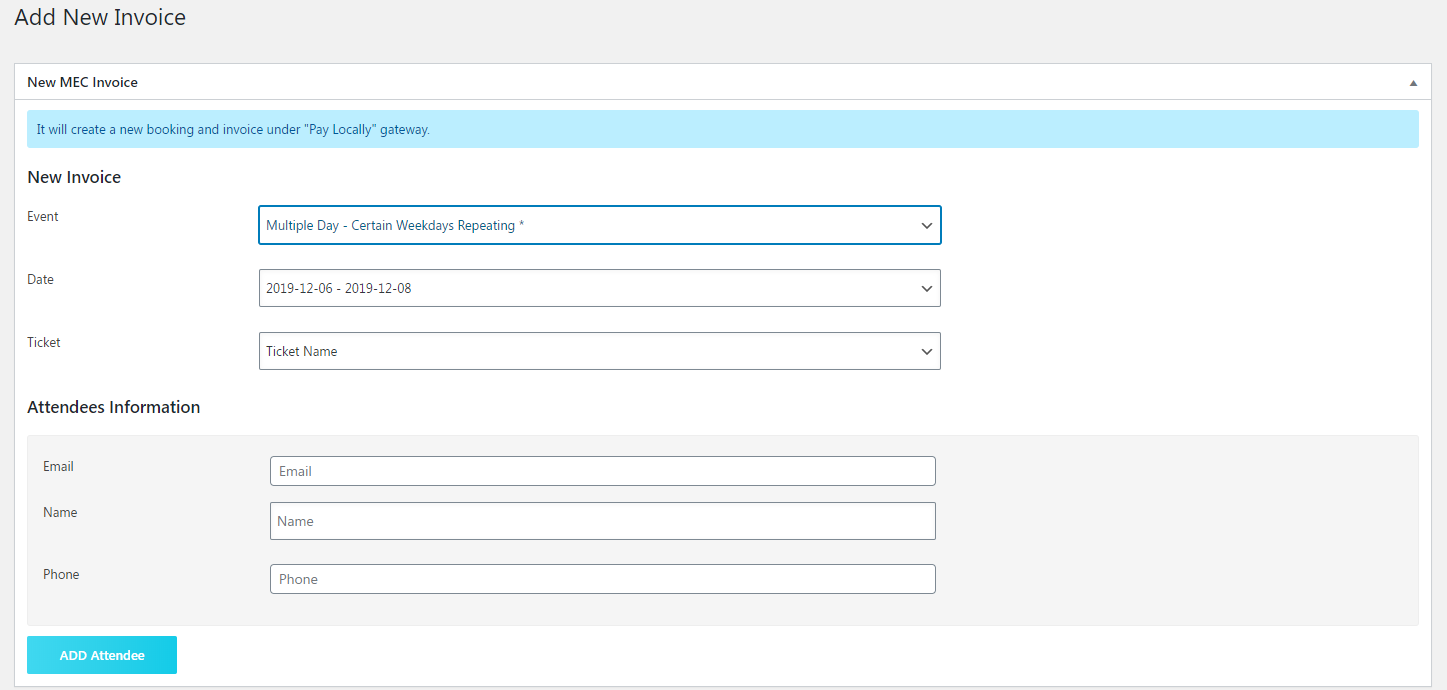
In order to manually add a new invoice, click on Add New and then select your event. Afterward, you’ll see the tickets for that event and you can use the form which has appeared to add a new invoice.
By clicking on Add Attendee, you’ll add a new user to your website but your invoice isn’t complete yet. You’ll need to publish the invoice in order to complete the process.
FAQ
How to Offer Tickets for Events?
For this, you are going to need MEC Pro and Ticket and Invoice addon.
With them, you can use the booking and ticket features provided by the Ticket and Invoice Addon.
After installing MEC Pro, you should go to MEC Settings > Booking and enable the Booking Module.
Reload the page to have the settings appear.
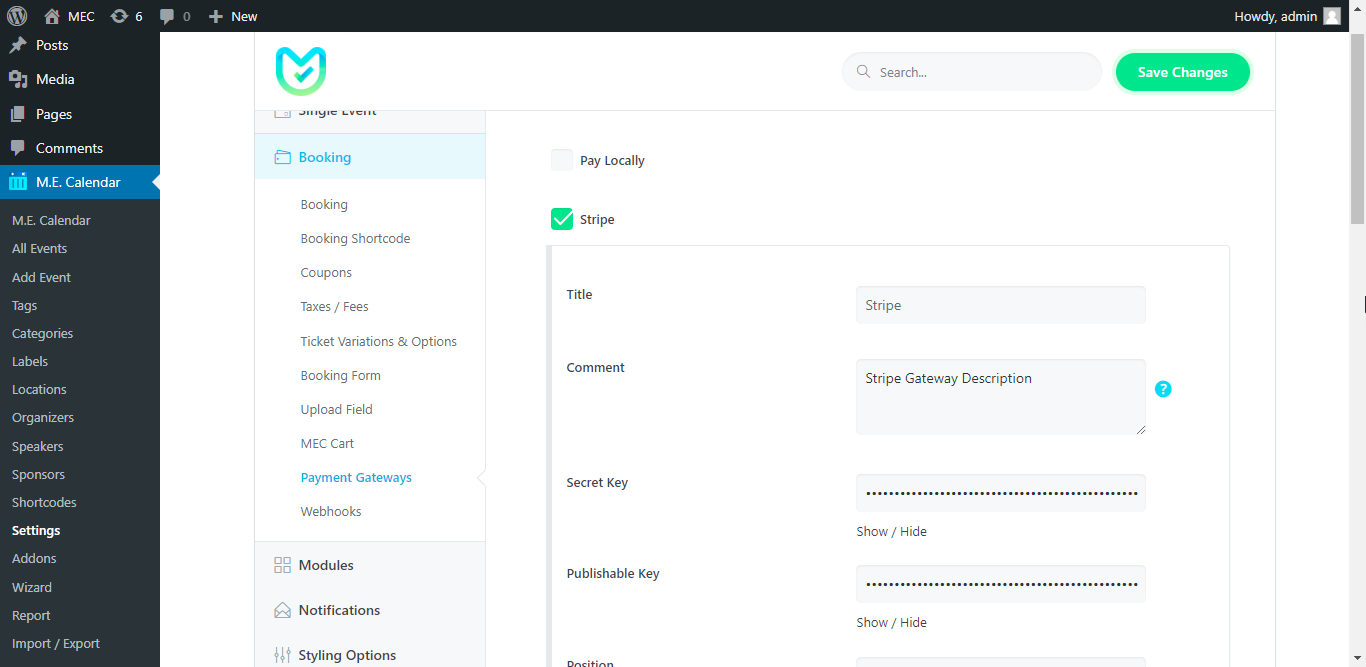
Then, go to MEC Settings > Booking > Payment Gateway and configure the payment gateway.
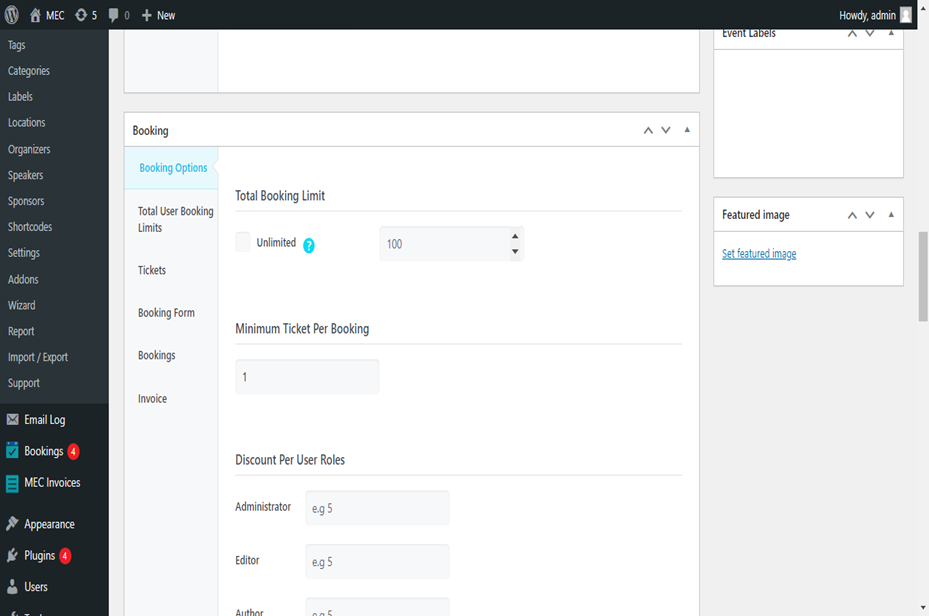
Now, by going to Add/Edit Event page, you will notice a new section that allows you to configure and setup bookings for your event.
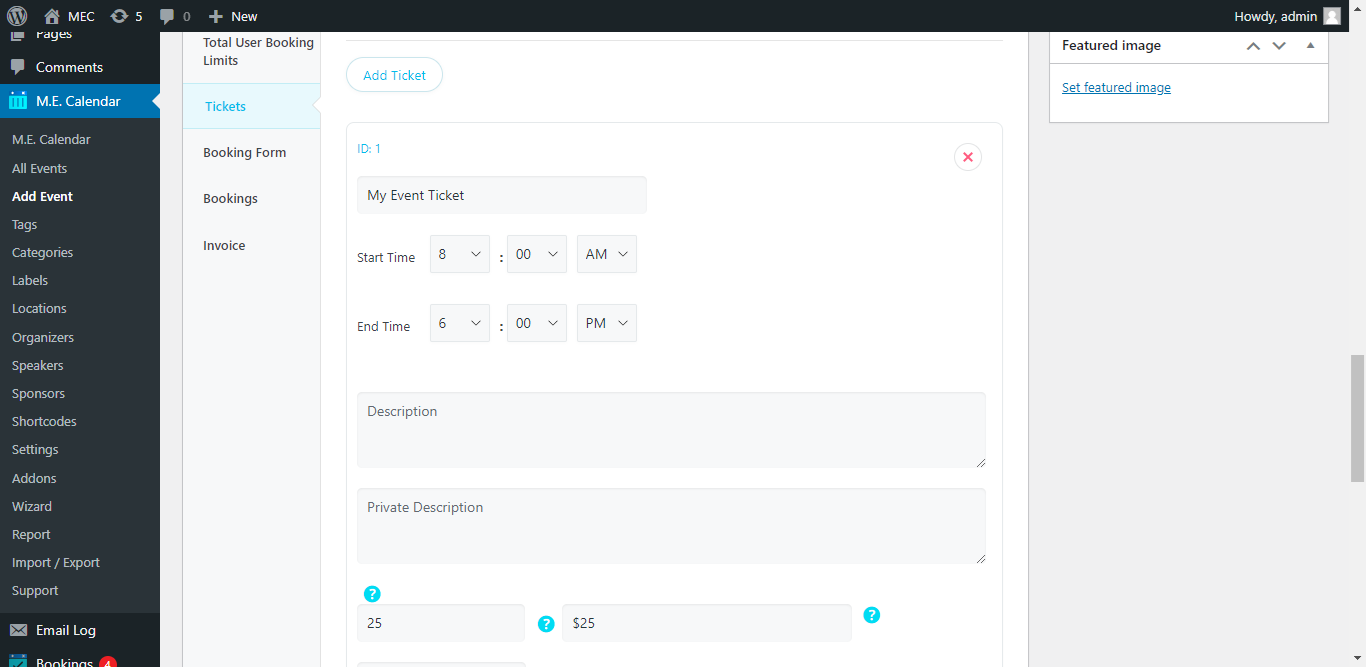
To begin, simply create a ticket for your event. Go to the Ticket tab and click on Add Ticket to create one. Enter a name and price for that ticket and fill out the rest of the fields.
After installing and activating the Ticket and Invoice addon, go to MEC Settings > Invoice Options.
Here, you can configure the options for printable tickets or invoices. One of these options is Invoice Type, which you can choose from one of the templates we have available for you.
The initial setup is complete.
Now, after making a booking, users will receive the ticket or invoice to the event and can have it printed and on them on the event day.
How to Plan an Event Efficiently?
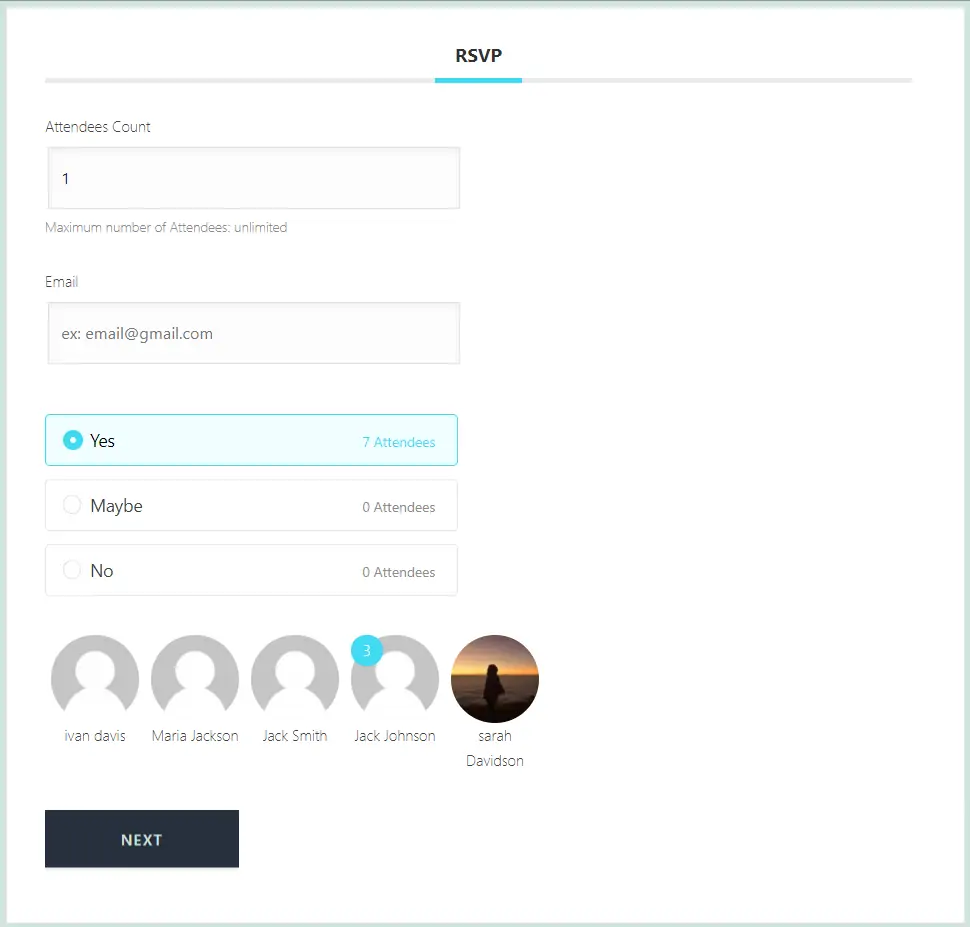
Our suggestion is the RSVP addon.
With the Ticket and Invoice Addon, you can get general feedback from the attendees for the event before starting to plan things.
Suppose you are planning an event, but you are not sure how many people will attend or you are not sure which location best suits your event.
Here, you can create the event in MEC, then use the RSVP addon to display a form to the users and ask them to submit an RSVP response.
Finally, you can plan your event and work out its details using the information you have received.
Is It Possible to Sell Tickets via PayPal or Stripe?
Absolutely. We have configured popular payment gateways such as PayPal and Stripe in MEC Pro by default.
You can go to MEC Settings > Booking > Payment Gateway and connect your PayPal or Stripe account there.
Watch this video for more information.
Is It Possible to Customize the Tickets?
Yes. You can use your business information in the tickets or invoices that are sent to the attendees.
To do this, go to MEC Settings > Invoice options and fill out the Company Information fields.
Also, in the Custom CSS section, you can change the style of the different parts of the ticket.
How to Export a List of Attendees?
To do this, simply go to MEC > Bookings and filter the bookings based on the event.
Then, you can select all of the bookings and export them from the Bulk Edit menu.
There is another filter besides the event name. For instance, you can filter one specific occurrence of a repeating event and export its attendees.
The exported file can be in CSV and MS Excel.
How Does the Check-In Process Work?
If you have the Ticket and Invoice addon installed and active, after users make a booking, they will receive a ticket or invoice that contains a QR code.
This QR code is used to check in attendees at the event, and, as the host, you can scan the code to check the attendees in and have an idea of who’s attended and who hasn’t.
You can do this with our app or with your smartphone. If you are using your smartphone, you must be logged in to your website in its browser app.
Otherwise, you won’t have the proper access to check-in people.
We have recently designed an app for this to make the process easier.
With this app, you don’t need to log in via your phone’s browser because it works with an API key.
This way, you can link your website and the app and scan the codes effortlessly.
After scanning the QR code, you will see a message regarding whether the check-in was successful, and it will also update the status in the backend of the website to Checked in.
If the attendee was already checked in, you will see a message saying Already Checked In. The messages are intended to improve user experience.
Report Out Dated Content
If you think the content of this page does not reflect updated information, please let us know.
We are looking to purhcase this Addon but want to know few things as that’s critical. Can we ask somehow another email for billing purpose in the booking form so user can specify this email to receive Invoice / Receipt of the purchase and Attendees only get booking confirmation email.
If I purchase the PRO subscription with the woocommerce bundle, will I be able to sell tickets and make money WITHOUT needing this addon? I am not exactly sure the purpose of this addon if the prosubscription already comes with ticketing features.. Thanks!
Is it possible to collect a deposit for an event and use this add-on to send an invoice for the balance due?
can you add a column in “WordPress Dashboard > MEC Invoice > Invoices” for display which attendees are already checked or not? So i don’t need to jump into edit Invoice page to check the status one by one.
Hi there,
is it possible with this Addon to use different invoice Layouts depending on the event?
We have events with and without taxes depending to which customer we offer it. So we have to companies who sell them. One with tax and one without and so we need to change the Logo and the Adress depending on the event.
Is this possible or could it be customized by your service?
Best regards,
Markus
Hello,
Unfortunately, currently, this is not possible,
I will forward your comment to our developer team and they’ll surely receive it. If it is possible they will add this feature in the upcoming updates of the Plugin.