Translate with WPML Plugin
In this article, we will explain how to Translate with WPML Plugin (the WordPress Multilingual Plugin) which is one of the most popular translation plugins for WordPress. With WPML, you can translate all pages, posts, custom types and taxonomy, and more.
How to Translate with WPML Plugin?
We work directly with the WPML team to guarantee 100% compatibility between MEC and the WPML, so to start translating, follow the steps below:
Step 1: Getting Started
First, you should make sure that some items are activated along with your MEC:
Our suggestion is WPML Advanced Translation Editor. To activate it, just navigate to WPML > Settings under the How to Translate Posts and Pages section.
Step 2: WPML Translation Tools
WPML provides a powerful Advanced Translation Editor (ATE) by default, which includes automatic translation, spell checking, and glossary management, making translations faster and more efficient.
In addition to translating your site’s content on your own, the followings are also possible:
- You can send your content for translation to a professional translation service.
- You can create your own local translators’ team. This is done through the Translators tab in Translation Management.
Step 3: Translate Taxonomies in MEC
First, make sure WPML String Translation is installed and activated.
With the latest WPML updates, most strings—including taxonomies—should be automatically translated while translating your event(s). However, if you need to manually translate a specific taxonomy, you can use the “Taxonomy Translation” feature. To do so, navigate to WPML → Taxonomy Translation in your WPML menu. This feature allows you to translate MEC’s taxonomies, such as categories, locations, organizers and more.
1. in Taxonomy Translation Menu you’ll see a drop-down menu that are includes all available MEC taxonomies that ME
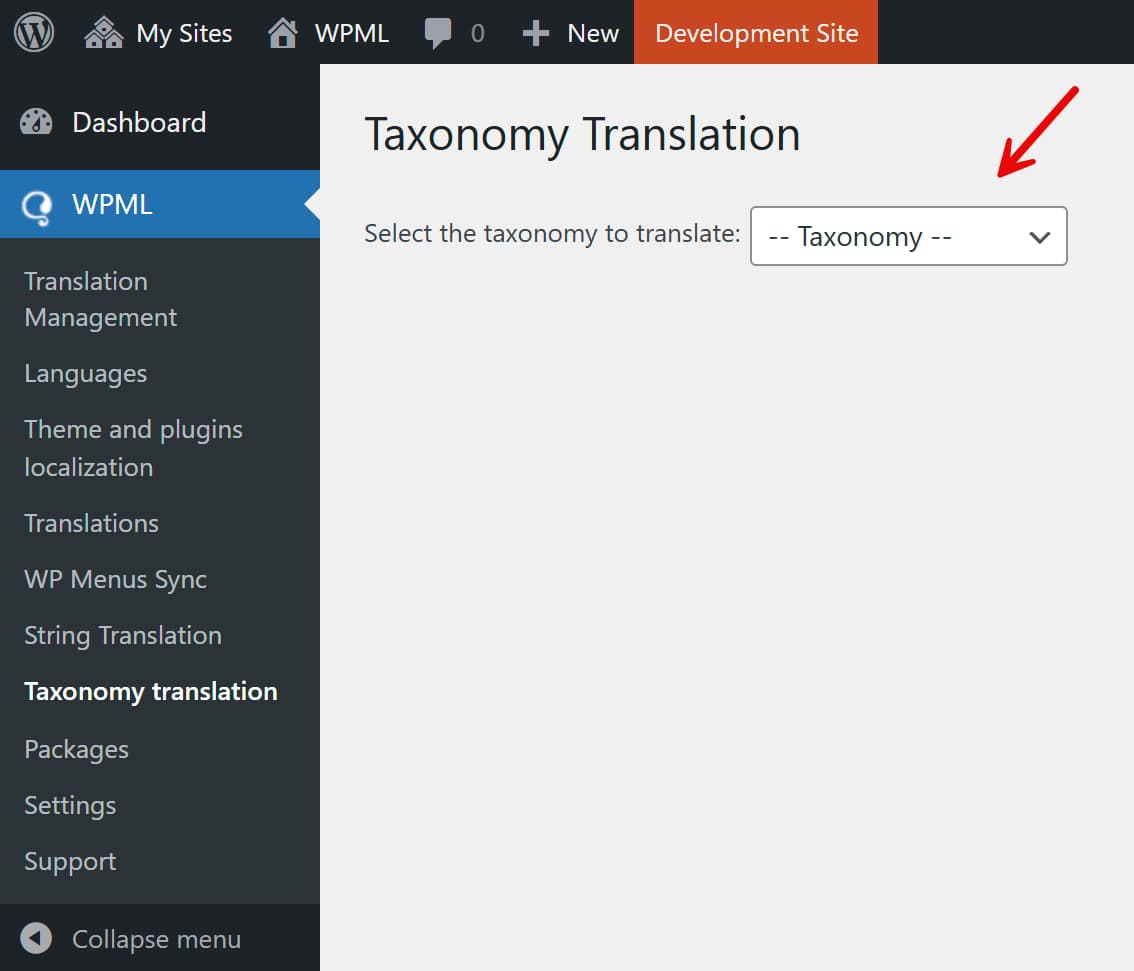
2. Select the MEC taxonomies you want to translate.
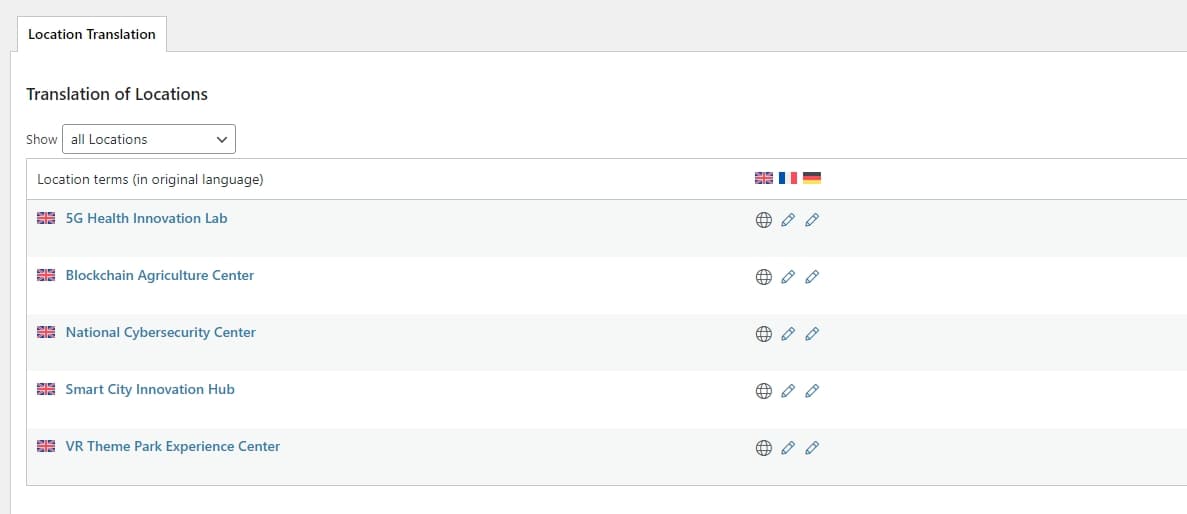
3. Click the “Pen” button for each language in which you want to localize the taxonomy.
4. A modal titled “Term Translation” will open, consisting of two sections: “Original” – Displays the original taxonomy text. “Translation to” – Indicates the target language for translating the taxonomy.
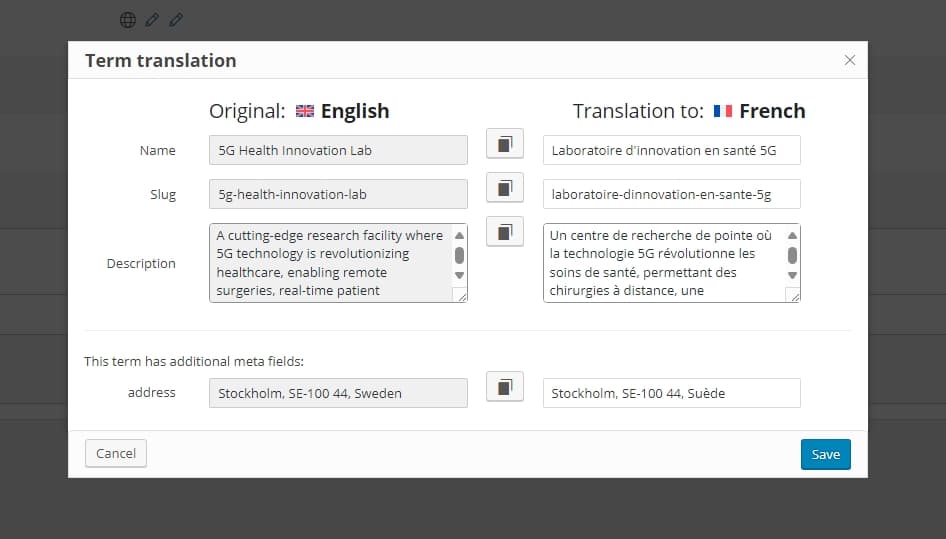
5. Simply enter your translation for the specific taxonomy term and click “Save.”
6. The process remains the same for all other taxonomies and terms, allowing you to fully translate them using the WPML Taxonomy Translation tool.
Step 4: Translating Your Events
WPML Advanced Translation Editor (ATE) main function is to allow your translators do their work faster and easier.
This editor has some main features like machine translation, translation memory, glossary, spell checker, HTML-less editing, etc.
WPML Advanced Translation Editor is basically a computer-assisted translation (CAT) tool.
It is completely integrated with browsers, so you or your local translators can easily translate posts, pages, and strings. If you want to use the Advanced Translation Editor, make sure you have the following WPML plugins, they should be installed and activated on your site:
- WPML Multilingual CMS
- WPML Translation Management
- WPML String Translation
The Advanced Translation Editor is selected by default in the Translation Management setup wizard.
However, if the feature is not enabled, you can activate it by navigating to WPML → Settings and enabling it under the Translation Editor section.
To translate MEC using WPML in the Gutenberg Block Editor plugin, follow the steps below:
Go to the Translation Management menu.
Here we have 2 steps to begin translating our events,
Step 1: Select items for translation
In this section, you’ll find multiple areas for translation, such as “My Templates,” “Blocks,” “Events,” and “Other texts.” However, since our focus is on translating events, we’ll concentrate on the “Events” section. By clicking on it, you’ll see a list of your events.
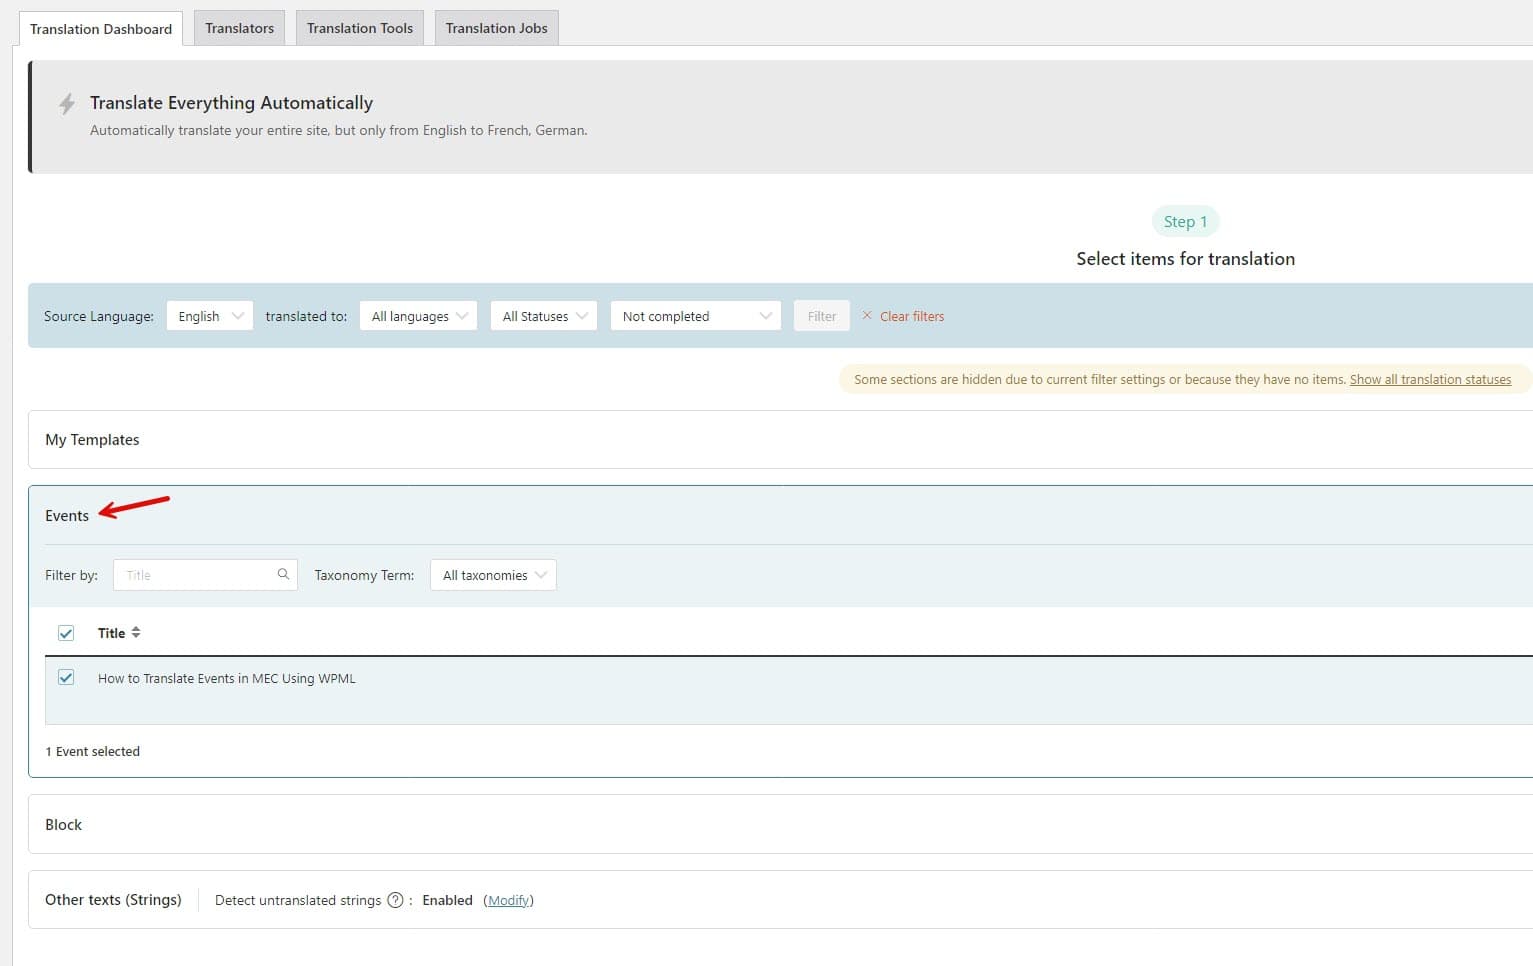
Now that you have all the events listed, you can select them and send them to the translation queue, either individually or in bulk. To do so, click the checkbox next to each event title.
Step 2: Translate your content
Now it’s time to choose how to translate our events. In this step, we have multiple options, such as Translate automatically (which requires WPML credits, available through their official website), translating it ourselves, or even assigning a translator so each event can be translated by a different person to speed up the process. For our case, we’ll take the direct approach and translate the events ourselves. So, we choose the “Translate myself” option from the dropdown and click the translate button.
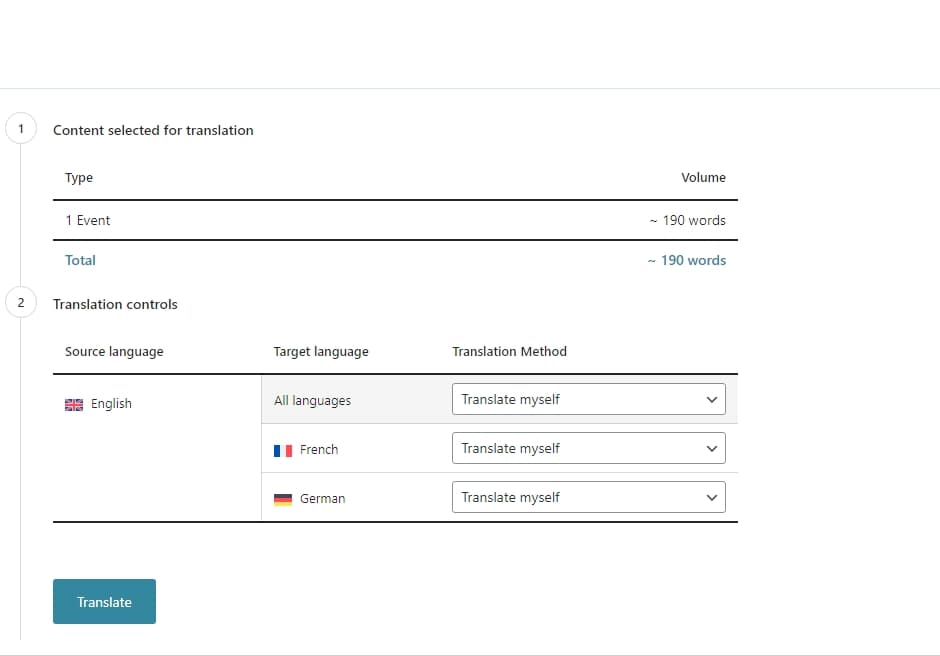
Now, as you can see in the screenshots, we have an event titled “How to Translate Events in MEC Using WPML.” which has already been added to the Translations Queue via Translation Management. To begin the translation process, navigate to the WPML menu and select “Translations.” The Translations Queue page will appear.

Here, for each language added in WPML languages, you will see a duplicate of the original event. For example, if English is set as the original and French and German are added for localization, you will see one entry for French and one for German. You will also be able to view the status of each translation. Since the translation has not yet started, the status will display as “Needs translation.”
Next, click on the “Translate” button for French to begin translating your event into the French language.
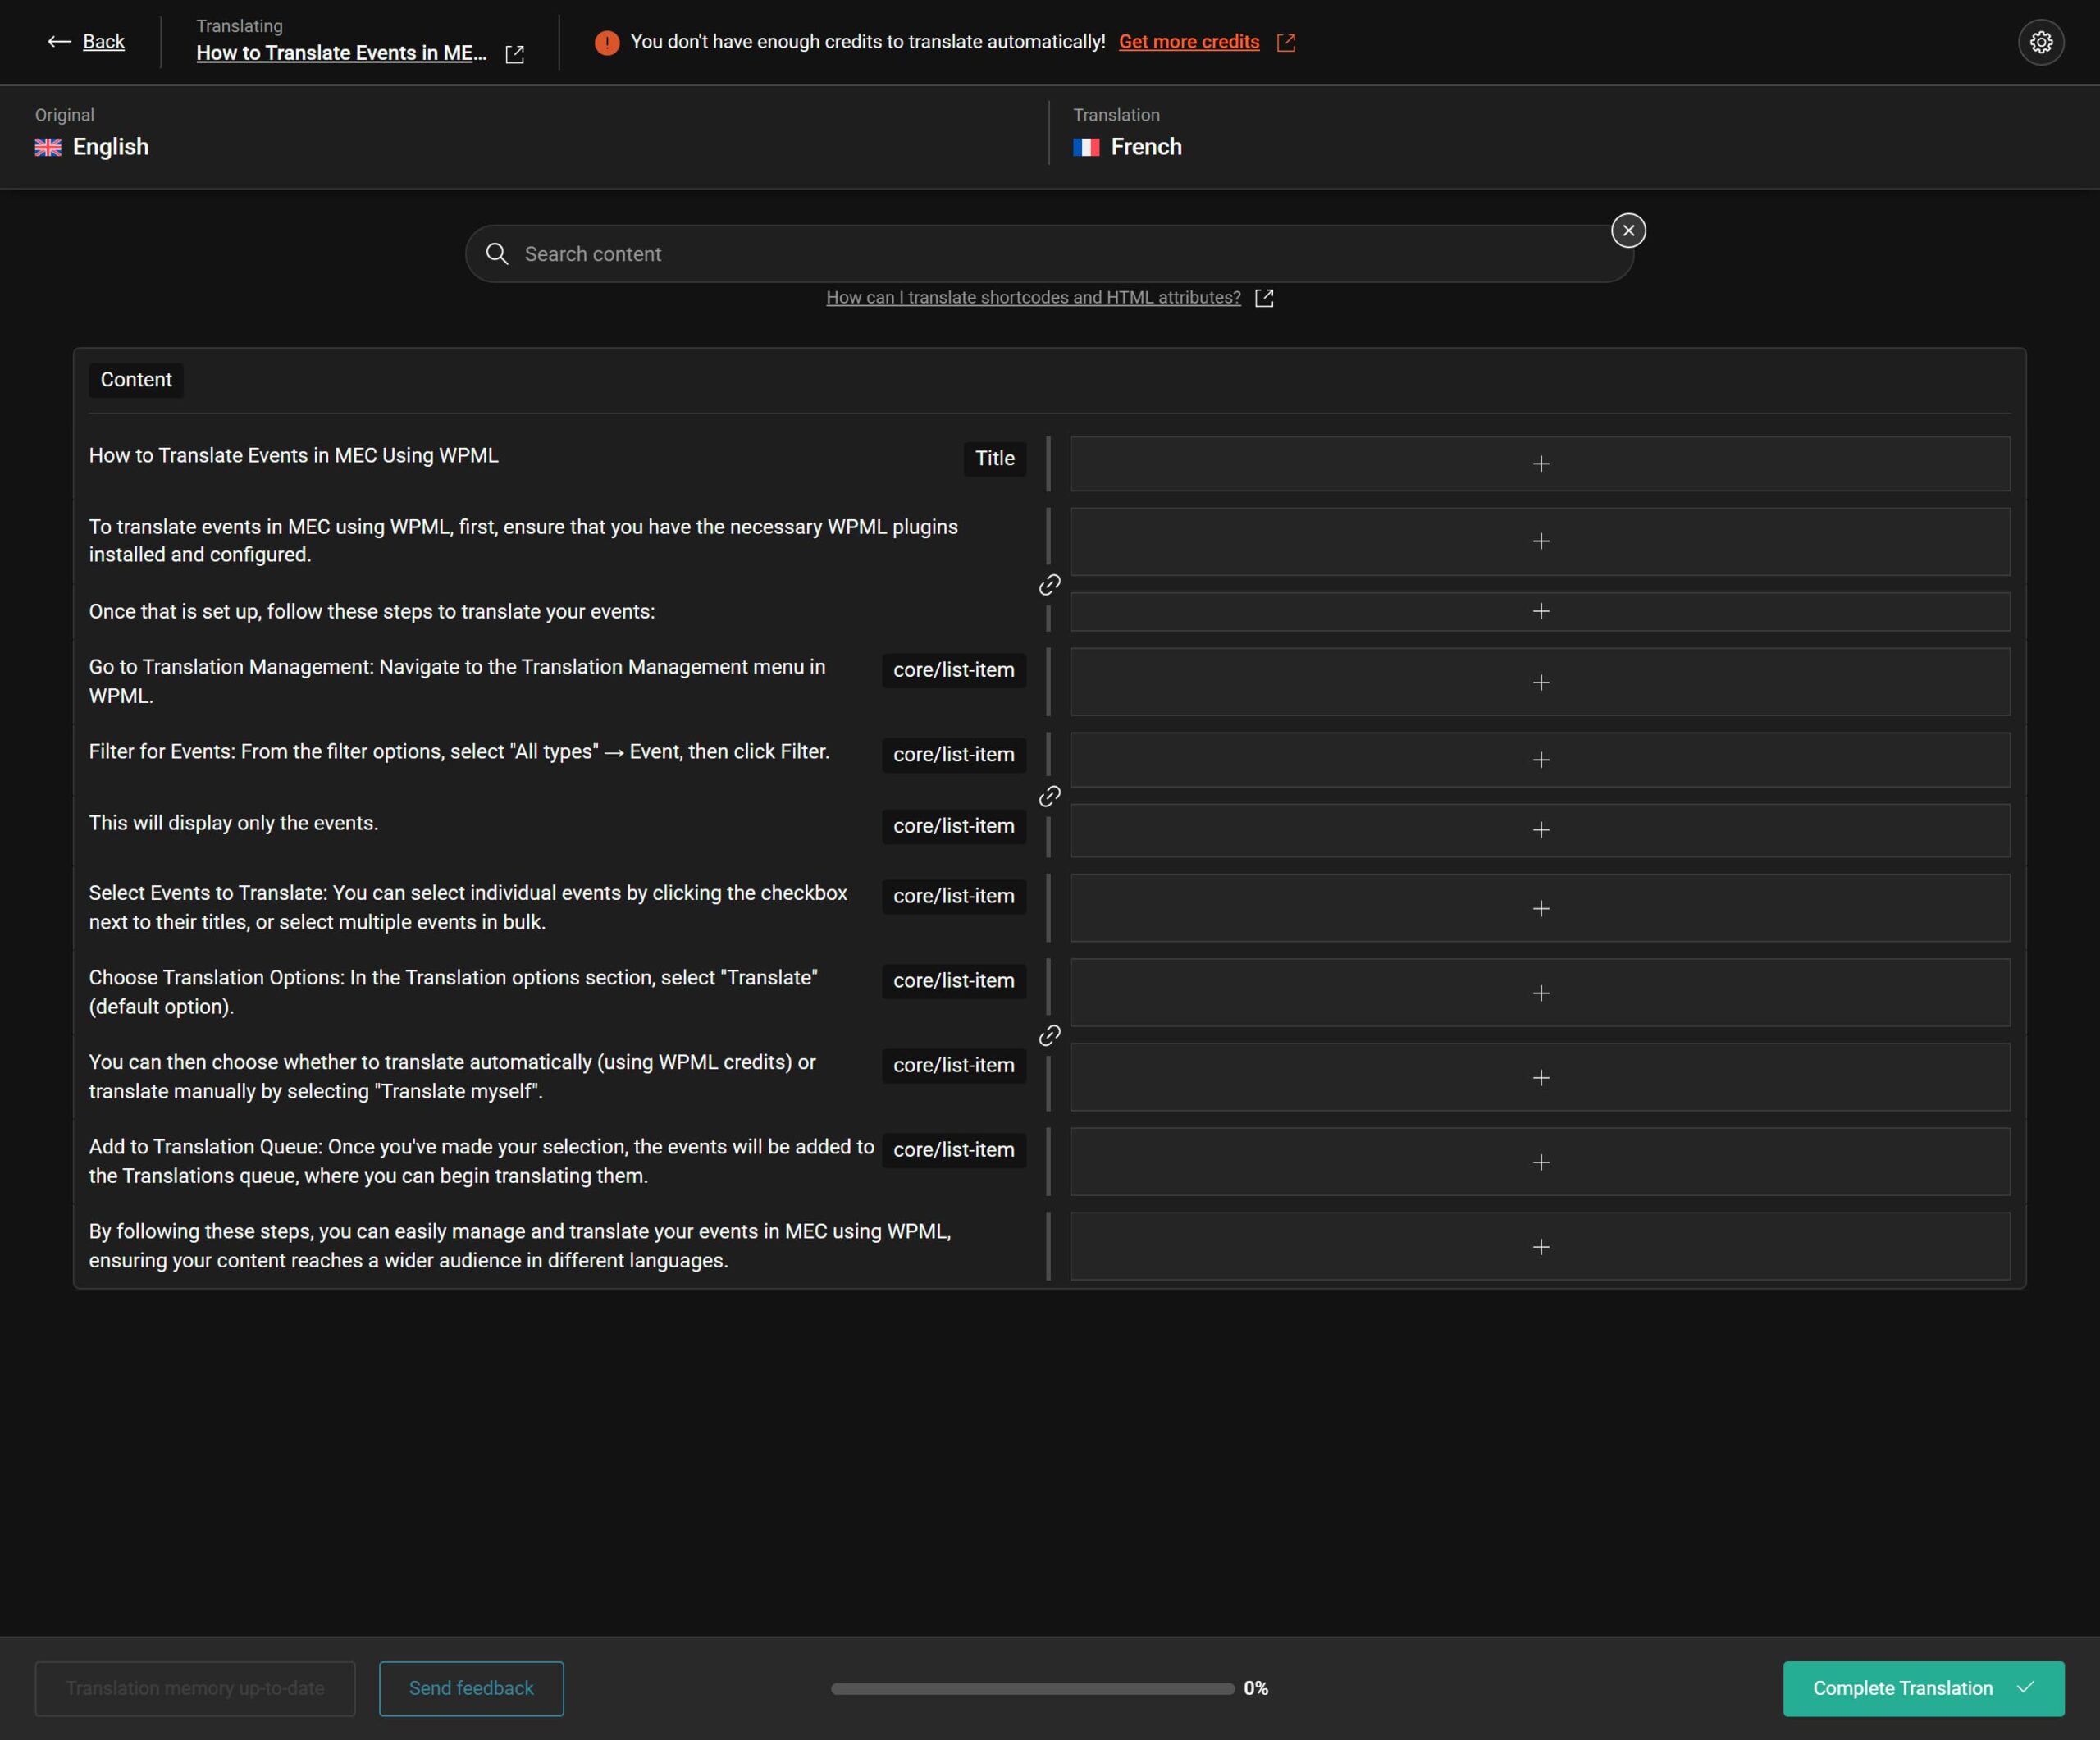
Tada! The renowned Advanced Translation Editor (ATE) opens, offering a clear and user-friendly interface. Simply input your translation for the target language, which is indicated by a small flag representing that language. As you translate each term, click the Save button located in the sticky bar to the right of each translation row. By clicking it, you save and confirm the translation for each row.
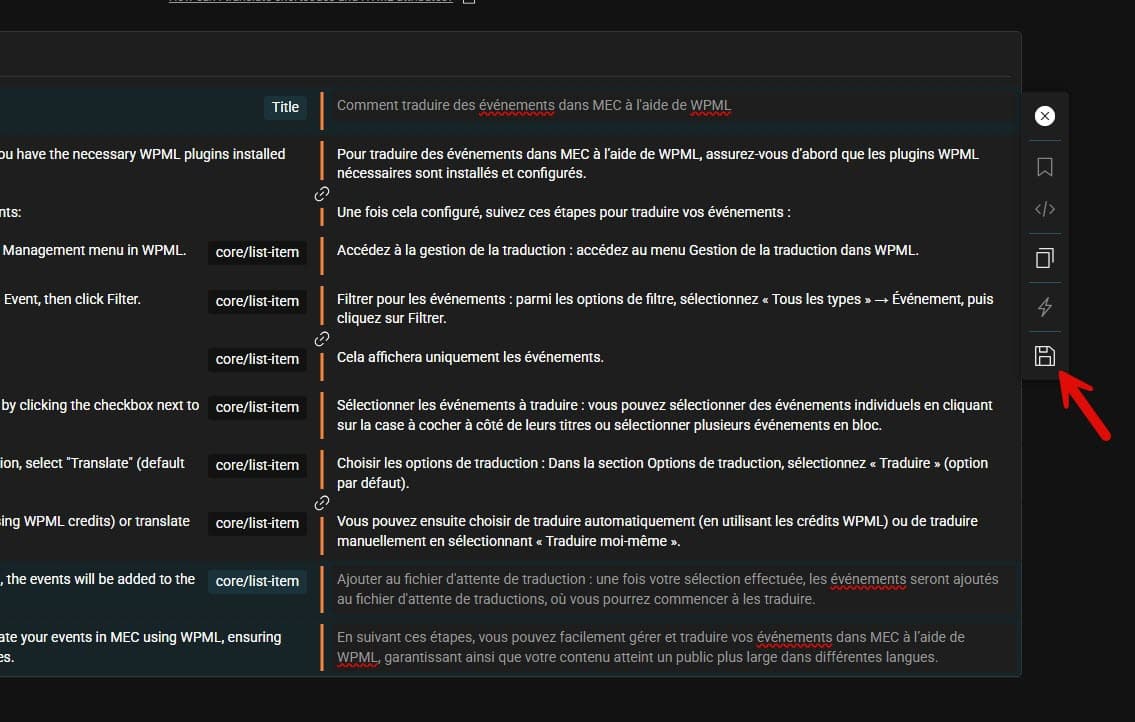
In the meantime, the progress bar below will gradually fill up to 100%. Finally, once the translation is complete, click Save to finalize the process.

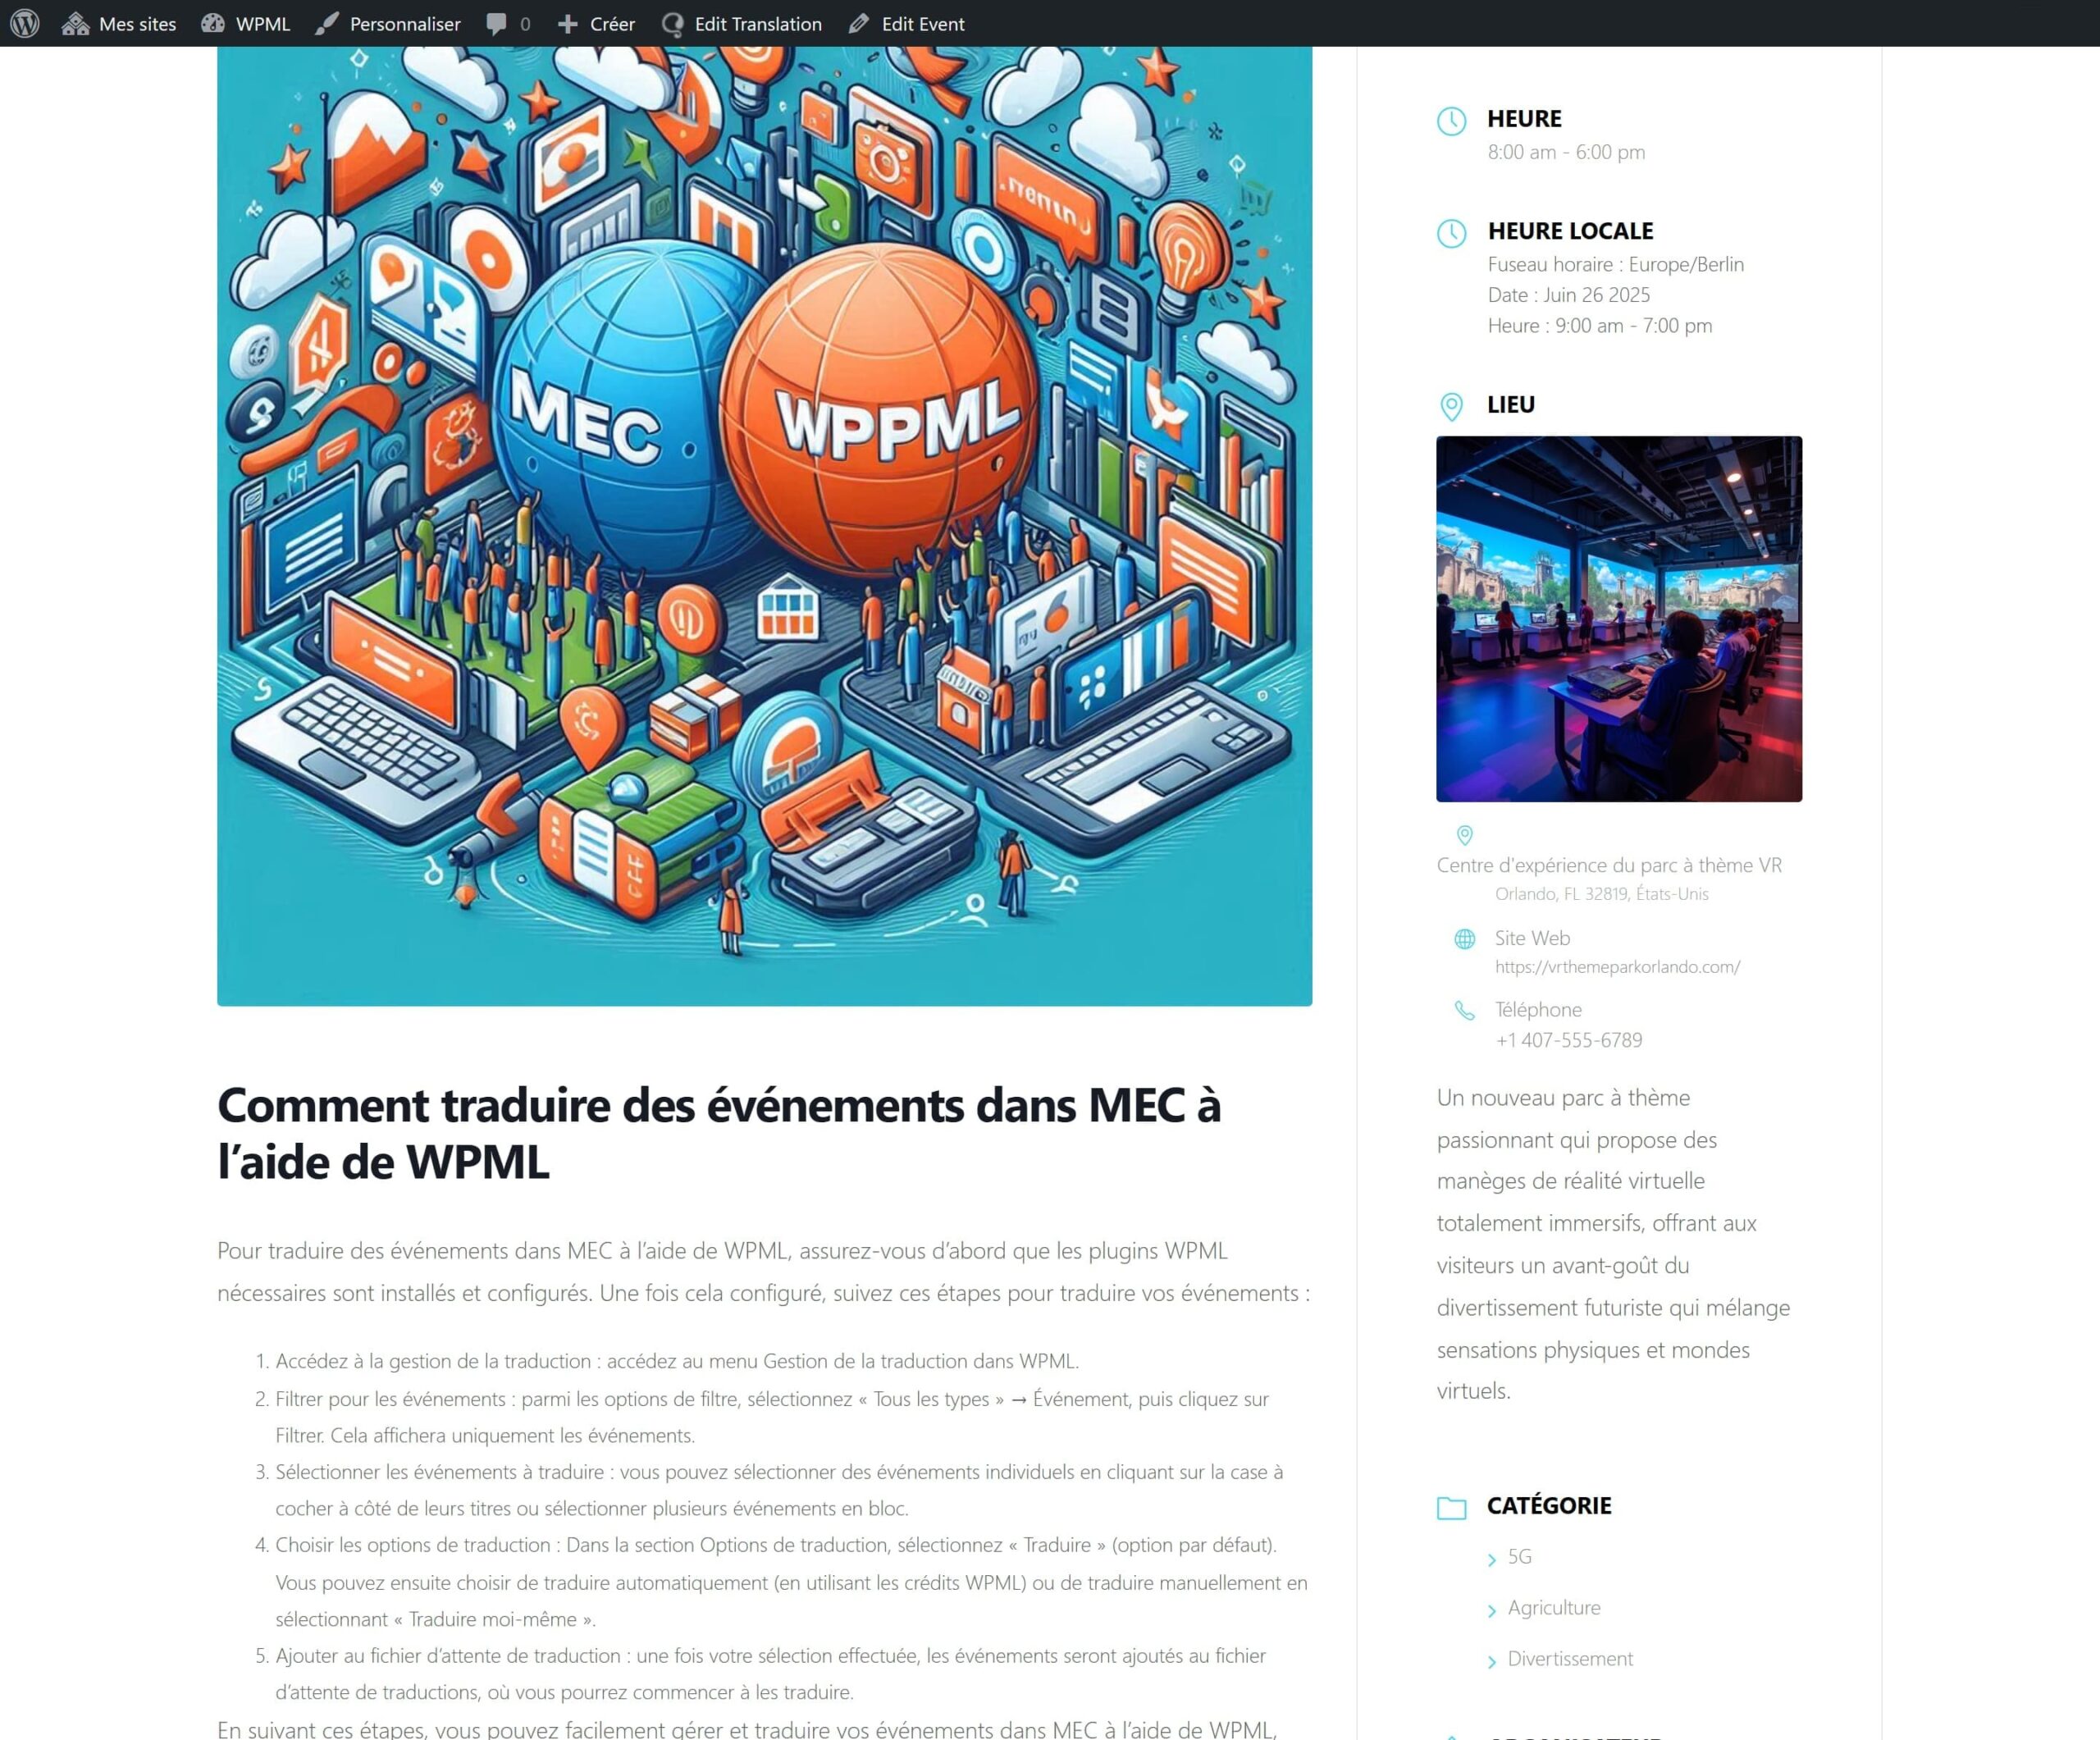
Now it’s time to check the results of our hard work. You can go back to your event and switch the language from your main language to the translation, which in my case is French. You’ll see that WPML has worked its magic, smoothly and seamlessly translating the event into the desired language (French in our case). If you take a closer look at the event, you’ll also notice that all other modules and taxonomies have been translated into their respective languages as well.
If you’d like a more in-depth overview of WPML’s Advanced Translation Editor (ATE), be sure to check out the video below.
Final Step: Webnus & WPML Support Teams Are There for You
- Webnus Support Forum
- Modern Events Calendar Lite Forum
- Modern Events Calendar Pro Support
- WPML English Support Forum
NOTE: Translation of dates, months, etc., is done using the WordPress date_i18n function. This is the same way with which your post’s date and time translations would be done.
This means that to achieve date localization (translation), you should install the base WordPress translation files for each of the languages you wish to use.
The monthly translations are supplied using the native WordPress internationalization. So you should be able to get those translations using a completed translation file.
WordPress already includes localized date formats. Please make sure that the WP .mo file is correctly installed in /wp-content/languages.
You can check this in WPML > Themes and Plugins localization:
- Go to WPML > Themes and Plugins localization.
- Enable the Translate by WPML option.
- Enable the WPML will automatically download WordPress translations option.
Click here for more information about WPML Localization.
Report Out Dated Content
If you think the content of this page does not reflect updated information, please let us know.