6 Steps to Start Your WordPress Website Without a Hitch
In today’s interconnected world, it’s not enough for businesses to have an amazing product.
If you want customers to buy from you, your brand must be trustworthy and reliable.
And what adds more reliability to your brand than a well-established website?
The good news is that in 2020 anyone can create a website with no coding knowledge or skills.
WordPress makes launching a website as easy as it can possibly be.
We’re here to help you figure out how to start your WordPress website.
How to Start Your WordPress Website Without a Hitch
Once you’ve completed the guide below, you’ll have a fully-functioning and ready-to-go WordPress website:
Step 1. Choose a Domain Name
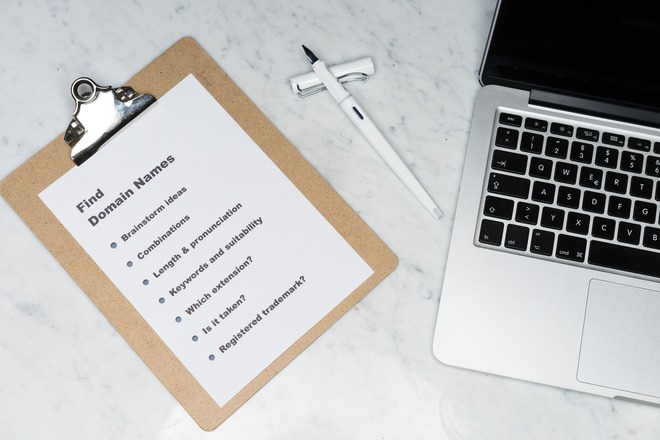
The first thing you need to do is to pick a domain name and a web host for your future website. A domain name is your website’s name on the web. A domain name is absolutely crucial for your website as it allows users to find, locate, and access the content on the site. Here are some tips for picking a good domain name:
- Choose the right top-level domain (TLD): TLD is the last part of your website’s URL (link). The most common TLDs include .com, .net, .org, .info, .edu, .gov, etc. While some TLDs are specific to certain locations (like .us or .nyc), others are specific to certain types of organizations (.gov stands for government, .edu stands for educational institutions). The best practice here is sticking to the most popular and reliable .com top-level domain.
- Choose a domain name that is simple yet memorable: It can be your company’s name, slogan, or just a catchy phrase. You can even create new words. The rule of thumb here is to keep it short and memorable. If you’re struggling to create a domain name, use a domain name generator or a slogan generator to get some inspiration.
- Pick a domain name that is easy to pronounce and type: When it comes to your domain name, you don’t want any confusion. Avoid words that have multiple spellings, numbers, hyphens, homonyms, and slang words.
Step 2. Get a Good Web Hosting
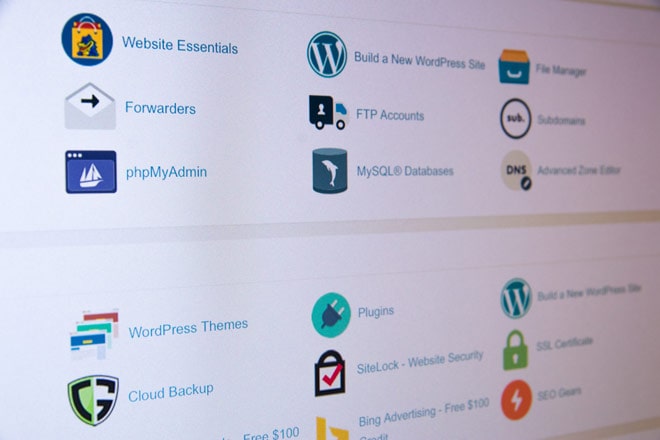
After you’ve figured out a domain name, it’s now time to choose your hosting provider.
The choice of a hosting provider is central to your website’s functionality.
A great web host compiles of the three critical S’s – security, speed, and support.
This means that your web host must provide domain name registration with SSL for improved security, a guarantee of more than 99% uptime for speed, and 24/7 customer service availability for support.
Most advanced internet surfers are using tools to make their data even more secure.
For example, you can use a virtual private network to secure your data and avoid personal information leaks and turn it invisible to cyber threats.
We have wrote an advanced article on best WordPress hosting services that will definitely help you choose between all of the various providers out there, feel free to check it out: 10+ Best WordPress Hosting Services
Step 3. Install WordPress
Make sure to choose a web hosting provider that offers free one-click WordPress installation. Once your domain and hosting are all set, it’s time to install the WordPress package through your web host.
The installation process will differ based on the web host you’ve chosen. Yet many web hosts provide a quick and easy WordPress installation, so there is nothing you should be worried about.
Step 4. Explore the WordPress Admin Dashboard
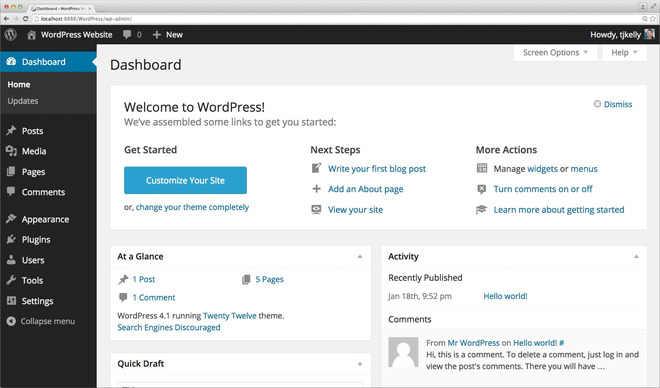
Some of the most critical areas of the admin panel are located within the Welcome frame.
The At a Glance tab shows you information about the current version of your website.
On the left, you will see many navigation tabs:
- You can create new posts under the Posts tab.
- The Media tab will help you upload and manage images on your website.
- If you need to create sub-pages, go to the Pages section.
- You can moderate comments under the Comments section.
- The Appearance tab is particularly important.
- This is where you can change your website’s design and customize the elements on your pages.
- Right under the Appearance section, you will find the Plugins tab.
- This is where you go if you need to install new plugins.
- The Users tab allows you to manage new accounts that have access to the admin dashboard.
- Finally, the Settings section is where you’ll find the main WordPress settings.
Step 5. Choose Your Website Design
After figuring the interface of the WordPress admin panel, the next step is choosing your website’s design.
A great benefit of WordPress is that you can pick and apply interchangeable designs called themes.
This means that you can change the total appearance of your website in just a few clicks.
You will find all of the WordPress themes on the official WP directory.
Pick a theme that you like and that offers enough functionality for the type of website you need.
To add a new theme, open the admin panel:
- Go to Appearance → Themes, and click Add New.
- Type in the name of the chosen theme and locate it in the list below the search bar.
- Click Install and then make sure to press the Activate button.
Another great thing about WordPress is its endless customization features.
This means that you can customize and adjust your theme based on your needs and preferences.
You will find all the needed customization options when you go to Appearance → Customize.
Step 6. Add Pages to Your Website
Once you’ve chosen how your website is going to look, it’s time to add some pages. To create a new page, go to Pages → Add New. Here are some of the basic pages you should consider adding in the first place:
- About: The About page is a perfect place to tell more about your brand’s story, mission, and values.
- Contact: The Contact page is there to help your visitors reach out to you. Include a physical address of your office, your contact number, and emails for different kinds of queries.
- Blog or Portfolio: Create these pages to either showcase your works or post blog posts related to your product/industry.
- Store: If you’re intending to sell your products or services online, the Store section is paramount.
Final Thoughts
Congratulations! Now you have a fully-functioning and beautifully looking WordPress website.
Completing the steps above is just a start.
WordPress offers countless opportunities to improve your website and add new features.
Experiment with design elements, add widgets, install plugins for better functionality, improve navigation, and never stop improving your website!
Recommended Posts

Best WooCommerce Pre-Orders Plugins 2024
May 20, 2024

Best WooCommerce Brands Plugins in 2024
April 30, 2024

