Social Auto Poster Addon
With Social Auto Poster add-on, you can automatically post events that you have published in MEC on your social media platforms, such as Facebook, LinkedIn, Twitter, Meetup, and Instagram.
Social Auto Poster Addon has numerous features that enable you to add your events to your social media. Below, we will walk you through its features.
Social Auto Poster Addon Installation
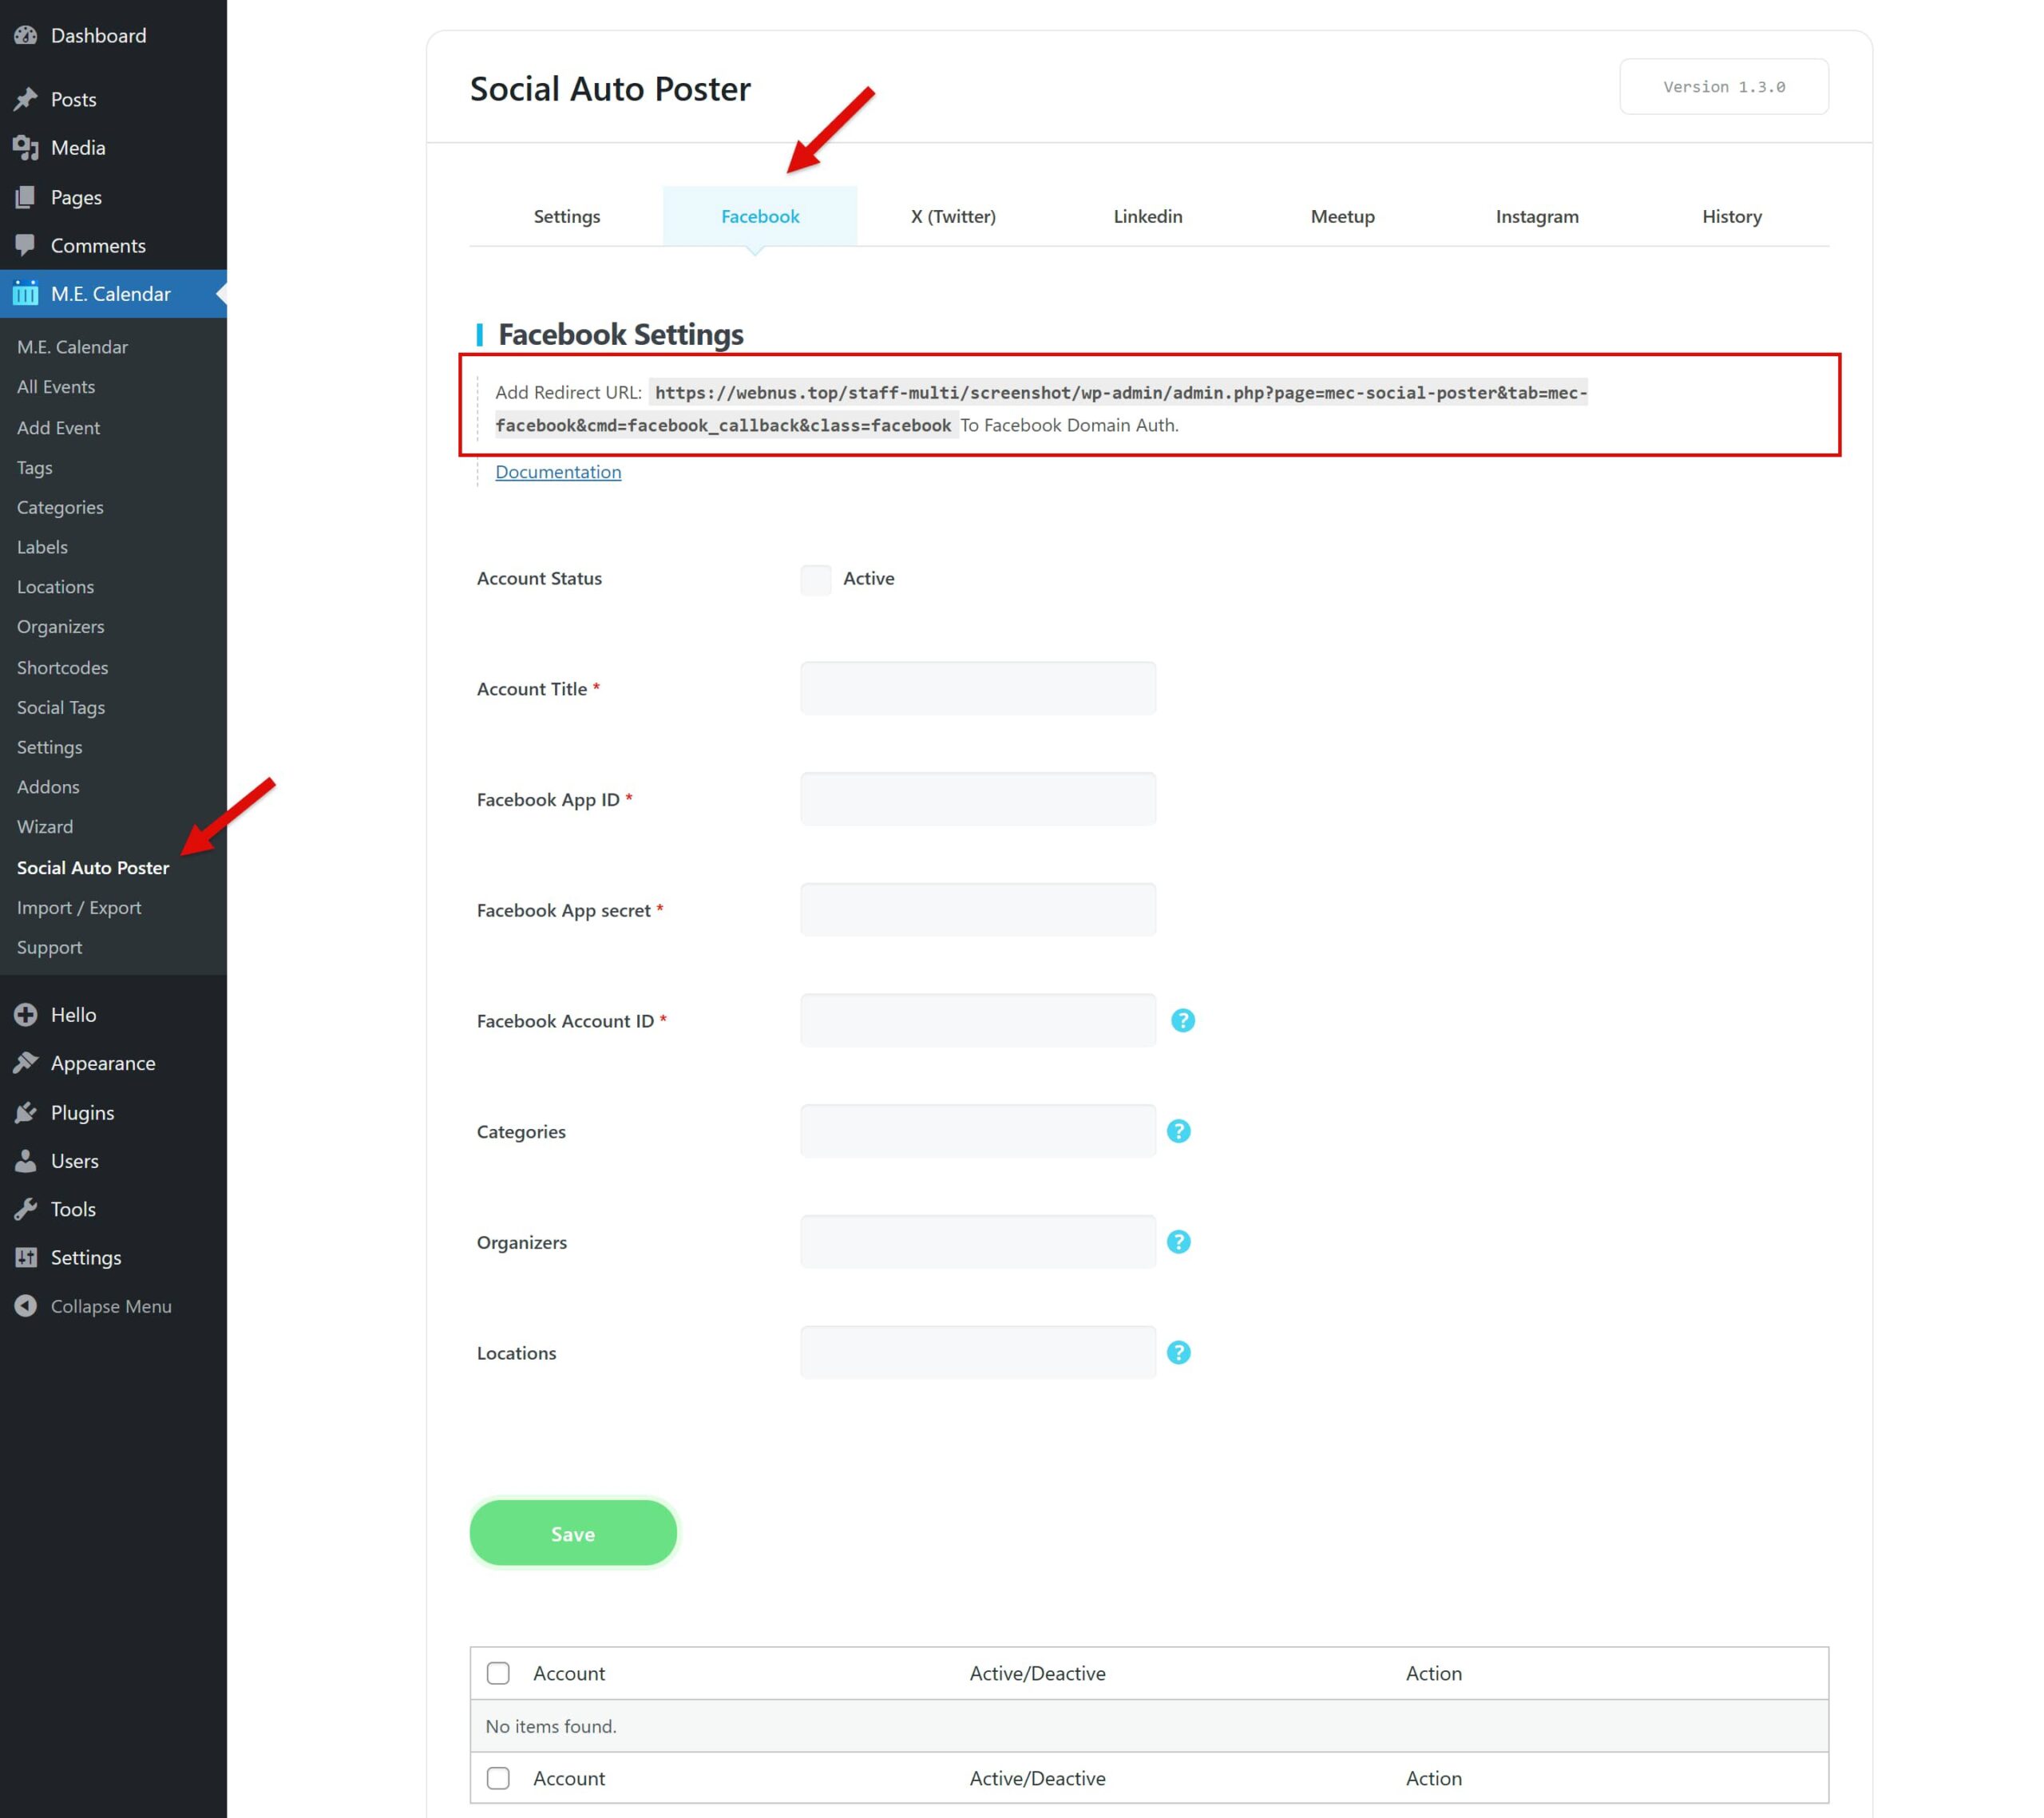
After installation and activation, a new option called Social Poster will be added to MEC’s menu. Once you click on it, you will see this page:
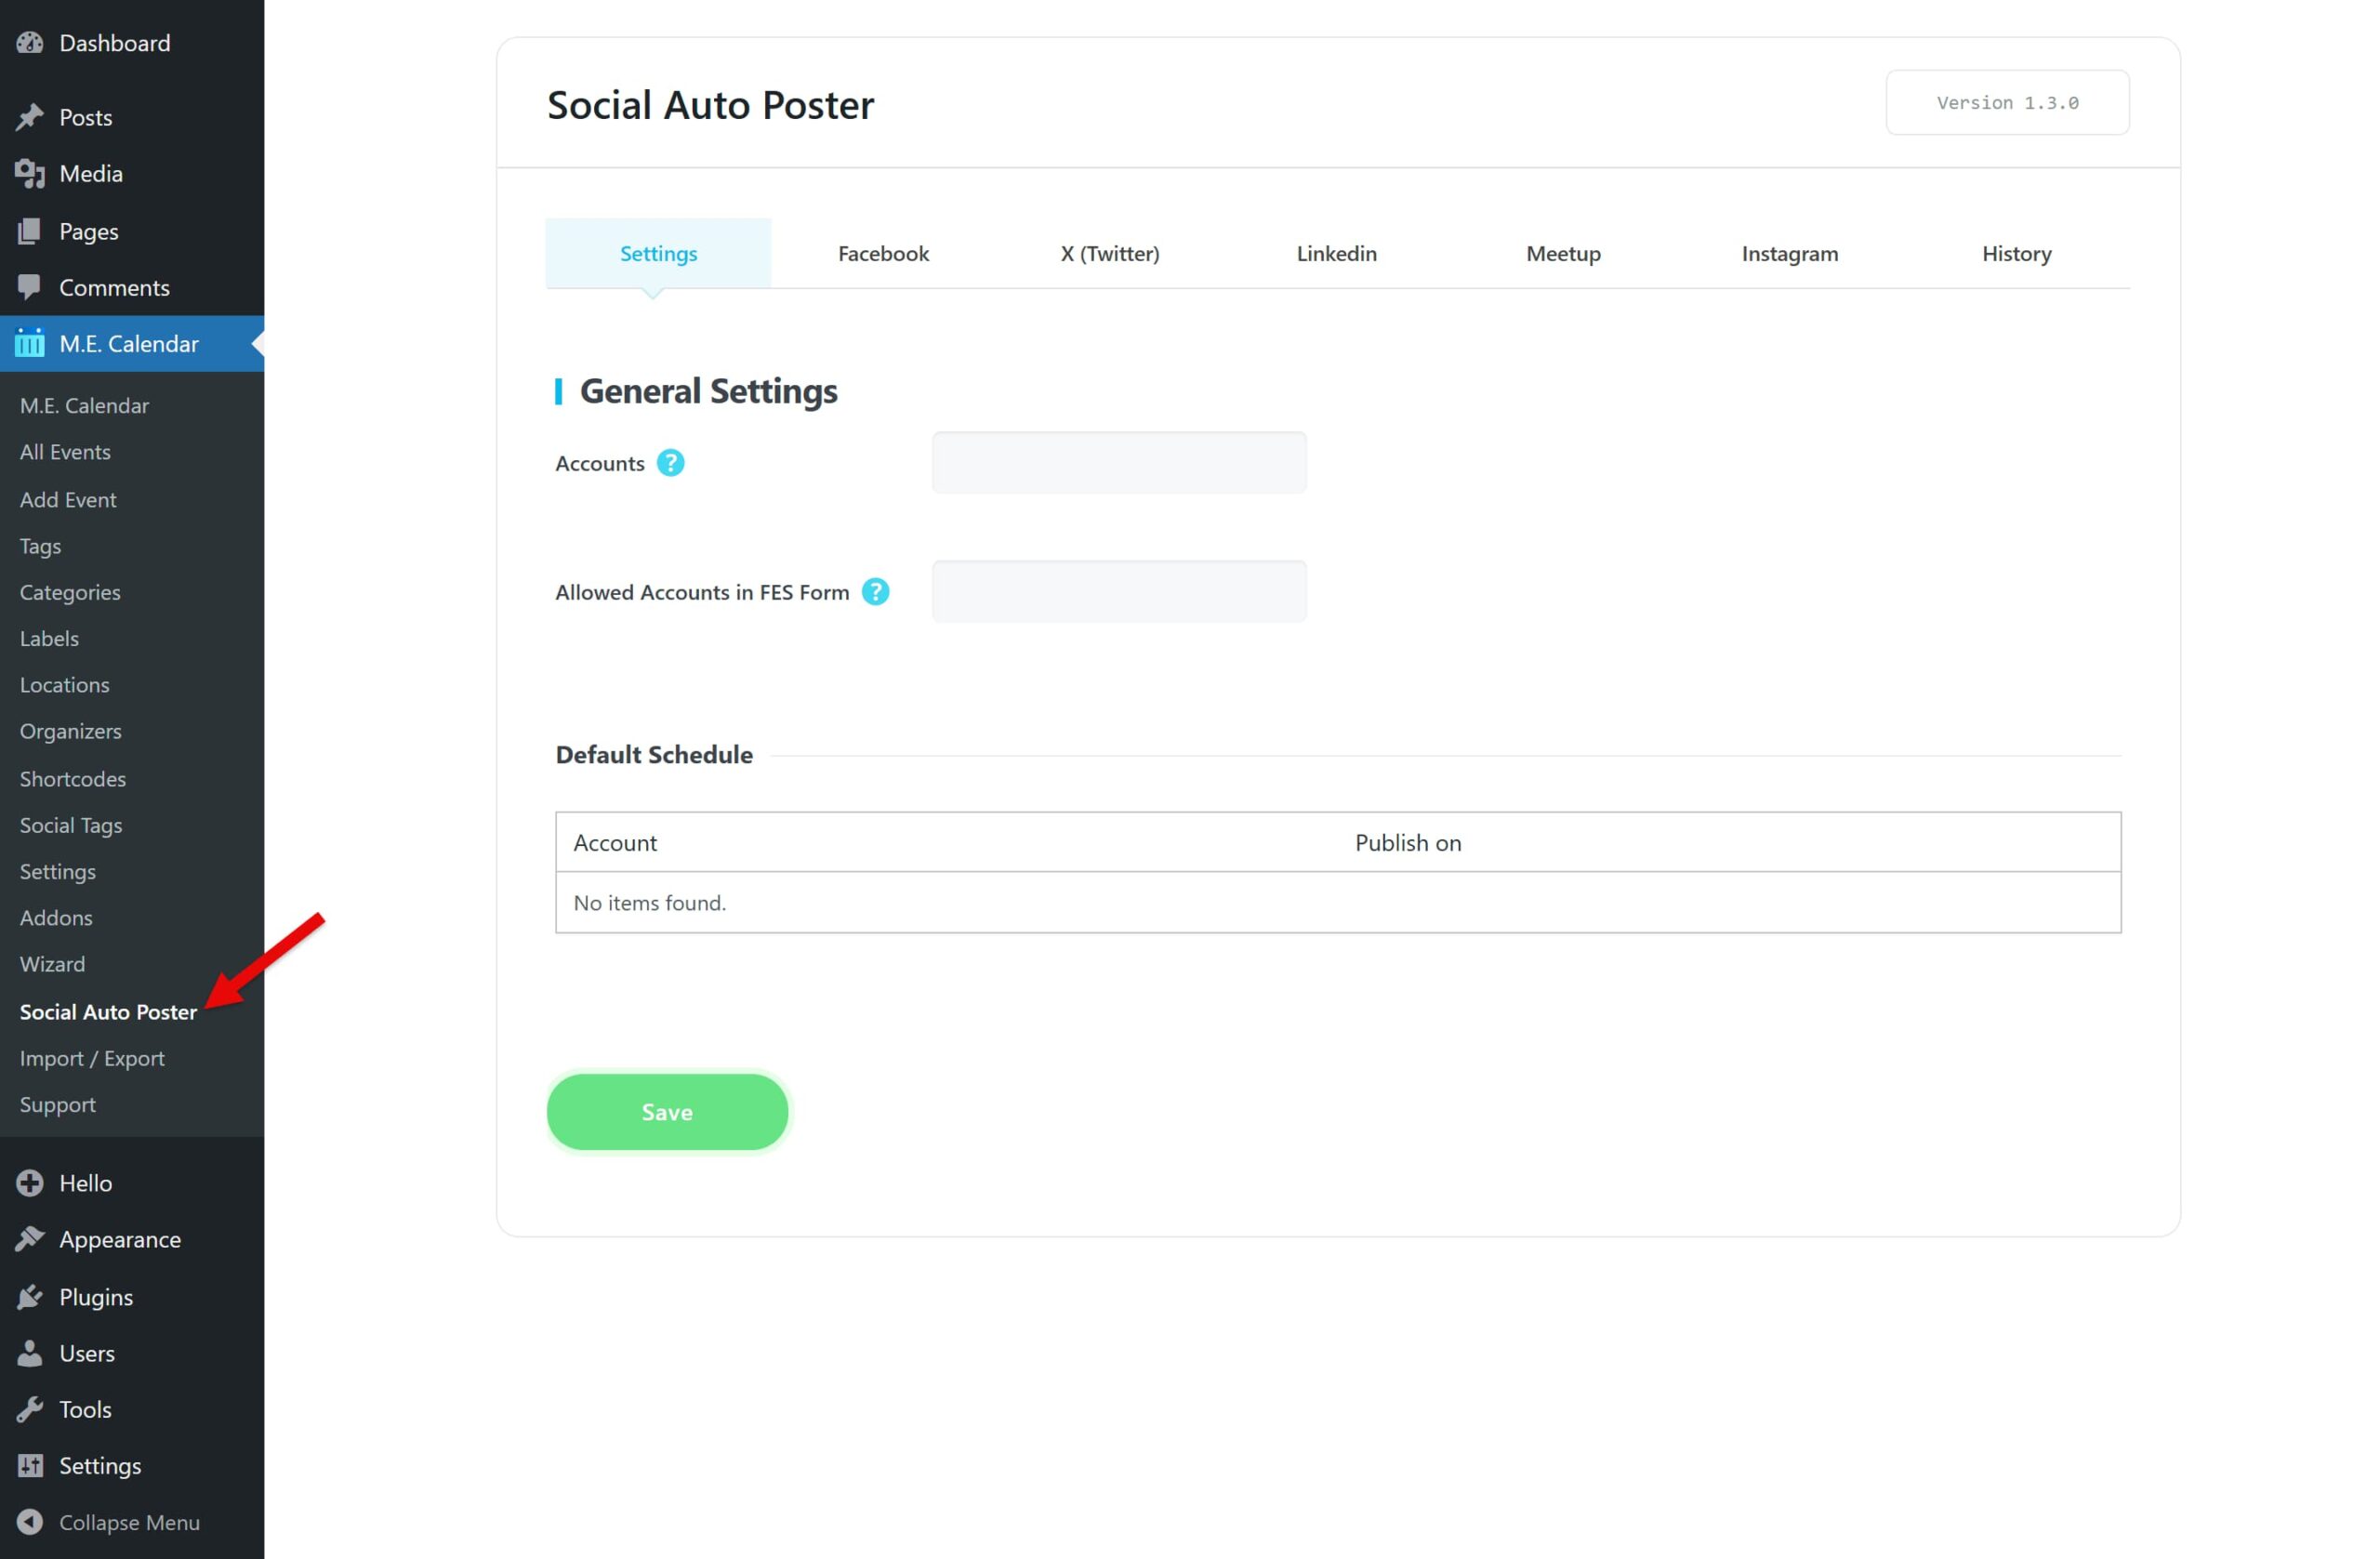
On this page, we enter the data for the social platforms we want to connect to MEC automatically, in their respective tabs. Then, we select the type of account. Now, let’s go through them one by one.
Create a Facebook App
First, we need to create a Facebook app to connect Facebook to the Social Auto Poster Addon. Please visit this page, log in to your Facebook account, and click Create App.
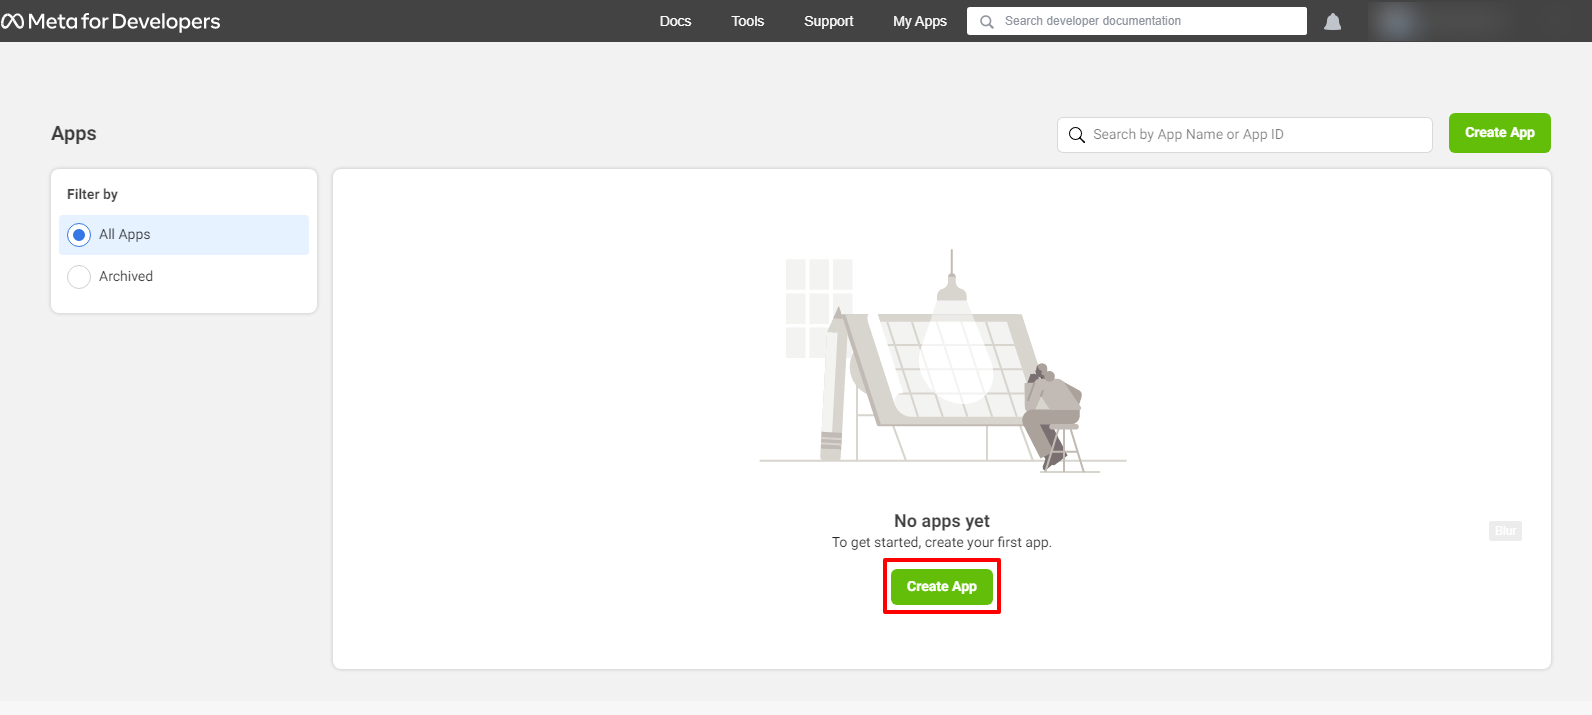
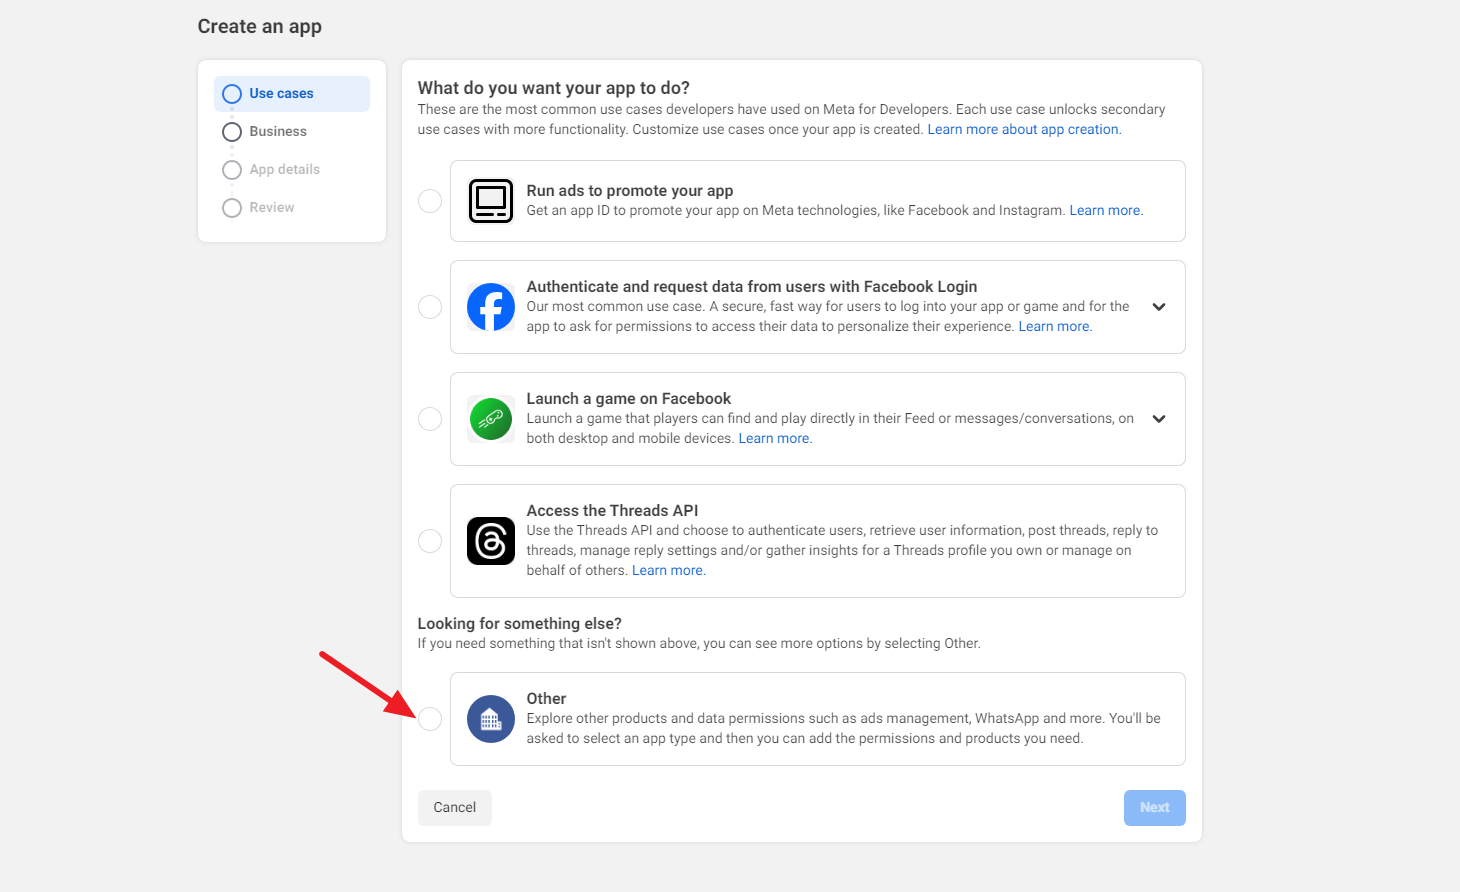
In the next window, click on Other and then click the Next button.
A new window opens, asking you to select an app type. Choose Business, and click Next at the bottom of the page.

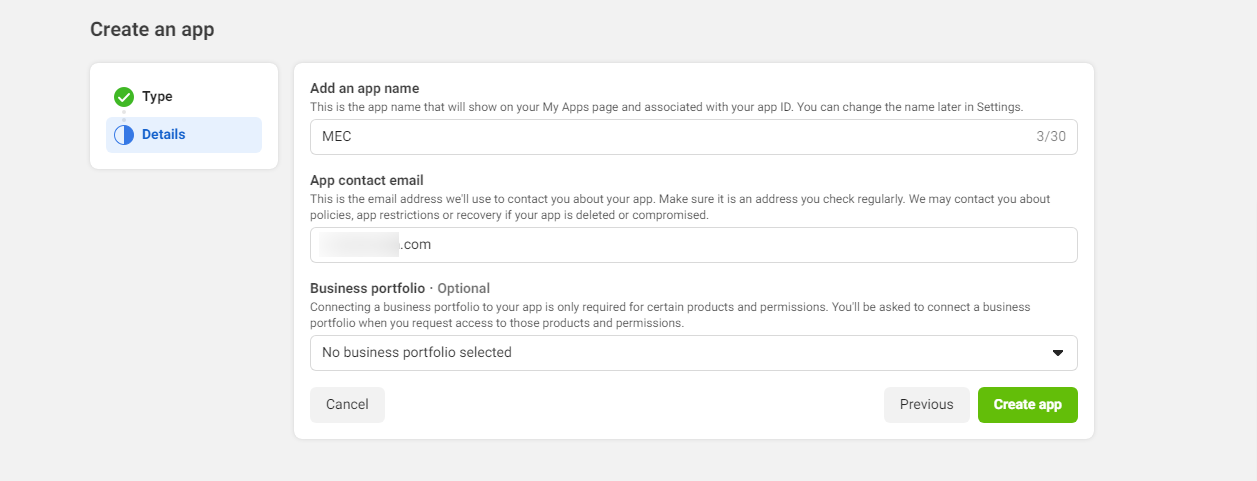
In the next step, the basic information of your Web App is needed, as shown in the example, and once done, click on Create App.
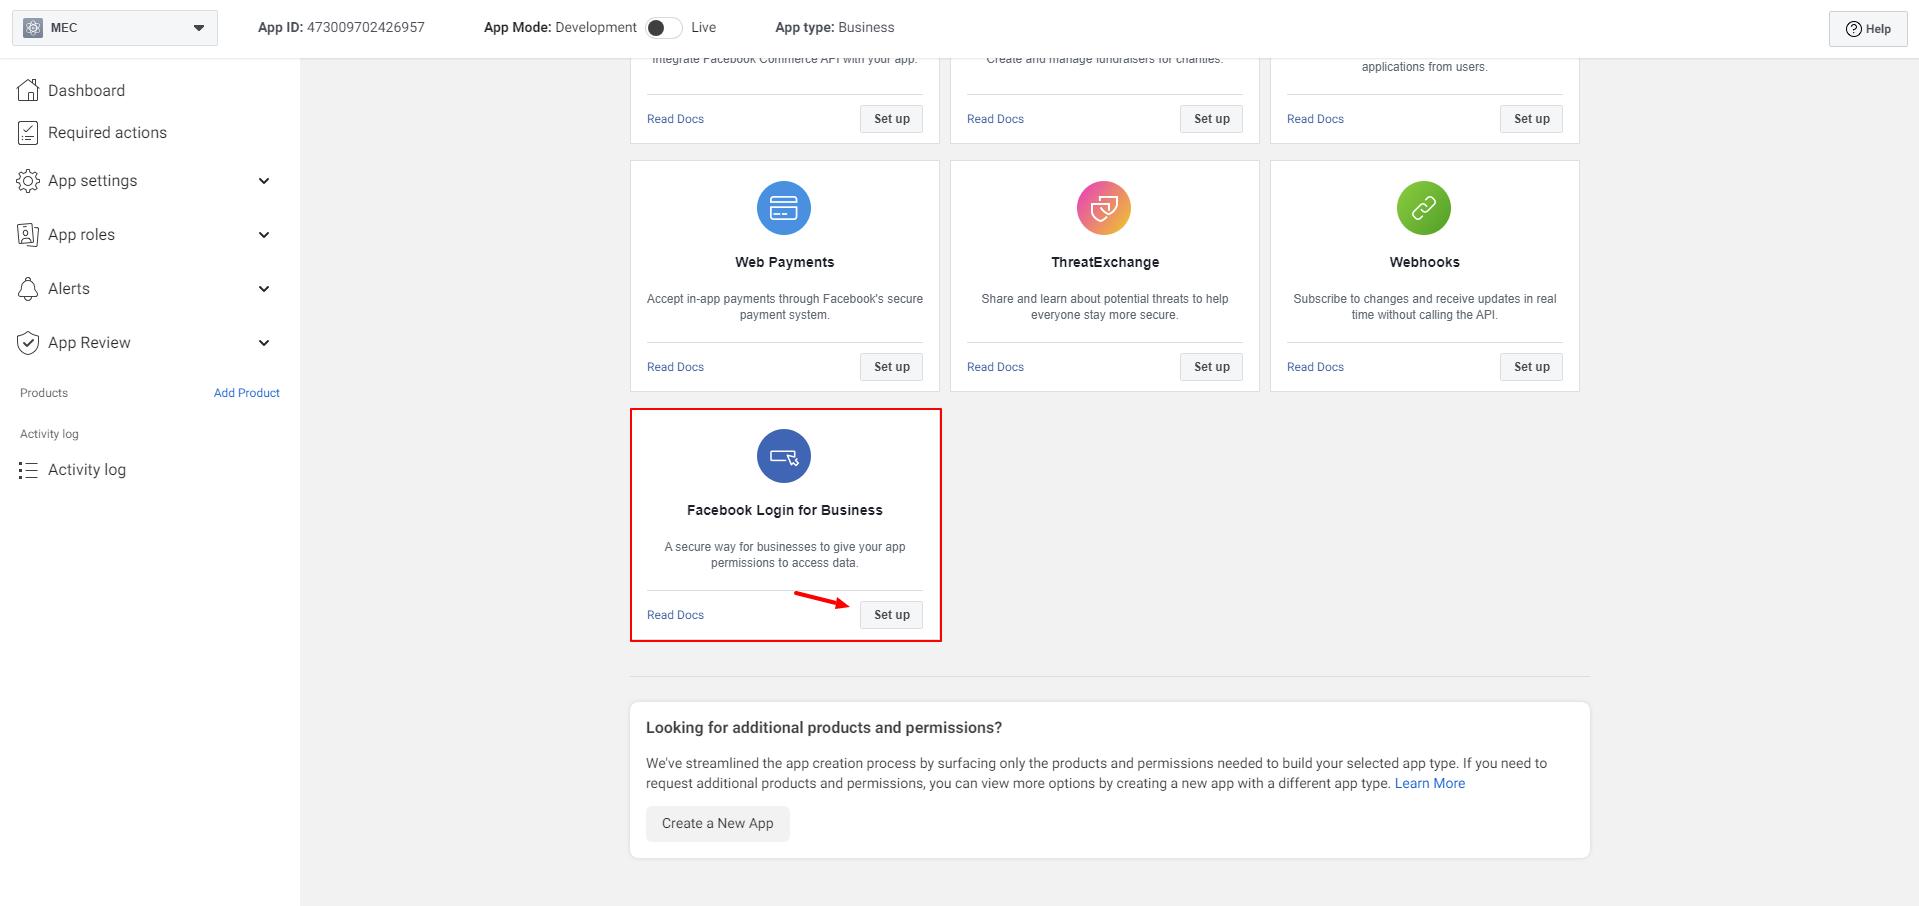
On this product page, set up and configure the Facebook Login for Business product.
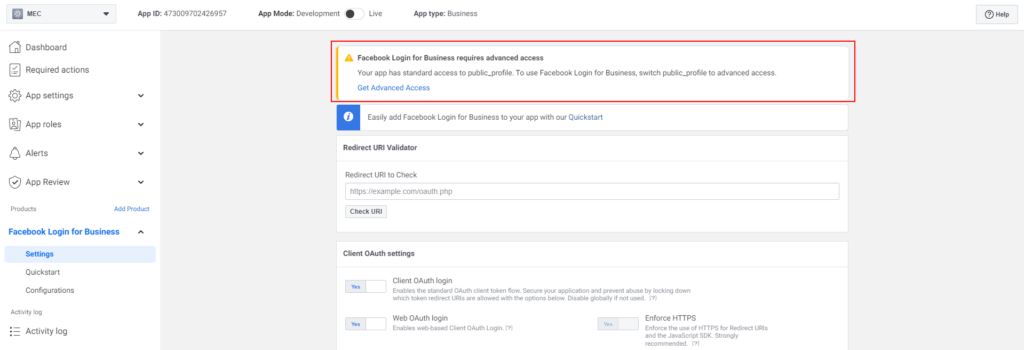
You will then be redirected to the Settings menu. If you see a warning on the page titled Facebook Login for Business requires advanced access, ignore it, it will not interfere with the process.
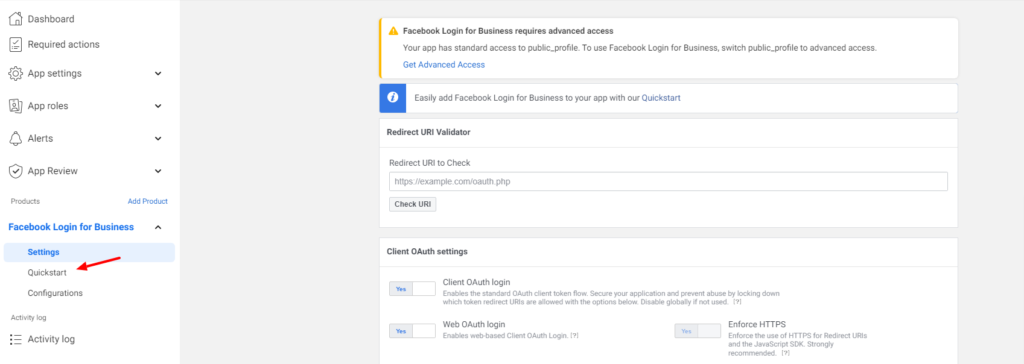
At this point, click Quick Start to complete the remaining settings.
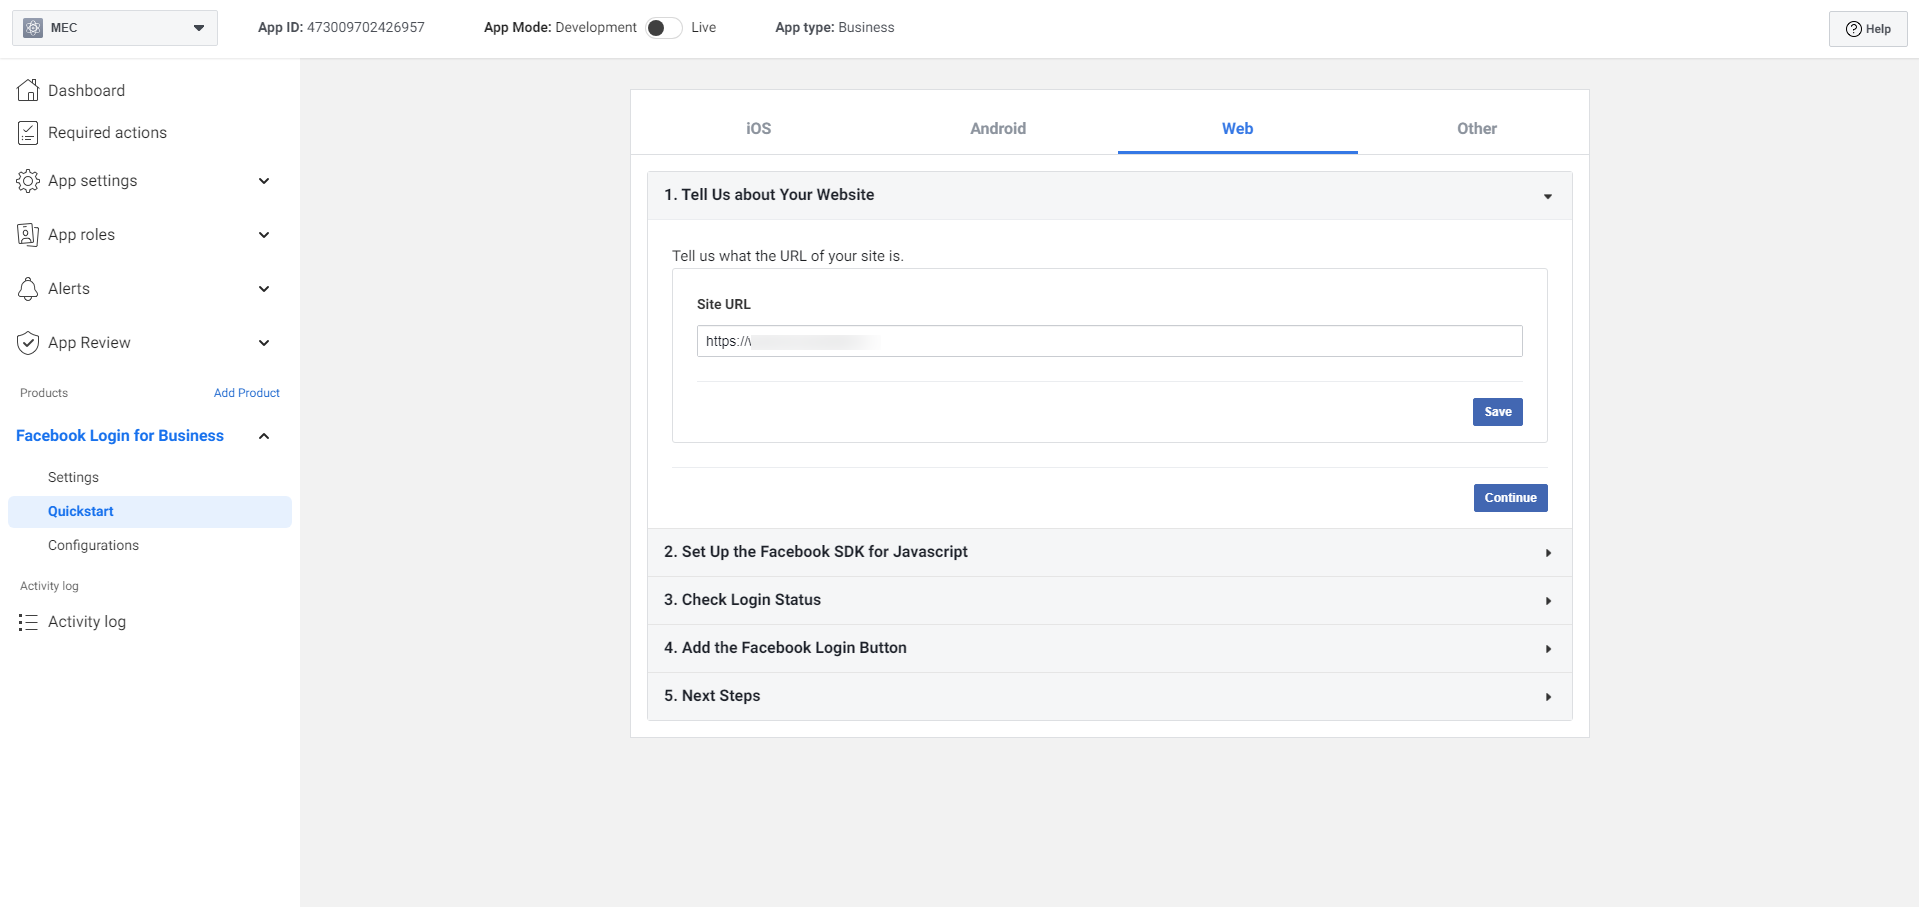
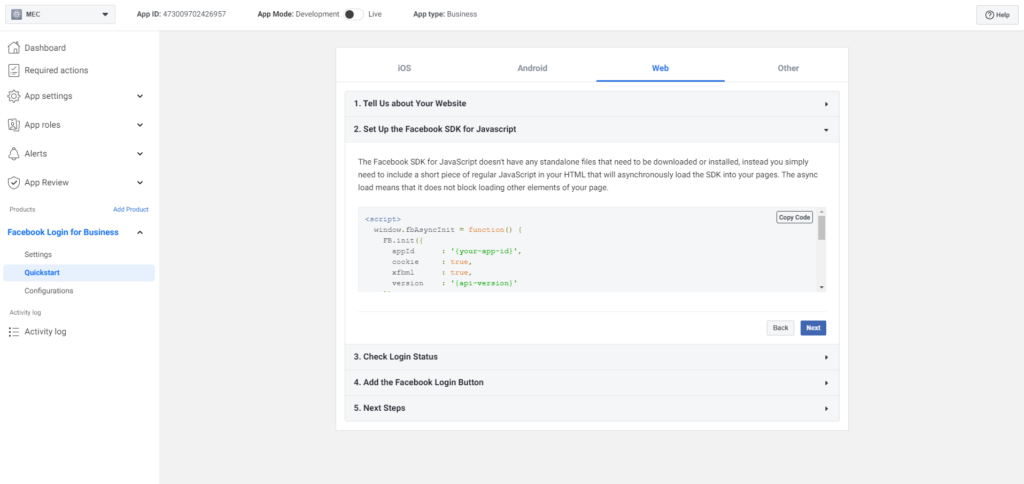
Next, click on the Web option.

In the highlighted tab, enter personal information such as your website URL. Click on Continue, and in the final stage, you’ll be provided a code to copy. Ignore the rest and click on Next.
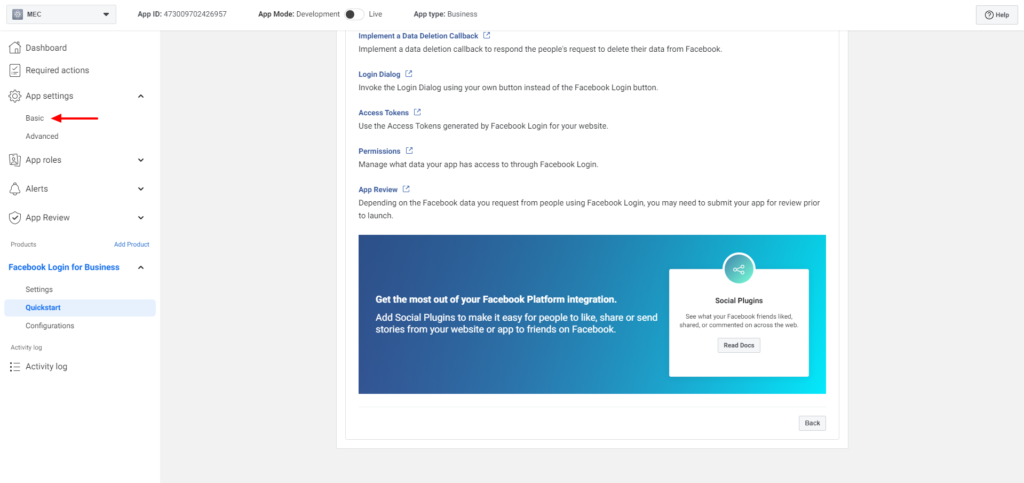
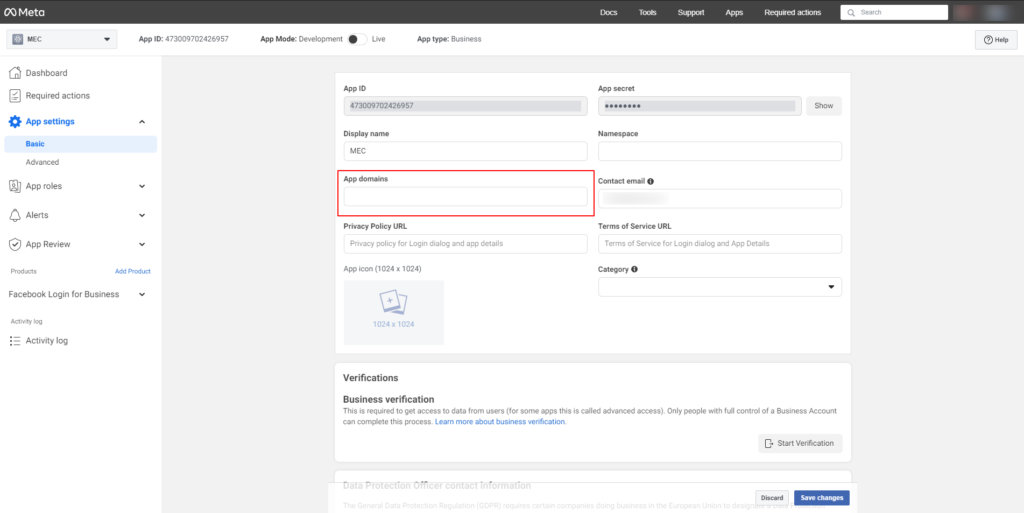
Click on App Settings > Basic on the left sidebar menu and enter your website address in App Domains.
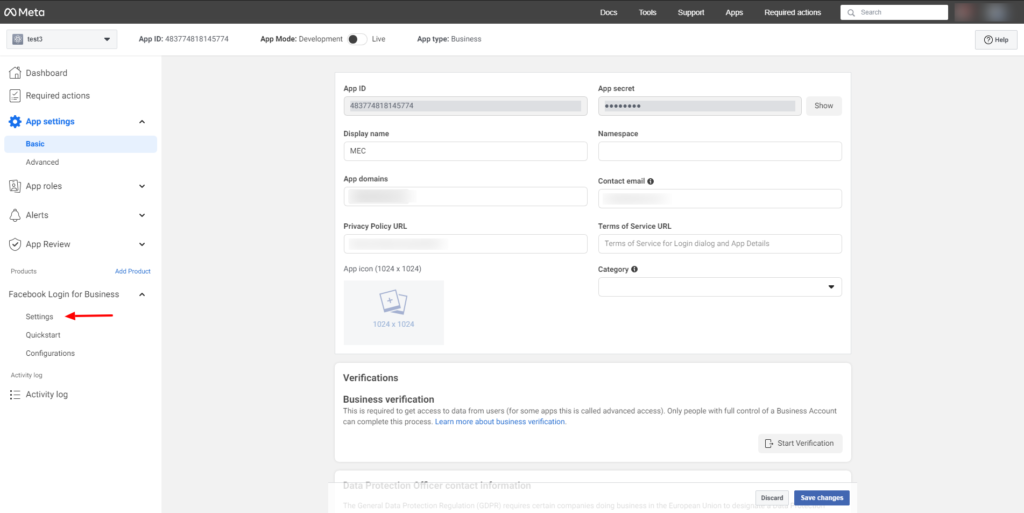
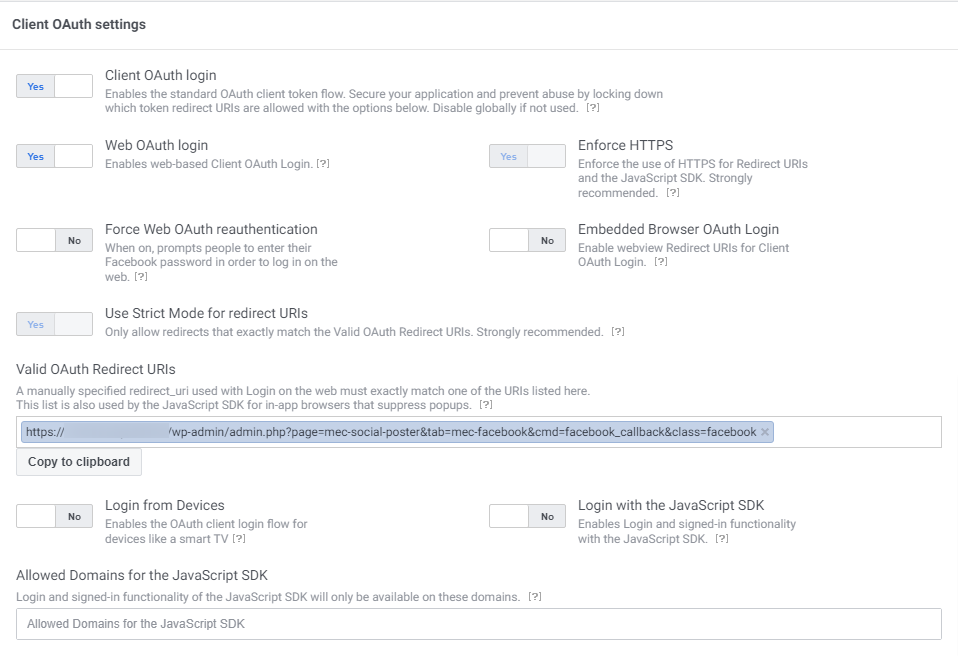
Then, from the Facebook Login for Business menu on the left sidebar, click on Settings.
Return to your website and copy your redirect URL under M.E Calendar > Social Poster > Facebook.
Then, in the Valid OAuth Redirect URLs section, enter that address and save the changes.
Temporary Access Token
To create a temporary access token, go to Facebook Graph API Explorer. Find your application in the Meta App dropdown menu. Then, from the User or Page drop-down menu, select the Get Page Access Token option.
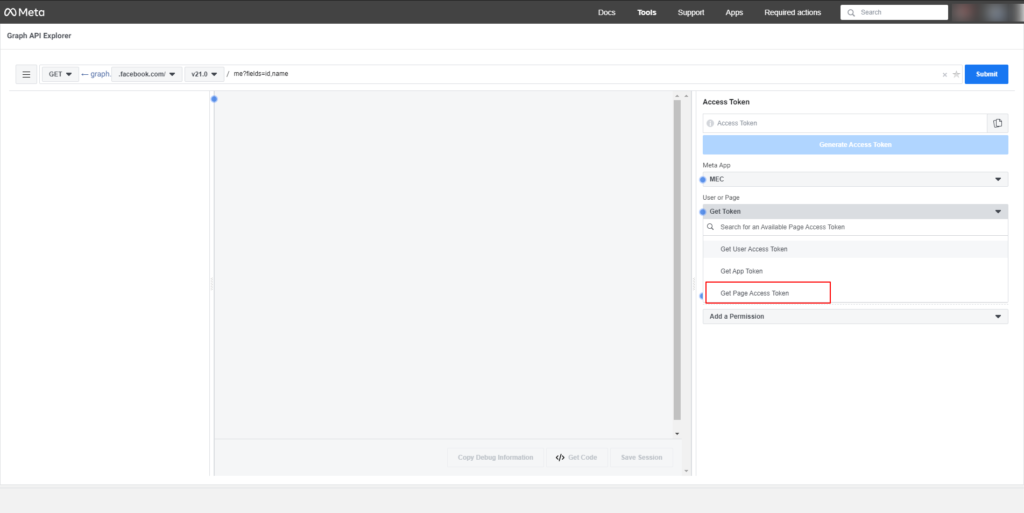
Note: Events can only be published to Facebook account pages and not to the main Facebook profile. Therefore, take note that before doing the steps above, you must create at least one page for the Facebook account, otherwise, you will not be able to access the Access Token.
After clicking on Get Page Access Token, a pop-up window will appear asking you to confirm access to the Facebook account the App is built. Click on the blue button.
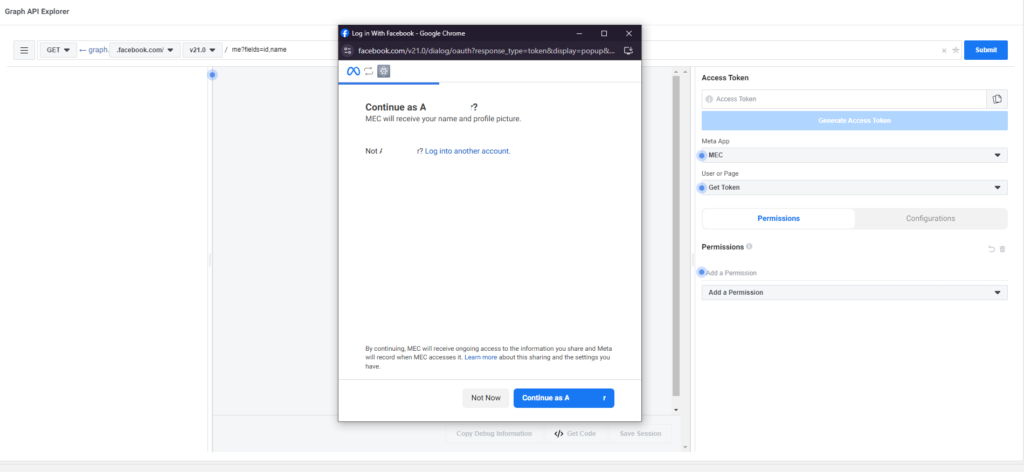
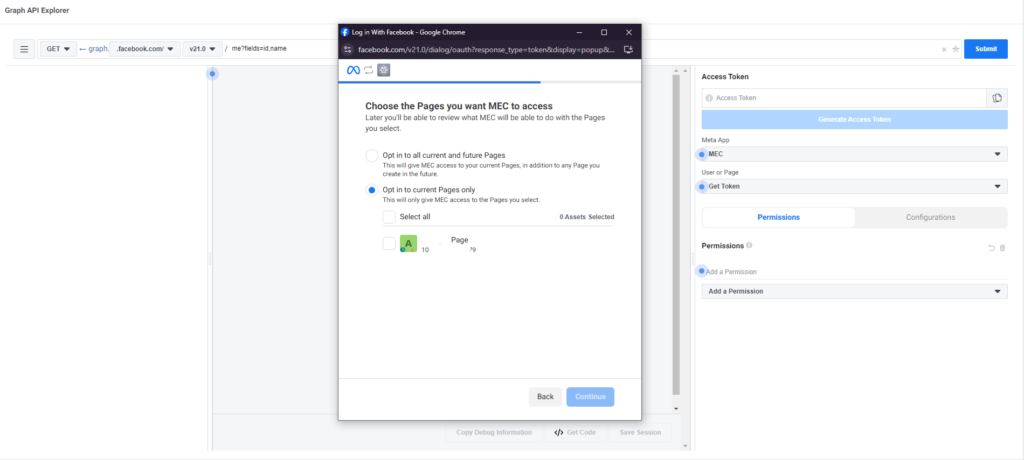
Next, you need to select the pages you want the app to have access to from the available pages. Click the Continue button. You can select as many pages as you want and grant access to all of them.
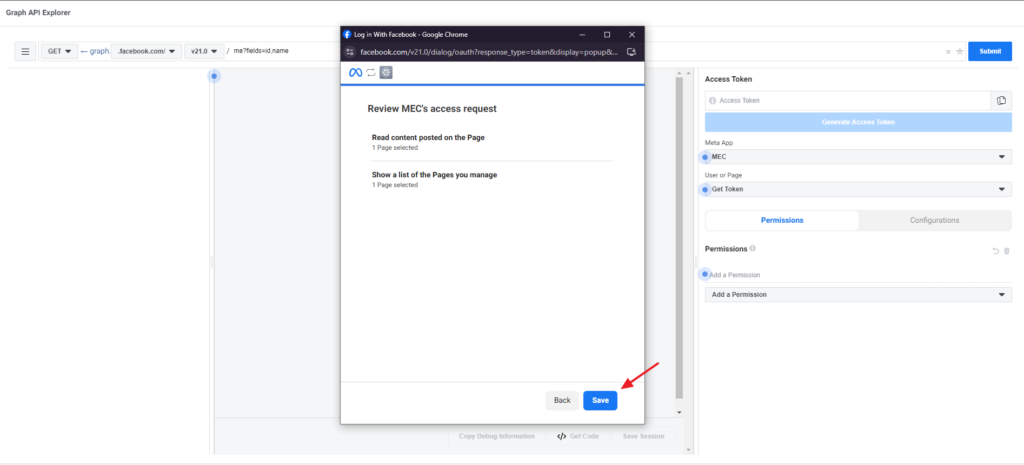
Next, a list of required permissions will be displayed. Click on the “Save” button and then on “Got it“.
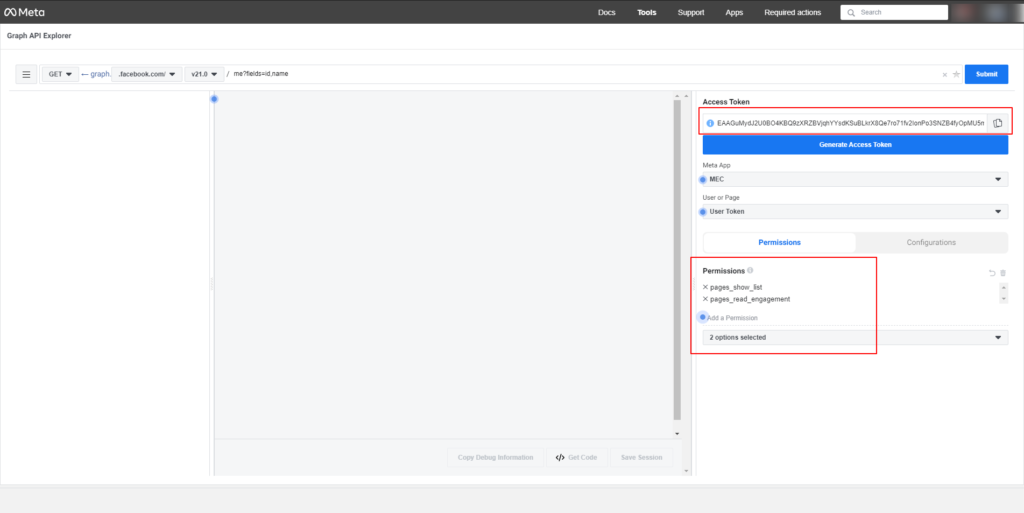
After that, you can see that the required permissions are added to the Permissions list and an Access Token is created.
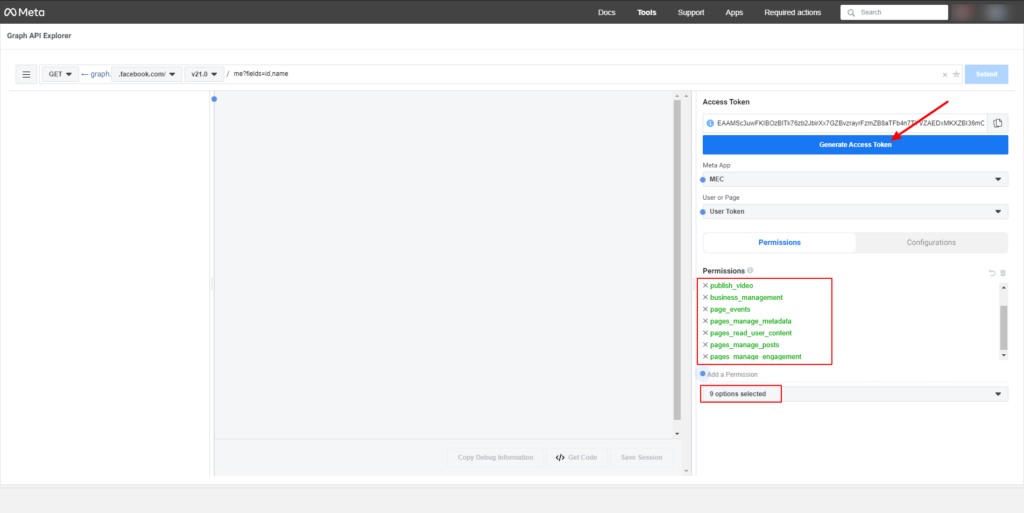
Another permission must be added to the permissions list for smooth access. To do this, click on the Add a Permission drop-down menu, select page_events from the permissions list to add it to the list, and then click on the Generate Access Token button to create a new Access Token.
The new permissions that need to be added are:
- publish_video
- business_management
- page_events
- pages_manage_metadata
- pages_read_user_content
- pages_manage_posts
- pages_manage_engagement
Upgrade Your Token
Now, you need to upgrade your token to a two-month user access token.
Note: A temporary user access token is a one-hour valid access token, for which you must extend the expiration time.
Extend the Expiration Time
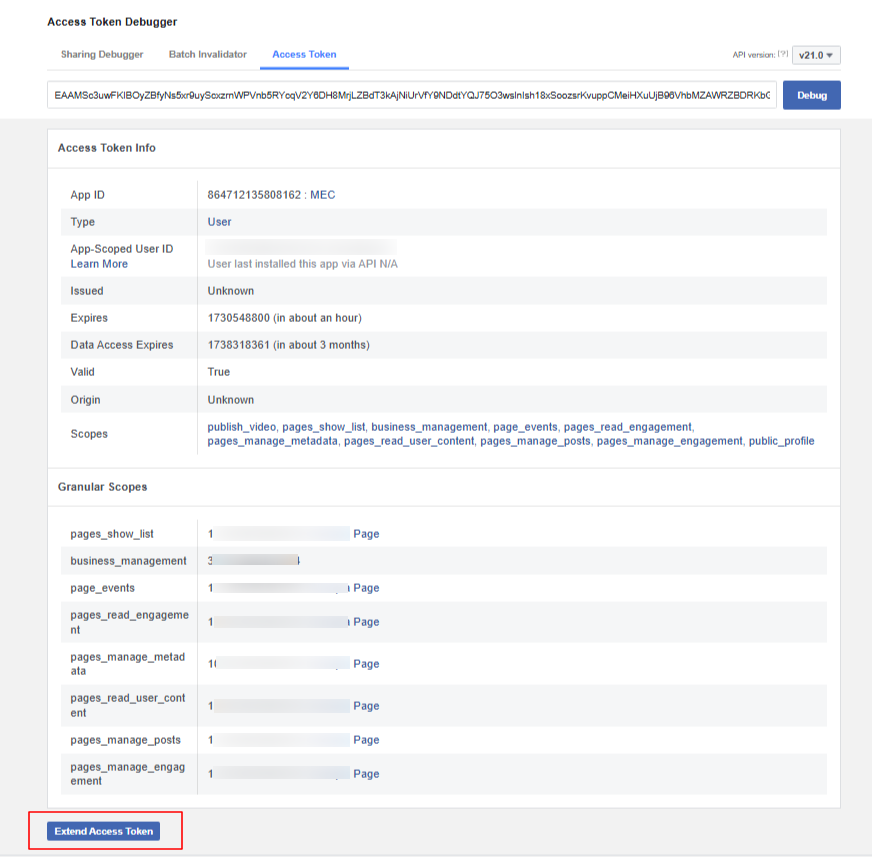
To do this, copy the code, go to the Access Token Debugger Tool, and enter it in the Debugger. Now, click the Debug button and copy the Access Token Key.

Two-Months Access Token
To create a two-month access token, click on the “Extend Access Token” option at the bottom of the box where user/app tokens are placed.
The button will be disabled, and a new box will appear at the bottom of the page.

Click on the Debug button (with a gray background) beside the new Token.
As mentioned earlier, this will open up a new window or tab in your browser.
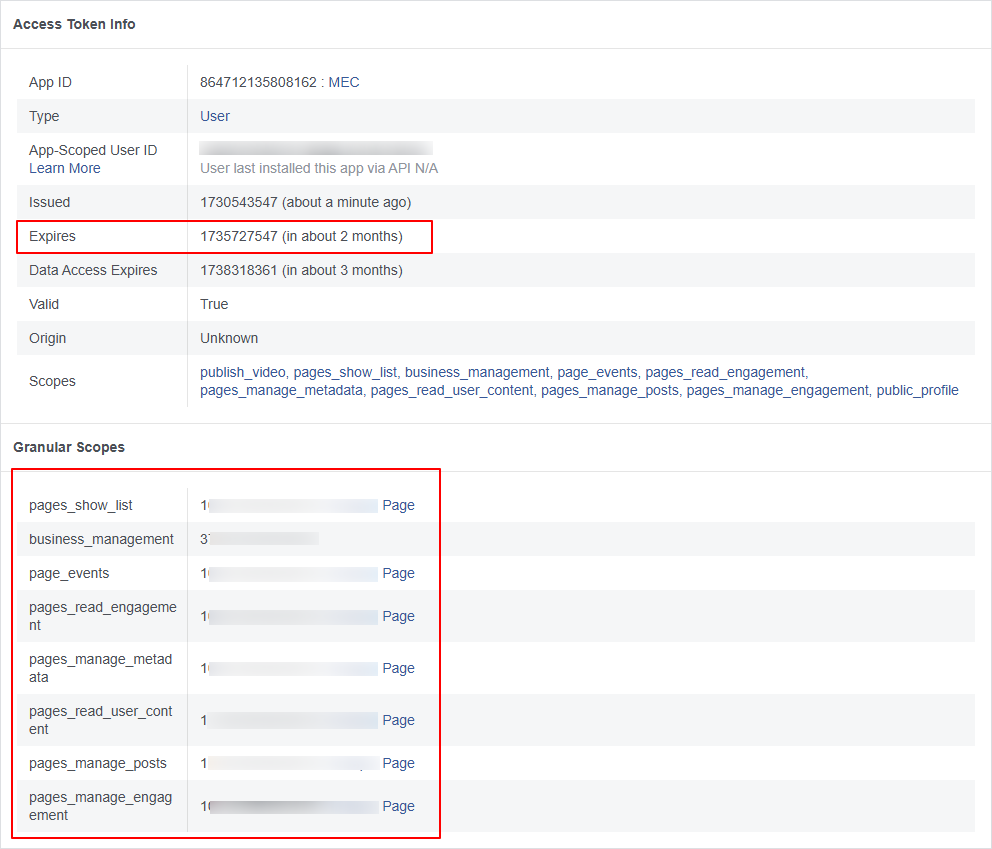
Then, you will be redirected to the Access Token Debugger, where your temporary user access token information is stated.
Verify the information for this new token. Ensure it is a Page Token that expires in two months and that all the permissions you previously selected are displayed.
Now, navigate to App settings > Basic through the left sidebar menu, input your website address in the App Domains field, and click Save Changes. Additionally, ensure to back up your App ID and App Secret for future use.
Copy the token at the top of the page (to the left of the blue “Debug” button).
Last Step
The last step is to generate the permanent user access token.
Graph API Explorer
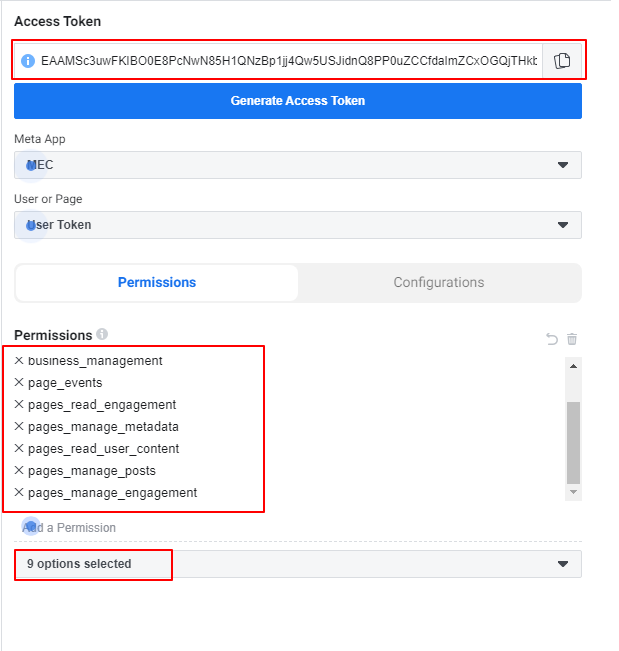
Now, head over to Graph API Explorer after generating the permanent user access token and place it in the “Access Token Field.” (Paste the token you just copied (that expires in 2 months) in the “Access Token” field) And make sure all the permissions you previously selected are displayed.
Note that you should not click on the “Generate Access Token” button at this stage.
Finally, go to the About tab on the Facebook page you created. Choose Page Transparency there from the menu. Your page ID will be visible in the section on the right.
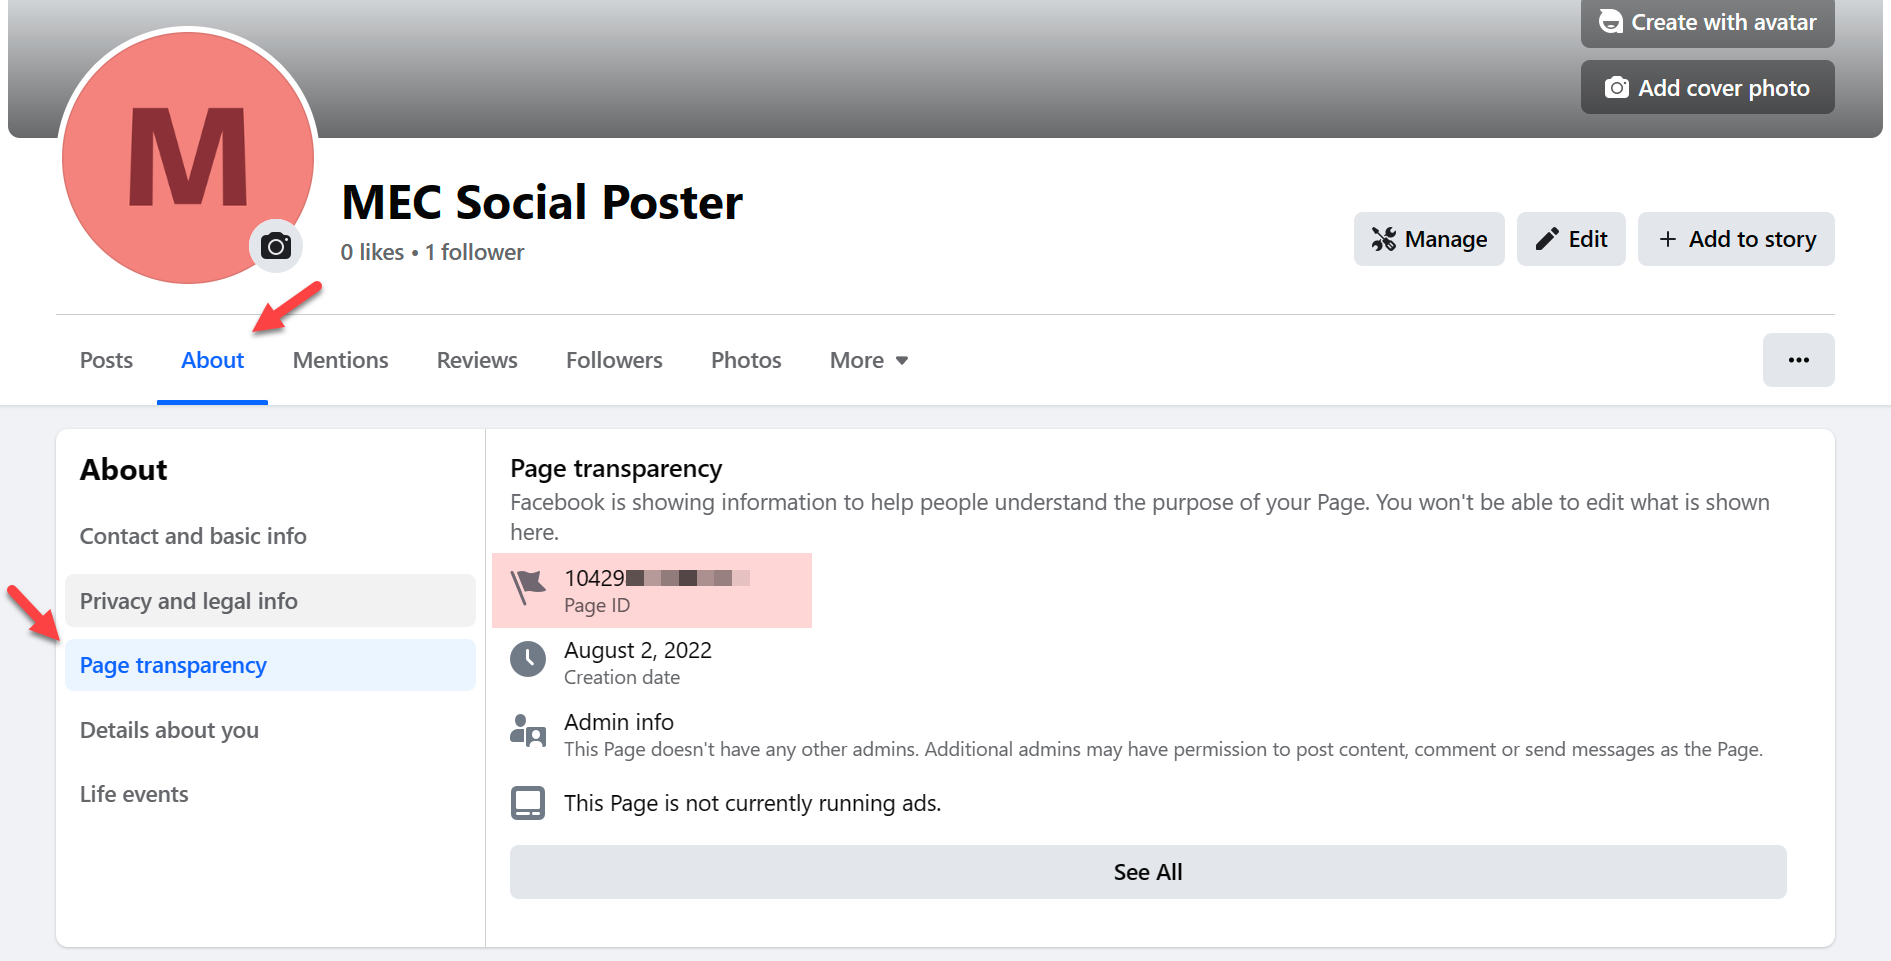
Copy the page ID and follow these steps.
Go back to your website again and go to M.E Calendar > Social Poster > Facebook.
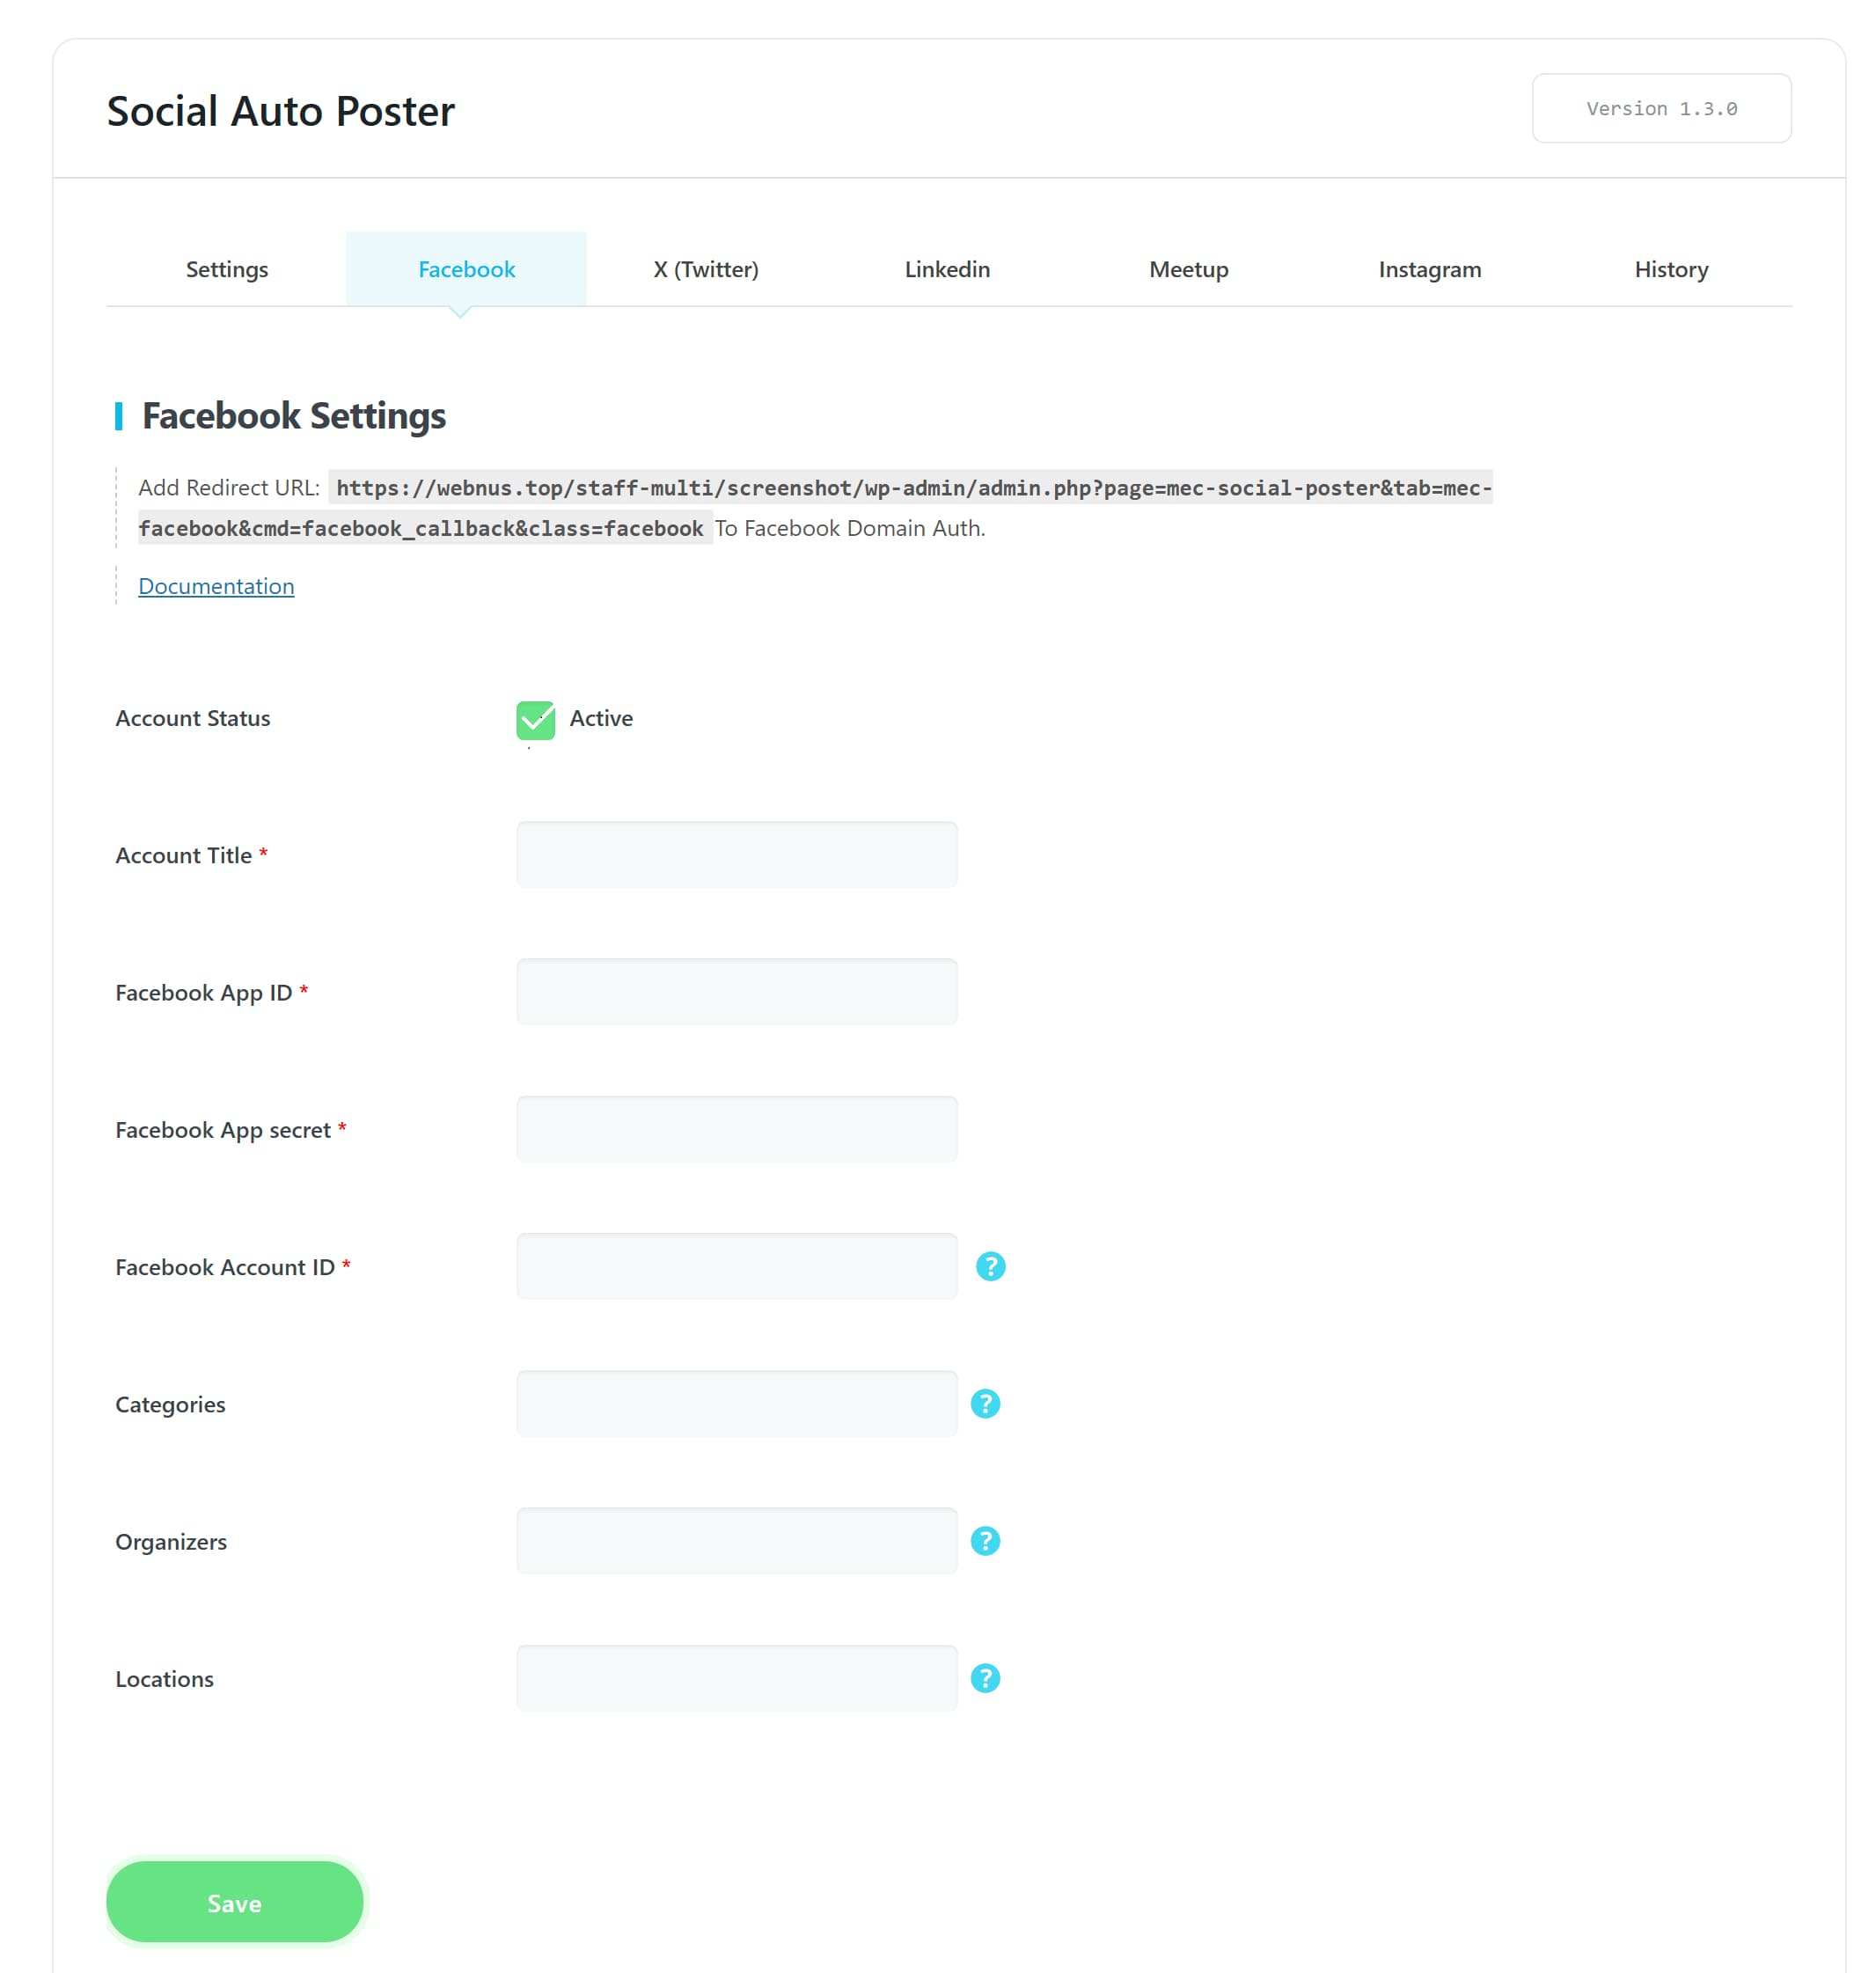
1. Account Status
Here, you can activate your Facebook account.
2. Account Title:
Here, enter a name of your preference.
3. Facebook App ID:
This is the step where the App ID is required. Input the App ID you previously backed up into this field. (Available in App Settings > Basic menu)
4. Facebook App Secret:
This is the step where the App Secret is required. Input the App Secret you previously backed up into this field. (Available in App Settings > Basic menu)
5. Facebook Account ID:
In the new Facebook page that you’ve created, scroll down to the About section and copy and paste the page ID in this field.
6. Categories:
If you wish to filter posts that are posted to this account based on category, use this field.
7. Organizers:
If you wish to filter posts that are posted to this account based on organizer, use this field.
8. Speakers:
If you wish to filter posts that are posted to this account based on speaker, use this field.
9. Locations:
If you wish to filter posts that are posted to this account based on location, use this field.Finally, click on Save, and you will see that your account has been added to the bottom of the page.

Now go to the General tab, and from the Account menu, select the Facebook API that we’ve created.
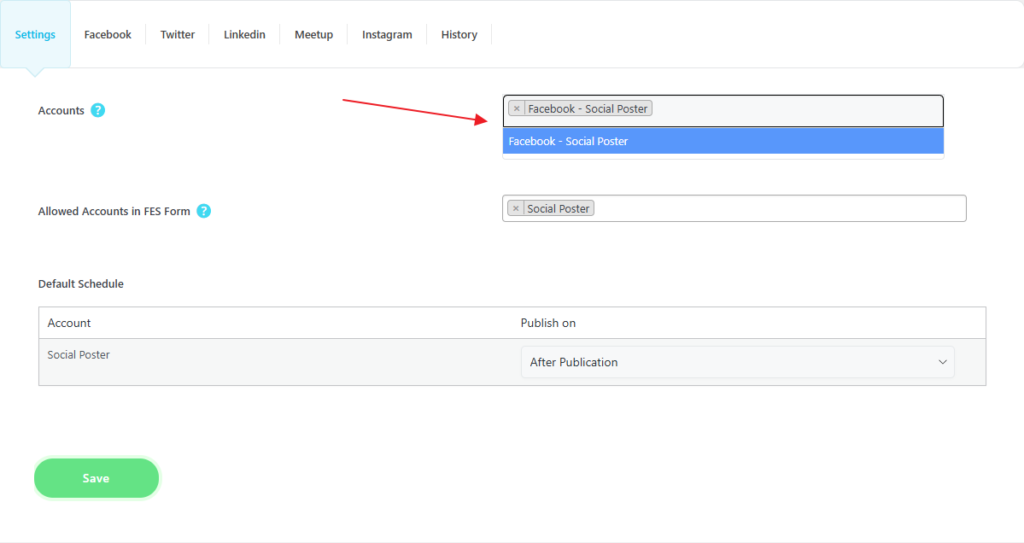
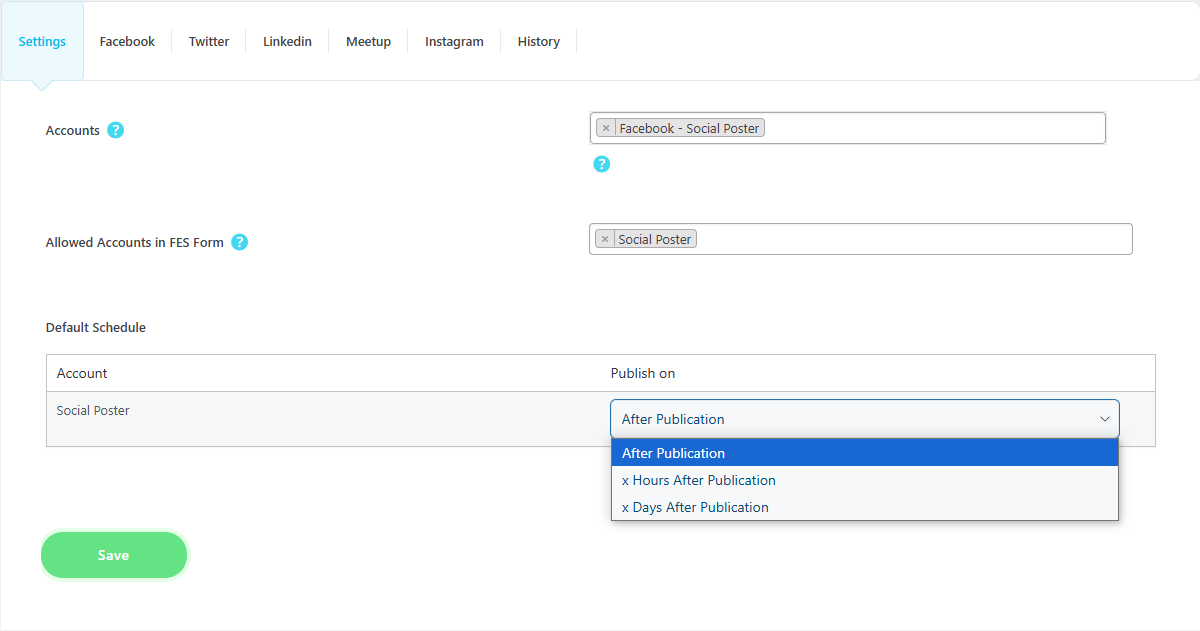
In the Default Schedules section, we can determine whether our events get posted on social media as soon as they are published on the website or after a specific period.
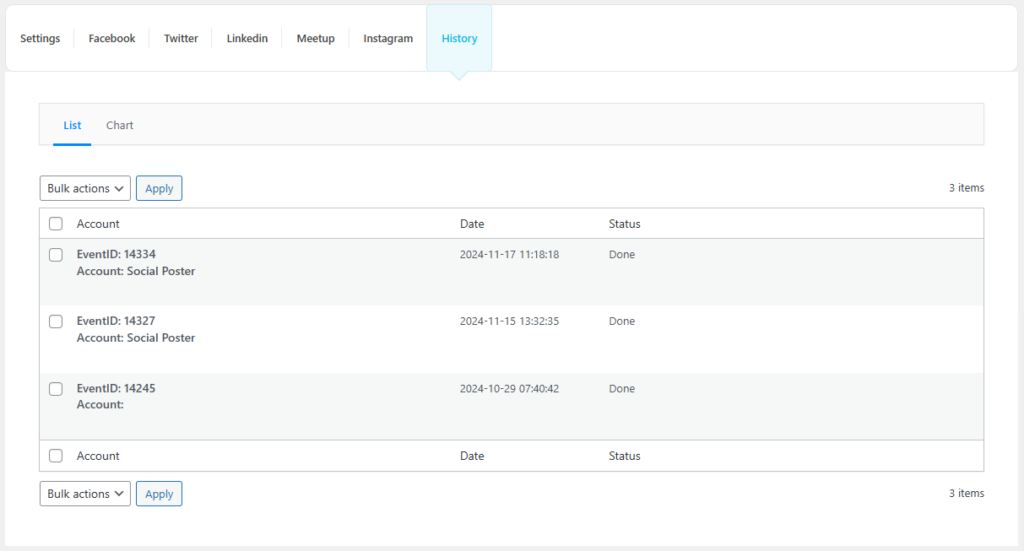
The addon includes a History section where you can access statistics about your posted content, presented in both list and chart views, to monitor and analyze your social media activity.
Also, on the Edit Event page, we have added a new tab called Social Poster, where you can activate the settings.
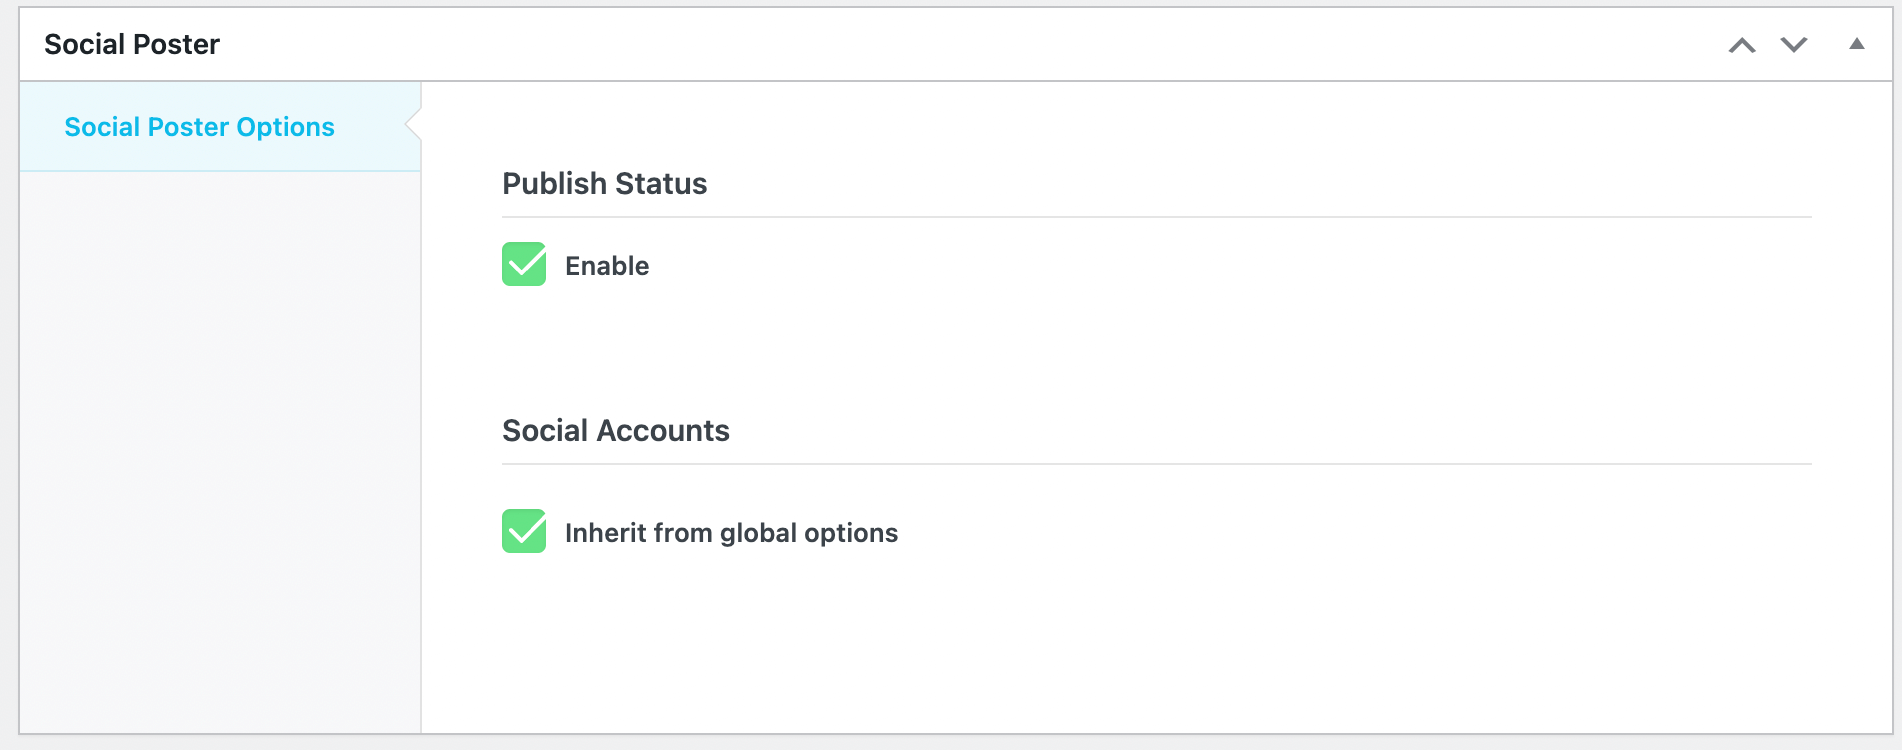
Additionally, If you prefer manual control over event postings, the addon provides a manual publish option on the Edit Event page, allowing you to select and share events on social media at your discretion.

To set up a Social Auto Poster Addon for Instagram, you simply have to link your Instagram Business Account to the Facebook Page.
How to connect Facebook to Instagram.
X (Twitter)
Note: Currently, it’s impossible to show event images on Twitter.
To post your events on X, first, you need to create a developer account on X and then create a project to connect your website to X’s API. Let’s see how.
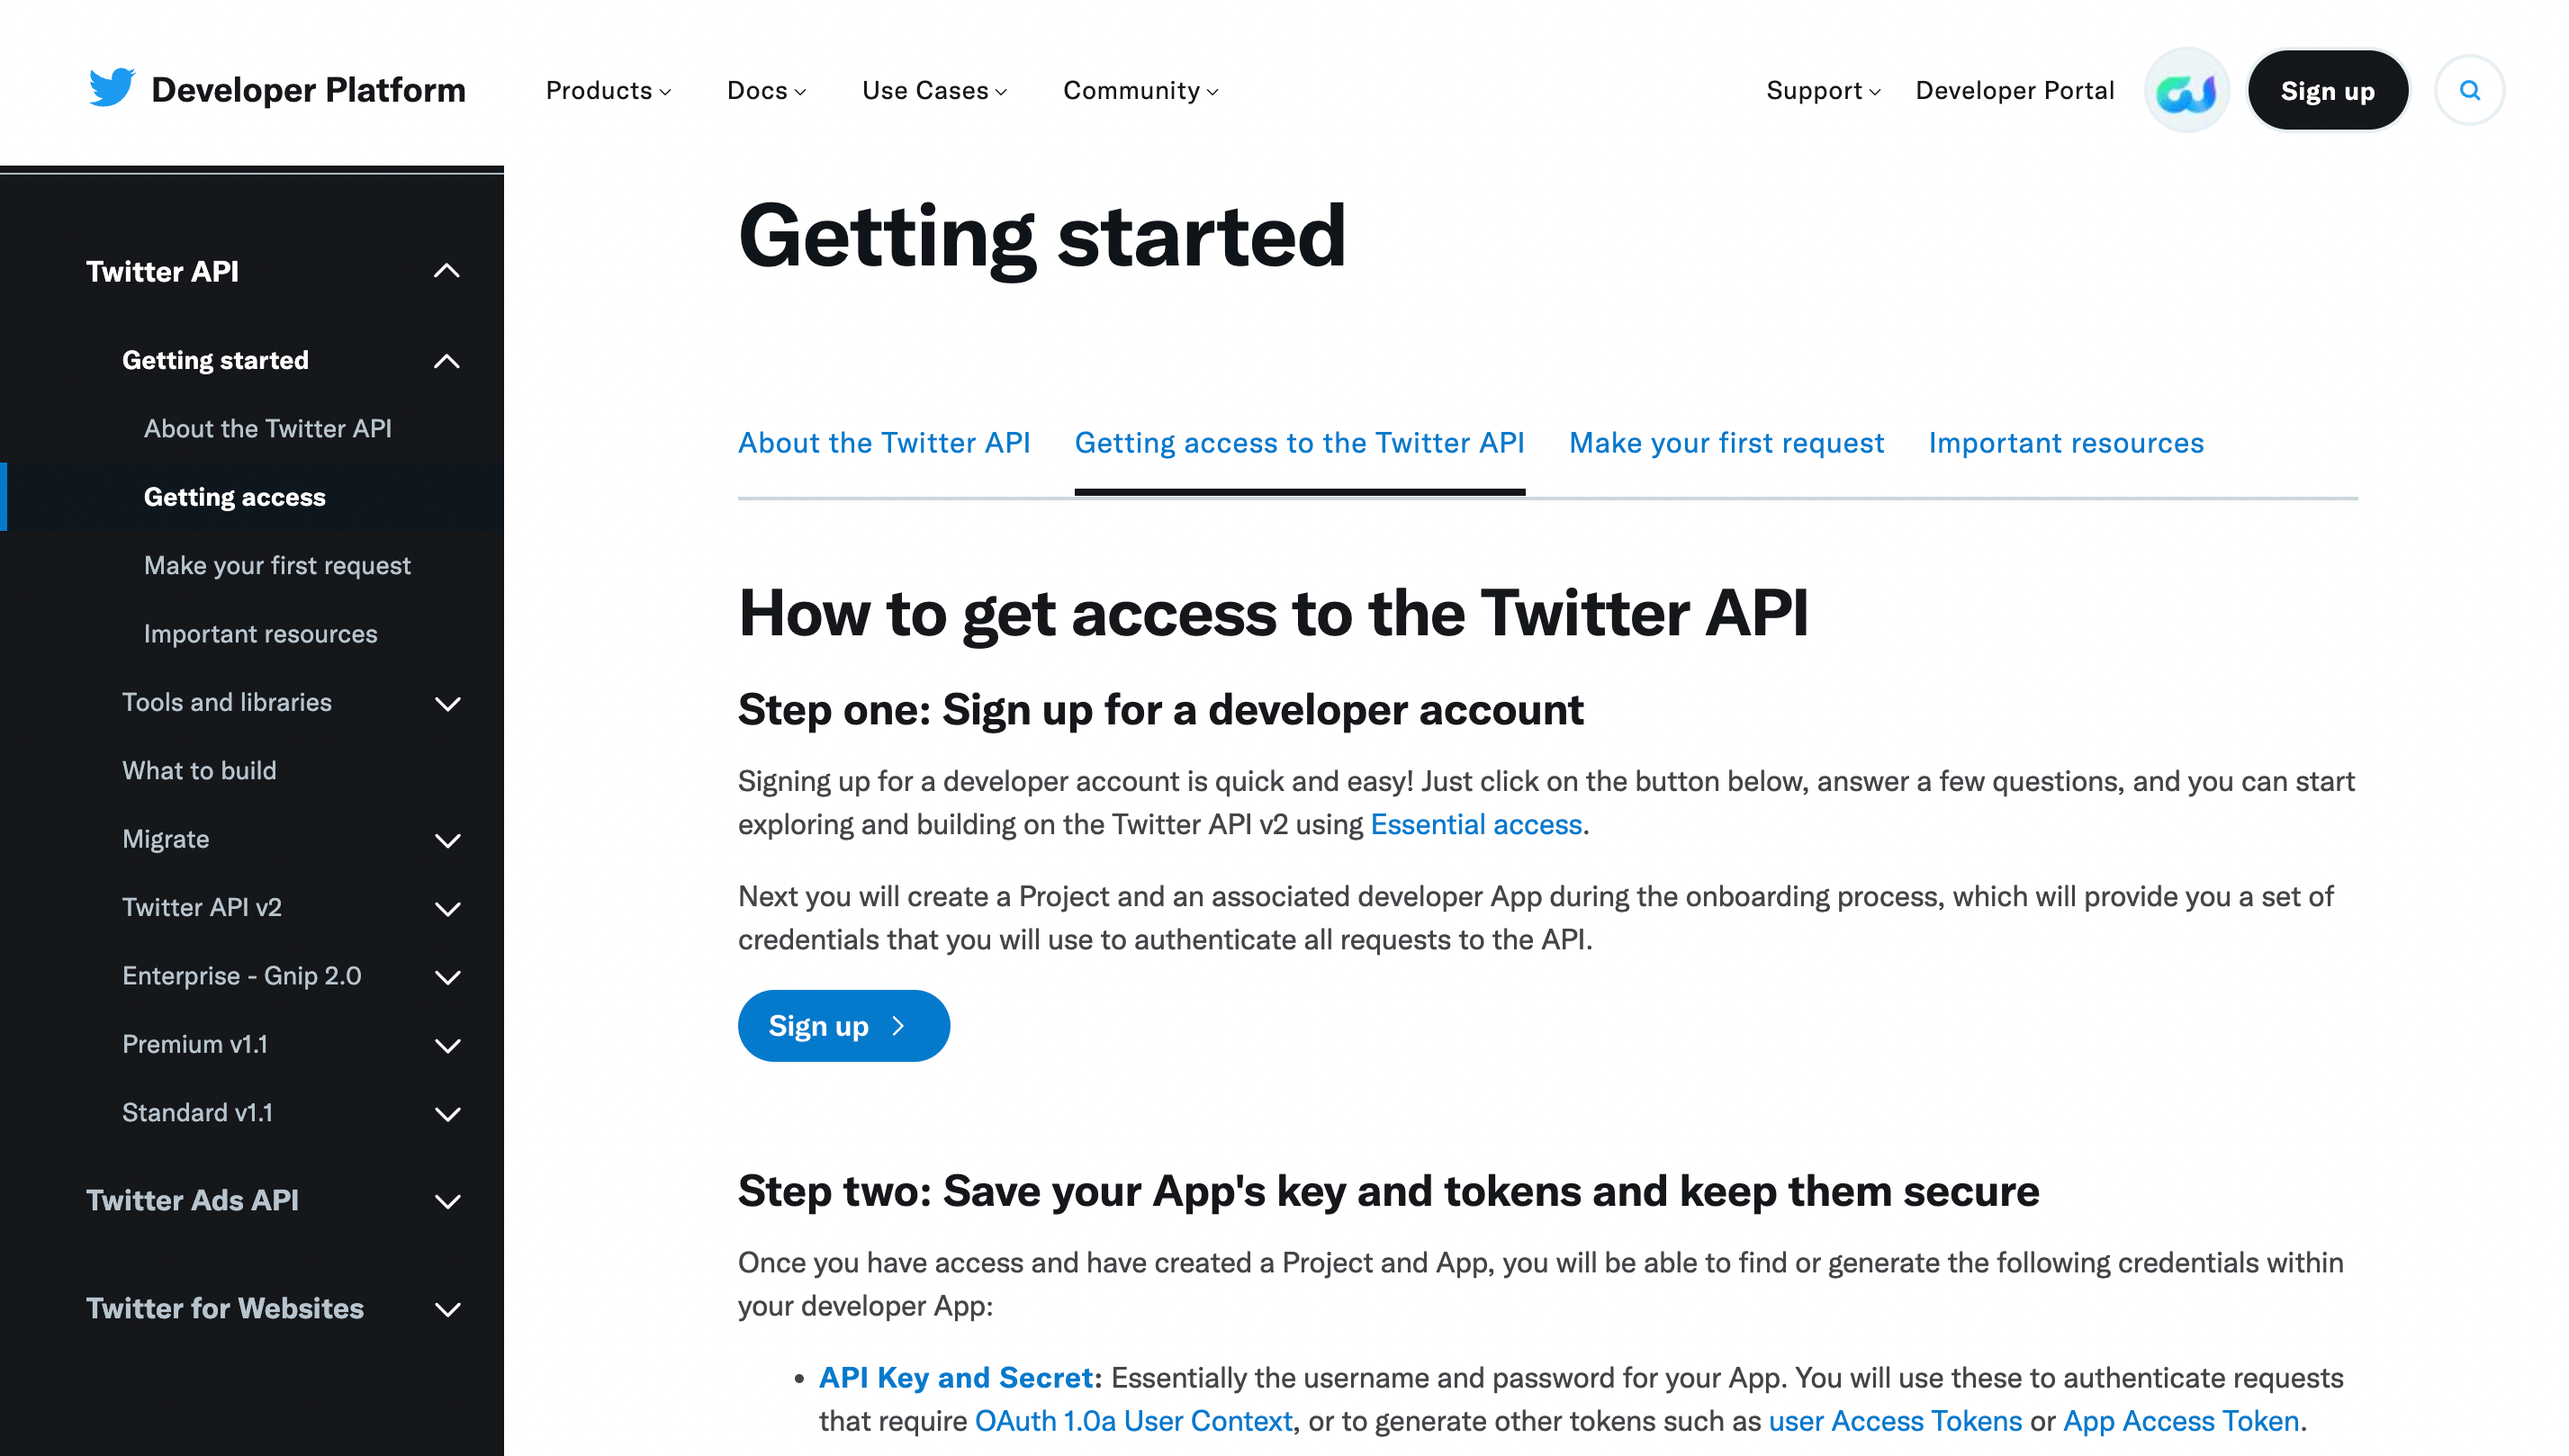
To create an X developer account, first log in to your account and then go to this address and click on Sign Up.
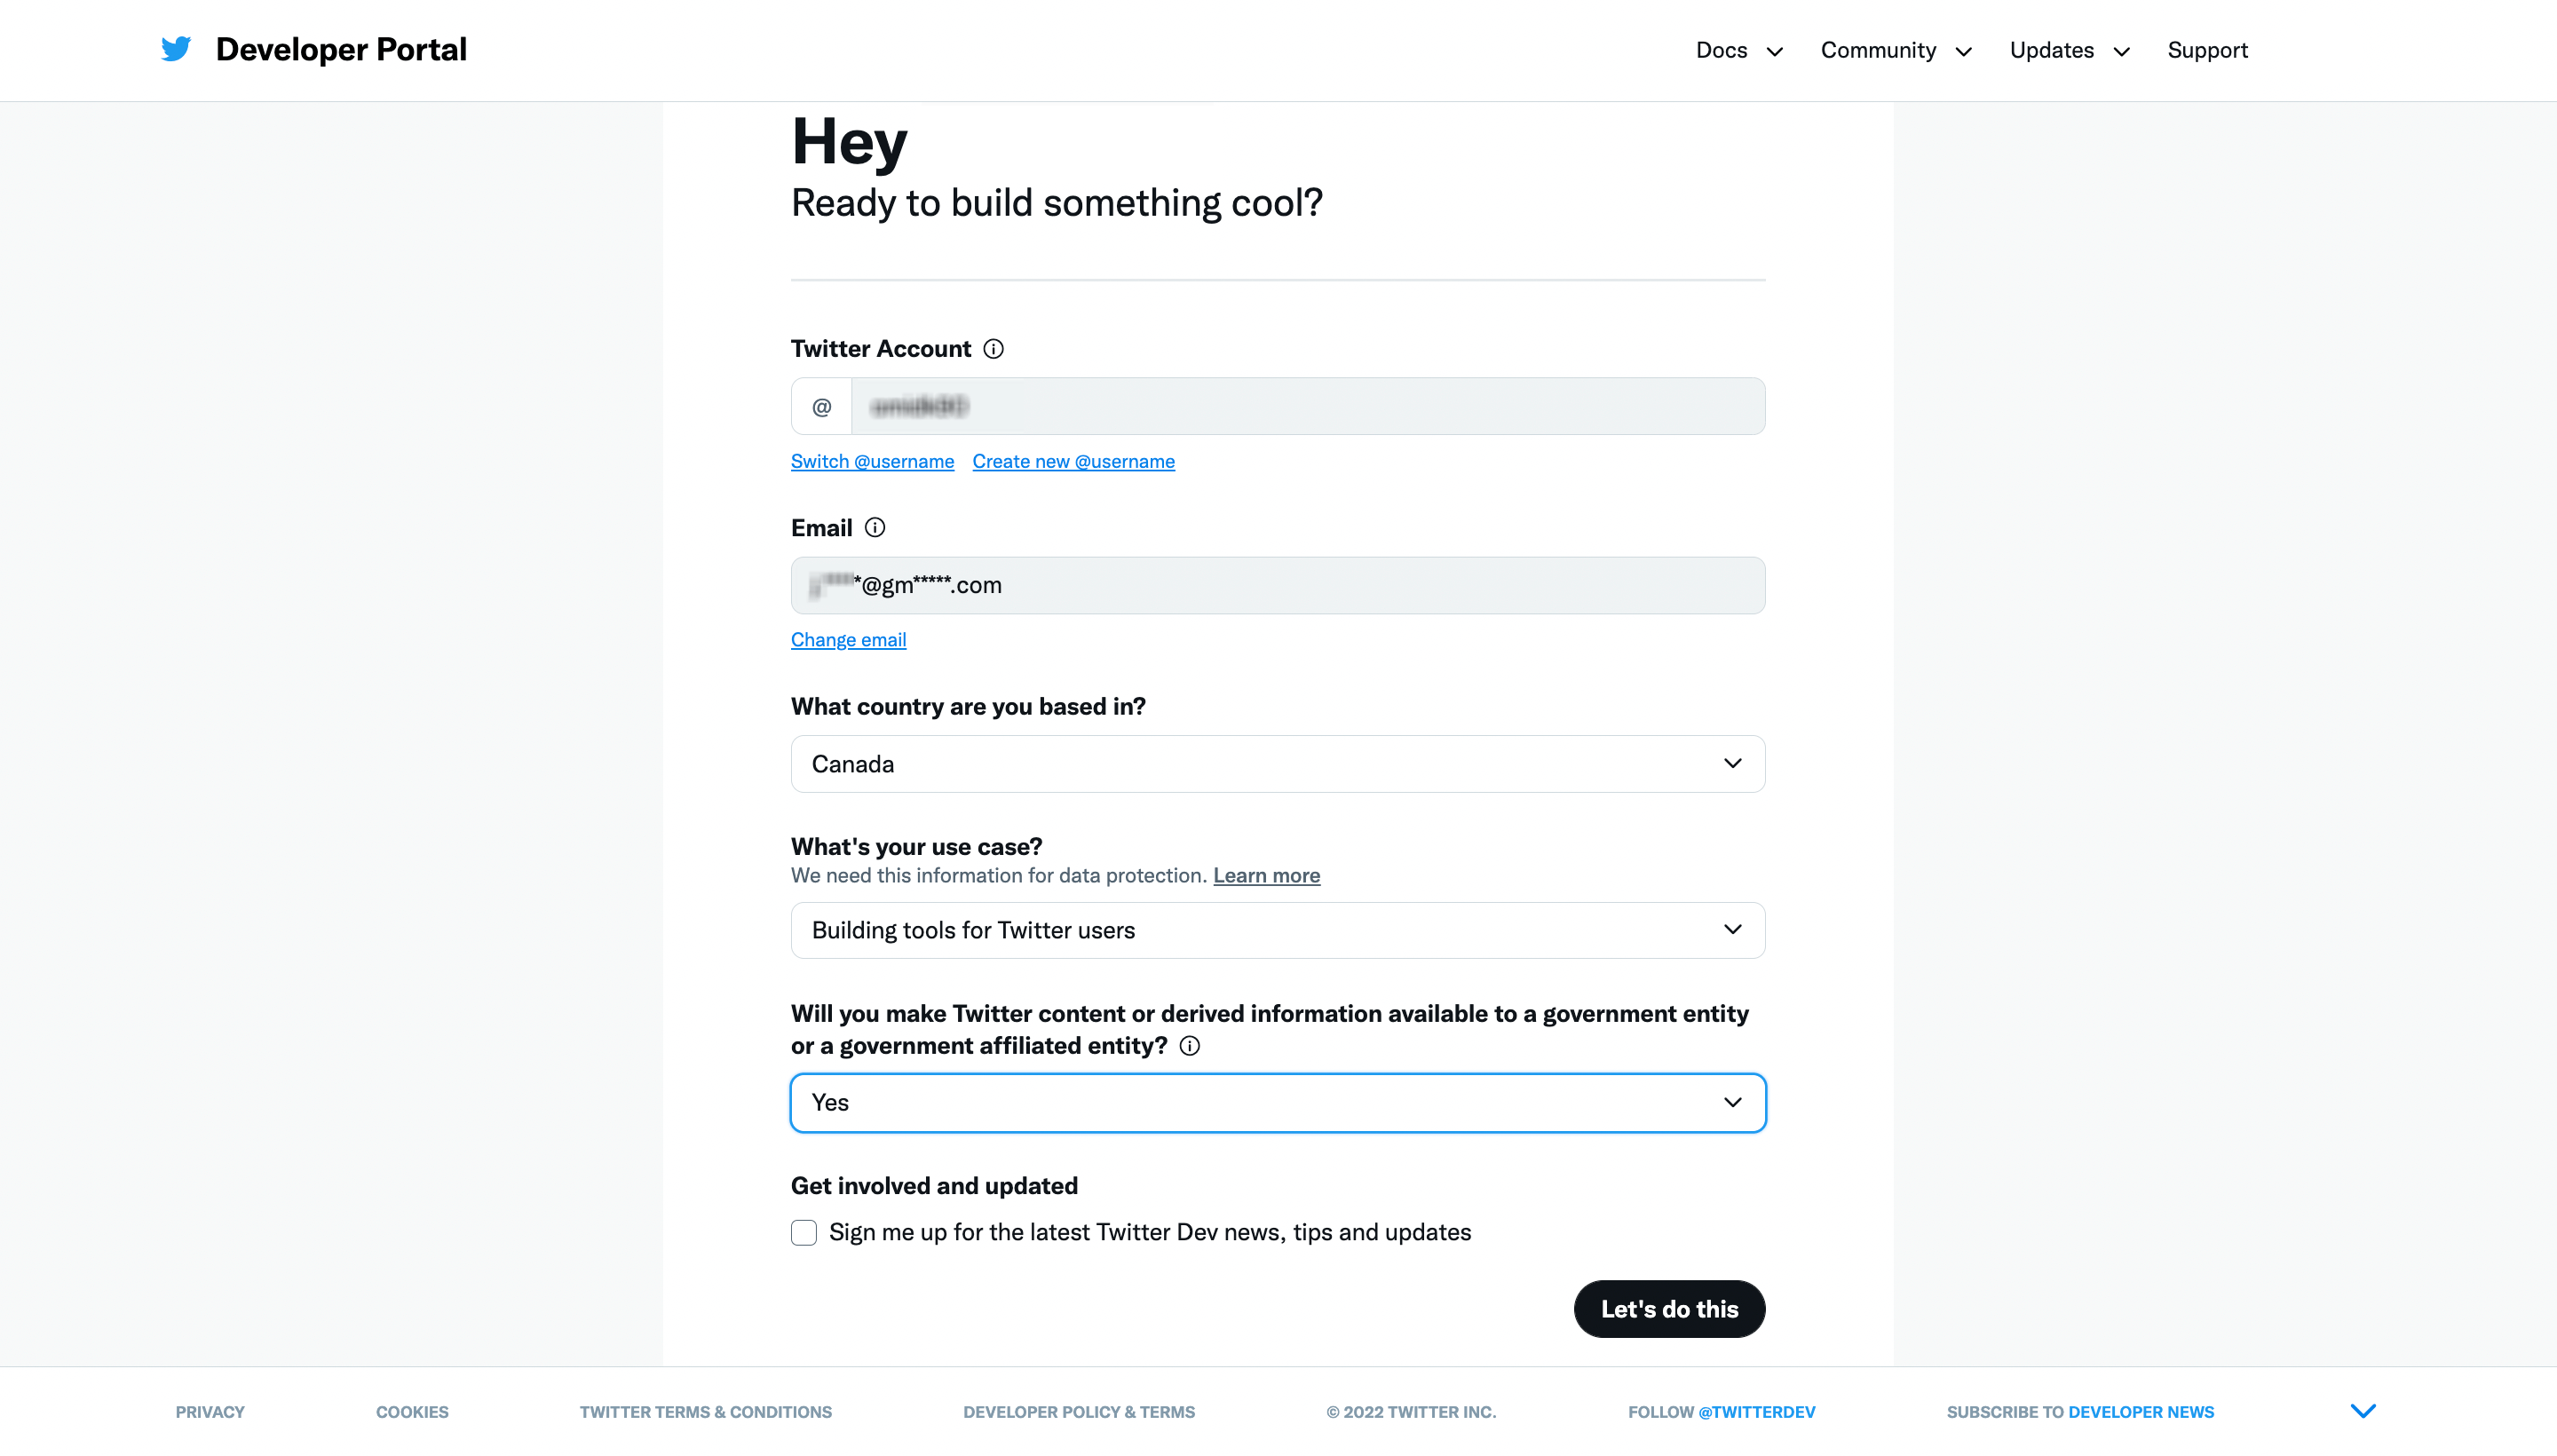
Fill in the form to create your account.
You will receive a confirmation email that you need to verify.
Once the developer account is created, go to your dashboard and click on Create Project.
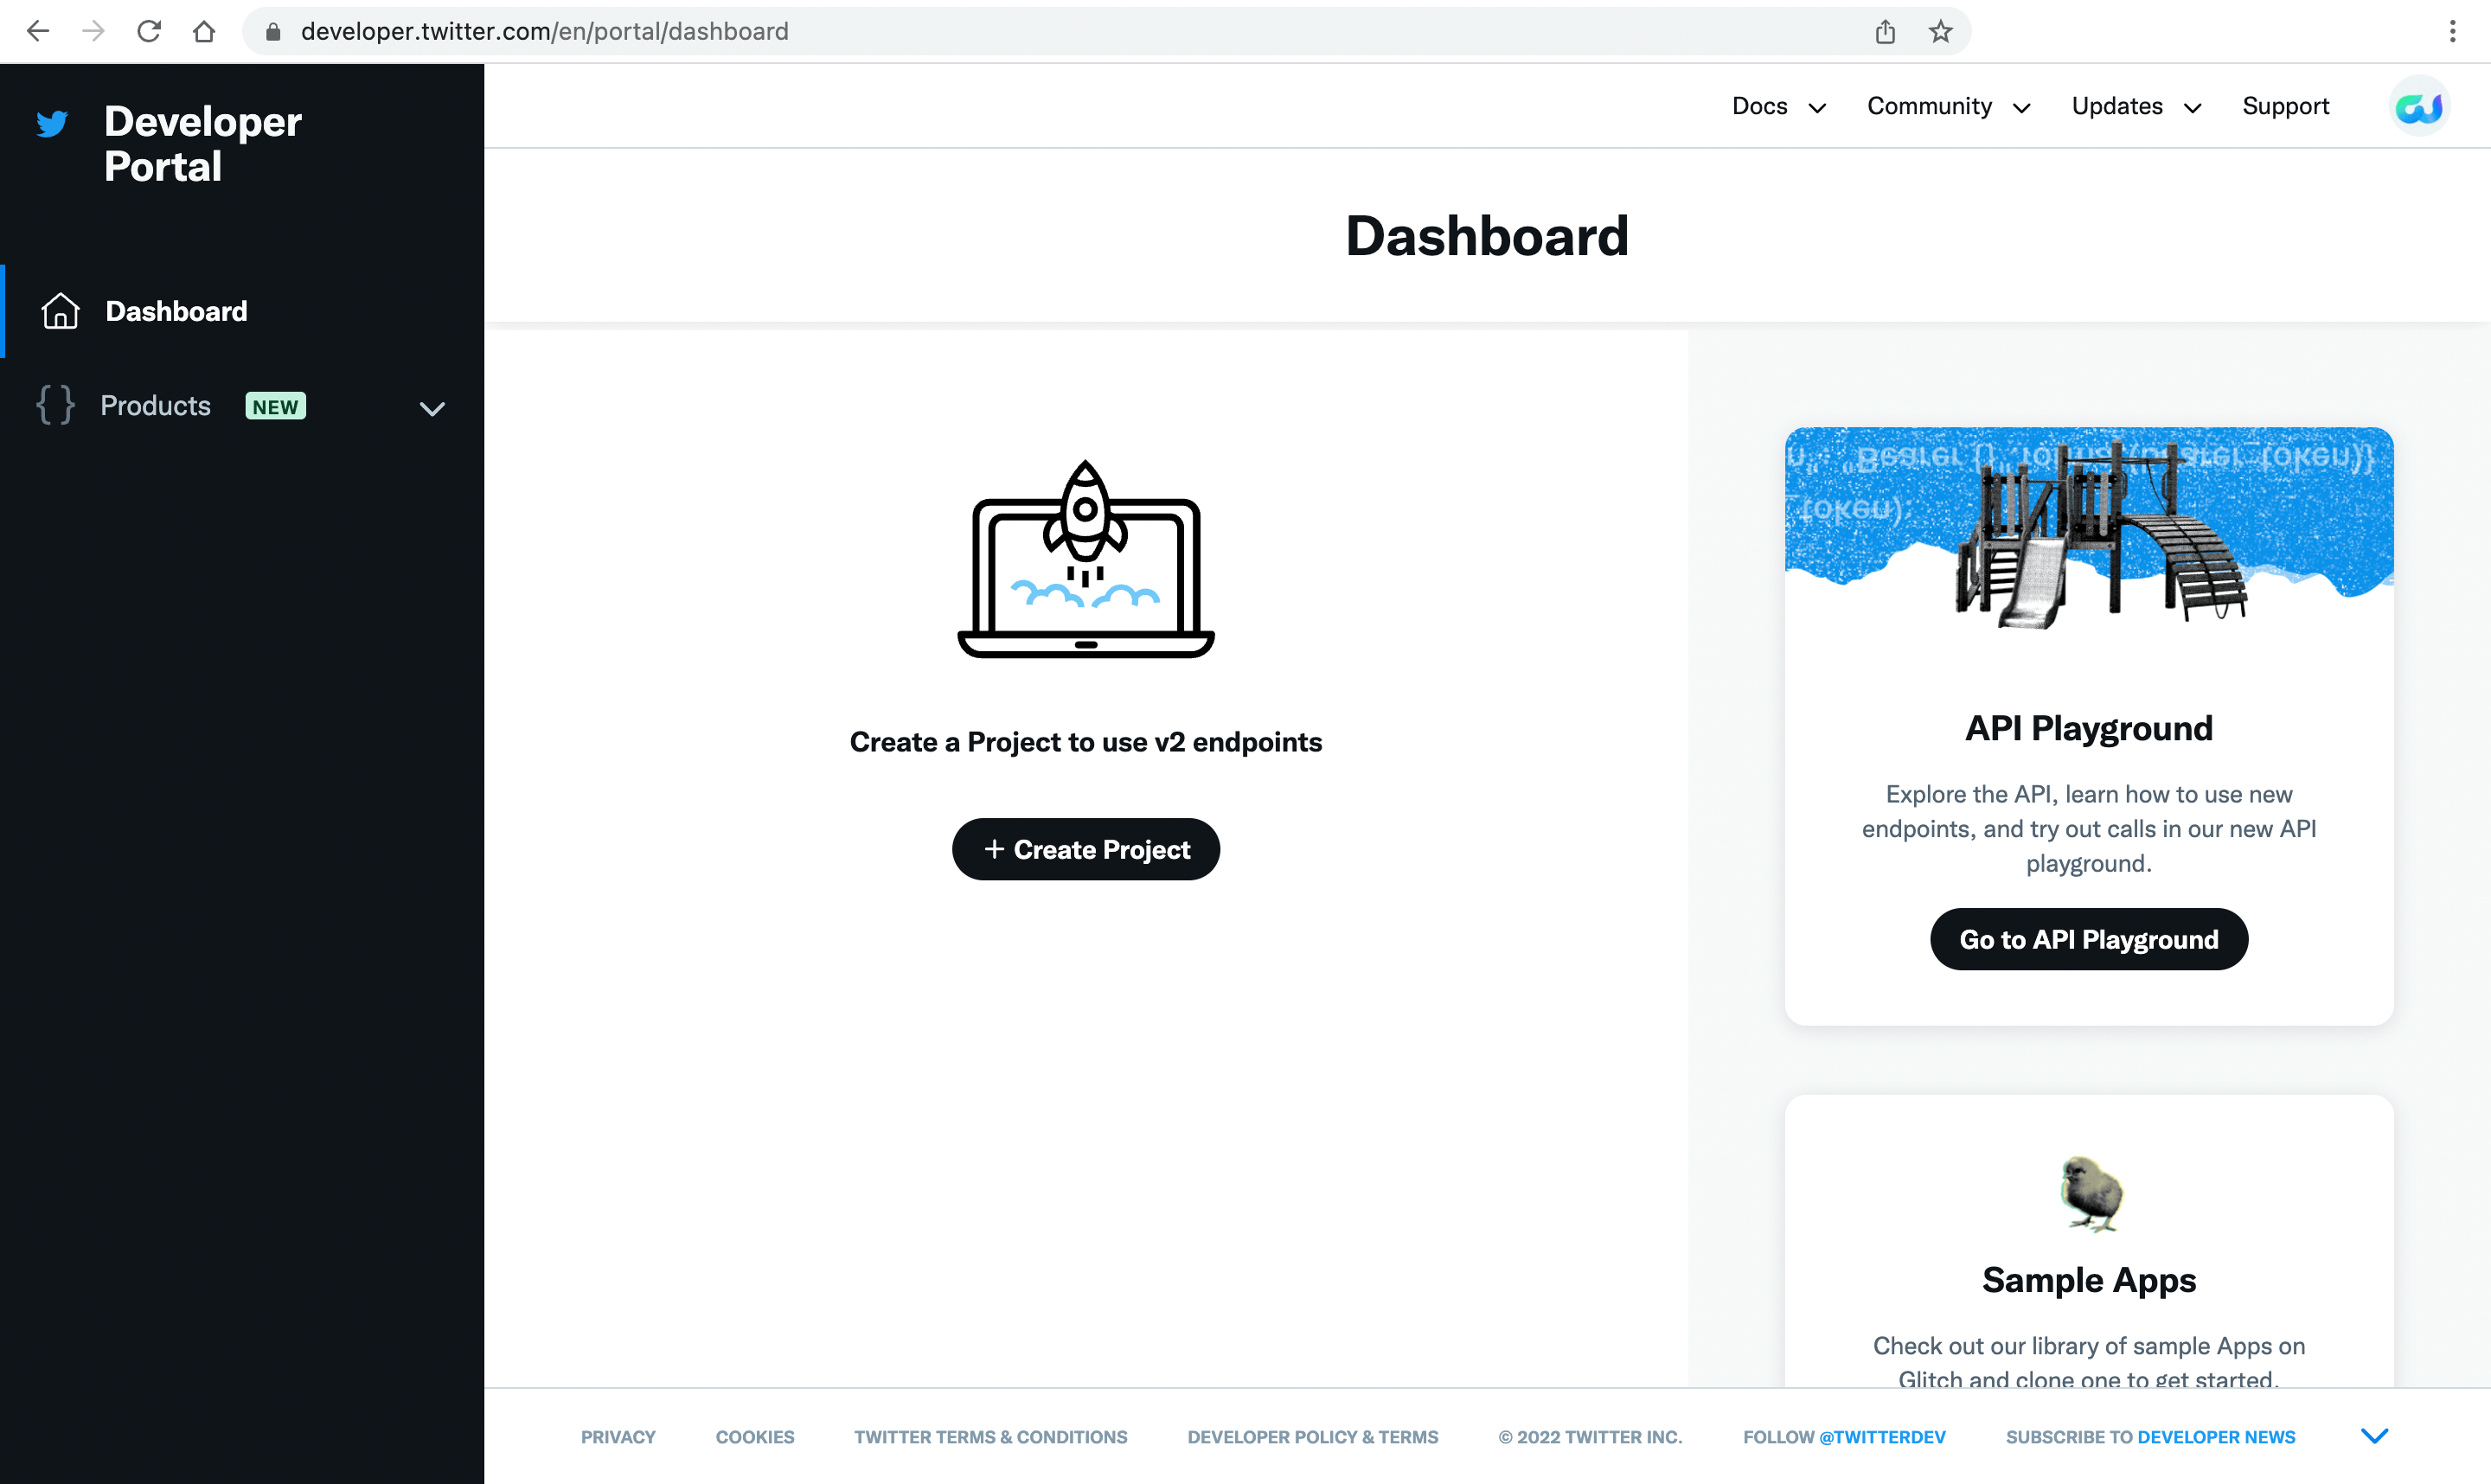
Next, select Building Tools for Business and click on Next. In the third step, you can enter a project description if needed.
Here, we have to create an app. So enter a name for the app on the new page and click Next.
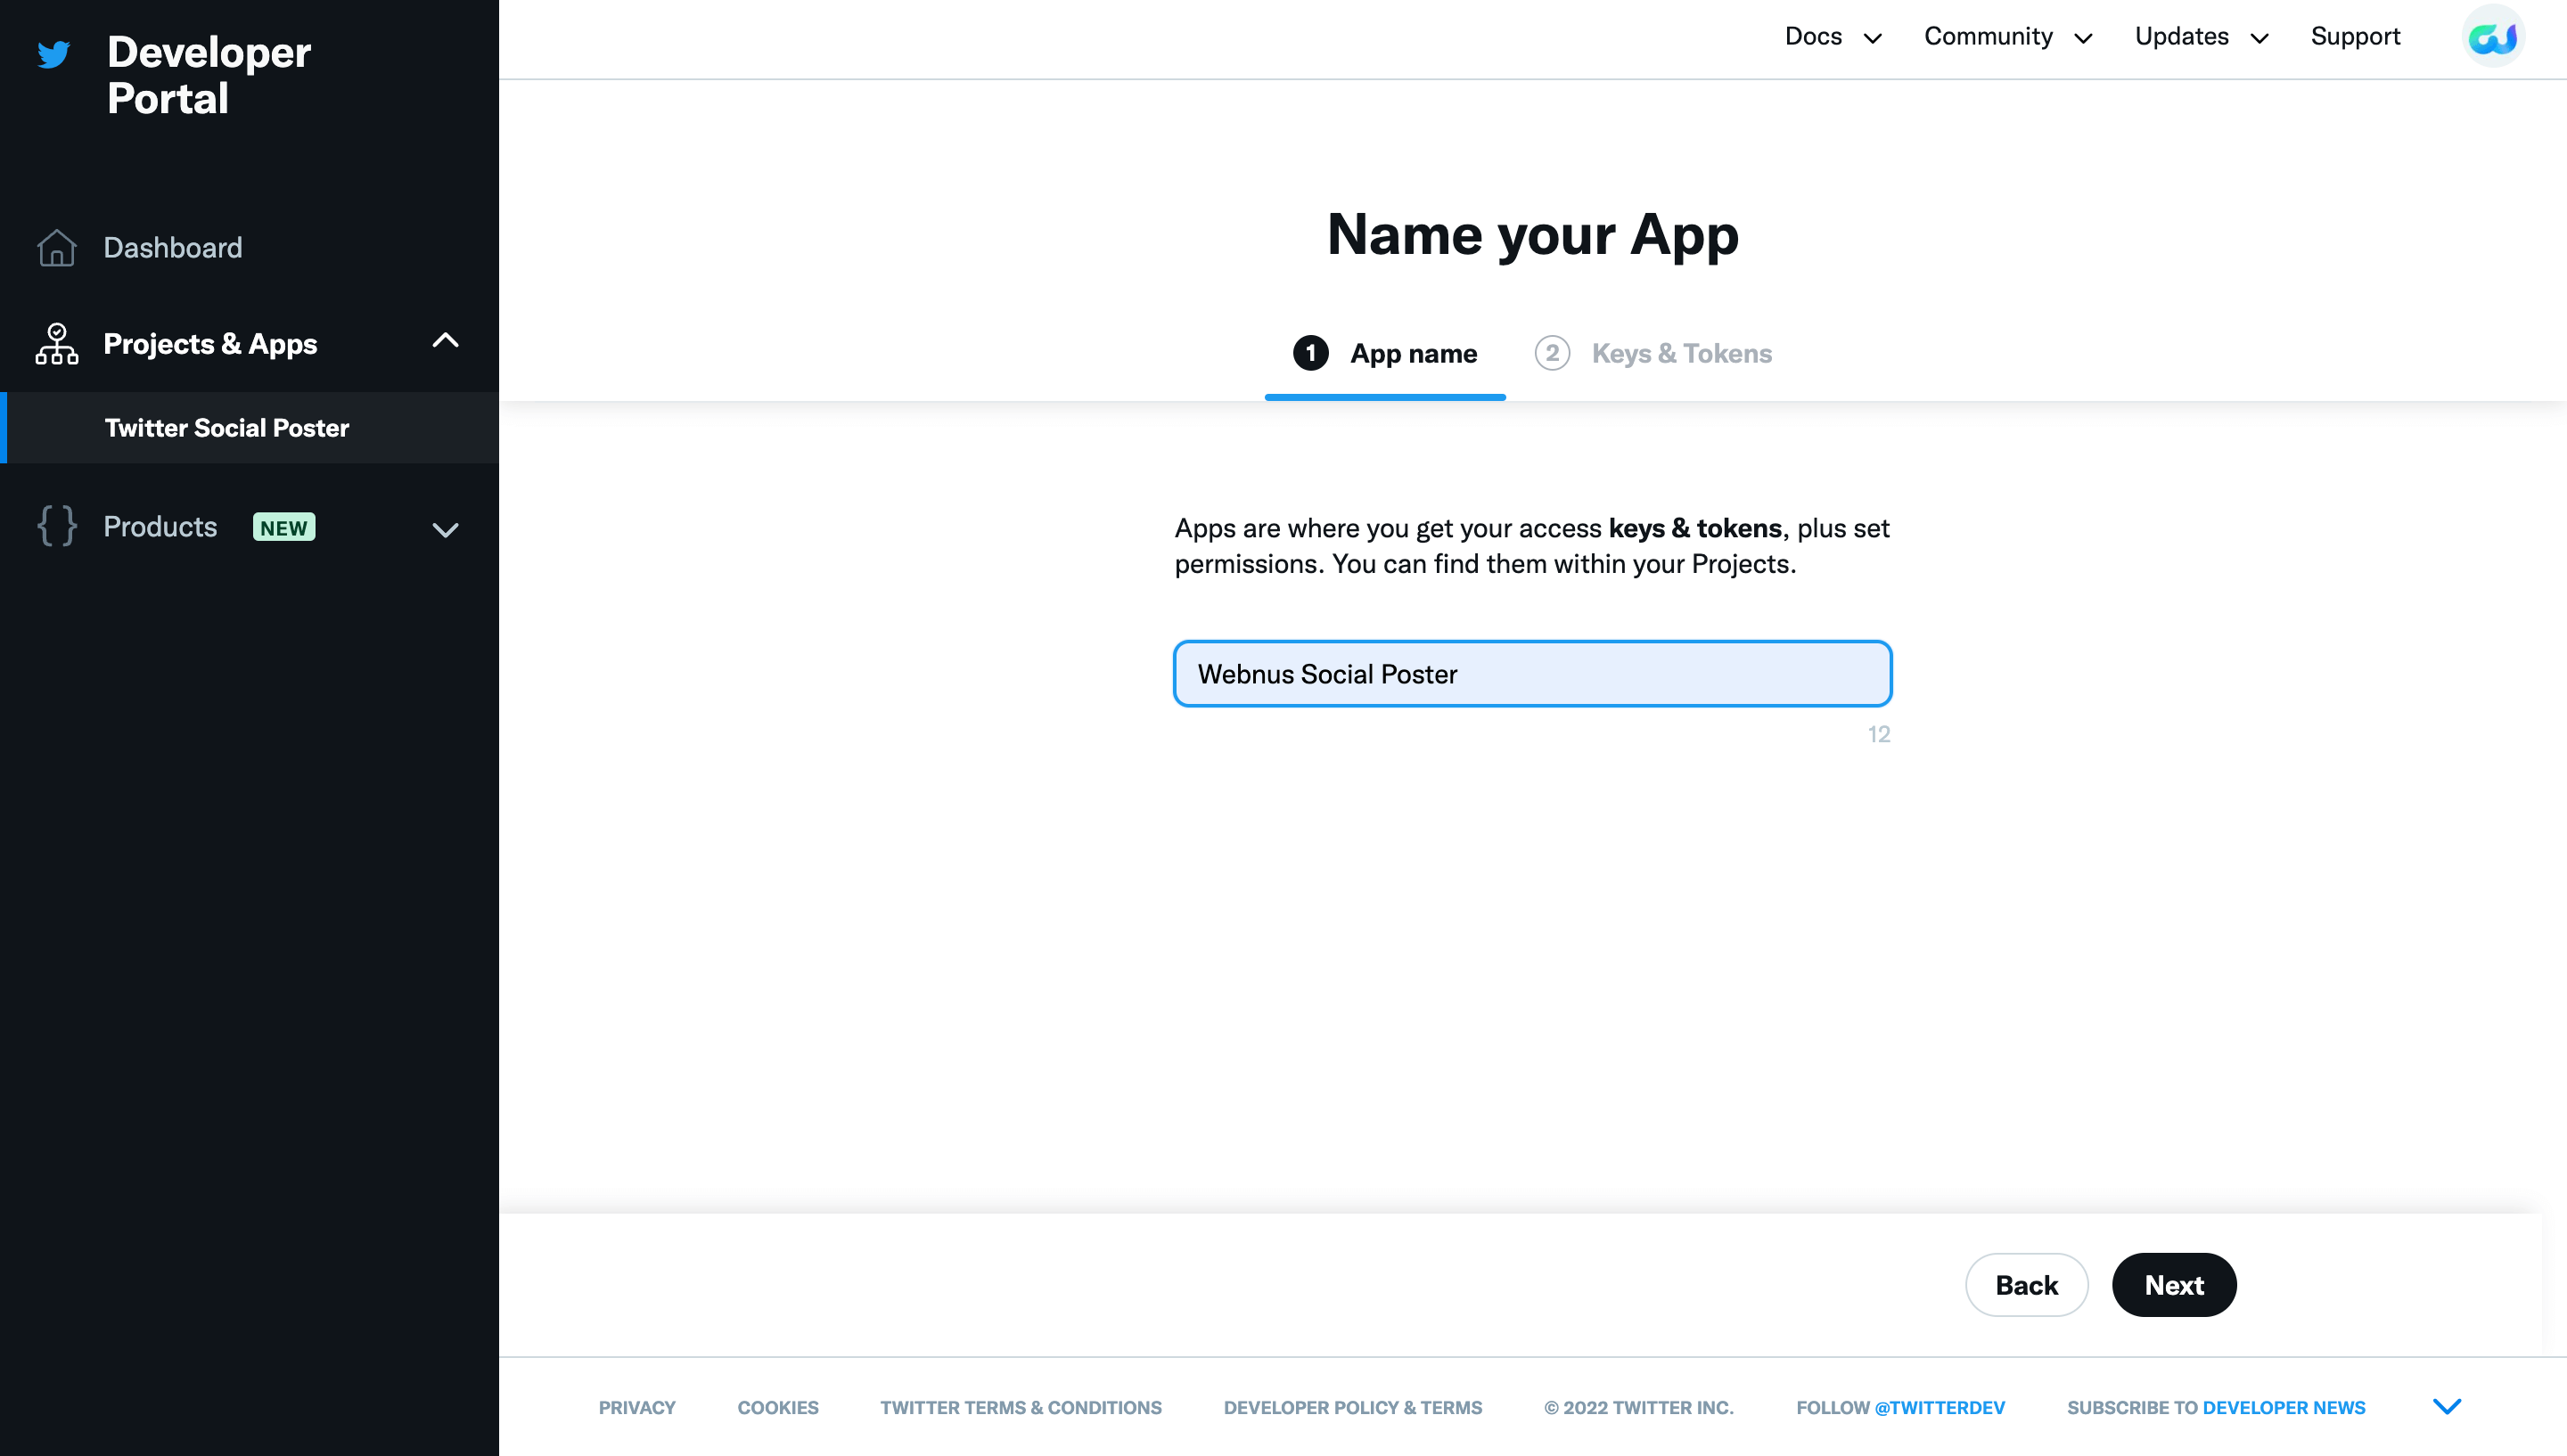
Now we have the info we need.
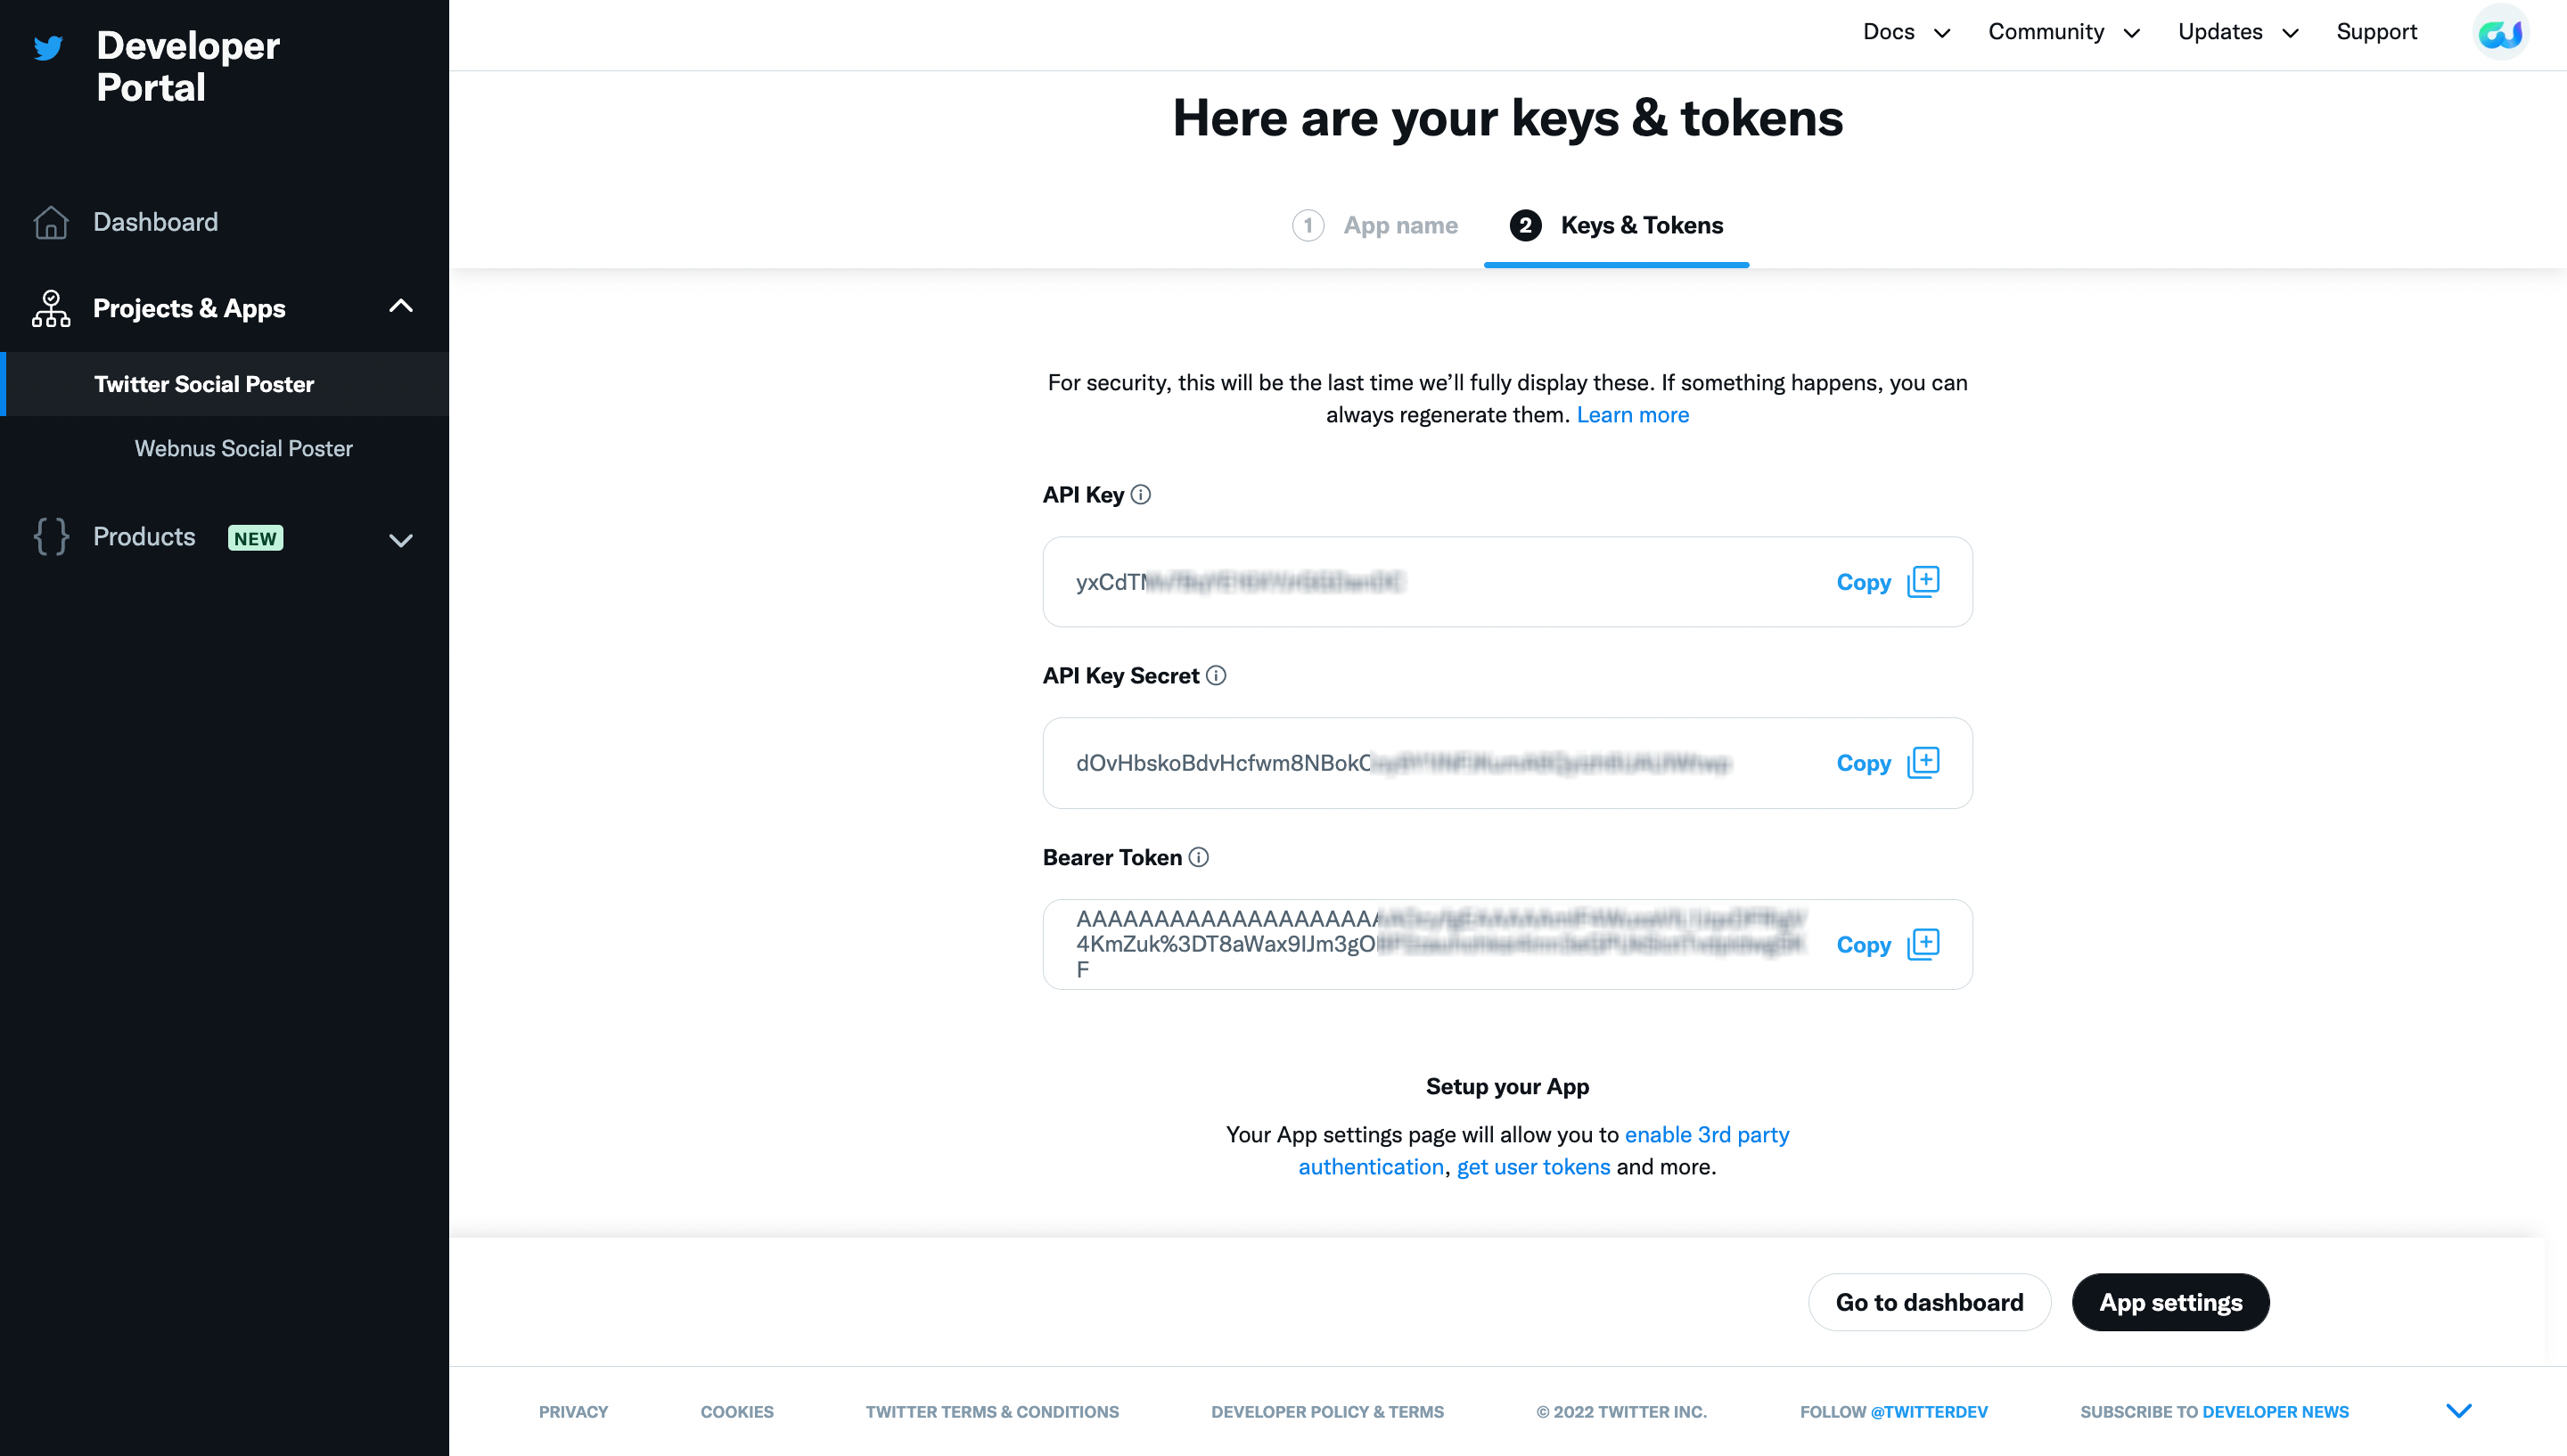
From the menu to the left, click on the app you’ve just created, and from User Authentication Settings, click on Setup.
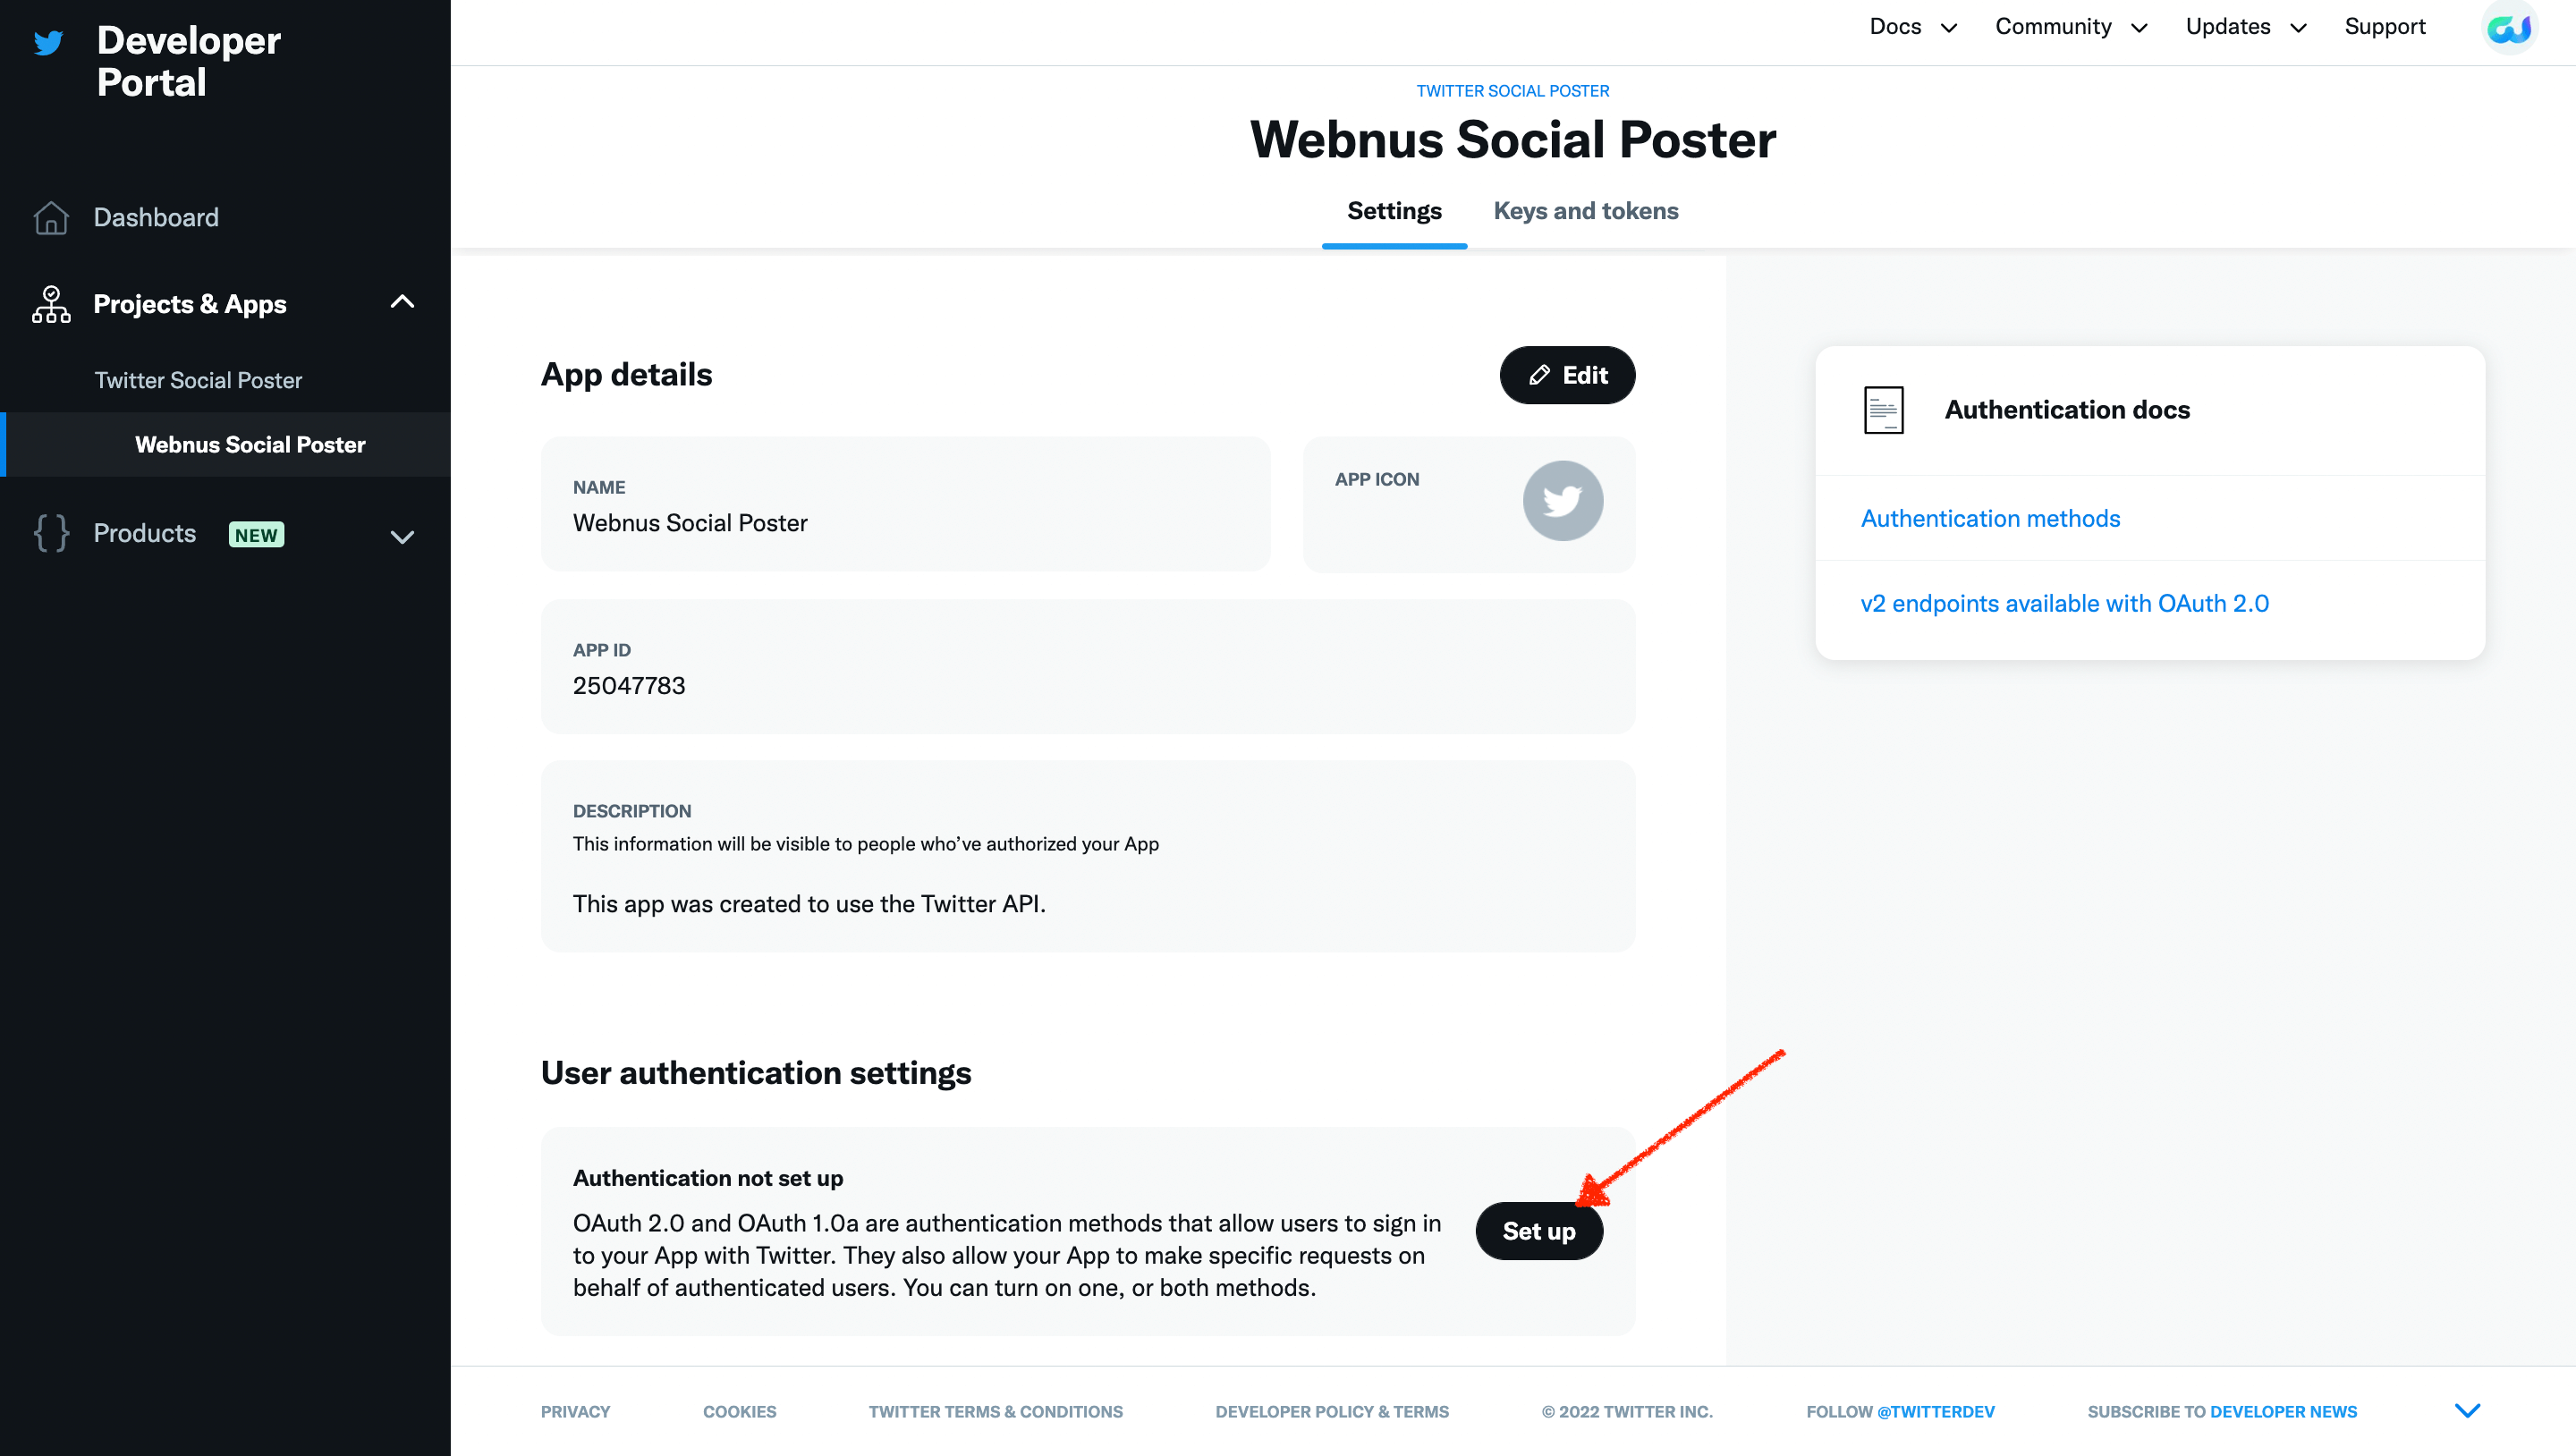
Here, activate OAuth 2.0 and set the Type of App on the web. Enter the info for website redirection and save.
To enter your website redirection info, go to M.E. Calendar> Social Poster > Twitter.

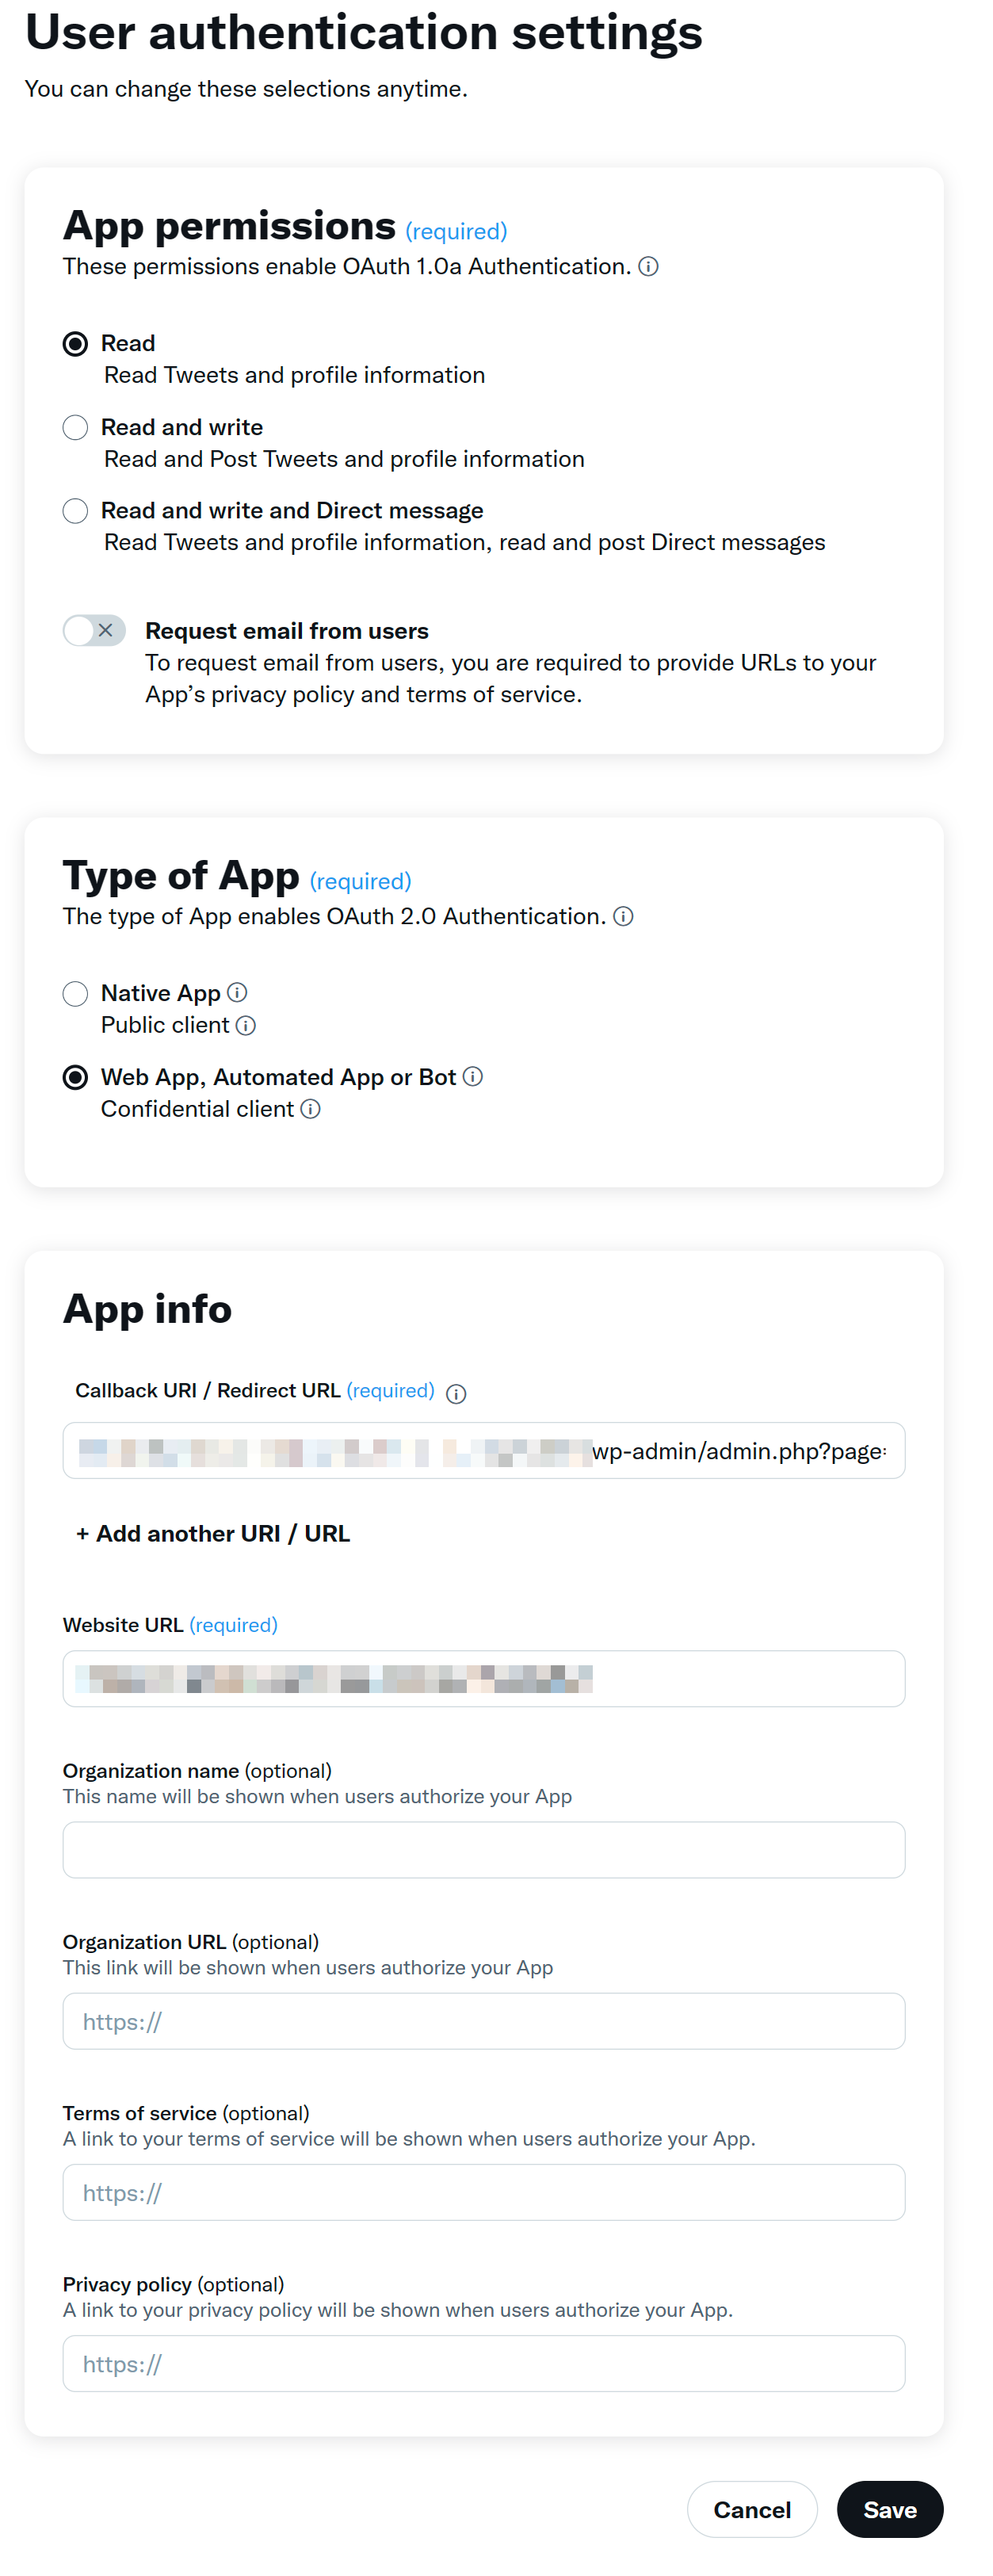
Copy the data and go to M.E. Calendar > Social Poster > Settings on your website and fill in the empty fields.
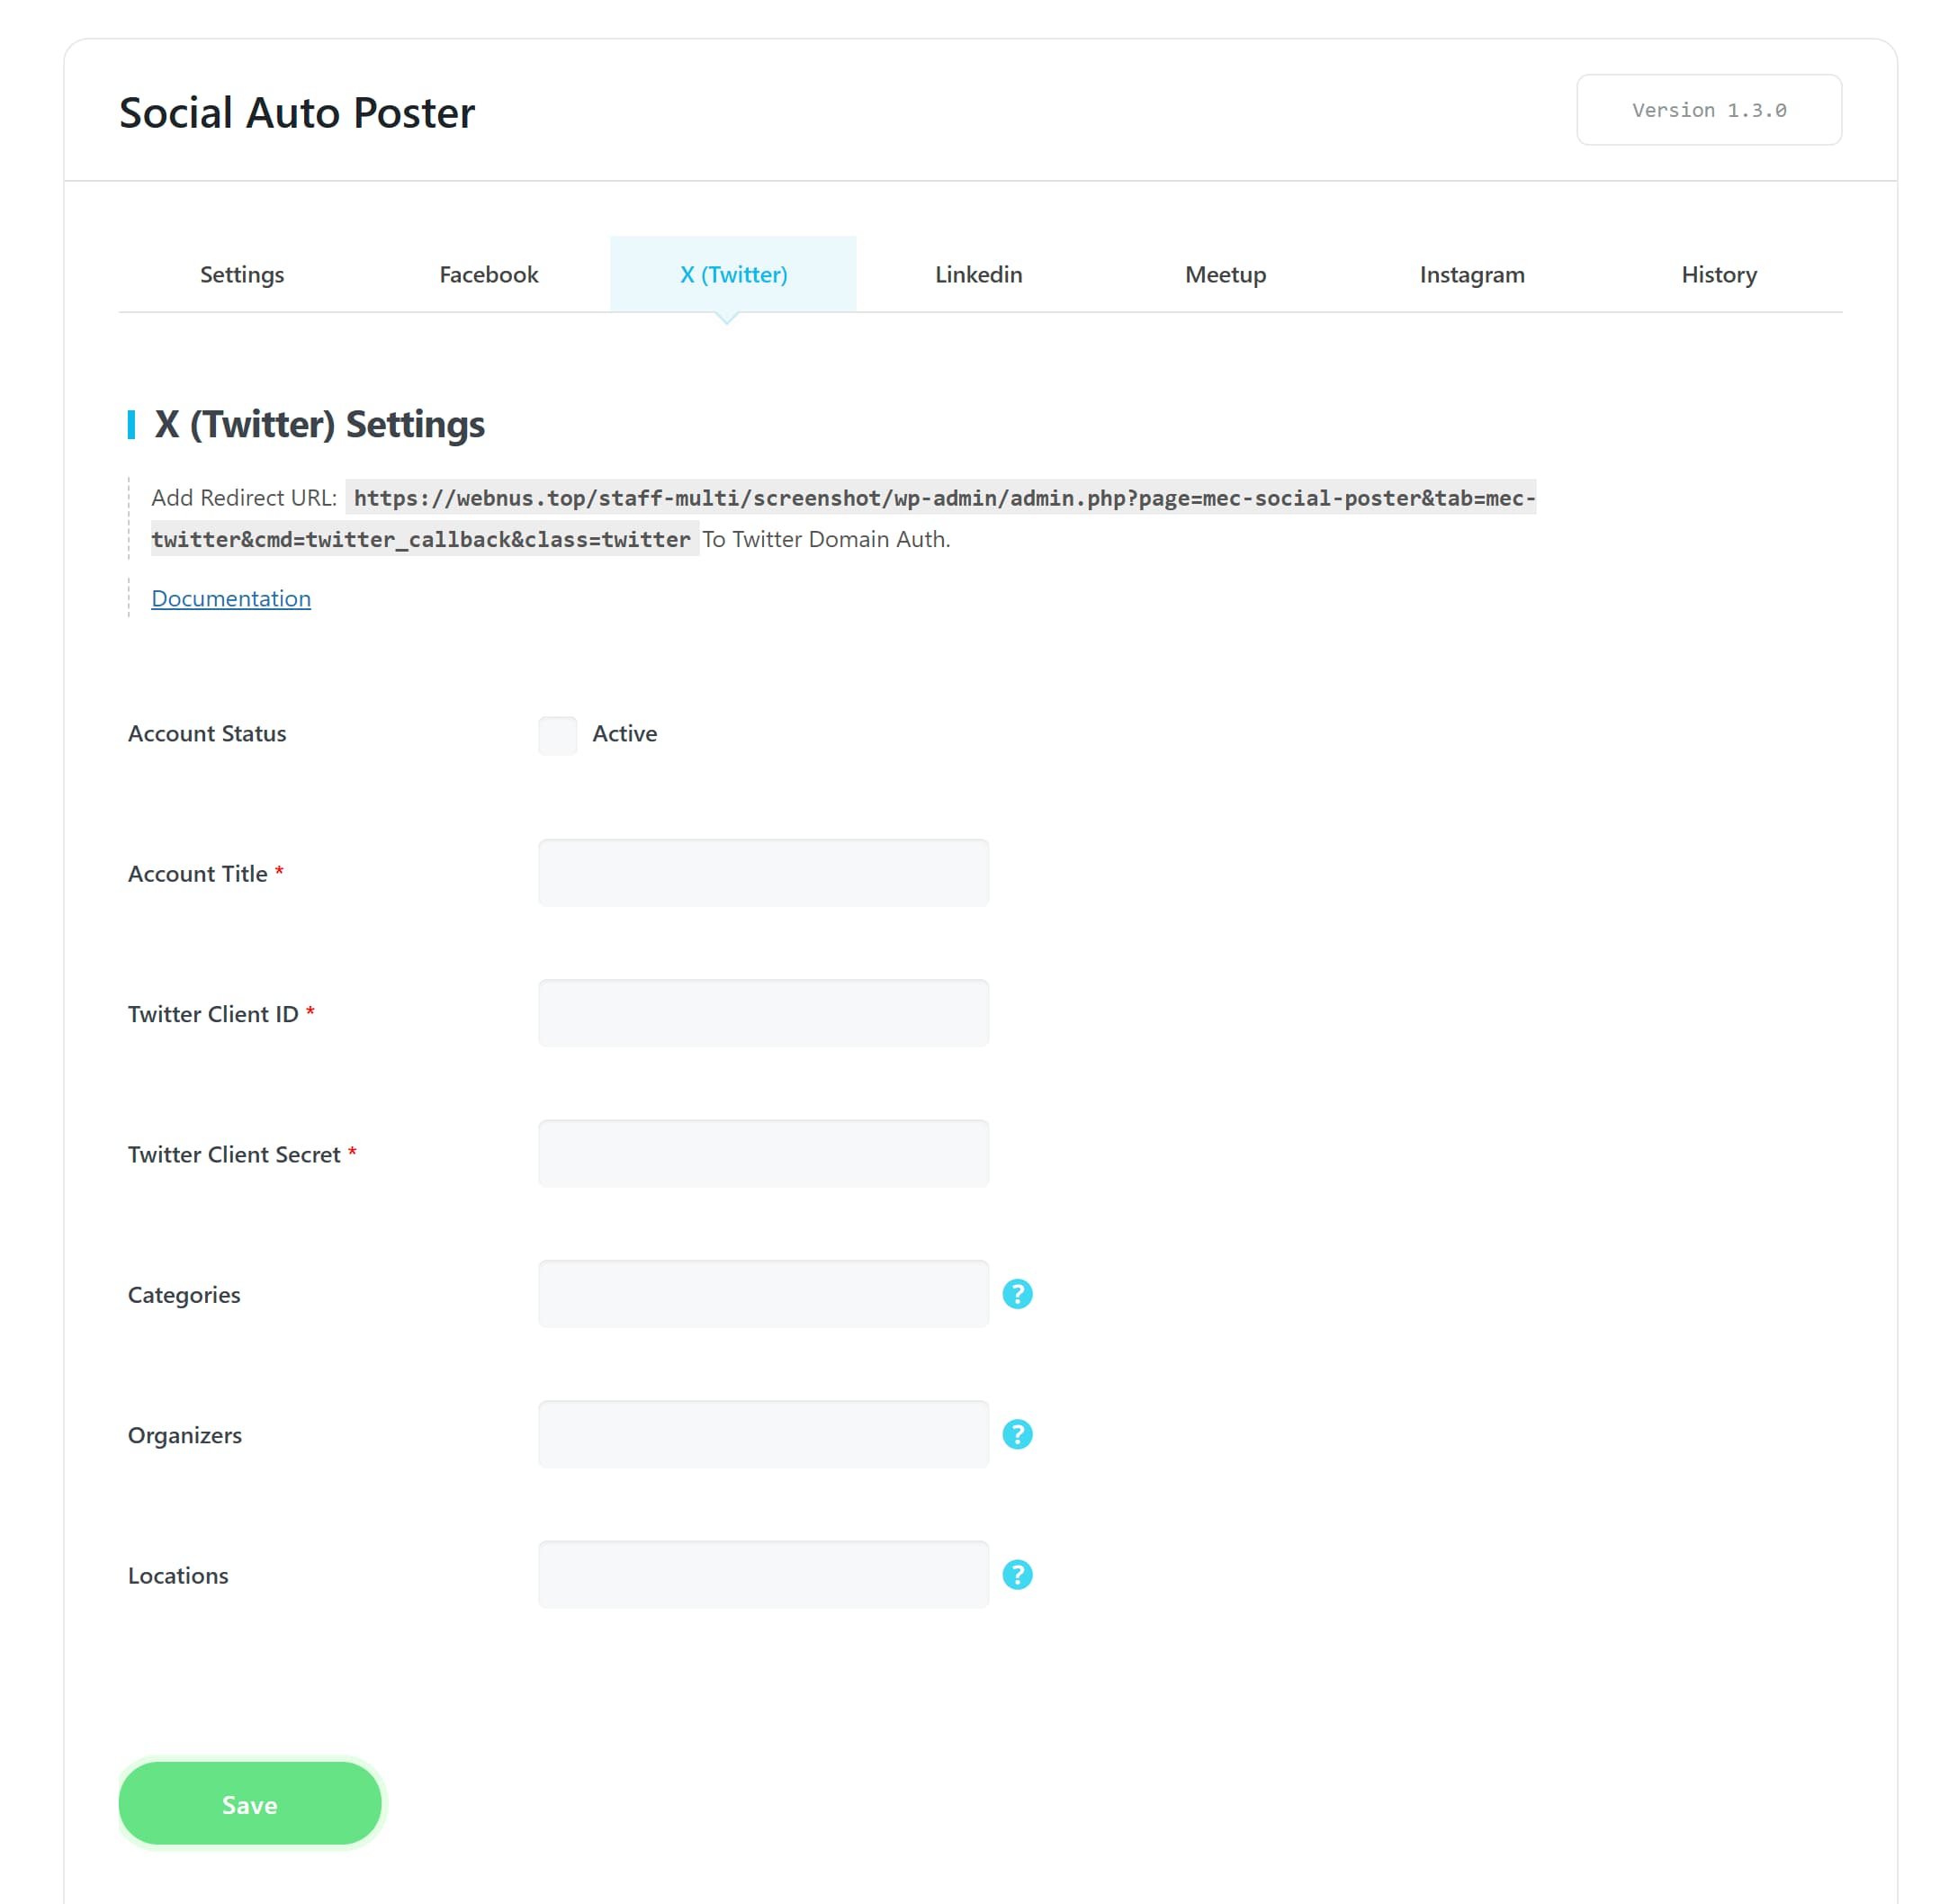
We will see the X account added to the bottom.

To enable Social Auto Poster for LinkedIn, you need a LinkedIn account and a Business Page connected to your personal account. To create a Business page, please see this article.
To begin, go to the LinkedIn Developer page and click on Create App.
Fill out the form and click on Create App.
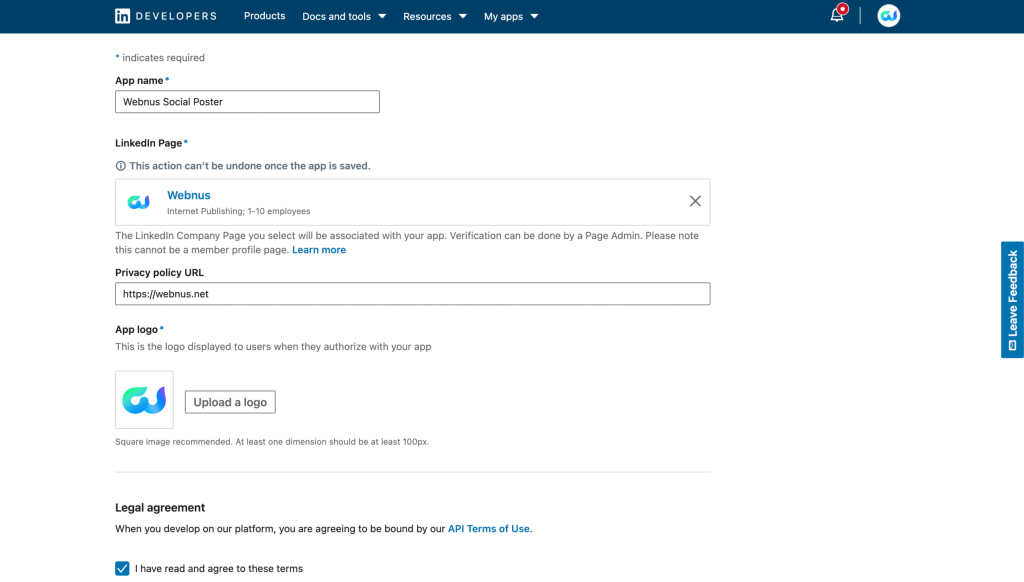
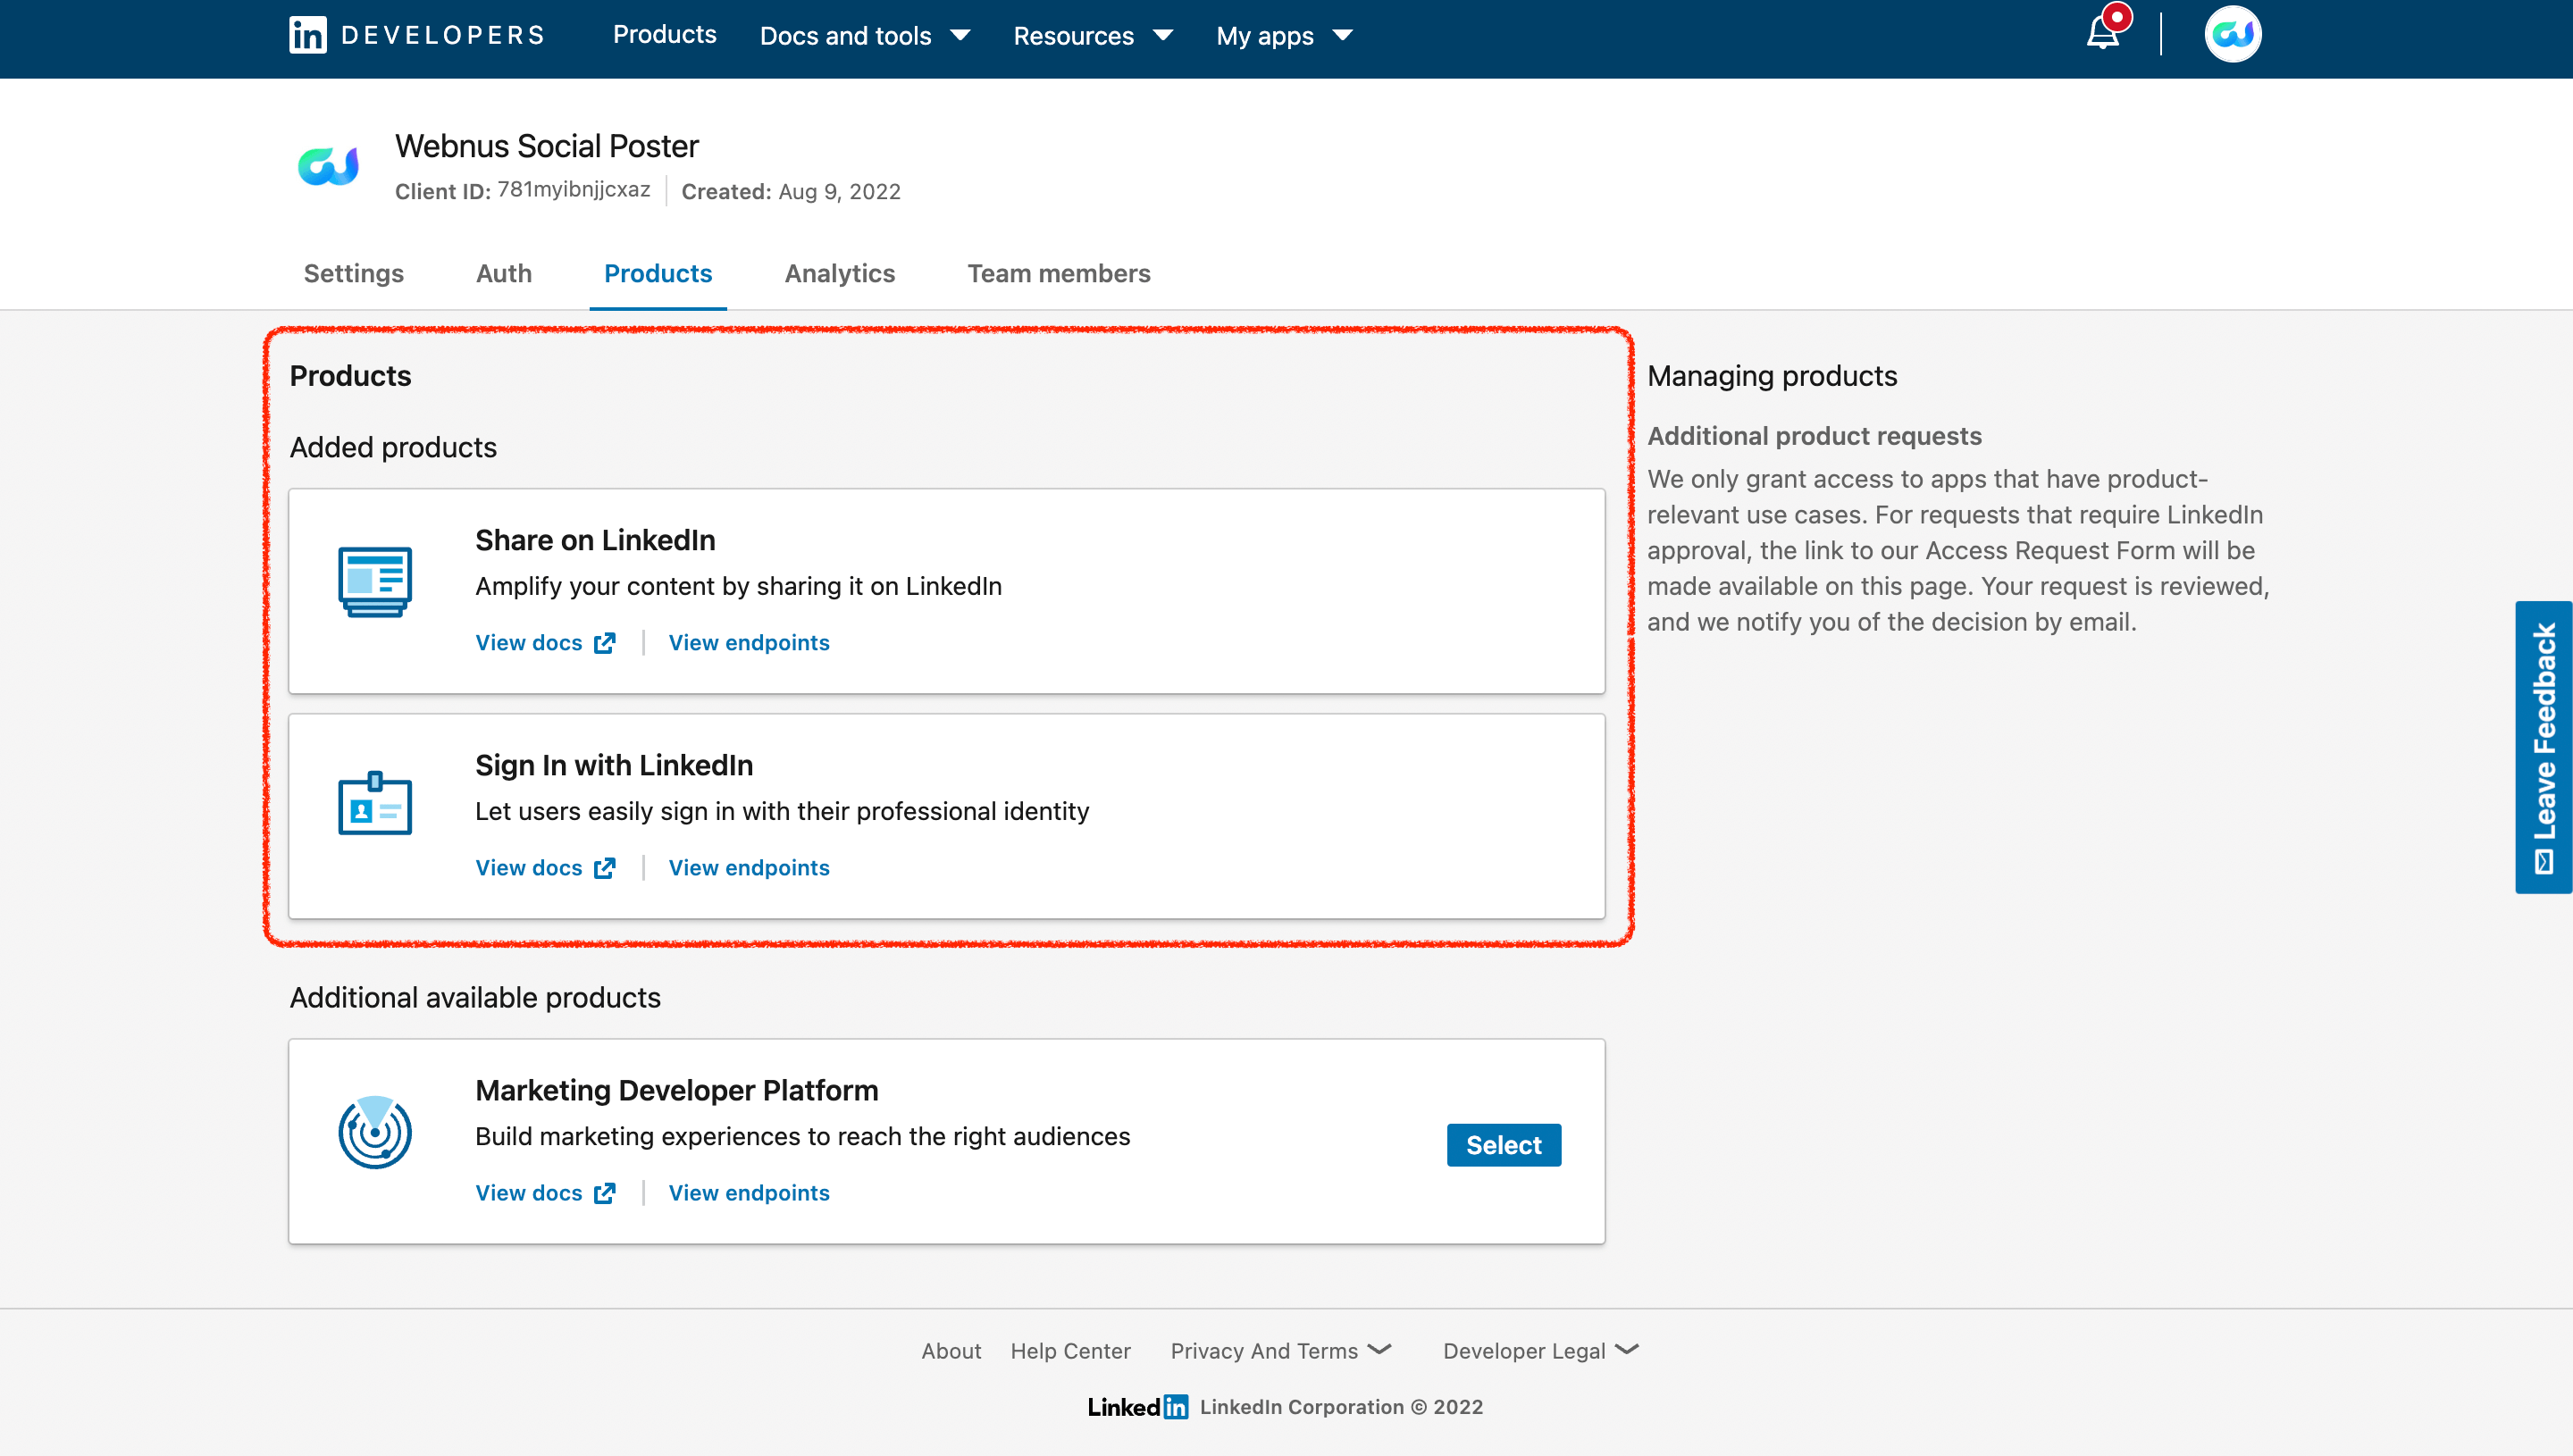
Here, we have to create two products:
1. Share on LinkedIn
2. Sign in with LinkedIn
After selecting the products, as you can see in the image, they will be added to the Products section.
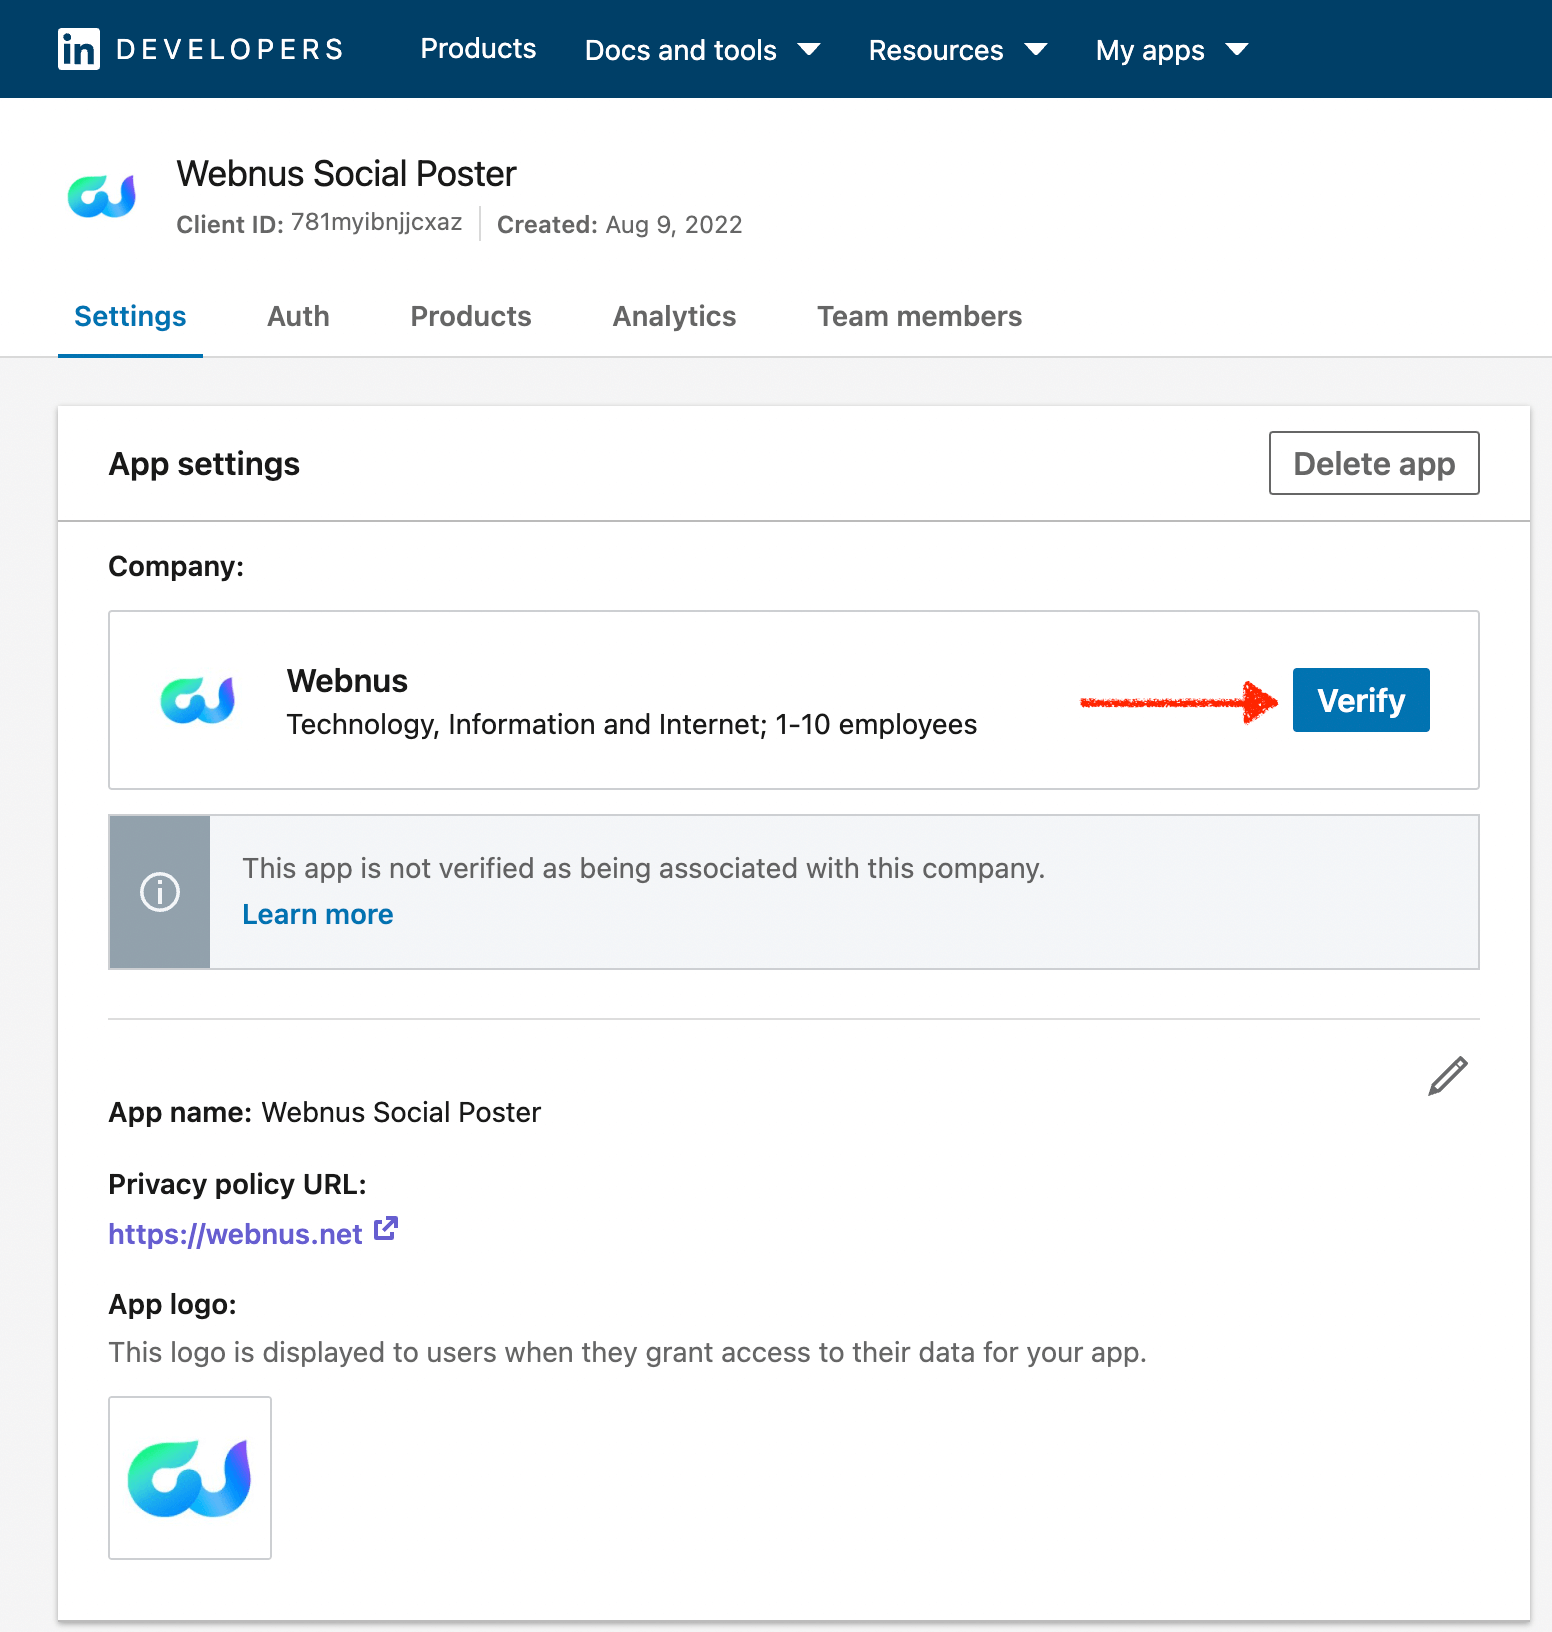
Then, you have to go to the Settings tab and verify the LinkedIn page.
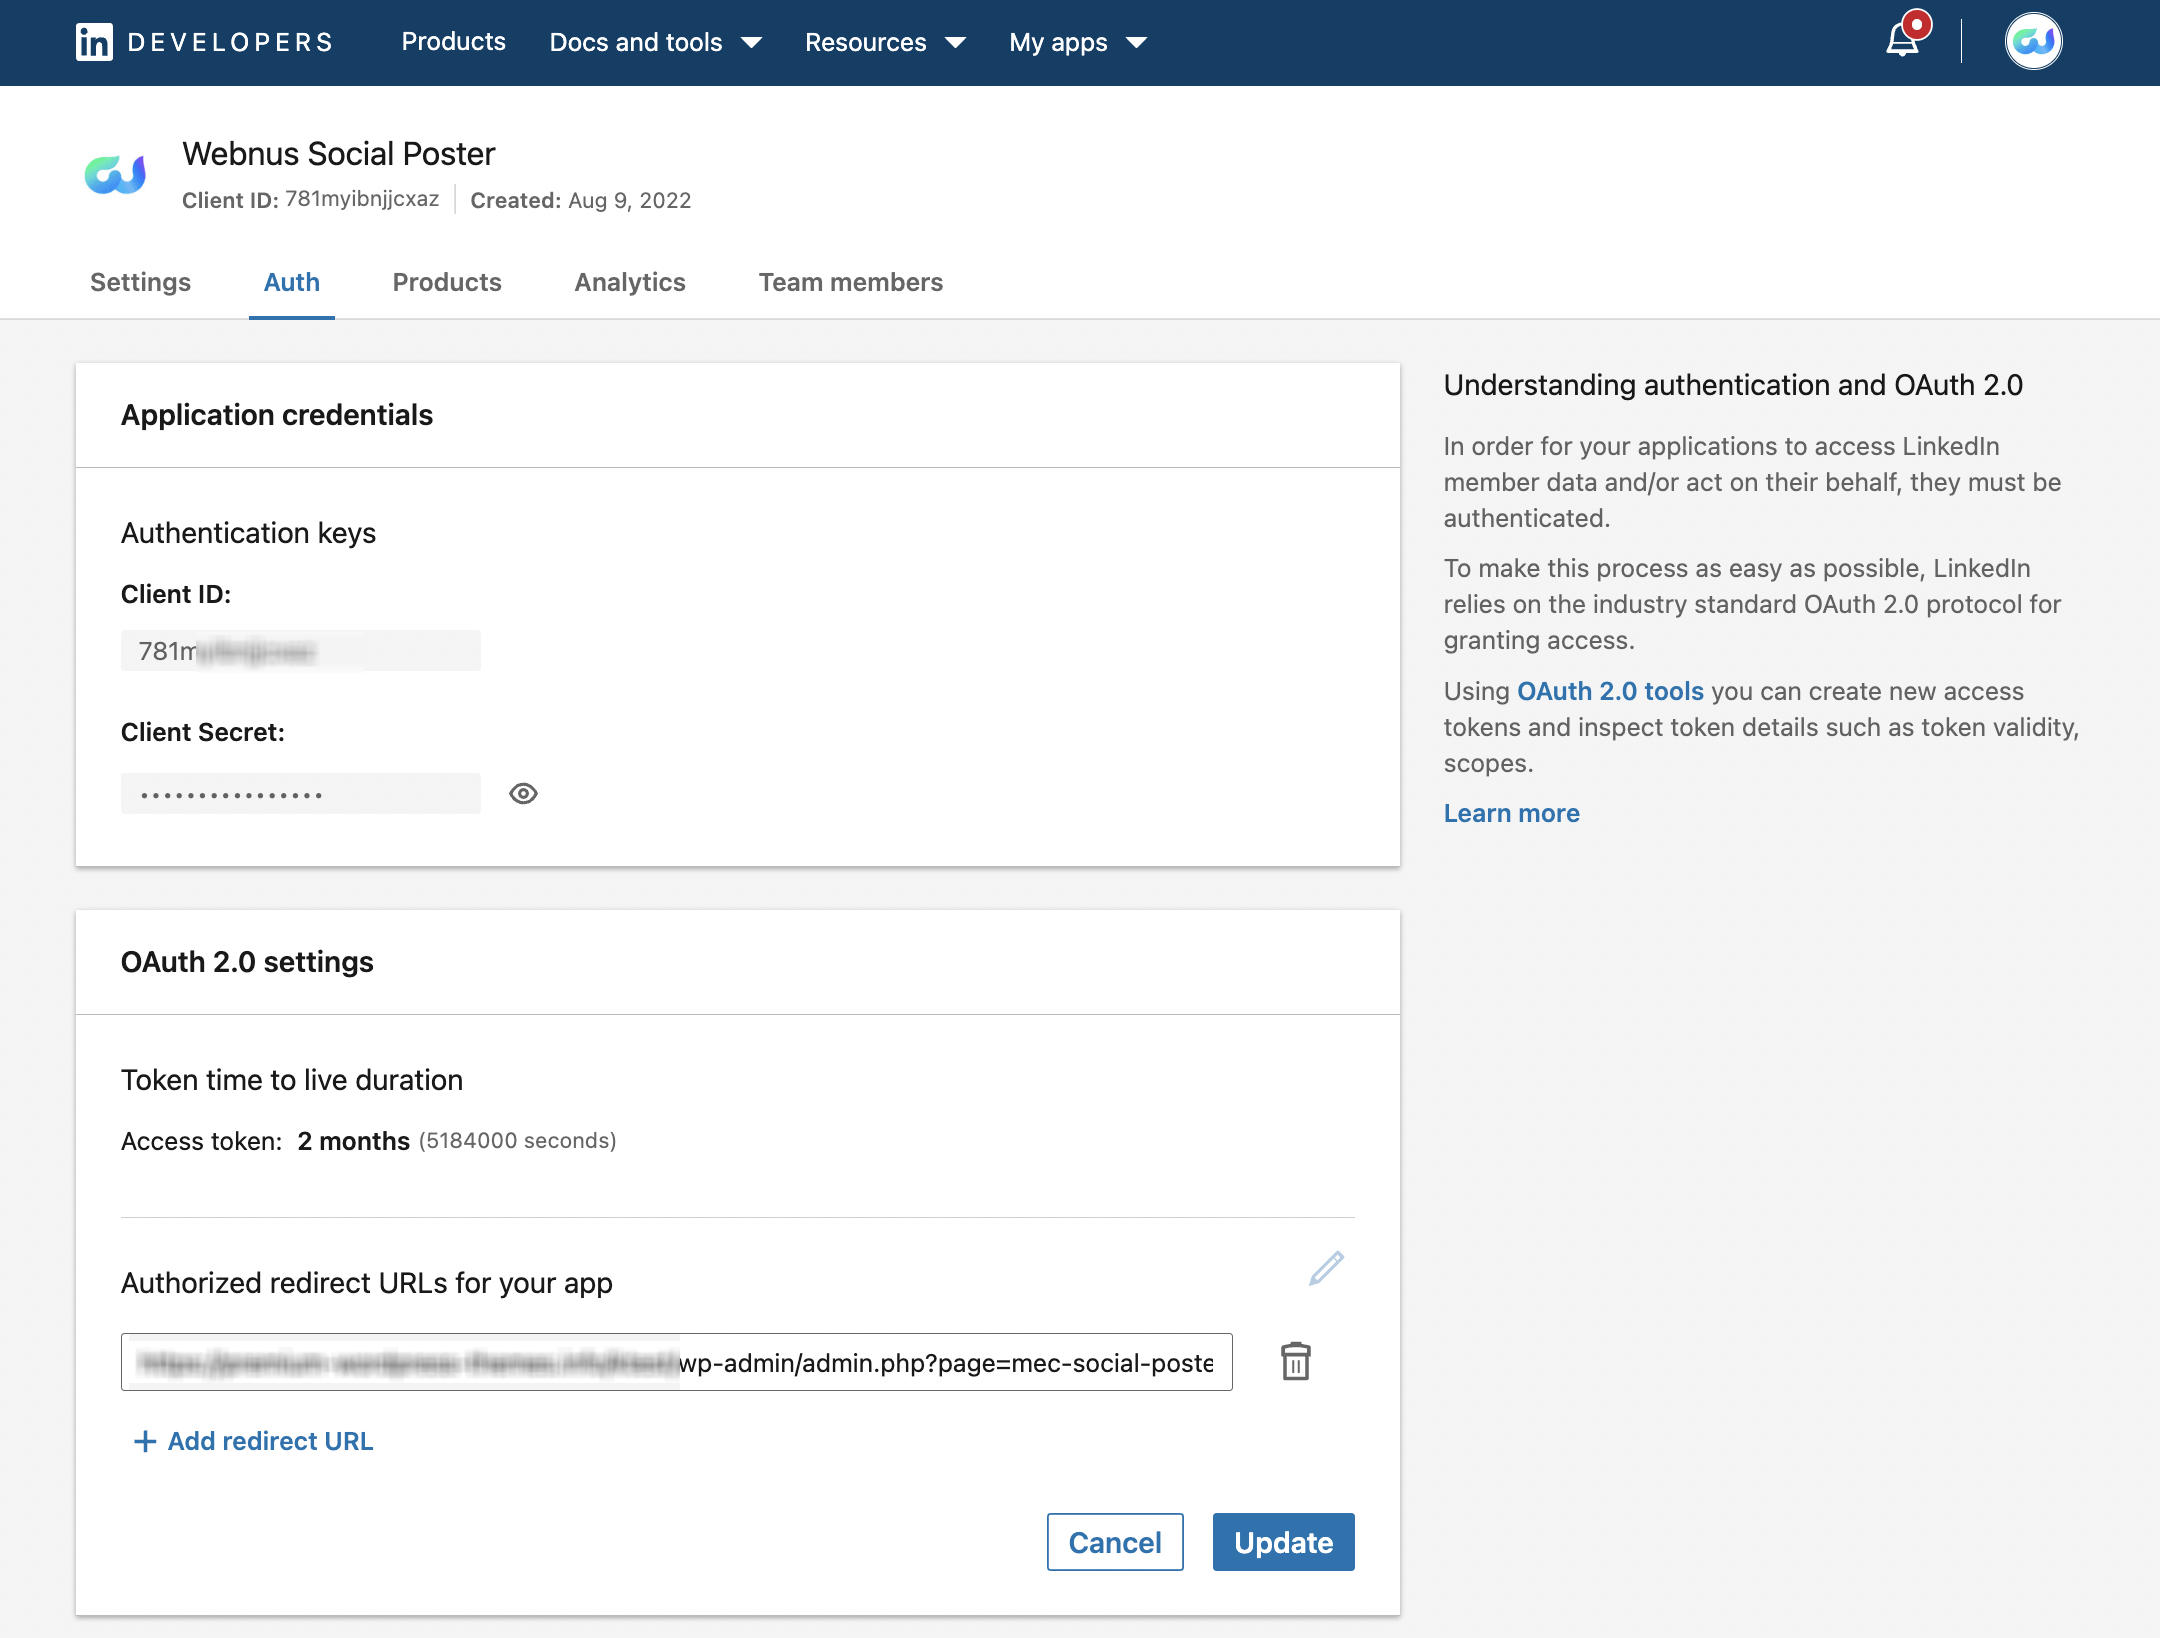
Then go to the Auth tab and copy the redirect address from your website from M.E.Calendar > Social Poster > Settings > LinkedIn and paste it into Authorized redirect URLs for your app.
Finally, go to M.E. Calendar> Social Poster > Settings > LinkedIn and enter the API data that we received on this page.
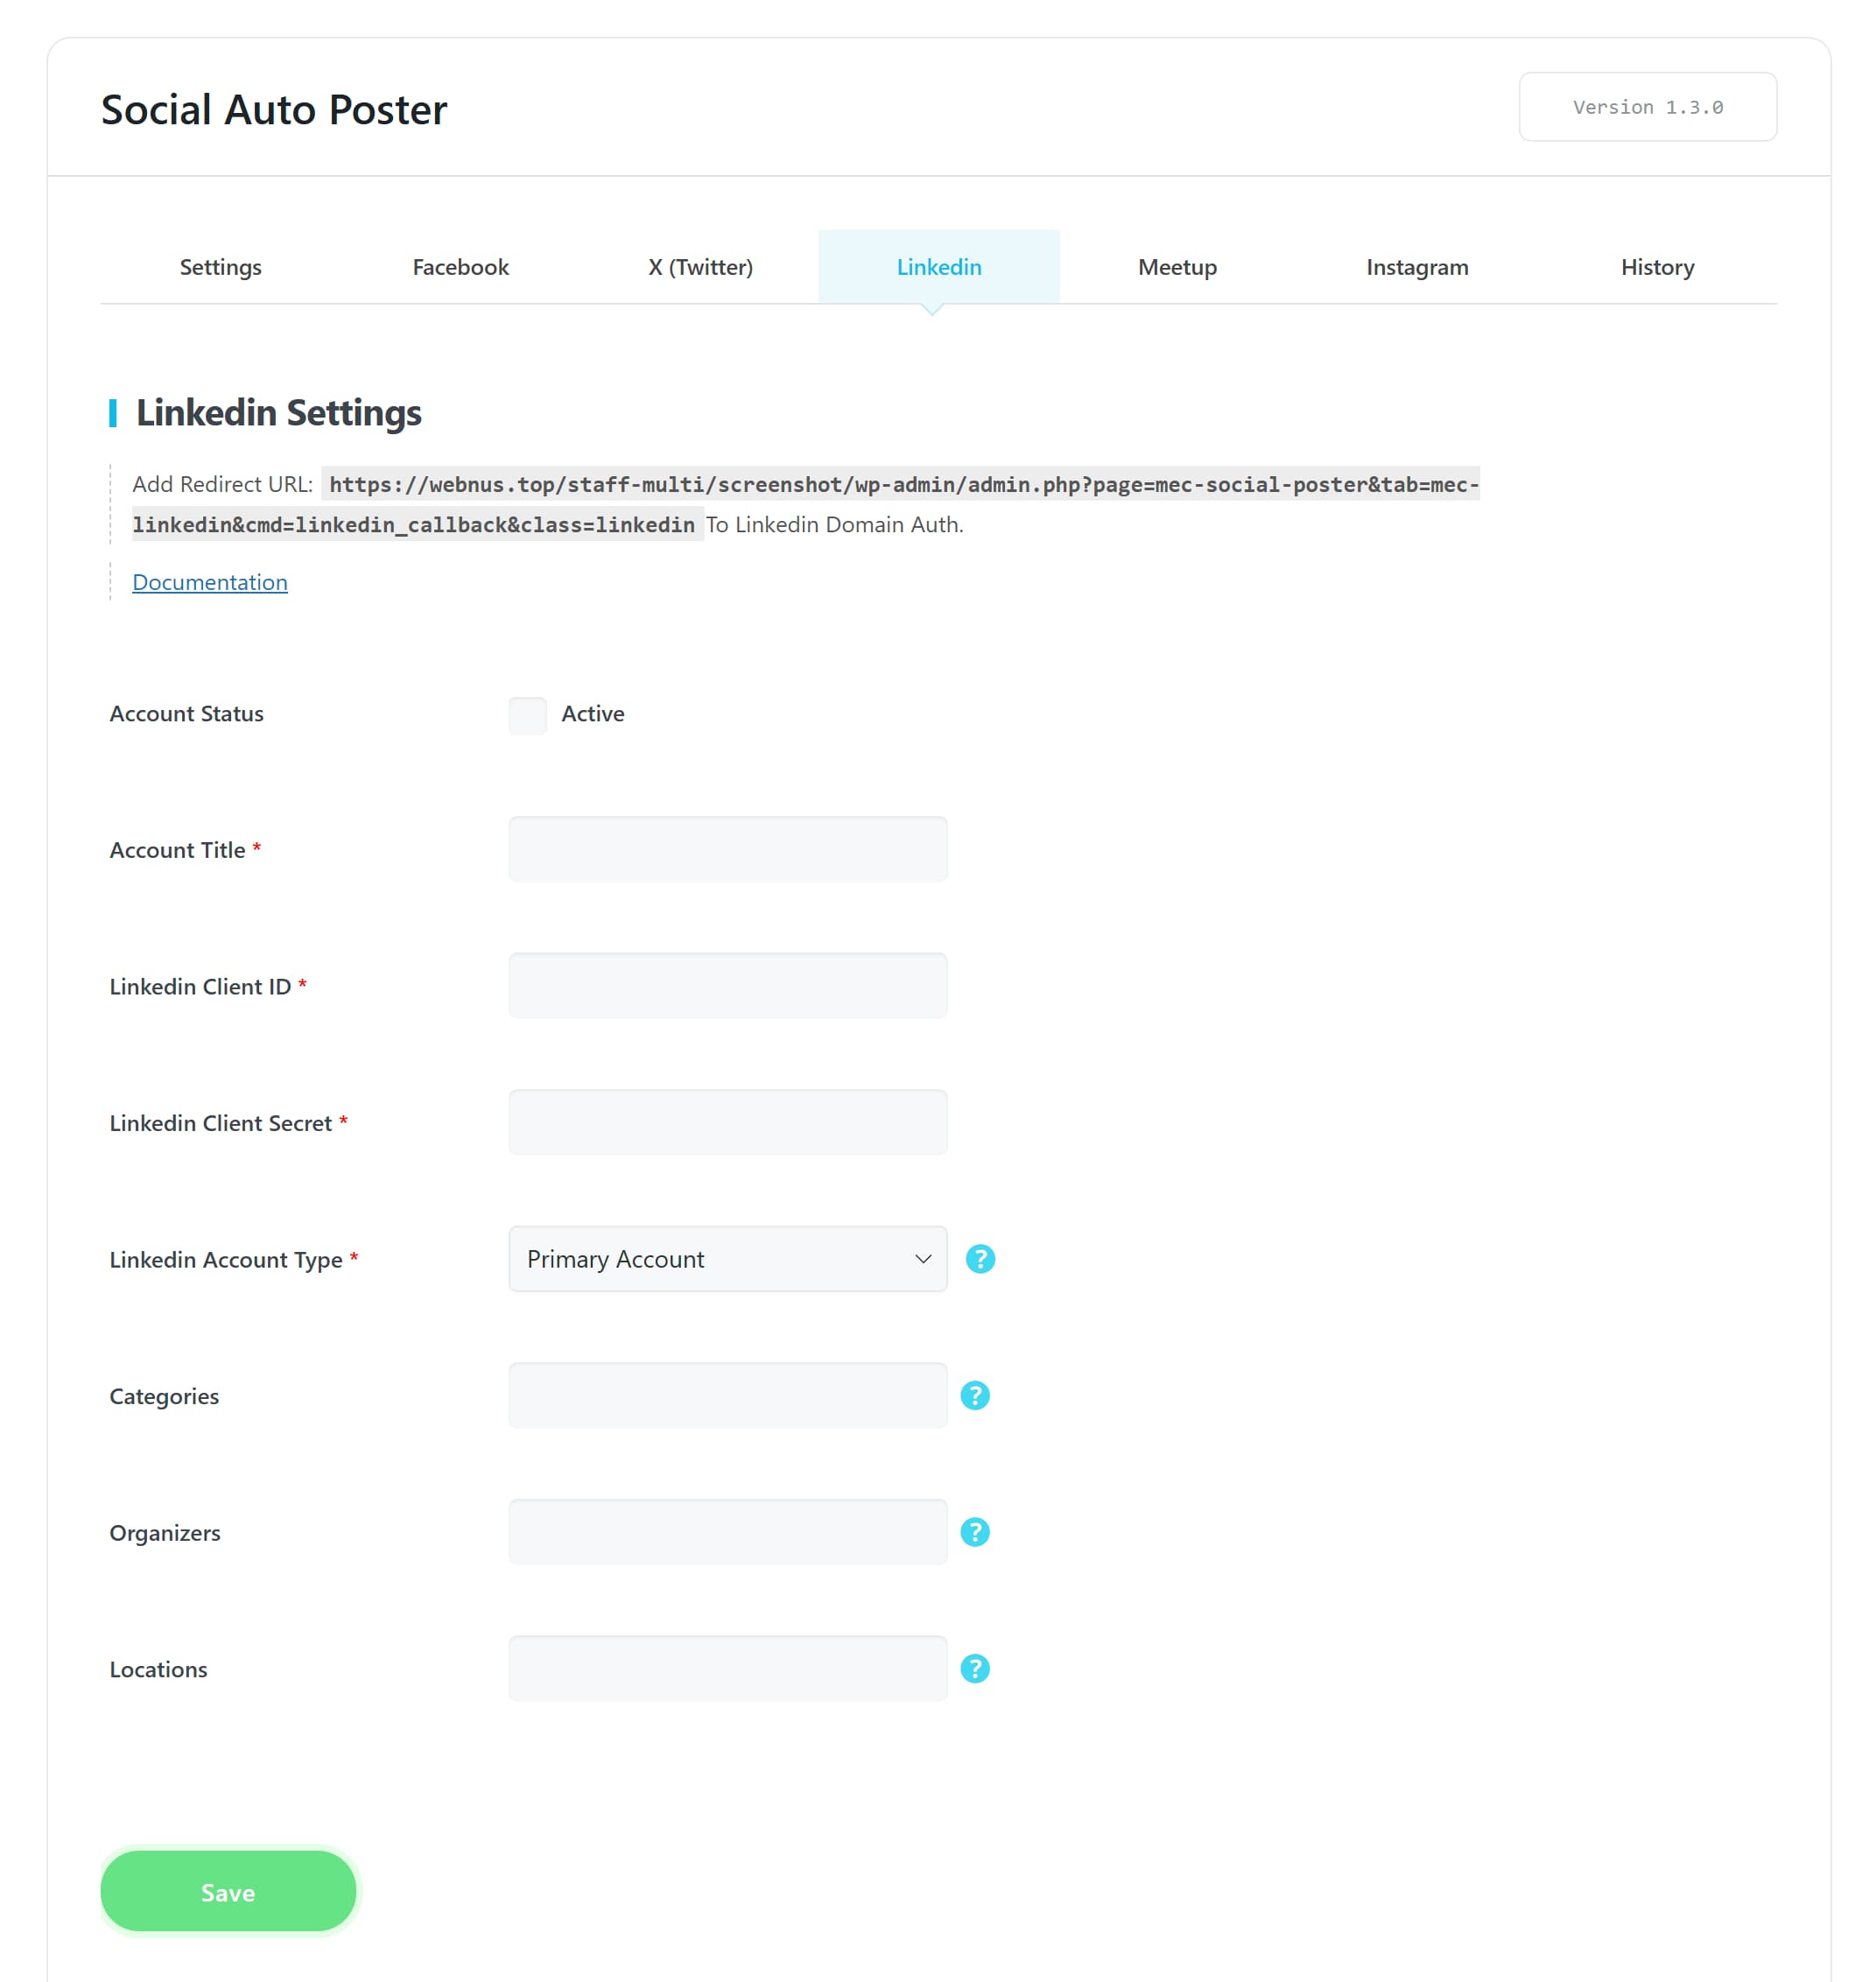
Now, click on Needs authentication to complete the verification.

Meetup
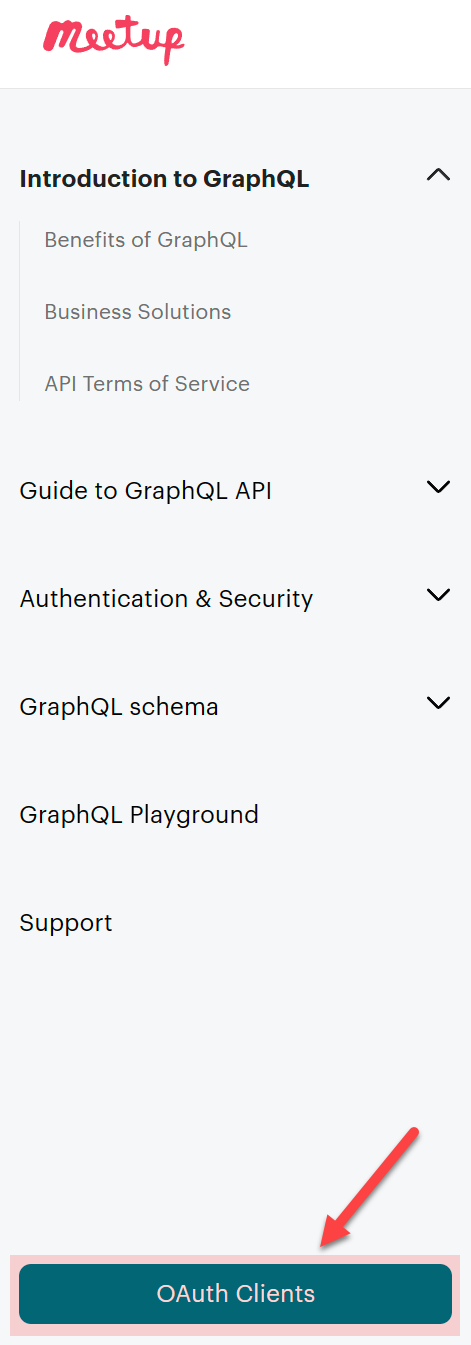
To enable the Social Auto Poster Addon for Meetup, you need a Meetup account. After creating an account, to create a new app, go to this link and click on OAuth Clients.
After that, go to this address and click on Create a New Client.
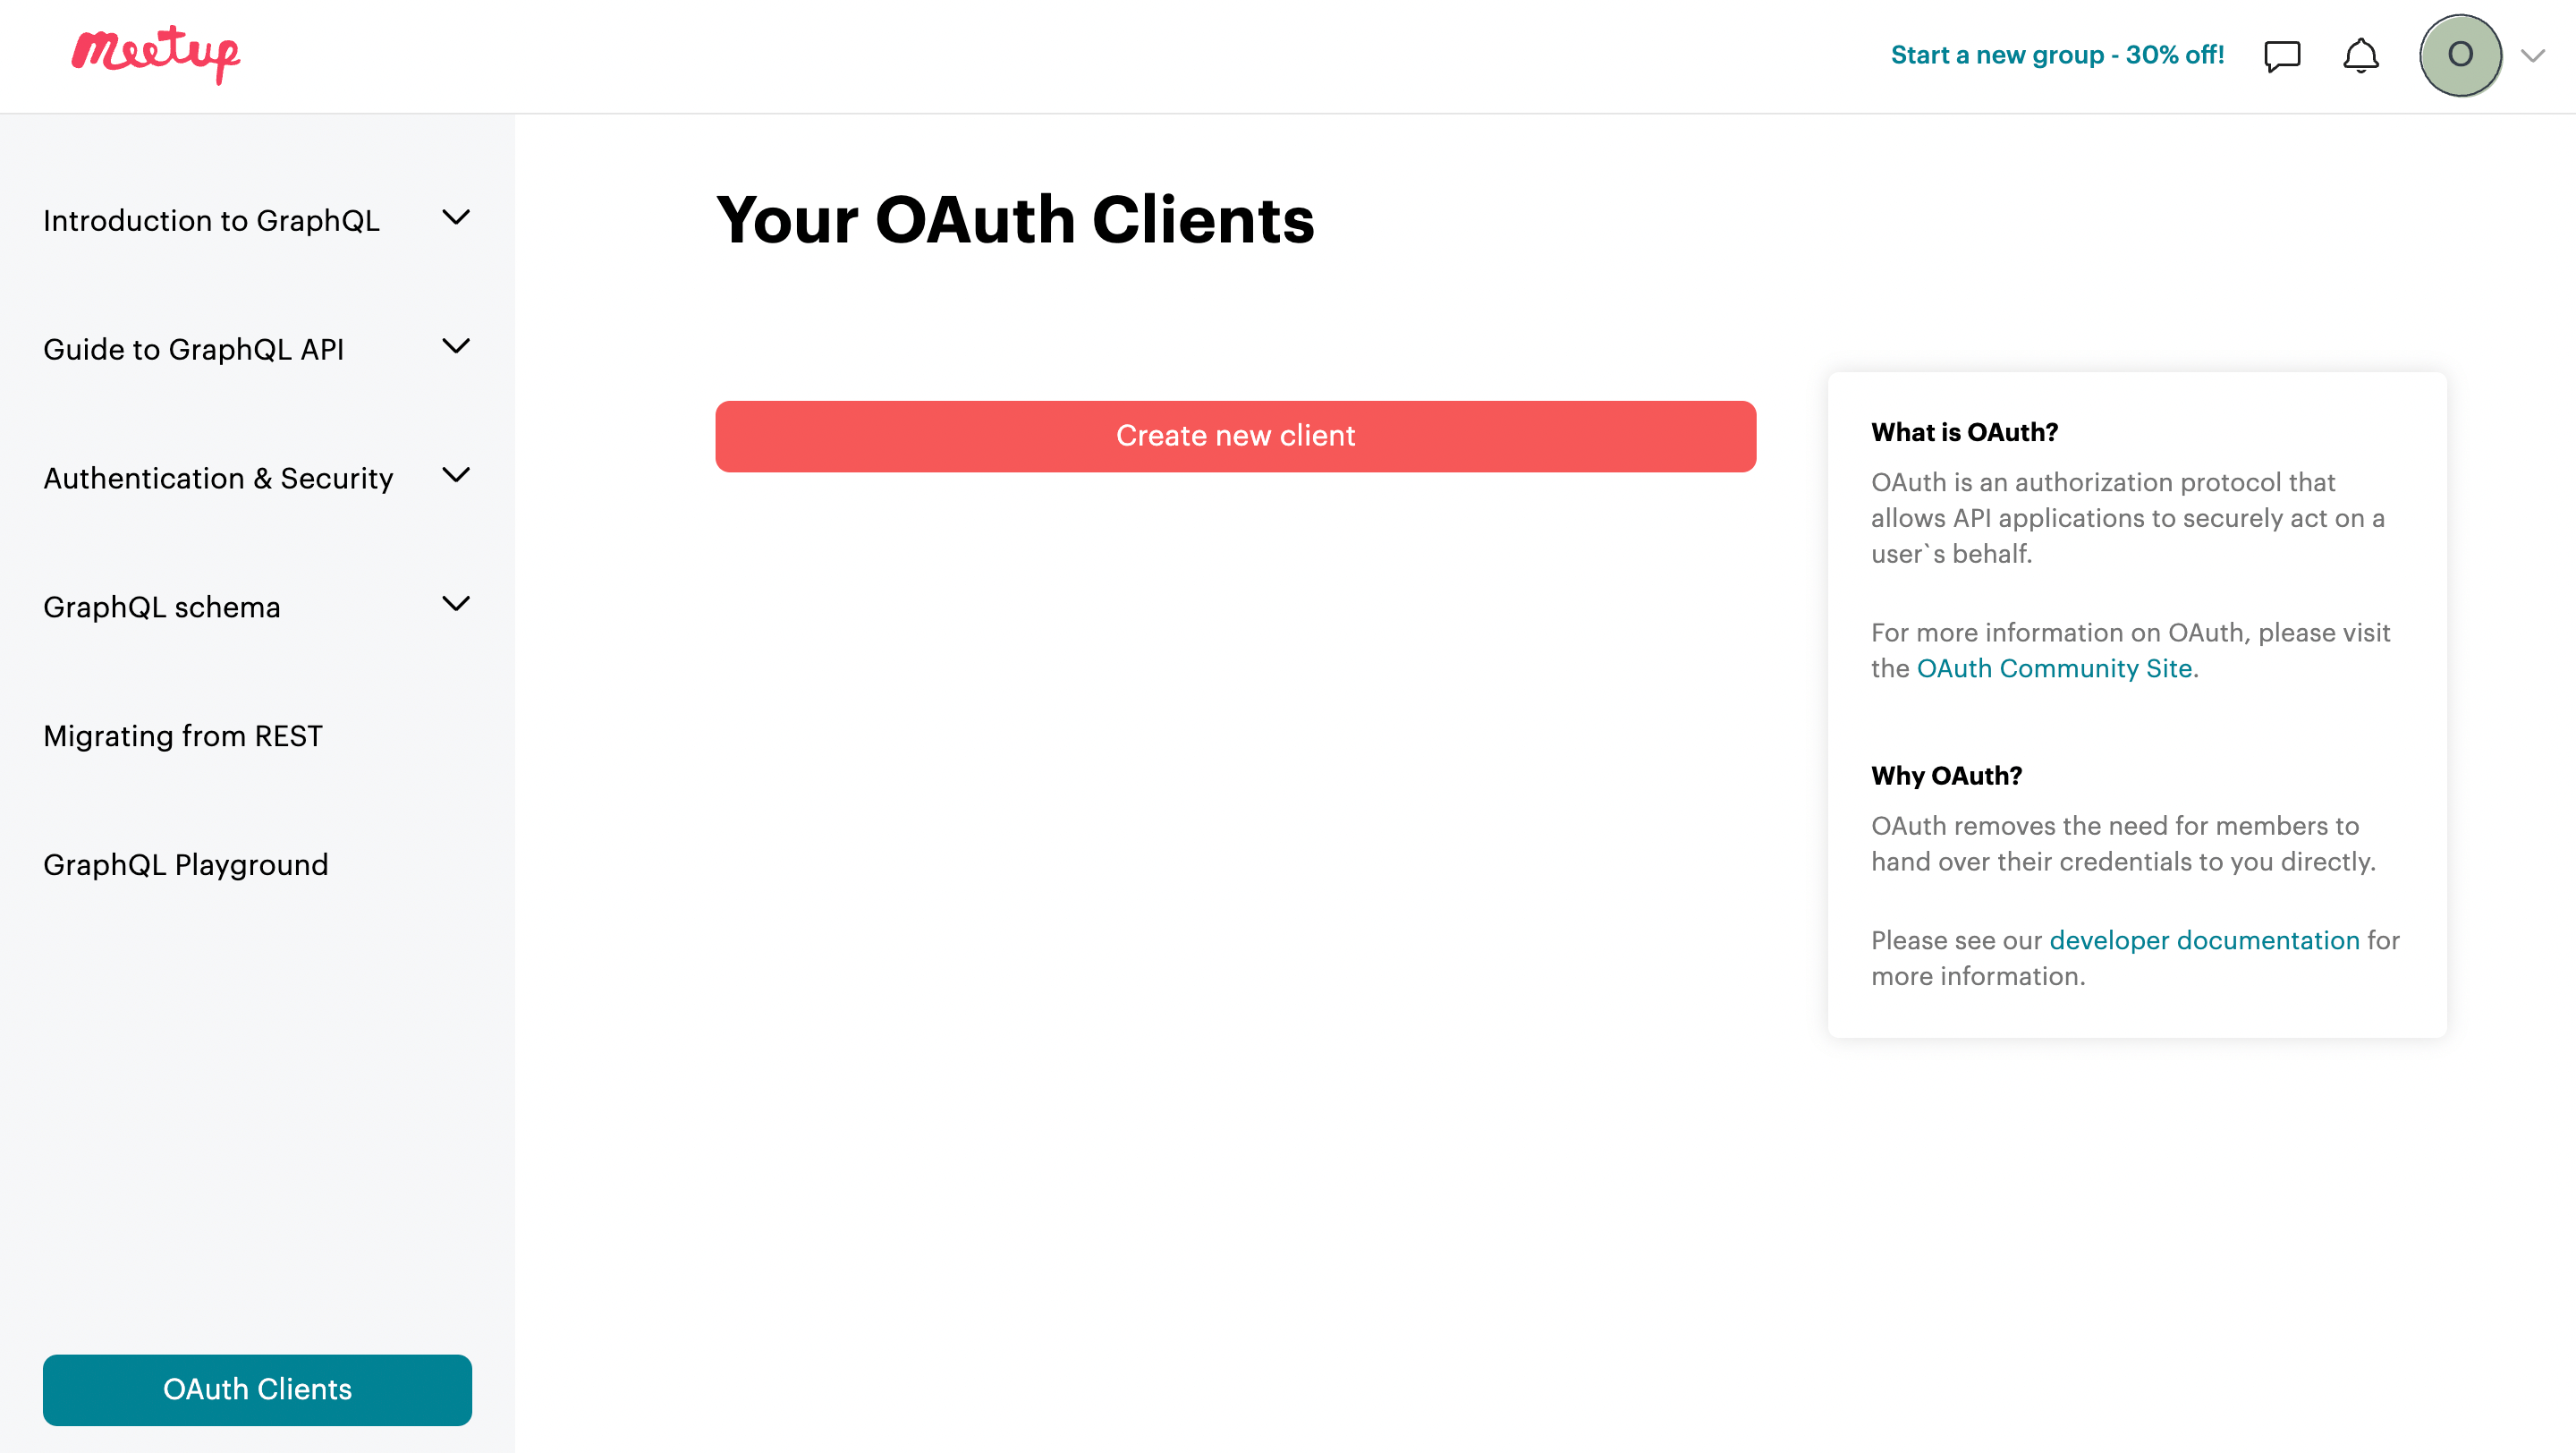
Next, fill in the info to create a new client.
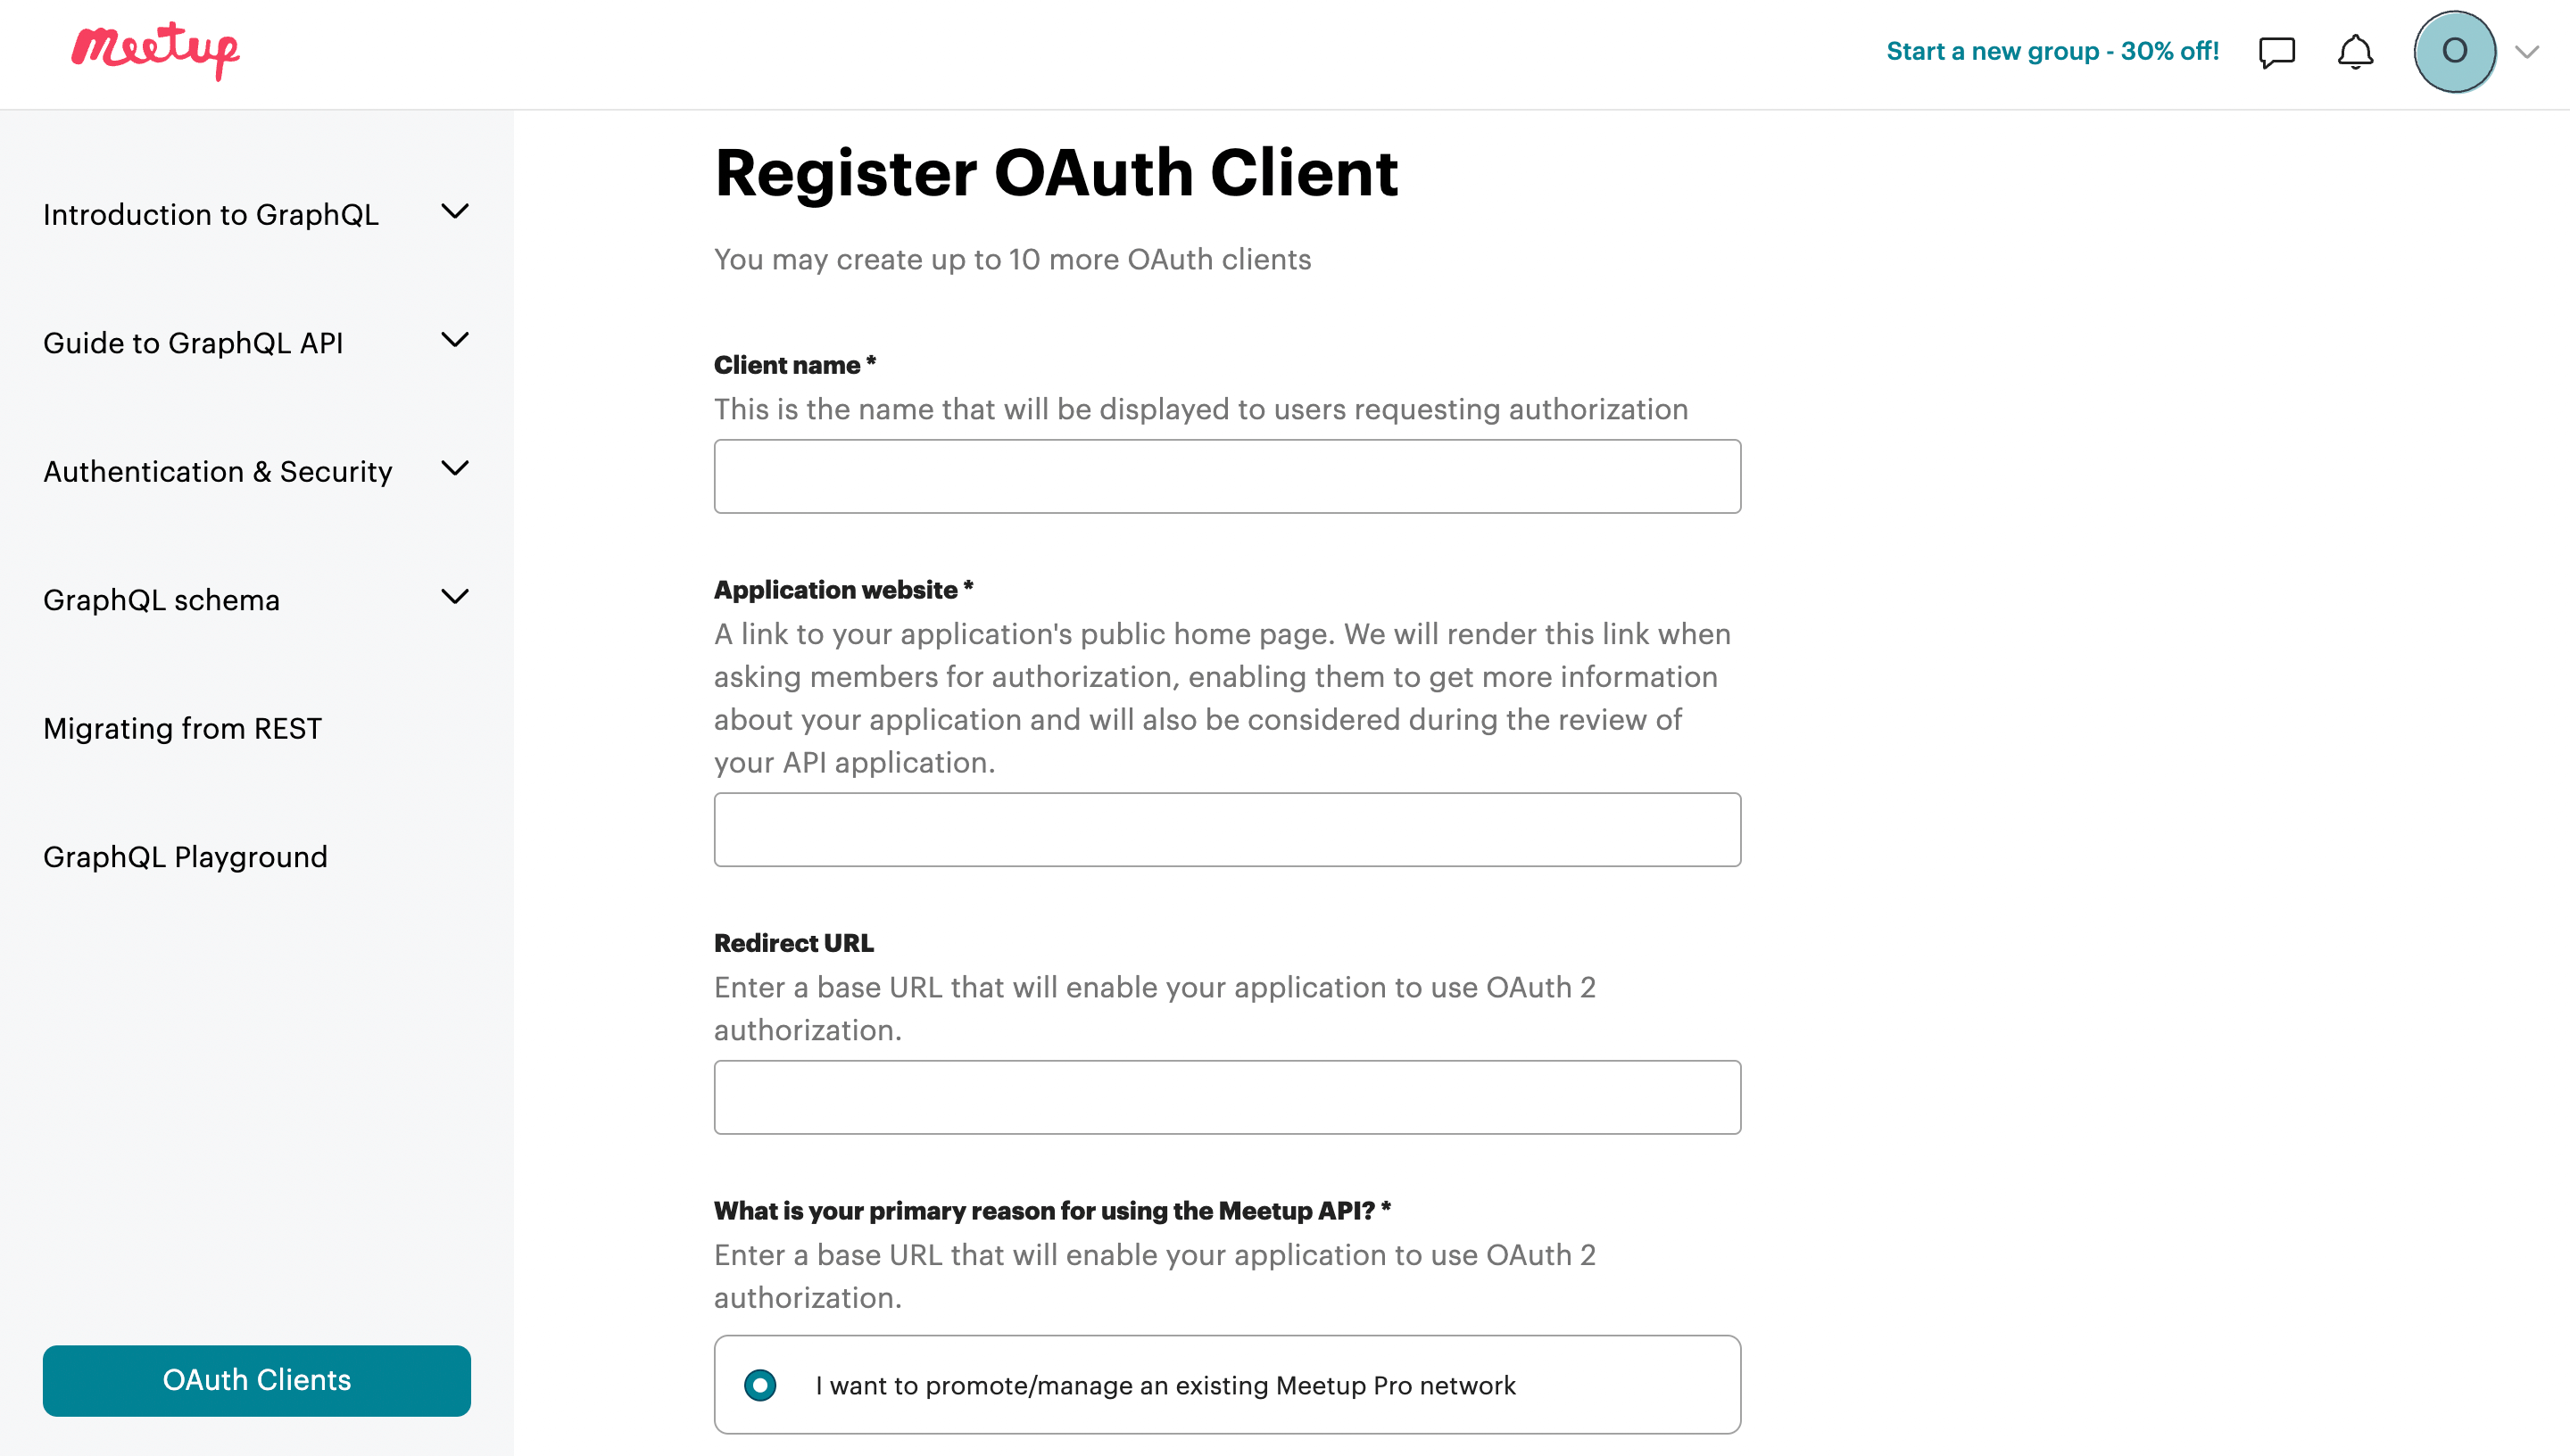
Note: From your website, navigate to M.E.Calendar > Social Poster > Meetup and copy the redirect address.
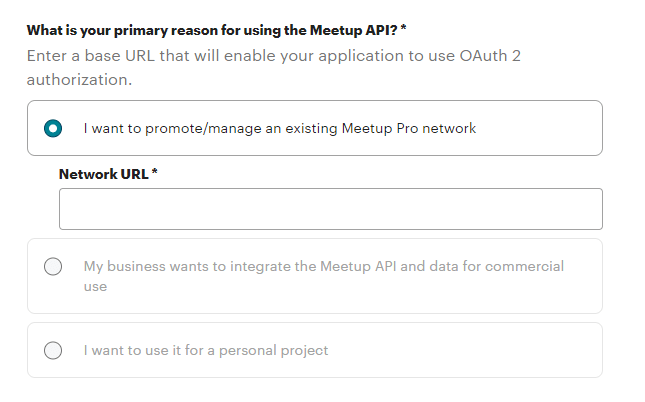
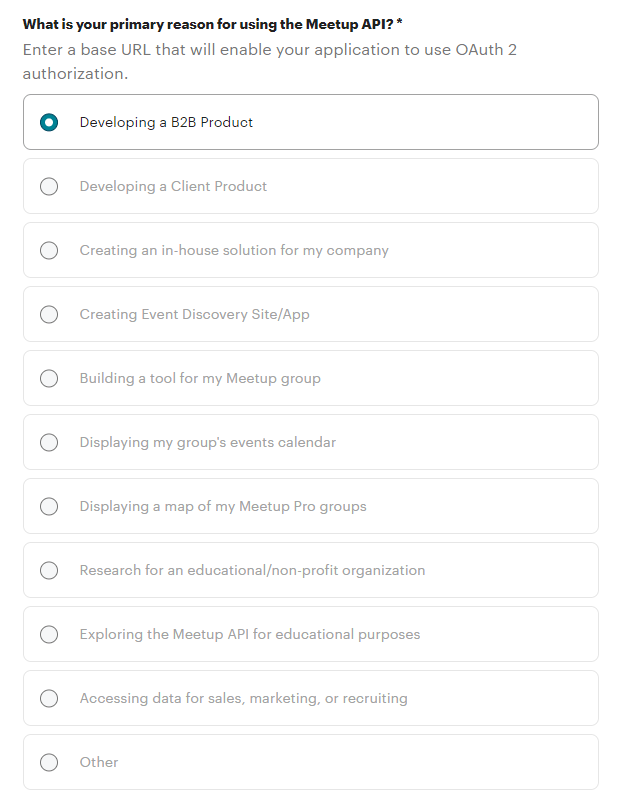
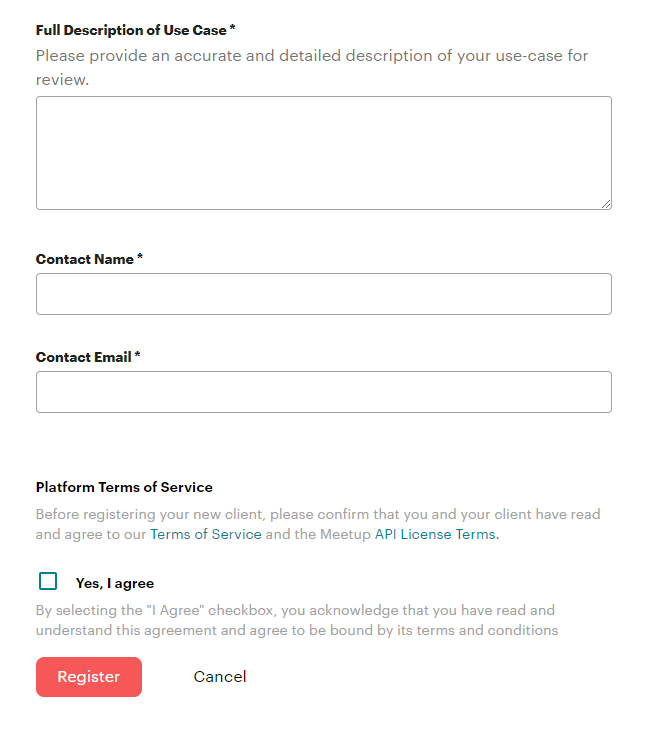
Once the form is completed, you must wait for API verification by Meetup.

Next, create a group in Meetup and get the group’s slug from the address after approval.
For example, if the group address is this:
https://www.meetup.com/mec-wordpress-plugins-group
Then the slug would be this: mec-wordpress-plugins-group
Finally, after getting the Secret Key and API Key, go to your website to M.E. Calendar> Social Poster > Meetup, add a Meetup account, and verify.
FAQ
How do I install and activate the Social Auto Poster Addon in MEC?
After purchasing the Social Auto Poster Addon, install and activate it through your WordPress dashboard. Upon activation, a new “Social Poster” feature will appear in the MEC menu, allowing you to configure your social media integrations.
What is the Social Auto Poster Addon for MEC?
The Social Auto Poster Addon is a tool that enables you to automatically post events published in the Modern Events Calendar (MEC) to your social media platforms.
Which social media platforms are supported by the Social Auto Poster Addon?
The addon supports integration with Facebook, LinkedIn, Twitter, Meetup, and Instagram, enabling automatic event posting to these platforms.
Can I connect multiple accounts from the same social media platform?
Yes, the addon allows you to link multiple accounts from each supported platform, providing flexibility in managing event promotions across various profiles.
Is it possible to schedule event posts to be published at a specific time?
Yes, in the Default Schedules section of the General tab, you can specify whether events are posted on social media immediately upon publication or after a designated period.
How do I manually publish an event to social media using the addon?
If you prefer manual control over event postings, the addon provides a manual publish option on the Edit Event page, allowing you to select and share events on social media at your discretion.
Can I assign specific event categories to be auto-posted on social media?
Yes, the addon offers category-based auto-posting, enabling you to configure certain event categories to be automatically shared on your connected social media accounts.
Can I filter which events are posted on social media?
Yes, you can filter posts based on categories, organizers, speakers, and locations.
How can I view the history and performance of my event posts on social media?
The addon includes a History section where you can access statistics about your posted content, presented in both list and chart views, to monitor and analyze your social media activity.
Can I control which events are automatically posted to social media?
Yes, you can manage auto-posting settings by selecting specific event categories for automatic sharing or opting for manual publishing to have full control over which events are posted.
How do I set up Facebook integration with the Social Auto Poster Addon?
To integrate Facebook, create a Facebook app by logging into your Facebook account and navigating to the Facebook Developers page. Follow the prompts to set up the app, configure the Facebook Login product, and enter your website’s URL in the Social Poster settings within MEC, select the Facebook API you’ve created to complete the integration.
Can I post events to my personal Facebook profile using this addon?
No, events can only be published on Facebook pages, not personal profiles.
What is a temporary access token, and how do I get one for Facebook?
A temporary access token is a short-lived token needed to connect to Facebook’s API. It can be generated through the Facebook Graph API Explorer.
How do I upgrade my Facebook access token to a longer-lasting one?
You can upgrade your temporary access token to a two-month user access token by using the Access Token Debugger Tool.
What permissions are required for the Facebook app to work with the Social Auto Poster Addon?
The Facebook app requires permissions such as `publish_video`, `business_management`, `page_events`, `pages_manage_metadata`, `pages_read_user_content`, `pages_manage_posts`, and `pages_manage_engagement`.
How do I find my Facebook Page ID for use with the plugin?
Your Facebook Page ID is located in the “Page Transparency” section of the “About” tab on your Facebook page.
How do I set up Instagram integration with the addon?
To integrate Instagram, connect your Instagram Business Account to your Facebook Page. Then, in the Social Poster settings within MEC, configure the Instagram tab by selecting the appropriate account type and entering the required credentials.
How do I integrate Twitter with the Social Auto Poster Addon?
To connect to Twitter, create a developer account on Twitter, set up a project, and configure the necessary API settings. Then, enter your Twitter API credentials in the Social Poster settings within MEC to enable automatic event posting to Twitter.
Can I share event images on Twitter using this addon?
No, it is not possible to show event images on Twitter.
How do I integrate LinkedIn with the Social Auto Poster Addon?
To connect to LinkedIn, create a LinkedIn app and verify your page. Then, in the Social Poster settings within MEC, configure the LinkedIn tab by entering the necessary app credentials to enable event posting to LinkedIn.
How do I integrate Meetup with the Social Auto Poster Addon?
To integrate Meetup with the Social Auto Poster Addon, you need to create a Meetup API key and connect your Meetup account within the addon’s settings. Navigate to the Social Poster section in MEC, select the Meetup tab, and enter the required API credentials. Once configured, your events can be automatically shared on your Meetup groups.
Where can I manage the social posting settings for an individual event?
You can manage the settings for individual events from the “Social Poster” tab on the Edit Event page.
What should I do if my events are not posted to social media as expected?
Ensure that all social media accounts are correctly connected and that the necessary API credentials are accurately entered. Verify that auto-publish settings are configured appropriately and check for any platform-specific requirements or restrictions that may affect posting.
Report Out Dated Content
If you think the content of this page does not reflect updated information, please let us know.