Choosing the Right Modern Events Calendar View
An events page only works if visitors can find a date quickly. A school needs a timetable, a venue needs a monthly calendar, and a conference built around one big day needs a countdown. Modern Events Calendar (MEC) covers all of these with its views, the layouts it uses to show your events on the front end of your site.
This guide goes through each view, where it fits best, and how to put one on a page. If you are still deciding between versions, the MEC comparison table shows what Lite and Pro each include.
Every view is created as a shortcode, so one site can use a different layout on each page. You won’t need any code for the basics.
Key Takeaways
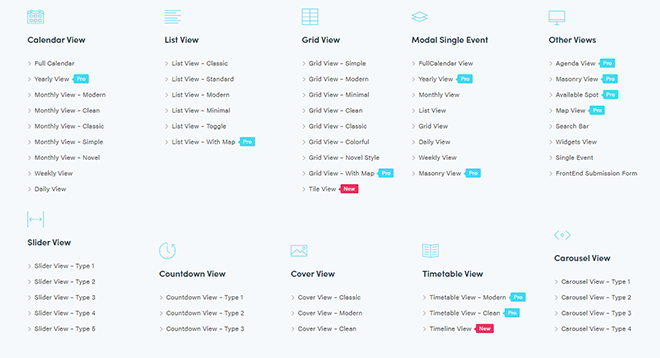
- MEC includes more than 15 view types, from full calendars and lists to countdowns, maps and timetables, with more than 60 layouts across them.
- Most views come in several styles. The List view has five layouts, the Grid view seven and the Slider view five.
- You create each view as a shortcode under M.E. Calendar > Shortcodes, then paste it into any page.
- When the built-in styles aren’t enough, MEC’s Elementor add-ons let you design shortcodes, single event pages and forms visually.
One Plugin, All Views
Different pages need different things. On a homepage you might only want the next three events in a slider. On a dedicated events page, a full calendar with search and filters makes more sense. MEC lets you create as many shortcodes as you need, each with its own view, style and filters, such as category, location or organizer.
These are the main views you can choose from:
- Full calendar
- Yearly, monthly, weekly and daily views
- List view
- Grid view
- Masonry view
- Slider view
- Countdown view
- Cover view
- Timetable view
- Carousel view
- Timeline, agenda, tile, map, available spot and general calendar views
Calendar View
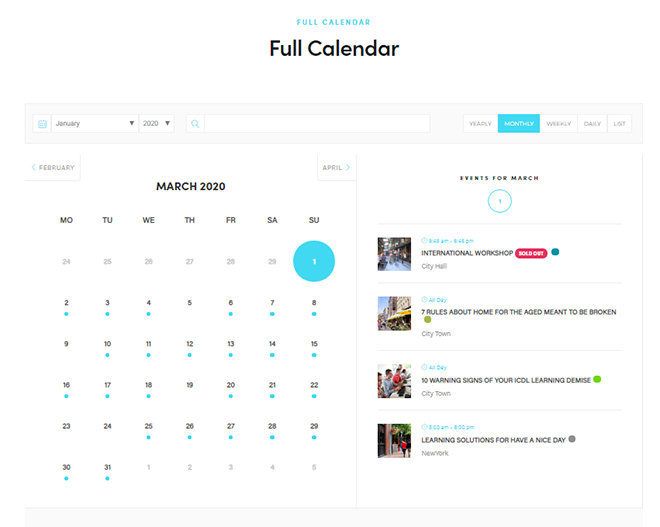
The full calendar puts everything in one place. Visitors switch between tabs such as yearly, monthly and weekly, and they can search and filter events without leaving the page. It works best as your main events page, where people come to browse rather than check one date.
The yearly view shows all twelve months at once, with event dates marked on each. It is most useful for organizations that plan far ahead, like clubs or training providers that publish a full year of sessions.

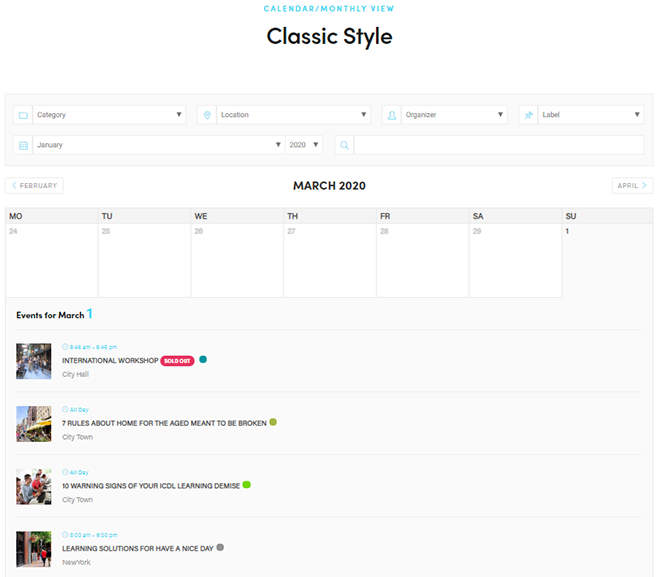
The monthly views are the ones most sites end up using. They come in several styles, including Classic, Clean, Modern, Simple and Novel, so you can match the calendar to your theme instead of the other way around.
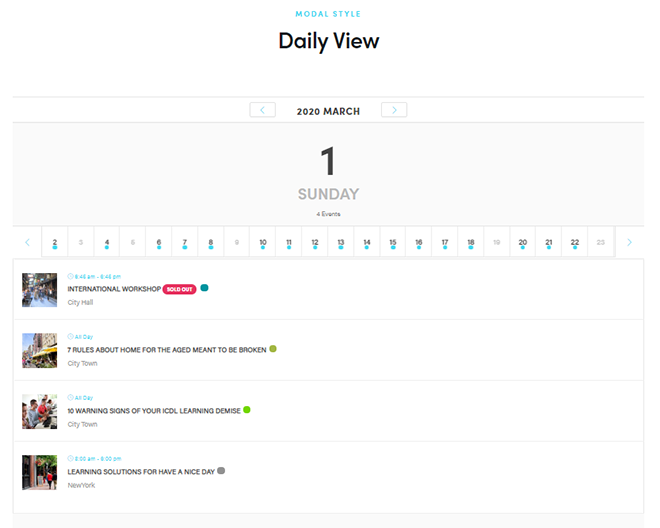
Weekly and daily views are narrower. They show only that week’s or that day’s events, with the key details visible, which suits gyms, studios and venues with a busy daily schedule.
List View
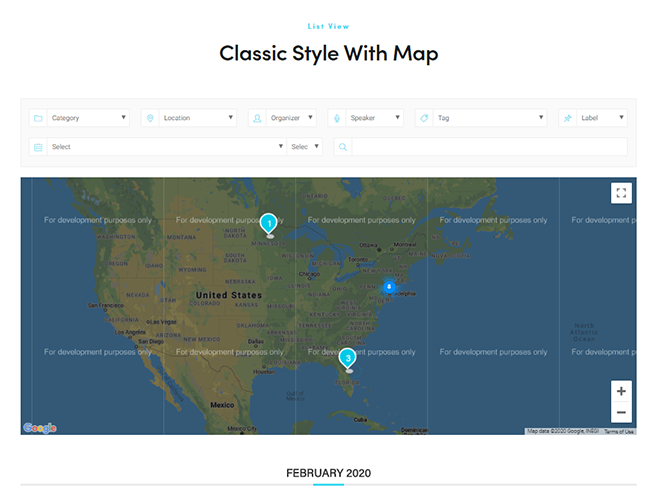
The list view is the simplest way to show upcoming events: dates, titles and short details in one column. It has five layouts (Classic, Standard, Modern, Minimal and Toggle) and copes with long schedules better than most other views.
If your events happen in different cities, pair the list with the map view. Each event appears as a pin, so visitors can spot the ones near them before reading the details.
Grid View
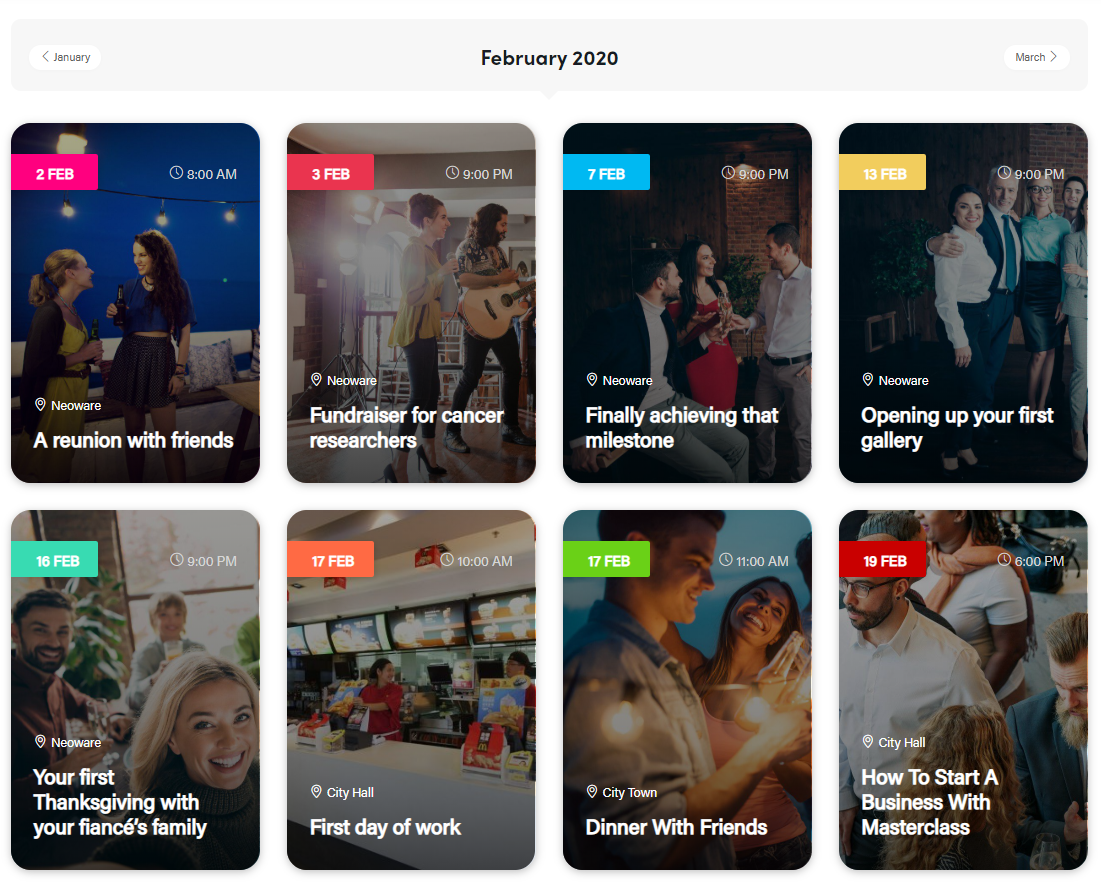
The grid view places events in cards, each with an image, date and title. It suits sites with good event photos, and visitors can open any event straight from its card.
Grid comes in seven formats. One of them is the tile view, which drops most of the text and arranges events as image tiles by date, a nice option for a minimal design.
Masonry View
The masonry view is a grid with cards of different heights, a bit like a Pinterest board. It works well when your event images come in different sizes and you want the page to feel less rigid.

Slider View
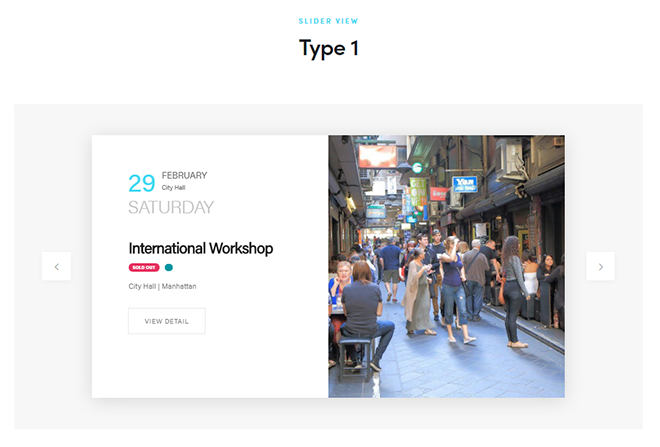
A slider shows one event at a time, large and in the middle of the screen, and lets visitors click through the rest. It’s a common choice for the top of a homepage.
There are five slider formats. Some place the event details over the image, others put the image on top and the details underneath.
Countdown View
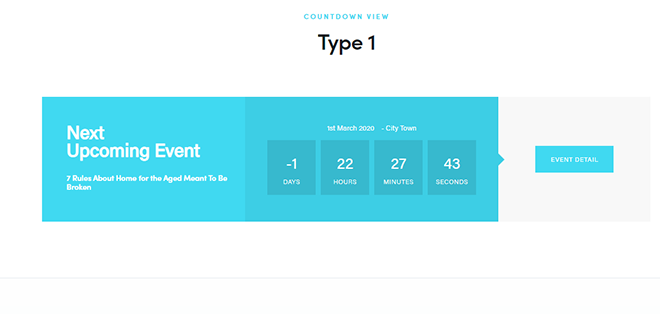
The countdown view focuses on one upcoming event and counts down the days, hours and minutes until it starts.
Save it for the event you really need people to notice, such as an annual conference or a launch. A ticking clock is a simple, honest reminder that registration won’t stay open forever.
Cover View
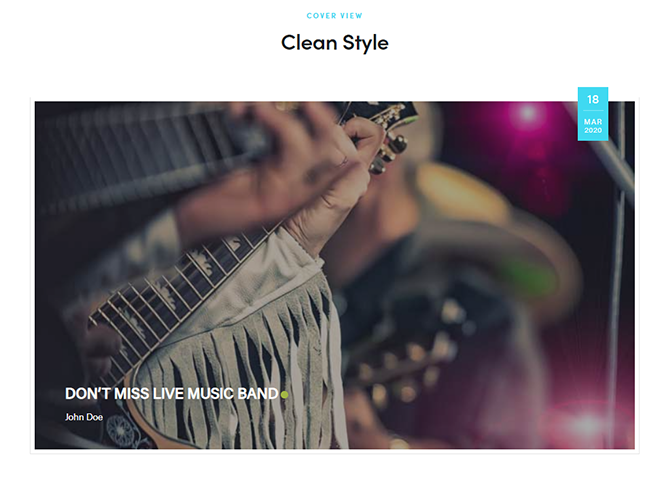
The cover view also highlights a single event, but it leads with the image. If you have a strong photo or poster for the event, this view gives it the room it deserves.
Timetable View
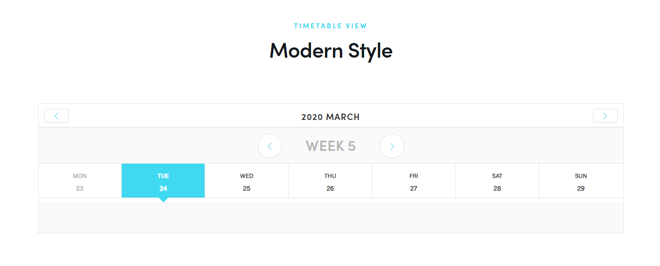
The timetable view lays events out by day and time, like a class schedule. It comes in two layouts, Modern and Clean.
Schools, universities, fitness studios and multi-track conferences get the most out of it, because visitors can see what comes before and after the session they care about.
Carousel View
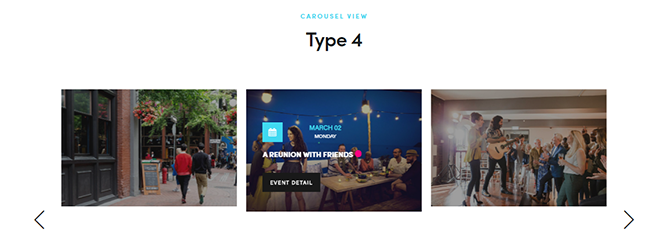
The carousel view shows several events side by side and scrolls through them, with a light hover effect on each card. It fits well in a homepage section or below a blog post where space is tight.
Other Views
MEC has a few more views for specific situations:
- Timeline: events in date order along a vertical line, good for a season or a festival program.
- Agenda: a compact list grouped by date, with a link to each event’s full page.
- Available spot: features one event together with the places still left.
- General calendar: a single, straightforward calendar layout for when you don’t need tabs.
- Widgets: a small calendar or a short list of upcoming events for sidebars and footers.
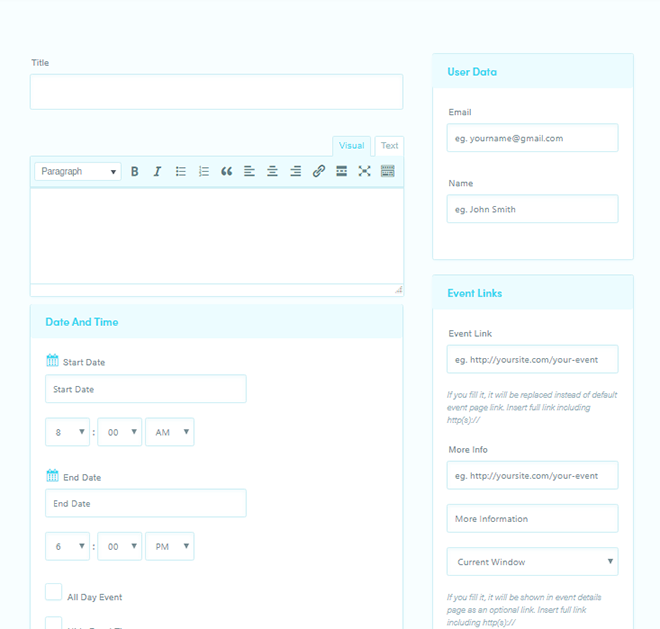
Frontend event submission isn’t a view, but it often lives on the same pages. It lets visitors submit their own events through a form on your site, without logging in to the WordPress dashboard.
You choose which fields appear on that form in the Frontend Event Submission settings of MEC.
How to Use Different Views on MEC?
Every view starts as a shortcode. In your WordPress dashboard, go to M.E. Calendar > Shortcodes and add a new one.
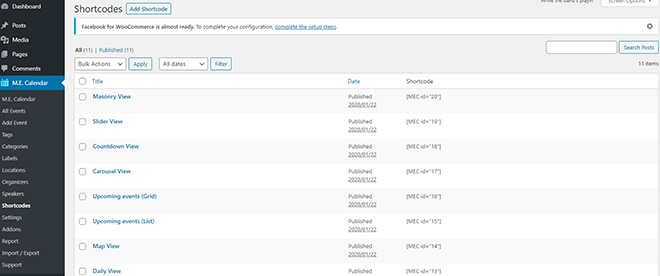
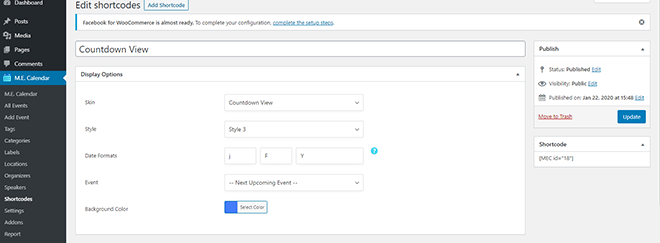
Pick a skin (MEC’s name for a view), then choose its style. Each skin has its own options, and you can also limit which events appear by category, location, organizer, label or tag.
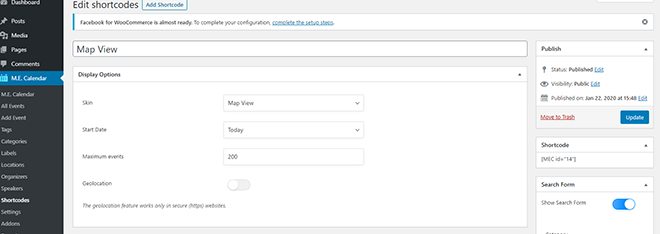
For example, with the map view you can set a start date, cap how many events load and turn on geolocation so the map centers on the visitor’s area.
Save the shortcode, copy it and paste it into any page or post, using a Shortcode block or your page builder’s shortcode widget. If you change the shortcode settings later, every page that uses it updates on its own.
More Customization by Elementor
The built-in styles cover most sites. When they don’t, you can design your own layouts in Elementor with MEC’s Elementor add-ons.
There are add-ons for shortcodes, single event pages, booking forms and the frontend submission form. They are sold separately on the addons page, and most of them work with both MEC Lite and MEC Pro. The Form Builder is the exception, because it builds on the booking module that only MEC Pro has.
Elementor Shortcode Builder
The Shortcode Builder lets you create MEC shortcodes inside the Elementor editor and see your events while you set them up, instead of jumping between the dashboard and the page.
You can restyle each part of the view and hide the elements you don’t need, such as the location or the read more button.
The video below gives a quick tour.

Elementor Shortcode Builder Addon
It enables you to create shortcodes in Elementor Live Editor. Adding this widget to your pages allows previewing the events and placing the shortcodes in pages with ease.

Elementor Single Builder
The Single Builder replaces the default single event page with a template you design in Elementor. You decide where the date, map, booking form and speakers go, and you can arrange them differently for desktop, tablet and mobile.
Here’s how it works:

Elementor Single Builder Addon
It provides you with the ability to edit single event page using Elementor. Manage the position of all elements in the Single page and in desktops, mobiles and tablets as well.
Elementor Form Builder
If you sell tickets with MEC Pro, the Form Builder lets you design the booking form in Elementor. You can add different field types, drag them into the order you want and style them to match the rest of your site.
This short video shows the add-on in action:

Elementor Form Builder Addon
Use this Add-on to build your form in Elementor Editor. It allows you to use many different type of fields and rearrange them by drag and drop and modify their styles.
Elementor Shortcode Designer
The Shortcode Designer goes a step further than the builder. Instead of adjusting an existing skin, you design the event card itself in Elementor and use it as the layout of a shortcode.
You control where each element sits, how many events appear and whether a map is shown, all from the Elementor editor.
Watch the video to see how it works.

Elementor Shortcode Designer Addon
Design your own shortcode layouts in the Elementor editor and control the position and style of every element.
Fluent View Layouts

If you like the default views but want a more current look, the Fluent View Layouts add-on adds a fresh set of skins to MEC’s views.
It works with both MEC Lite and MEC Pro. A license costs $39 for one site, $99 for five sites or $179 for ten, and each includes a year of updates and support (as of November 2026).
Prefer a different style? The Liquid View Layouts add-on is another option, and you can compare the two on the addons page.

Fluent View Layouts Addon
A modern set of skins for your calendar views that works with both MEC Lite and MEC Pro.
Which View Should You Use?
There’s no single best view. A list or full calendar suits a main events page, a countdown or cover view suits one important event, and a timetable suits anything with fixed weekly sessions.
Start with one shortcode for your main events page, watch how visitors use it, and add other views where they make sense. Because each view is just a shortcode, trying a different one takes a couple of minutes.