MEC Integration Addon for Zoom
Introduction
The Zoom Integration Addon allows you to connect your Zoom account to Modern Events Calendar (MEC) and manage Zoom Meetings and Webinars directly from your WordPress dashboard.
The new generation of the Zoom Integration Addon introduces a completely redesigned connection process. Unlike previous versions, you no longer need to create or configure a Zoom OAuth application manually.
Instead, the addon uses a secure OAuth authentication flow through Webnus, allowing you to connect your Zoom account with just a few clicks.
The addon supports:
- Secure OAuth authentication
- Server-to-Server authentication
- Importing Zoom Meetings and Webinars
- Two-way synchronization between MEC and Zoom
- Automatic synchronization
- Real-time updates using Zoom Webhooks
- Multiple Zoom accounts
Note
The Zoom Integration Addon is developed and maintained by Webnus and uses the official Zoom APIs to provide Zoom integration for Modern Events Calendar. Zoom is a trademark of Zoom Communications, Inc.
Initial Setup
To successfully connect MEC with Zoom, you must meet the following requirements and complete the application handshake.
Requirements
- MEC Pro or Lite: This addon is compatible with both the Pro and Lite versions of Modern Events Calendar. Note that certain advanced booking features may vary depending on your base MEC version.
- Zoom Account: You must have a valid Zoom account to connect MEC with Zoom.
- Activation: Ensure both Modern Events Calendar and the Zoom Integration Addon are installed and activated on your WordPress site
A Basic Zoom account is sufficient for creating and managing Zoom Meetings.
Some Zoom features, including Webinars, require additional licenses provided by Zoom. The available webinar options depend entirely on your Zoom subscription.
Read Also:
How to install MEC and Addons?Installing the Addon
Installation is identical to previous versions.
- Install the Zoom Integration Addon.
- Activate the addon.
- Navigate to:
MEC → Zoom Integration
The addon contains three primary sections:
- Accounts
- Import
- Sync
Adding Your Zoom Account (OAuth)
OAuth is the recommended connection method for most users.
Unlike previous releases, you do not need to create or configure a Zoom OAuth App manually. The addon securely connects your Zoom account through Webnus using Zoom’s official OAuth authorization flow.
Prerequisites
Before connecting your Zoom account, make sure that:
- MEC and the Zoom Integration Addon are installed and activated.
- You have a valid Zoom account.
- Your website can communicate with Zoom services.
Connect Your Account
- Navigate to:
MEC → Zoom Integration → Accounts
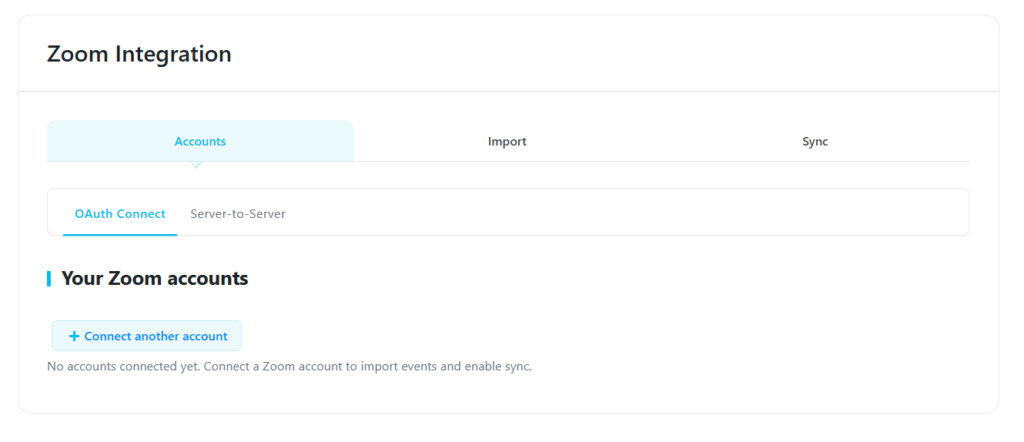
- Open the OAuth Connect tab.
- Click Connect Another Account.
- You will be redirected to Zoom.
- Sign in using your Zoom account.
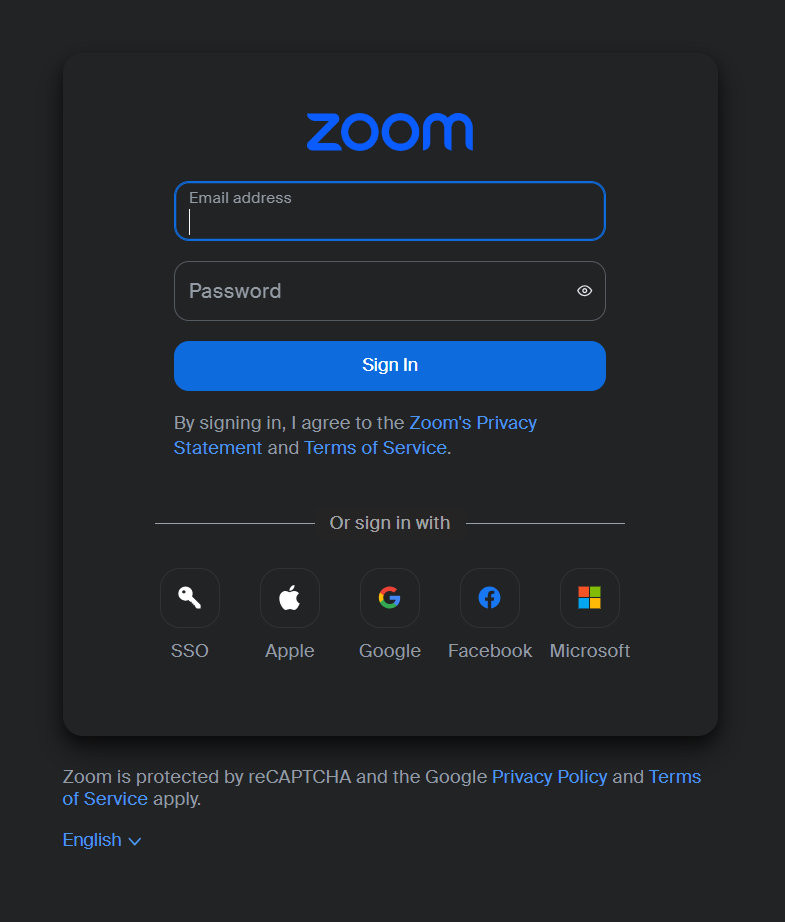
- Review and approve the requested permissions.
- After you approve the authorization request, Zoom grants the permissions required for MEC to access your Zoom account. No additional permission configuration is required..
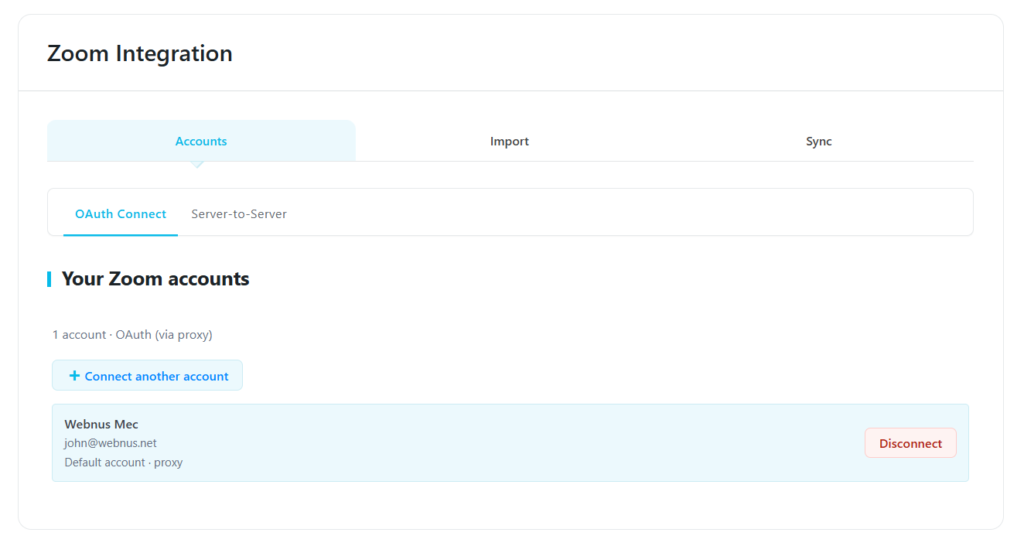
- Your Zoom account will appear in the connected accounts list and is ready to use.
The connection is now complete and your Zoom account is authorized to communicate with Modern Events Calendar.
You can immediately begin importing Zoom Meetings, creating new Zoom Meetings from MEC events, or enabling Two-Way Synchronization.
Note
If you experience any problems while connecting your Zoom account, please refer to the Troubleshooting section at the end of this document.
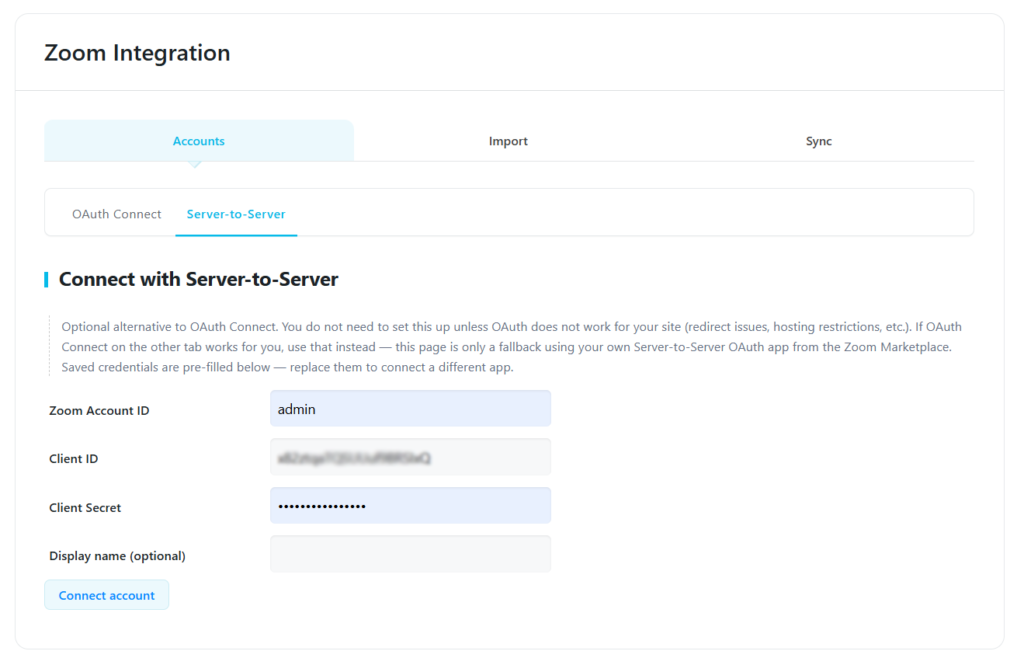
Connecting Using Server-to-Server
For advanced users, the addon also supports Zoom Server-to-Server authentication.
This connection method requires your Zoom Client ID and Client Secret, similar to previous addon versions.
Managing Multiple Zoom Accounts
The addon supports connecting multiple Zoom accounts.
Connected accounts are displayed in the Accounts page.
You can switch between connected accounts at any time.
Each organizer can select the Zoom account associated with them when creating Zoom Meetings or Webinars.
The selected account determines which Zoom features are available for that event, including Meeting and Webinar support.
The maximum number of connected accounts depends on your Zoom account limitations.
Importing Zoom Sessions
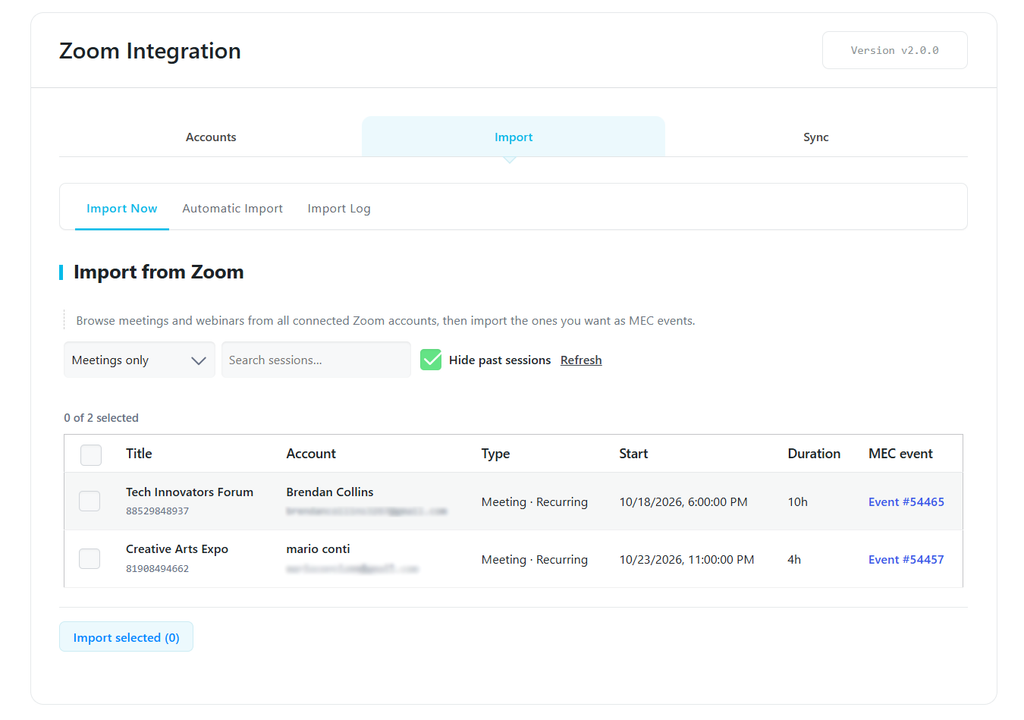
The Import section allows importing Zoom Meetings and Webinars into MEC.
It contains three tabs:
- Import Now
- Automatic Import
- Import Log
Import Now
Use Case
Import existing Zoom Meetings or Webinars from your connected Zoom accounts into Modern Events Calendar.
Prerequisites
- At least one connected Zoom account.
- Existing Meetings or Webinars in the connected Zoom accounts.
This page lists all available Meetings and Webinars across your connected Zoom accounts. Each session displays the Zoom account it belongs to, making it easy to identify the source account before importing.
Select the desired sessions and click Import to create MEC events.
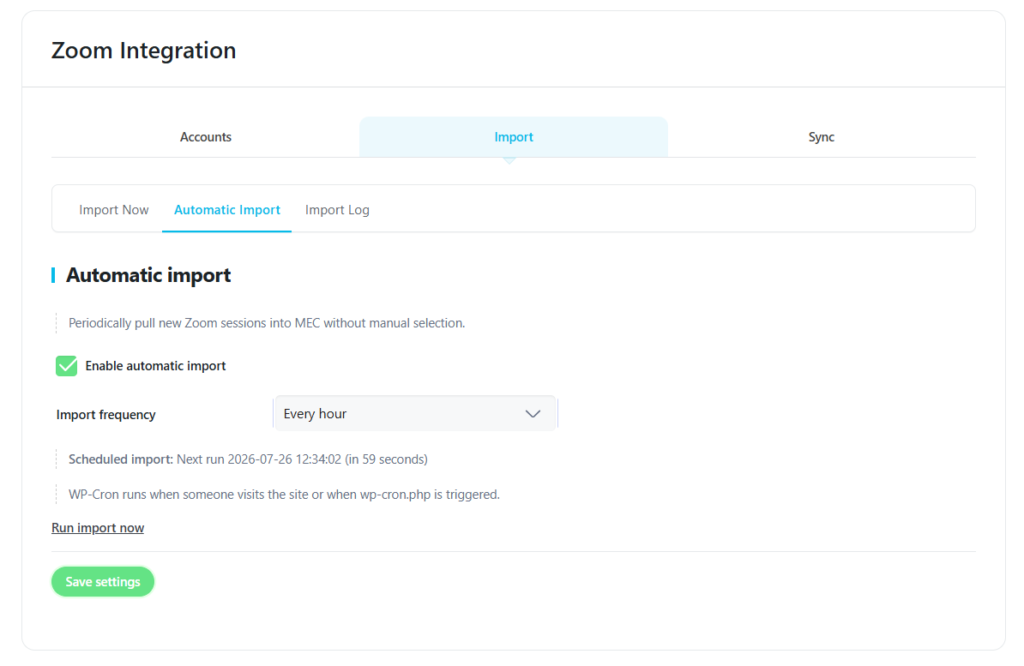
Automatic Import
Use Case
Automatically import newly created Zoom Meetings or Webinars into MEC.
Prerequisites
- A connected Zoom account.
- Automatic Import enabled.
Automatic Import periodically imports newly created Zoom sessions into MEC.
Available schedules include:
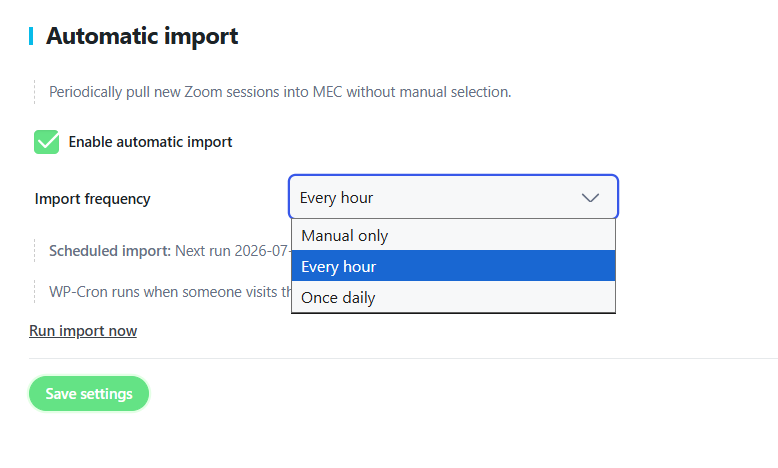
- Manual Only
- Every Hour
- Once Daily
Import Log
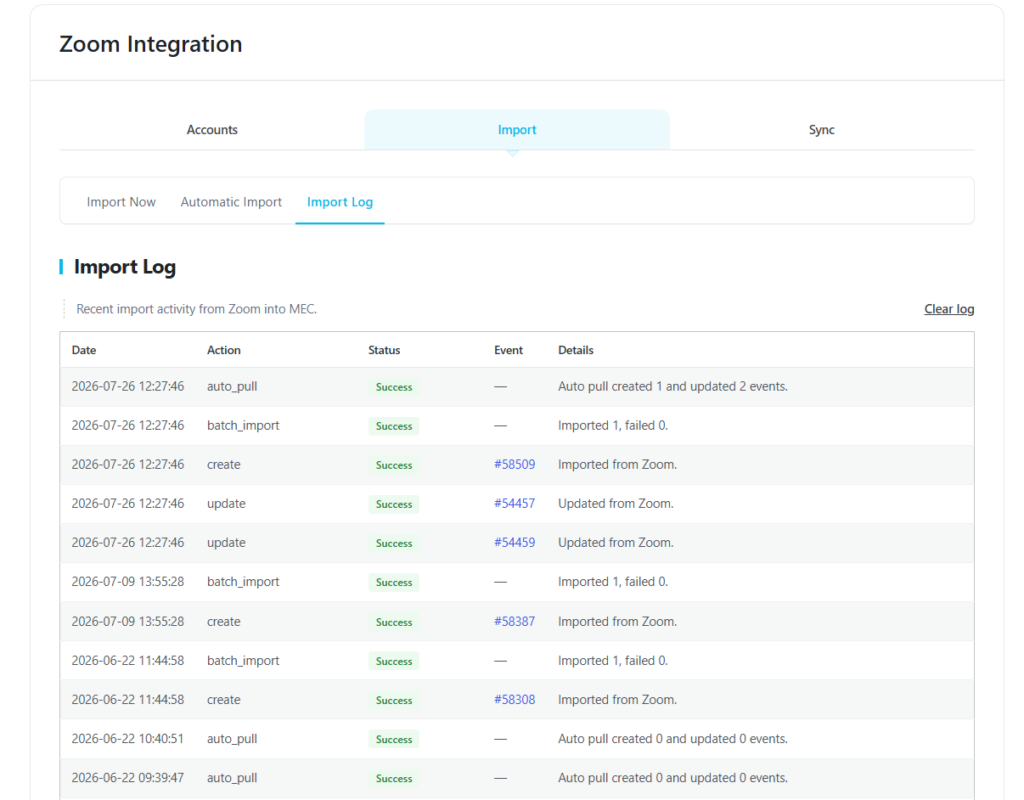
Displays the recent import history between Zoom and MEC.
Use this page to verify successful imports or investigate failed import attempts.
Synchronization
The Sync section keeps Zoom and MEC synchronized.
It contains four tabs:
- General
- Advanced
- Webhooks
- Sync Log
General
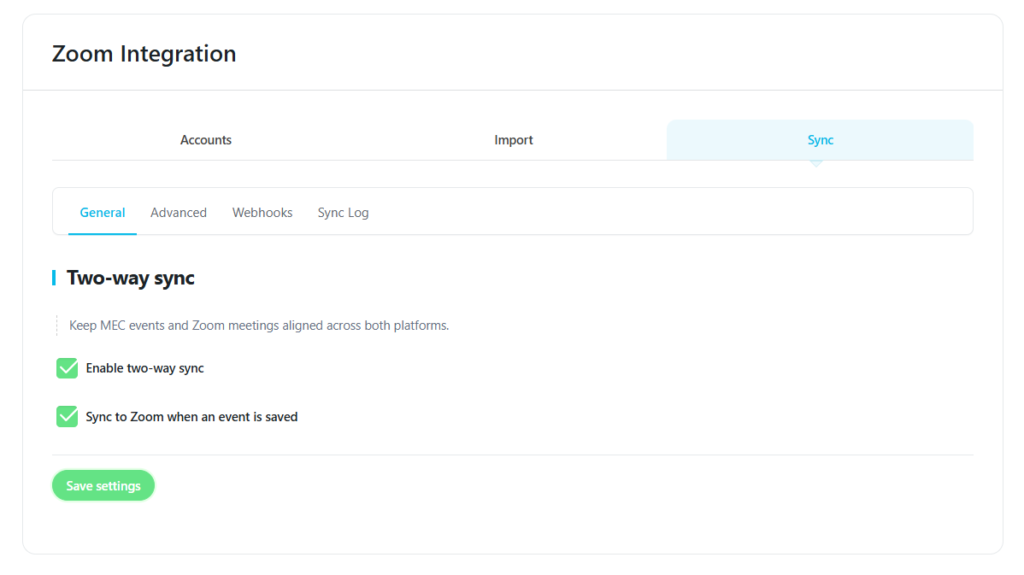
Enable Two-Way Sync
Use Case
Automatically synchronize changes between MEC and Zoom.
Prerequisites
- A connected Zoom account.
- Two-Way Sync enabled.
Keeps MEC events and Zoom sessions synchronized in both directions.
Sync to Zoom when an Event is Saved
Automatically pushes event changes to Zoom whenever an event is saved.
Advanced
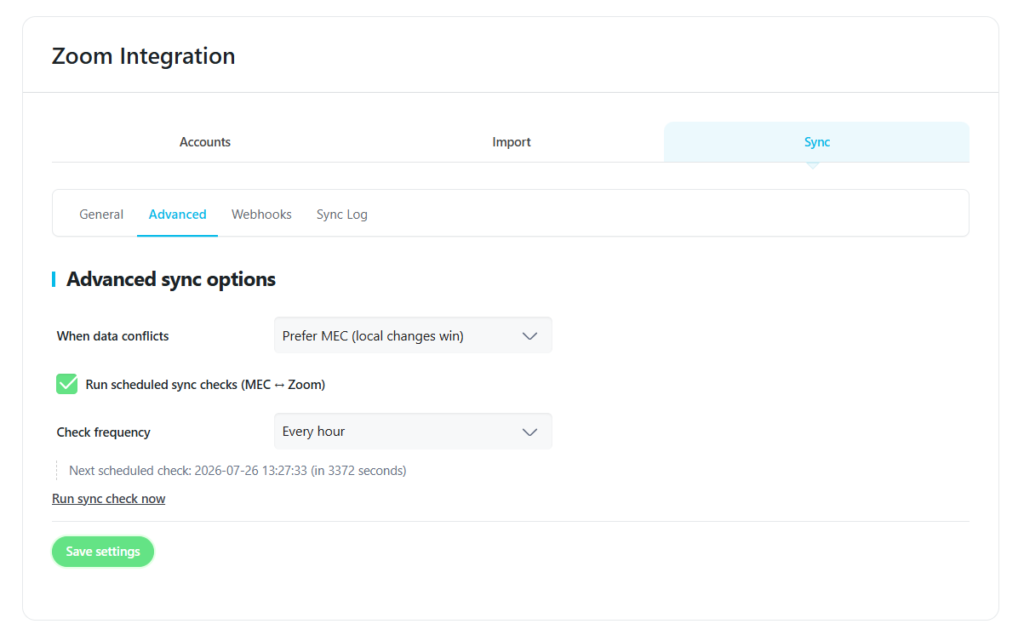
Conflict Resolution
Choose which platform has priority whenever conflicting data exists.
Available options:
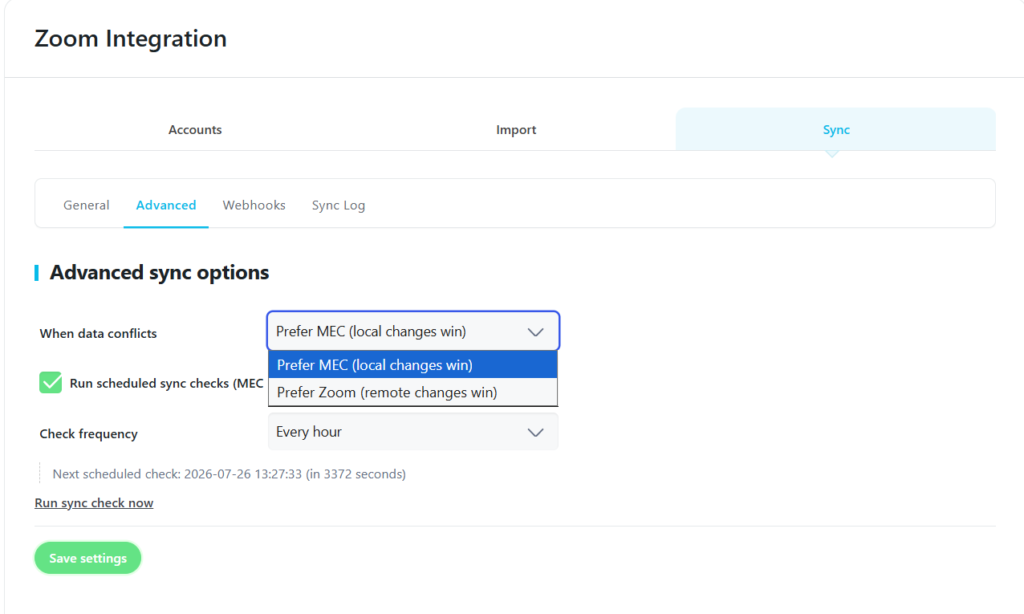
- Prefer MEC
- Prefer Zoom
By default, MEC has priority.
Scheduled Synchronization
Synchronization can be configured to run:
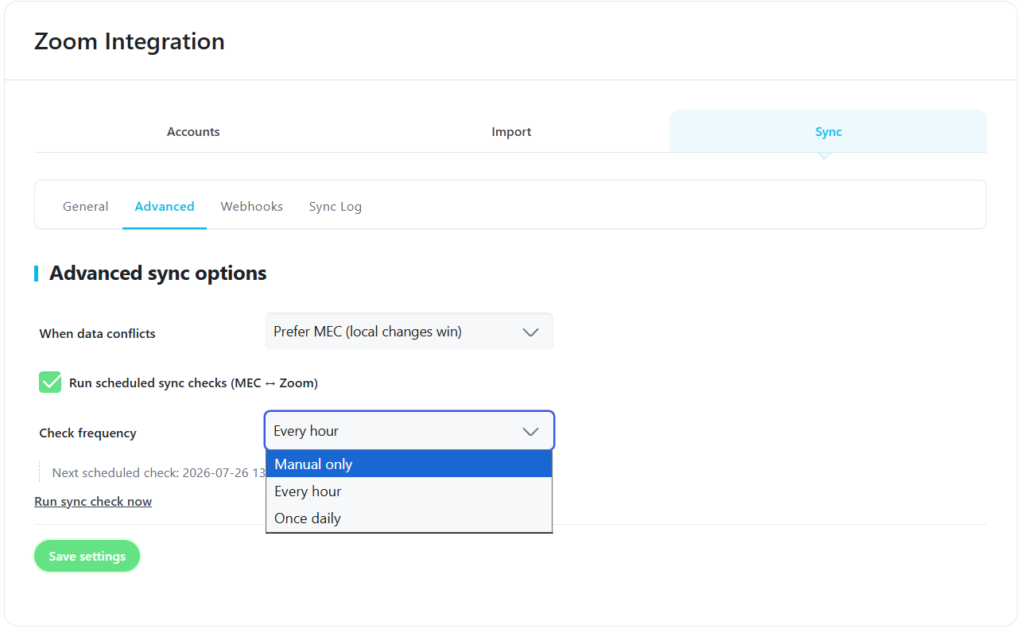
- Manual Only
- Every Hour
- Once Daily
Webhooks
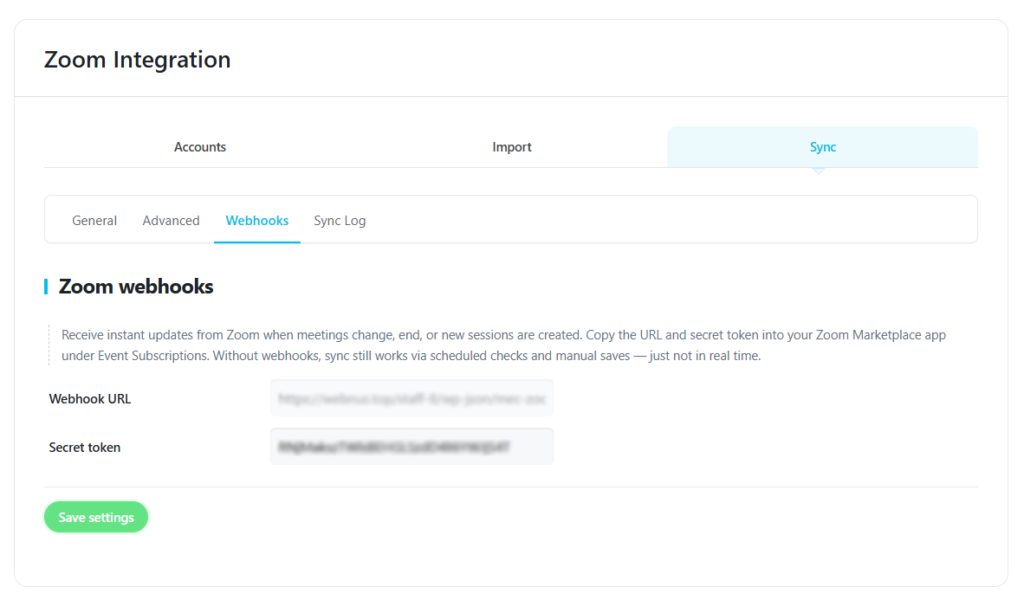
Use Case
Receive Zoom updates immediately without waiting for scheduled synchronization.
Prerequisites
- A connected Zoom account.
- Webhooks configured inside your Zoom App.
Copy the generated Webhook URL and Secret Token into your Zoom Server-to-Server App under Event Subscriptions.
Webhooks are optional but recommended for real-time synchronization.
If Webhooks are not configured, synchronization continues to work through scheduled synchronization and manual updates.
This step is required only when using your own Zoom Server-to-Server application.
If you are using the recommended OAuth connection through Webnus, the authorization process is handled automatically and no manual OAuth App setup is required.
Sync Log
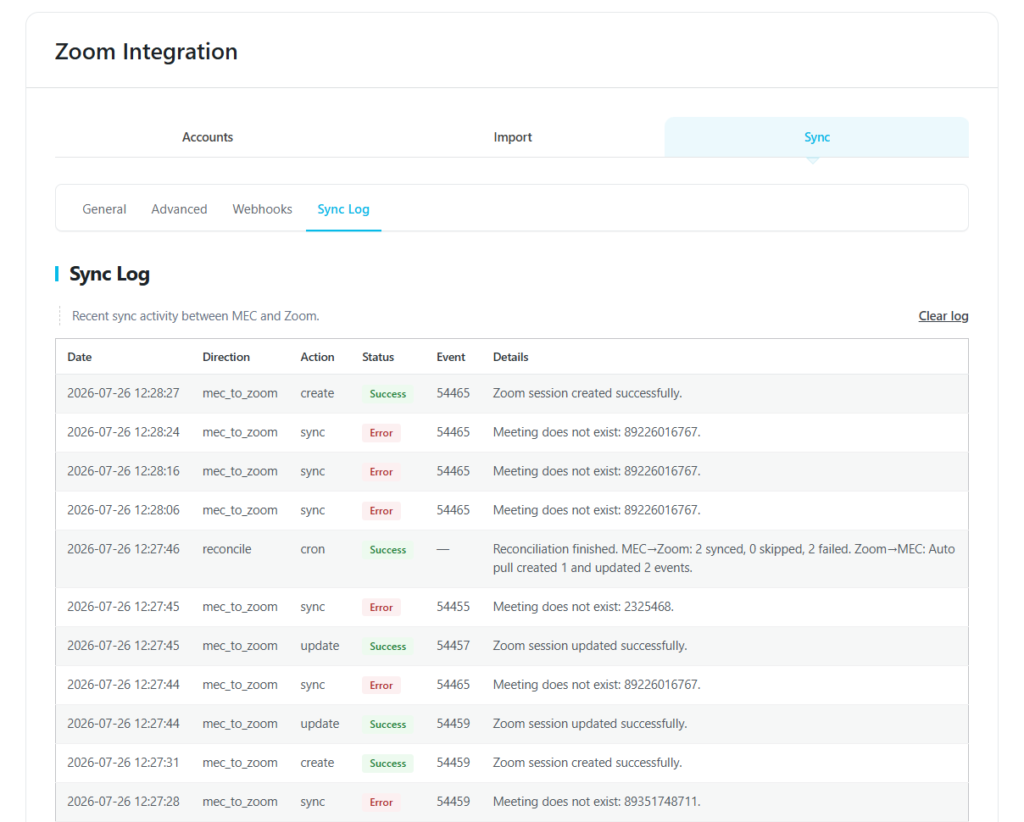
Displays recent synchronization activity between MEC and Zoom.
Use this page to review synchronization history and identify possible issues.
Using Zoom with Events
Note
The Zoom settings available within the Event Editor are dynamically displayed based on the connected Zoom account, the selected meeting type, and the features supported by your Zoom subscription.
As a result, some settings or options described below may not be available for every Zoom account.
Each event can have its own Zoom configuration.
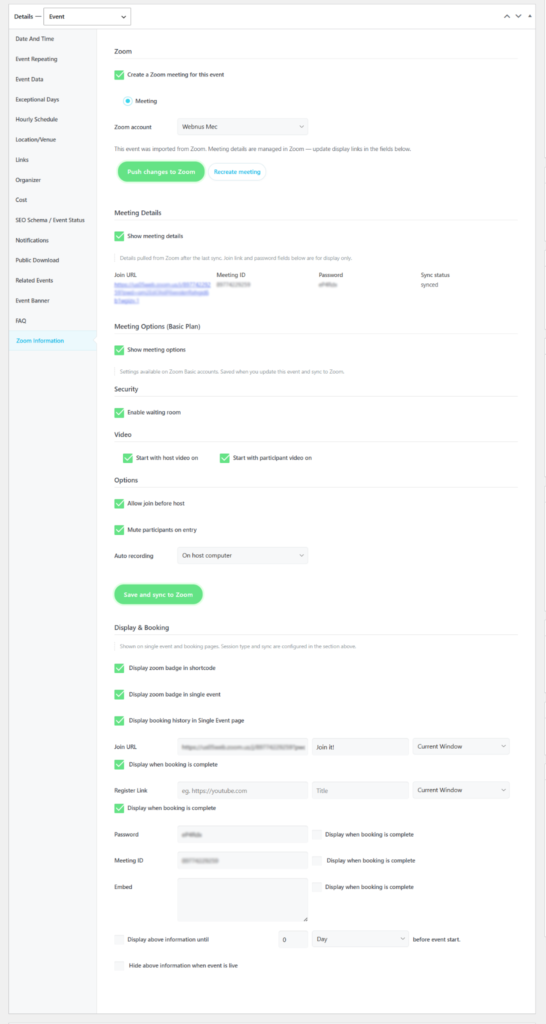
The Zoom Information panel inside the Event Editor allows you to:
- Enable Zoom for the event
- Select Meeting or Webinar
- Choose the connected Zoom account
- Push the event to Zoom
- Synchronize changes
- View Zoom meeting information
Note
The available meeting types depend on the capabilities of the connected Zoom account. If the selected account does not support Zoom Webinars or does not have the required Zoom license, only the Meeting option will be available. You can reconnect a different Zoom account at any time to access additional meeting types and features supported by that account.
Configuring Zoom Meeting Settings
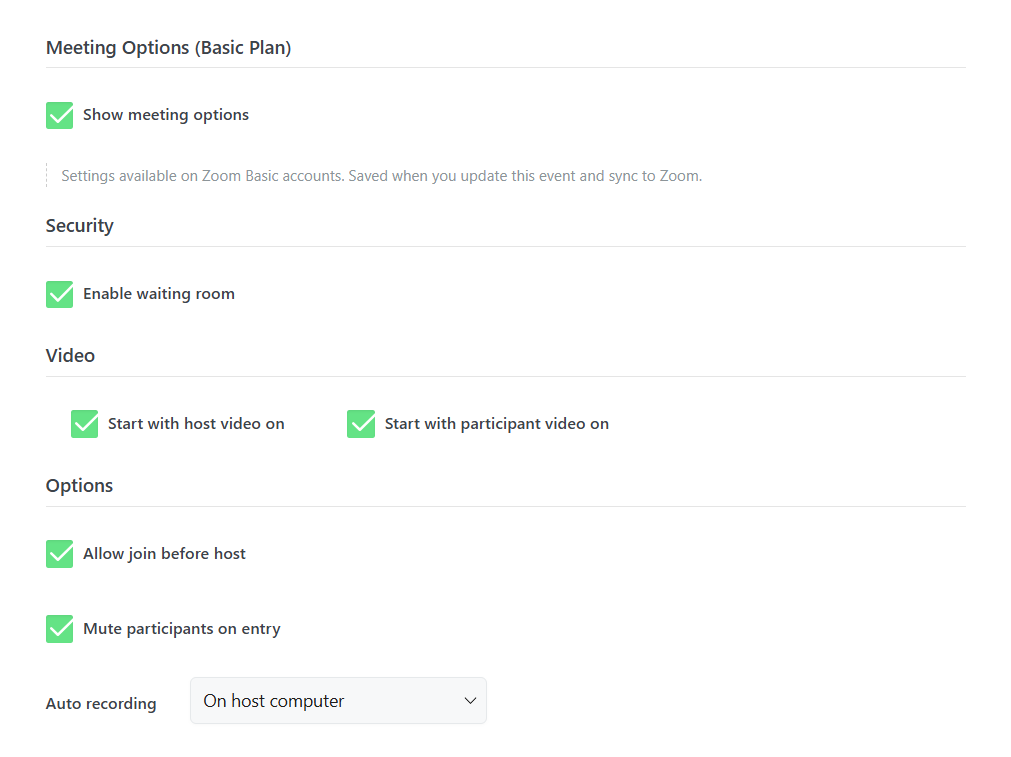
The Zoom Information panel includes several groups of settings that allow you to configure how the Zoom Meeting or Webinar will be created.
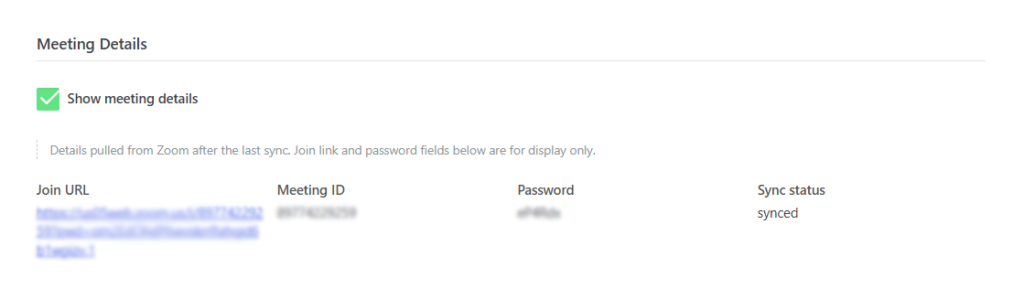
Meeting Details
The Meeting Details section displays information about the Zoom Meeting or Webinar associated with the current event.
Enable the Show Meeting Details option to display the meeting information directly within the Event Editor.
Depending on the meeting status, this section may display:
– Join URL
– Meeting ID
– Password
– Synchronization Status
This information is automatically retrieved from the connected Zoom account after the Meeting or Webinar has been created.
Meeting Options
Configure the behavior of the Zoom session for hosts and participants.
Depending on your Zoom account, this section may include options related to participant management, registration, meeting behavior, and other Zoom features.
Security
Configure the security settings for the Zoom session.
Depending on your Zoom account capabilities, available options may include passwords, waiting rooms, authentication requirements, and other security-related features.
Video
Configure the default video behavior for hosts and participants when the meeting starts.
Options
Additional Zoom Meeting or Webinar settings are available in this section.
The available options depend on the connected Zoom account, selected meeting type, and the features included with your Zoom subscription.
Important
The settings displayed in these sections are provided by Zoom and may vary depending on the connected Zoom account and its available features. Users with different Zoom plans may see different configuration options.
Push to Zoom
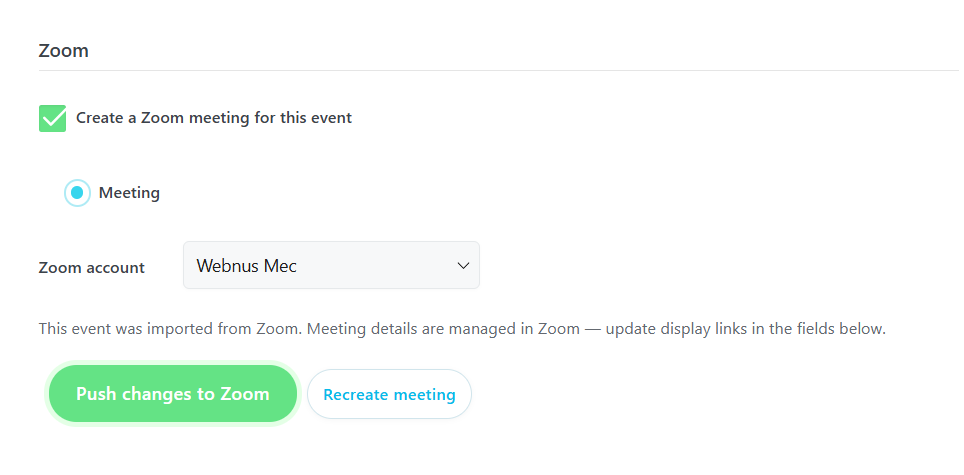
Use Case
Create a new Zoom Meeting or Webinar directly from an MEC event.
Prerequisites
- A connected Zoom account.
- Zoom enabled for the event.
- Two-Way Sync enabled under MEC → Zoom Integration → Sync → General.
Click Push Changes to Zoom to create the meeting.
After creation, MEC automatically retrieves:
- Meeting ID
- Join URL
- Password
- Meeting Details
The available meeting options depend on your Zoom account type and subscription.
If the event has already been linked to a Zoom Meeting, use Save & Sync instead of Push to Zoom to update the existing meeting.
Save and Sync
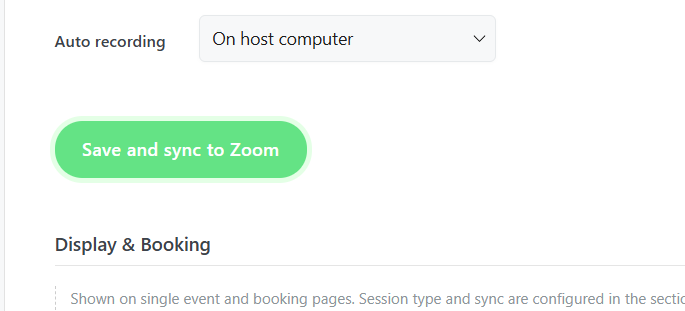
Use Case
Update an existing Zoom Meeting after editing an event.
Prerequisites
- An existing linked Zoom Meeting.
- Two-Way Sync enabled under MEC → Zoom Integration → Sync → General
Click Save and Sync to update the existing Zoom Meeting with the latest event information.
Disconnecting Your Zoom Account
If you no longer wish to use the Zoom Integration Addon, you can disconnect your Zoom account at any time.
Disconnecting an Account
- Navigate to:
MEC → Zoom Integration → Accounts
- Locate the connected account.
- Click Disconnect (or remove the connected account).
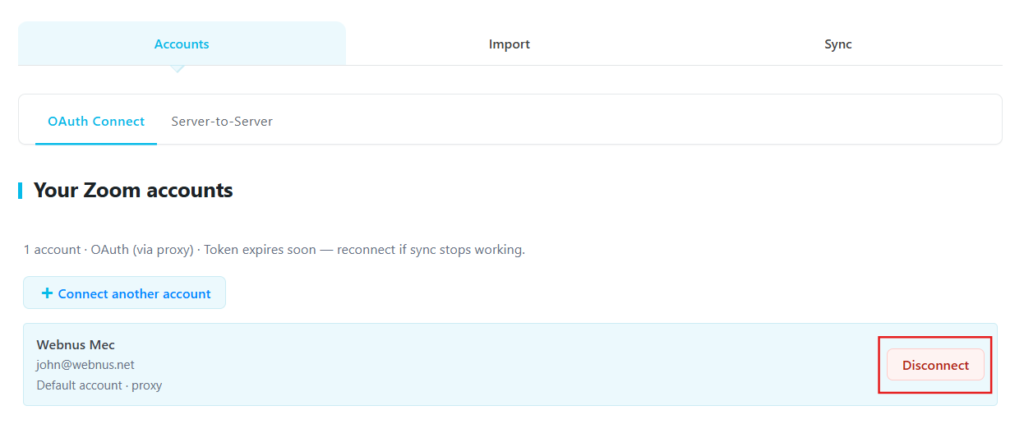
You may also revoke the application’s authorization directly from your Zoom account settings. Revoking the application’s authorization immediately prevents MEC from accessing your Zoom account using the granted OAuth permissions.You can reconnect the application at any time by repeating the OAuth authorization process.
What Happens After Disconnecting?
After authorization is removed:
- MEC can no longer create or update Zoom Meetings or Webinars.
- Automatic Import stops.
- Two-Way Synchronization stops.
- Webhook updates are no longer received.
- Existing MEC events remain available on your website.
- Existing Zoom Meetings are not deleted automatically.
User Data
Disconnecting the application does not automatically remove previously imported event information stored in WordPress.
Imported events remain available until they are manually deleted from MEC or your WordPress website.
If you reconnect the same Zoom account later, you can continue using the addon normally.
If you wish to completely remove previously imported Zoom information, simply delete the imported MEC events or disconnect the Zoom account and remove the associated event data from your WordPress website.
The addon stores only the information required for its functionality within your WordPress website. No additional data is transmitted to Zoom after the application has been disconnected.
Display & Booking Settings
Use Case
Control how Zoom information is displayed to attendees before and after registration.
Prerequisites
- A Zoom Meeting or Webinar associated with the event.
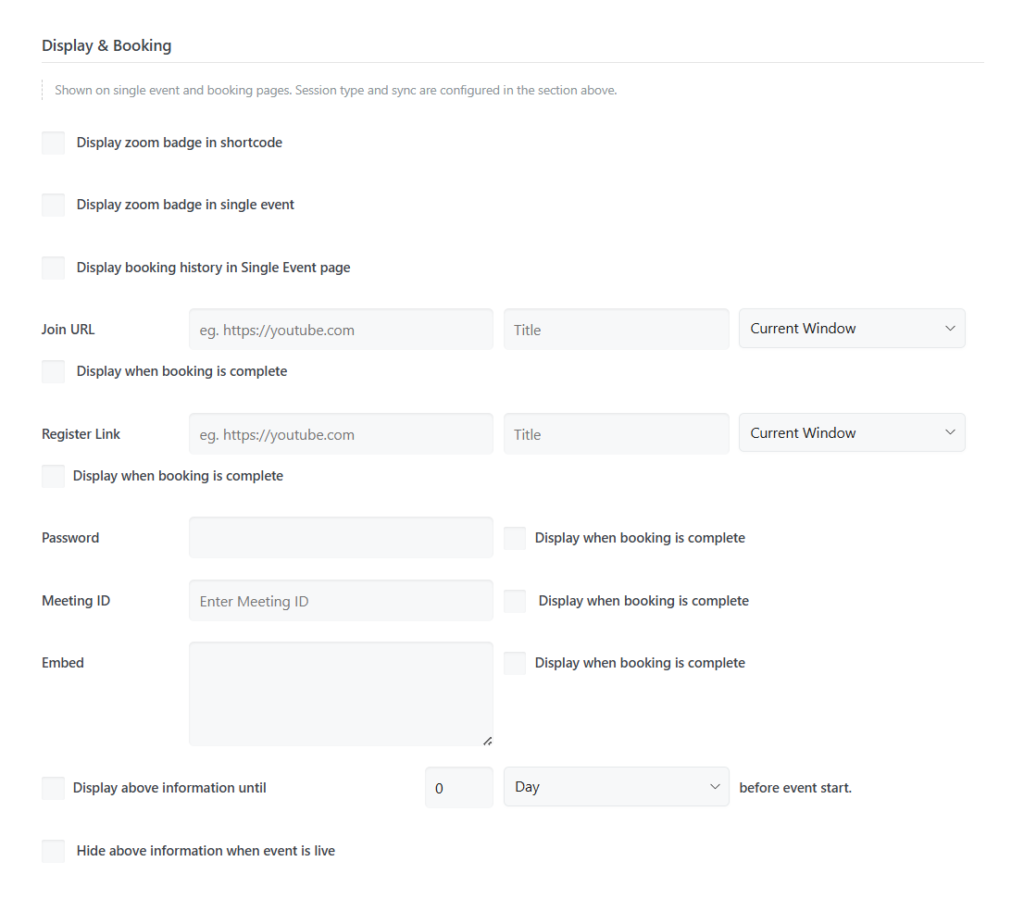
Visual Branding & Badges
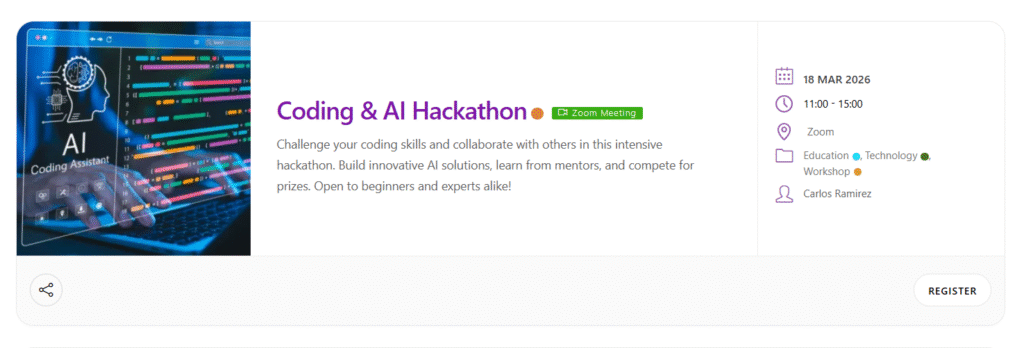
- Shortcode Badges: Enable the zoom event icon to appear as a badge in all MEC shortcodes for easy identification.
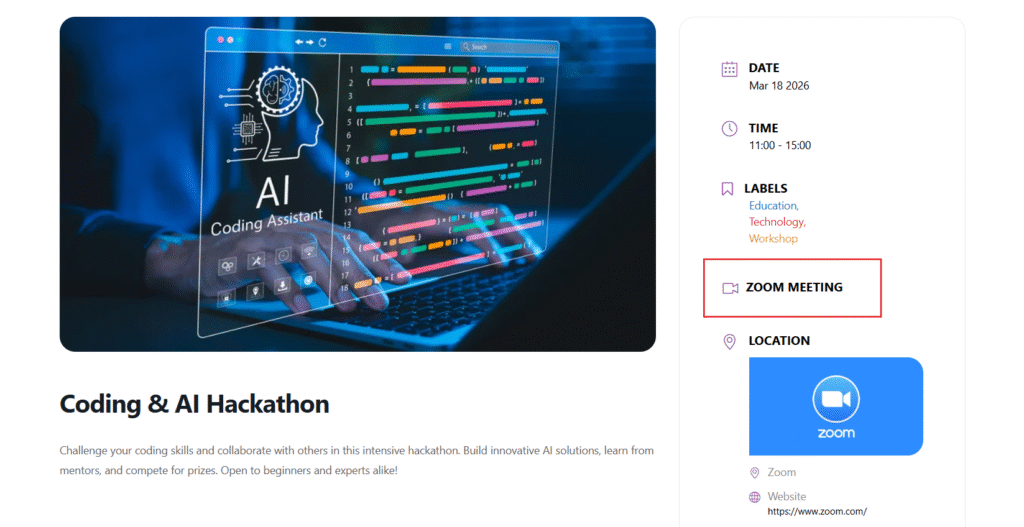
- Sidebar Badge: Display a dedicated zoom event badge in the sidebar of the Single Event page.
User Experience & Access
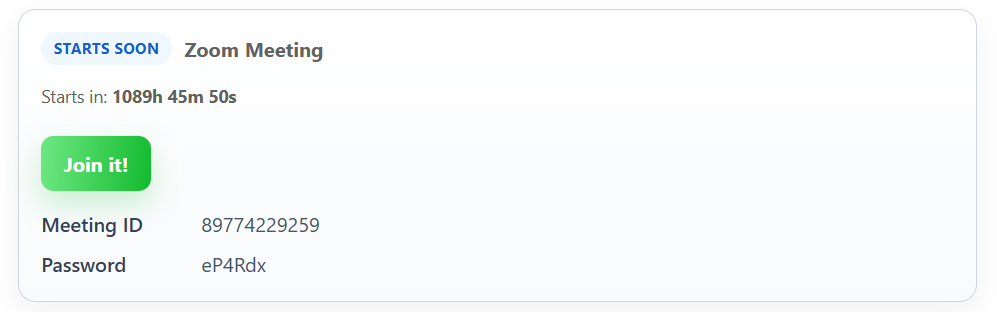
- Display booking history on the Single Event page: When enabled, this option provides a special box on the event page for logged-in users who have previously booked the Zoom event. In this section, the system displays only the data related to the Join URL, Register link, Password, Meeting ID, and Embed fields; it does not display the registration data the user entered during checkout.
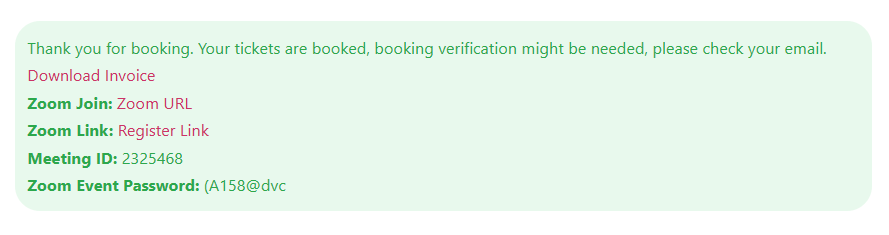
- Display when booking is complete (Checkbox next to fields): By selecting the checkbox located next to the Join URL, Register link, Password, Meeting ID, and Embed fields, you enable an immediate, temporary display of those details within the booking form itself right after a successful registration. This is designed for the immediate user experience and disappears once the form is closed.
Visibility Logic
- Timed Visibility: Enable View the above info at a certain interval before the event starts to hide meeting details until a specific timeframe before the event begins.
- Live Concealment: Enable Hide above information when the event is live to automatically remove details as soon as the session starts.
Notifications & FES Integration
Email Communication
Use Case
Automatically send Zoom Meeting information after successful registration.
Prerequisites
- MEC Notifications enabled.
- Zoom enabled for the event.
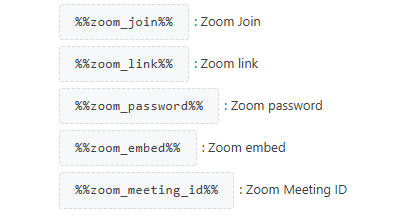
- Placeholders: Use email placeholders to automatically send the Zoom URL, Zoom link, Password, Meeting ID and embed to users after registration.
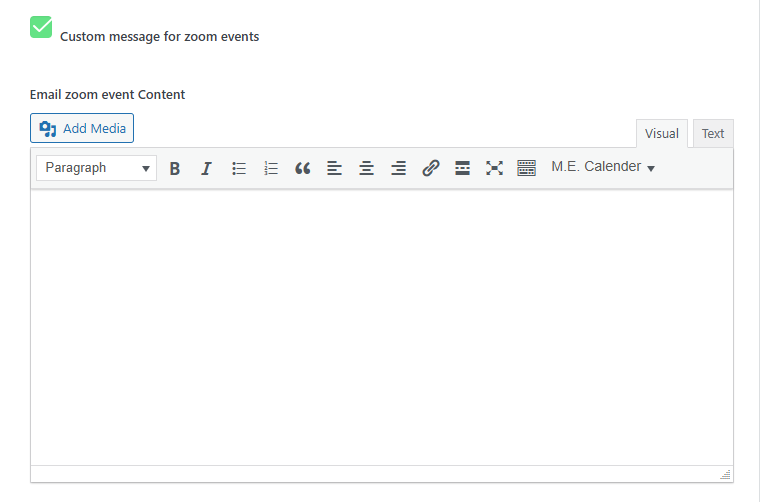
- Customization: Navigate to MEC Notification Settings to find the Custom message for Zoom events. This allows you to write specific instructions for your virtual attendees without affecting your standard physical event emails.
Frontend Event Submission (FES)
Use Case
Allow frontend users to create Zoom-enabled events.
Prerequisites
- Frontend Event Submission enabled.
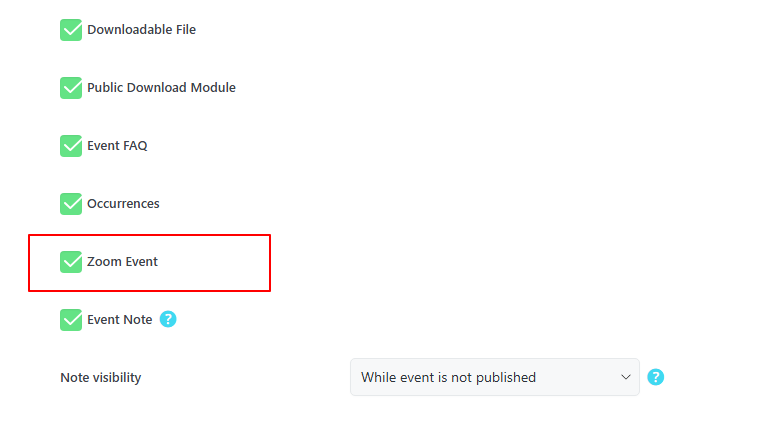
- Zoom Event option enabled in FES settings.
Troubleshooting
Unable to Connect
- Verify that you can successfully sign in to your Zoom account.
- Complete the OAuth authorization process.
- Ensure your website can communicate with Zoom services.
- If necessary, disconnect the account and reconnect it.
- Ensure that your browser allows the OAuth redirect to complete successfully.
Meetings Are Not Importing
- Verify that the correct Zoom account is selected.
- Check the Import Log.
- Confirm that Automatic Import is enabled if scheduled importing is required.
Synchronization Is Not Working
- Verify that Two-Way Sync is enabled.
- Review the Sync Log.
- Confirm that Webhooks are configured if real-time synchronization is required.
Frequently Asked Questions
Do I need to create a Zoom OAuth App?
No.
The new Zoom Integration Addon uses a secure OAuth authorization flow through Webnus. Manual Zoom OAuth App creation is no longer required.
Can I connect multiple Zoom accounts?
Yes.
The addon supports multiple connected Zoom accounts. Different organizers can use different Zoom accounts.
Can I still use Server-to-Server authentication?
Yes.
Server-to-Server authentication is still available for advanced users who prefer this connection method.
Is a Basic Zoom account supported?
Yes.
A Basic Zoom account is sufficient for Zoom Meetings.
Some Webinar features require additional Zoom licenses and depend on your Zoom subscription. Meeting functionality is available with a Basic Zoom account.
What happens if I disconnect my Zoom account?
Disconnecting your Zoom account stops synchronization and prevents MEC from creating or updating Zoom Meetings. Existing MEC events and previously imported data remain available on your website.
Can I reconnect my Zoom account later?
Yes.
You can reconnect the same or a different Zoom account at any time using the Accounts section.
Does disconnecting the addon delete my Zoom Meetings?
No. Disconnecting the addon only removes MEC’s access to your Zoom account. Existing Zoom Meetings and Webinars remain in your Zoom account unless you delete them manually.
For additional assistance, please contact the Webnus support team.