Advanced Importer Addon
With Advanced Importer Addon, you can connect to Facebook, Google, Meetup, and Eventbrite, making the import process seamless. You should authenticate your account with just a few clicks and plan the import. Also, with this addon, you can have more third-party plugins for importing. You should initiate the process from a WordPress on which MEC is installed.
Advanced Importer Addon Installation
First, ensure that both MEC (Modern Events Calendar) and the Advanced Importer Addon are installed and activated.
Read Also:
How to install MEC and Addons?After activating the Advanced Importer addon, a new menu will be added to the M.E. Calendar Dashboard. Click on it, and you will be redirected to the import page.
Advanced Importer Settings
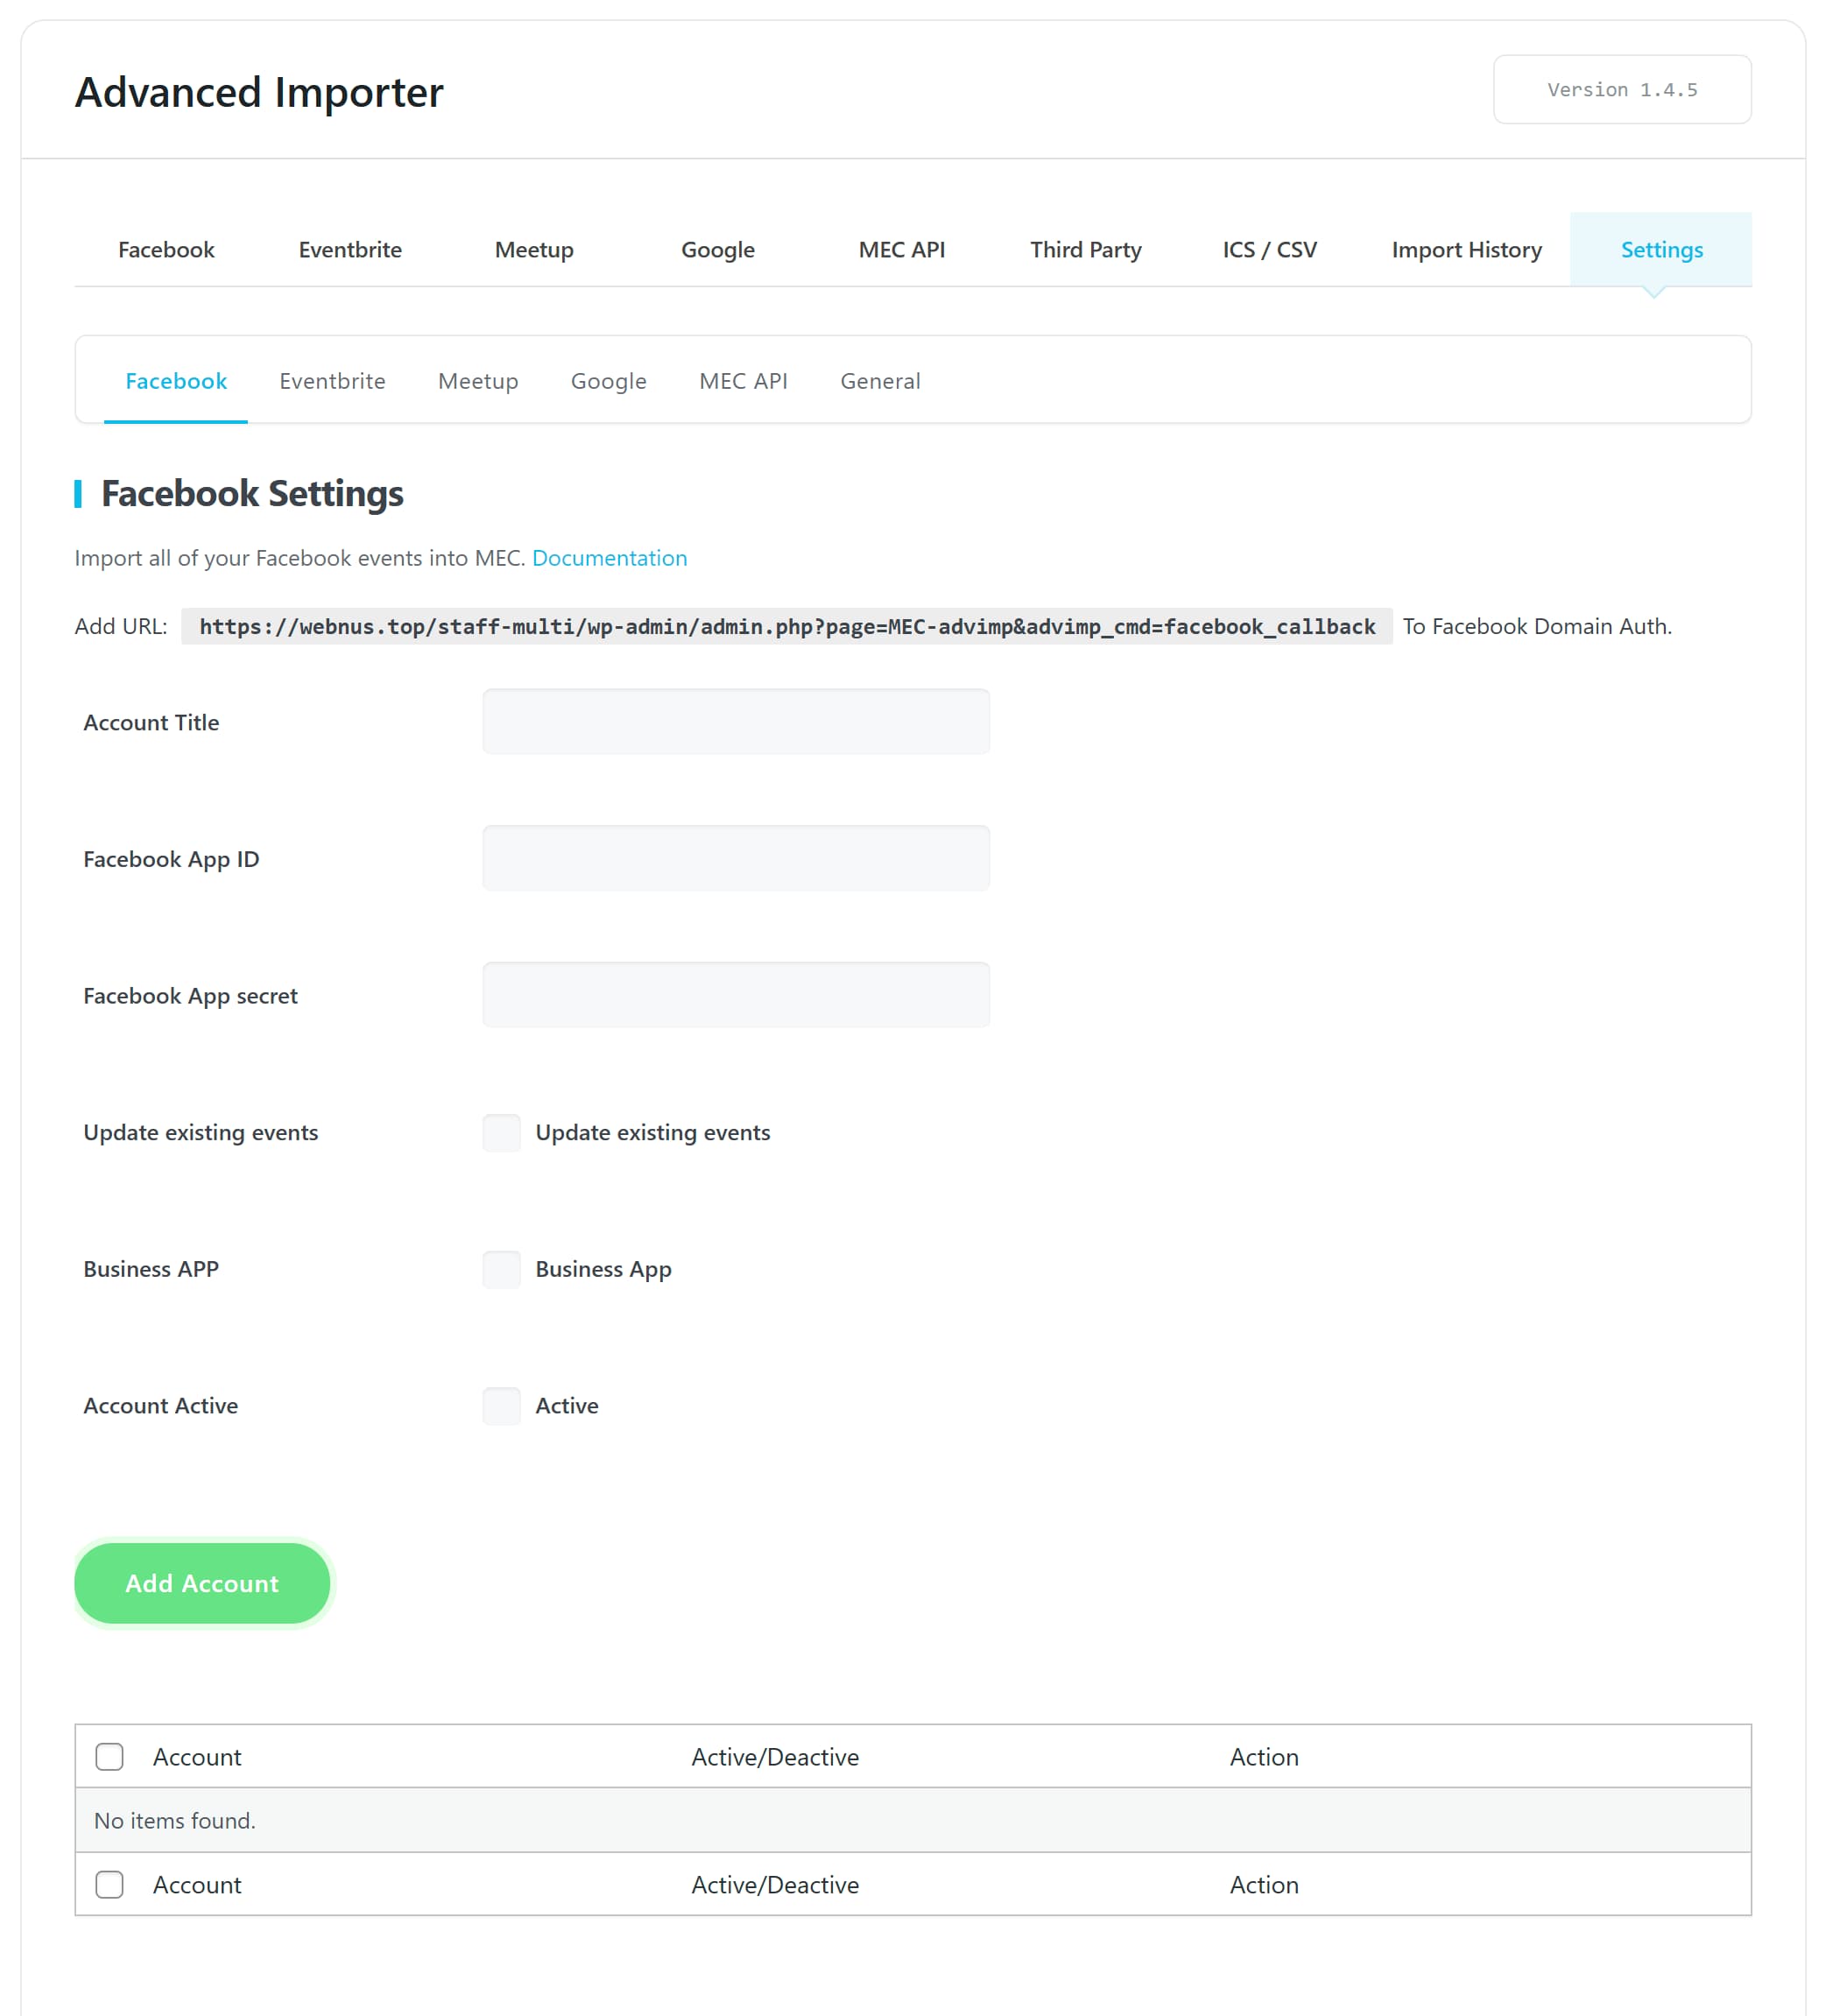
To start, go to the Advanced Importer addon settings. You should connect an account to the importer. We show them to you one by one. You can connect as many accounts as you wish. To set the account, follow these steps:
Facebook Settings
Follow every step mentioned in this link:
Read Also:
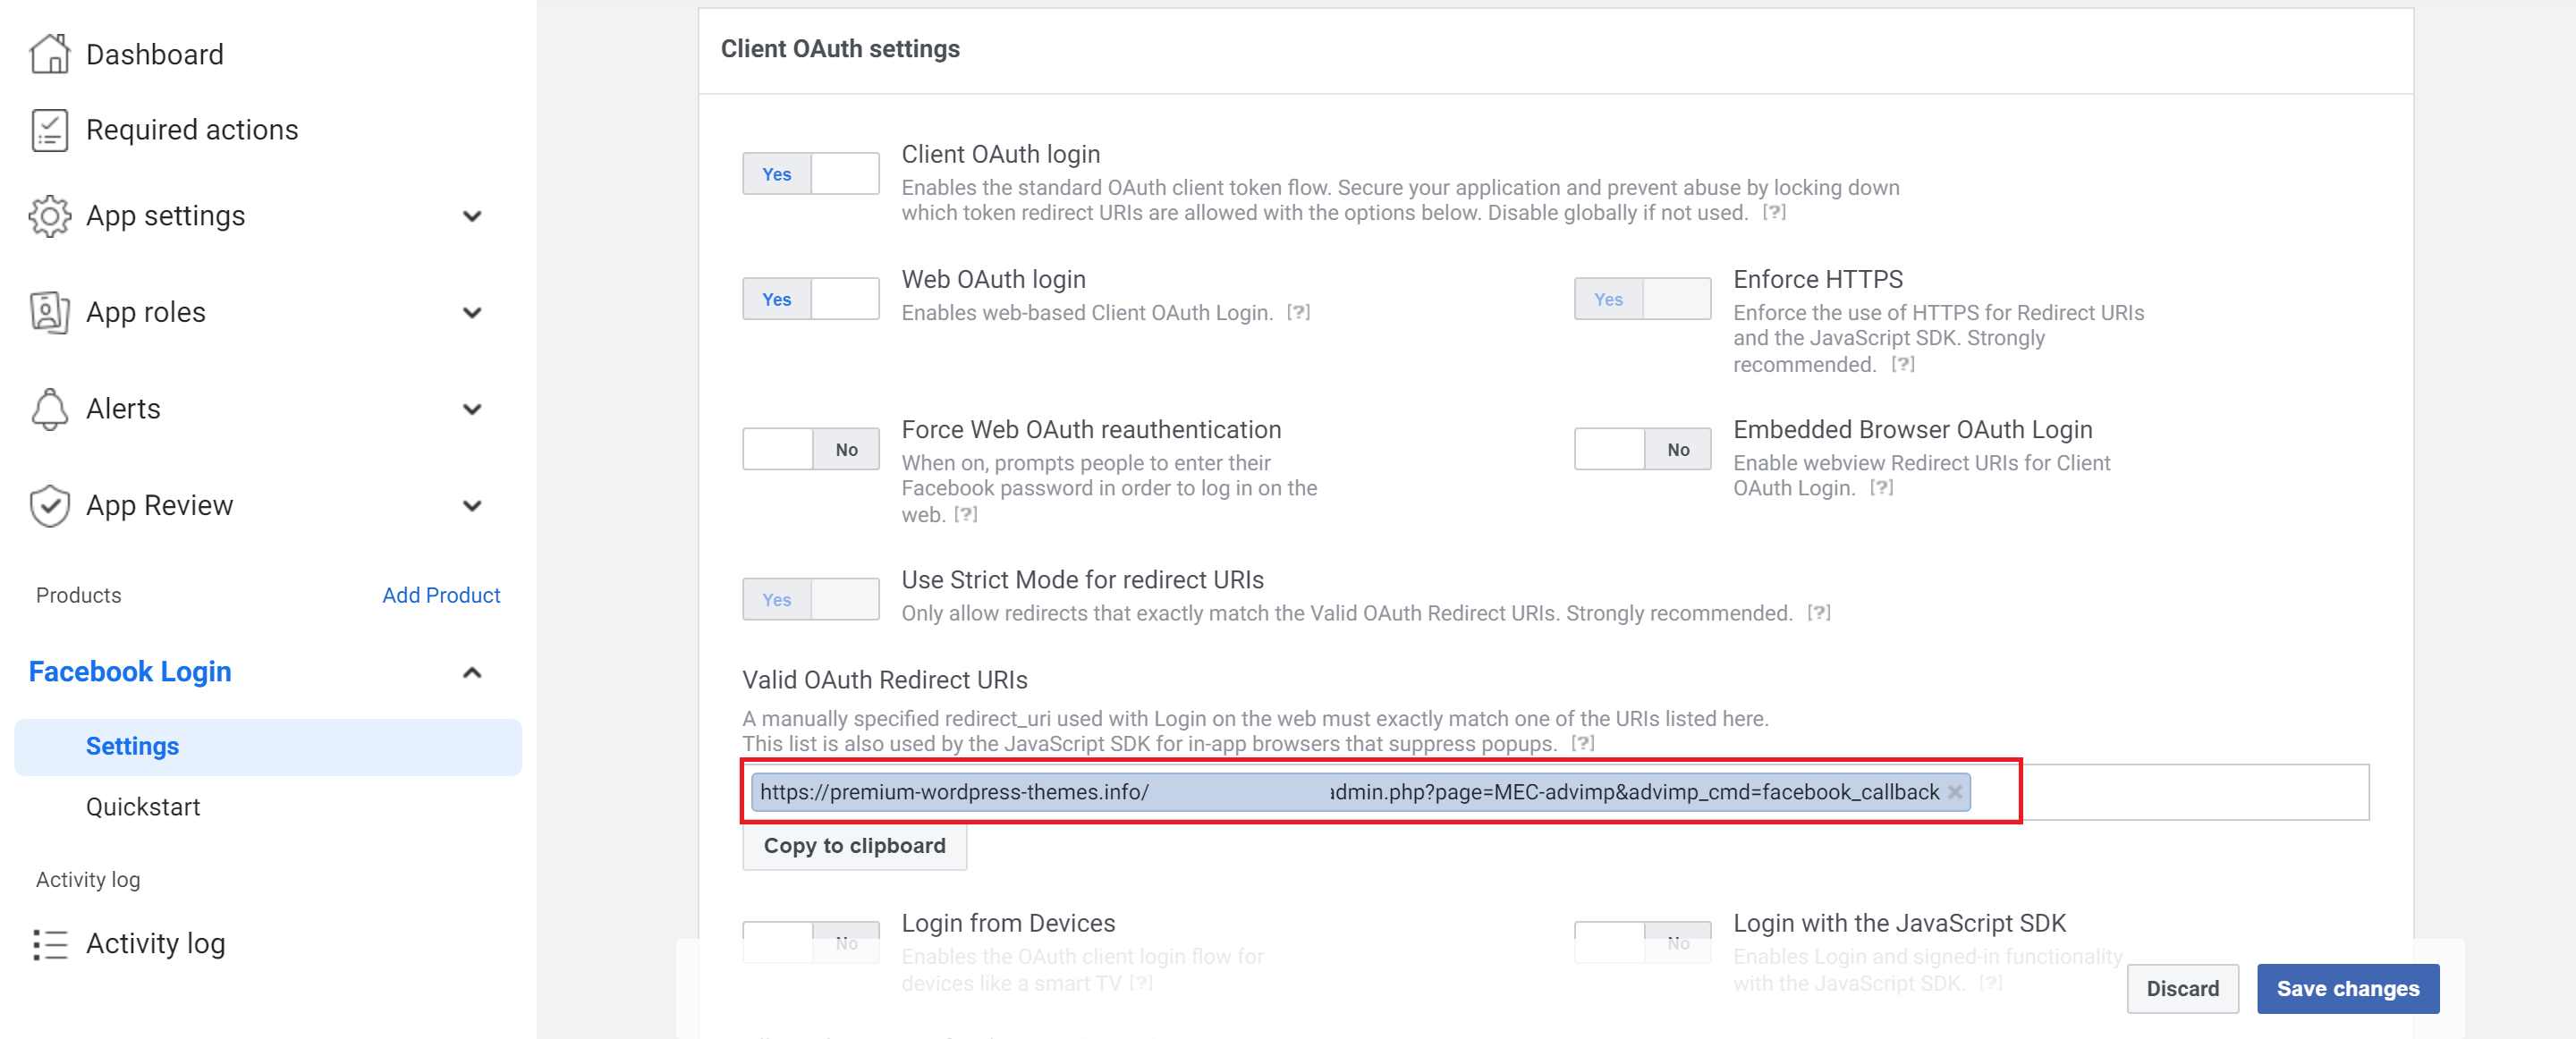
Import Facebook EventsTo proceed with the import process, you must give your dedicated URL to Facebook. Provide the dedicated URL in Valid OAuth Redirect URIs on Facebook. Other permissions are explained in the link above.
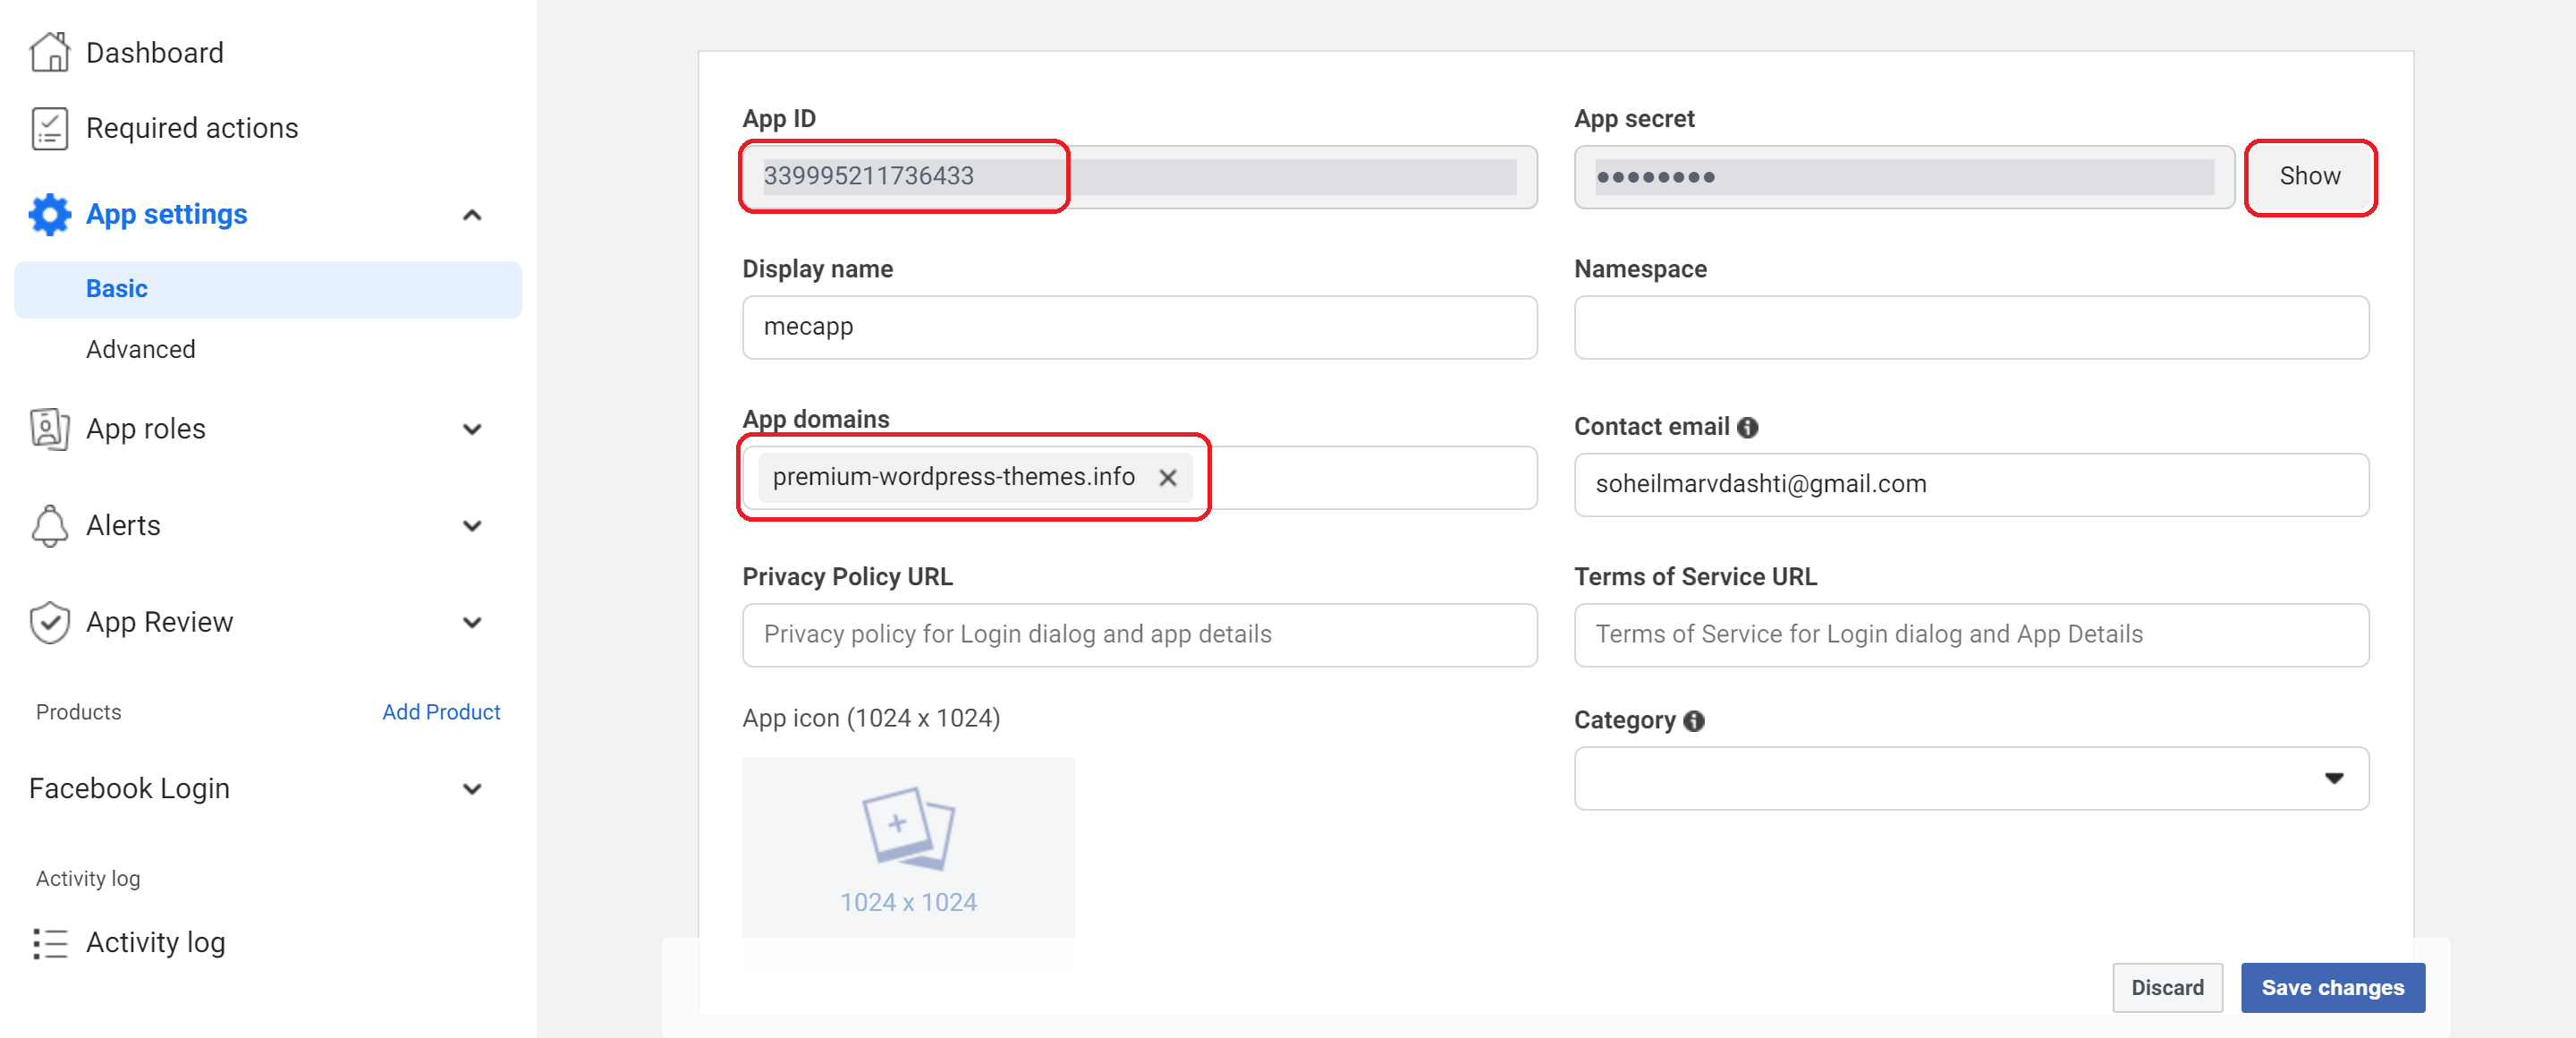
Now, fill in the information fields in the Advanced Importer Addon settings.
Eventbrite Settings
To get an API Key, please read this link and follow the instructions carefully.
Once you arrive at the designated website, click the Get a Free API Key button. If you already have an Eventbrite account, log in and proceed; otherwise, you need to create a new account.
After completing the necessary steps as directed, you will receive your API Key.

Meetup Settings
To get OAuth information, please read this link and follow the instructions carefully.
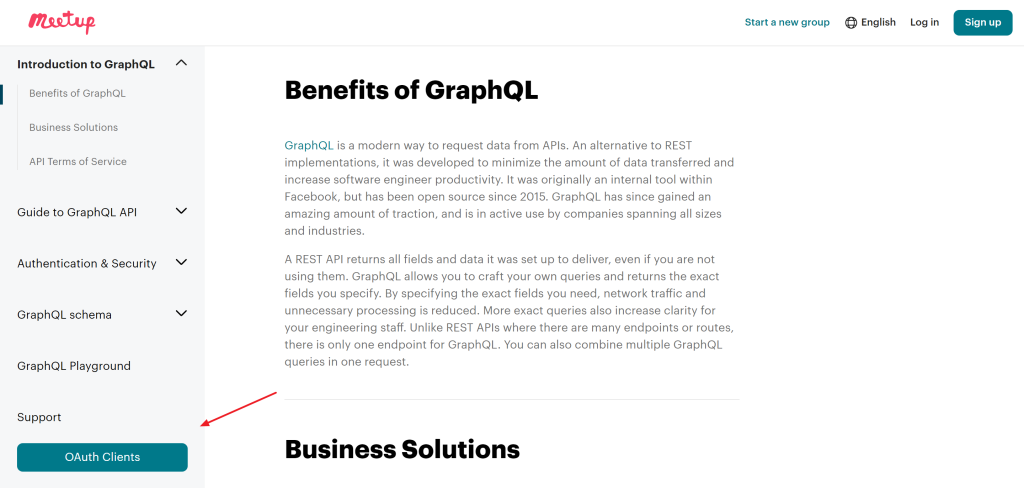
In the relevant page, click the OAuth Clients button. If you already have a Meetup account, log in and proceed; otherwise, you need to create a new account.
The activation process may take up to an hour or two.
Google Settings
Follow the instructions here to get an API key: Creating Google Calendar API Key
You must give your dedicated URL to Google to proceed with the import process. You should provide the URL via Authorized redirect URIs in Google. Other permissions are explained in the link above.
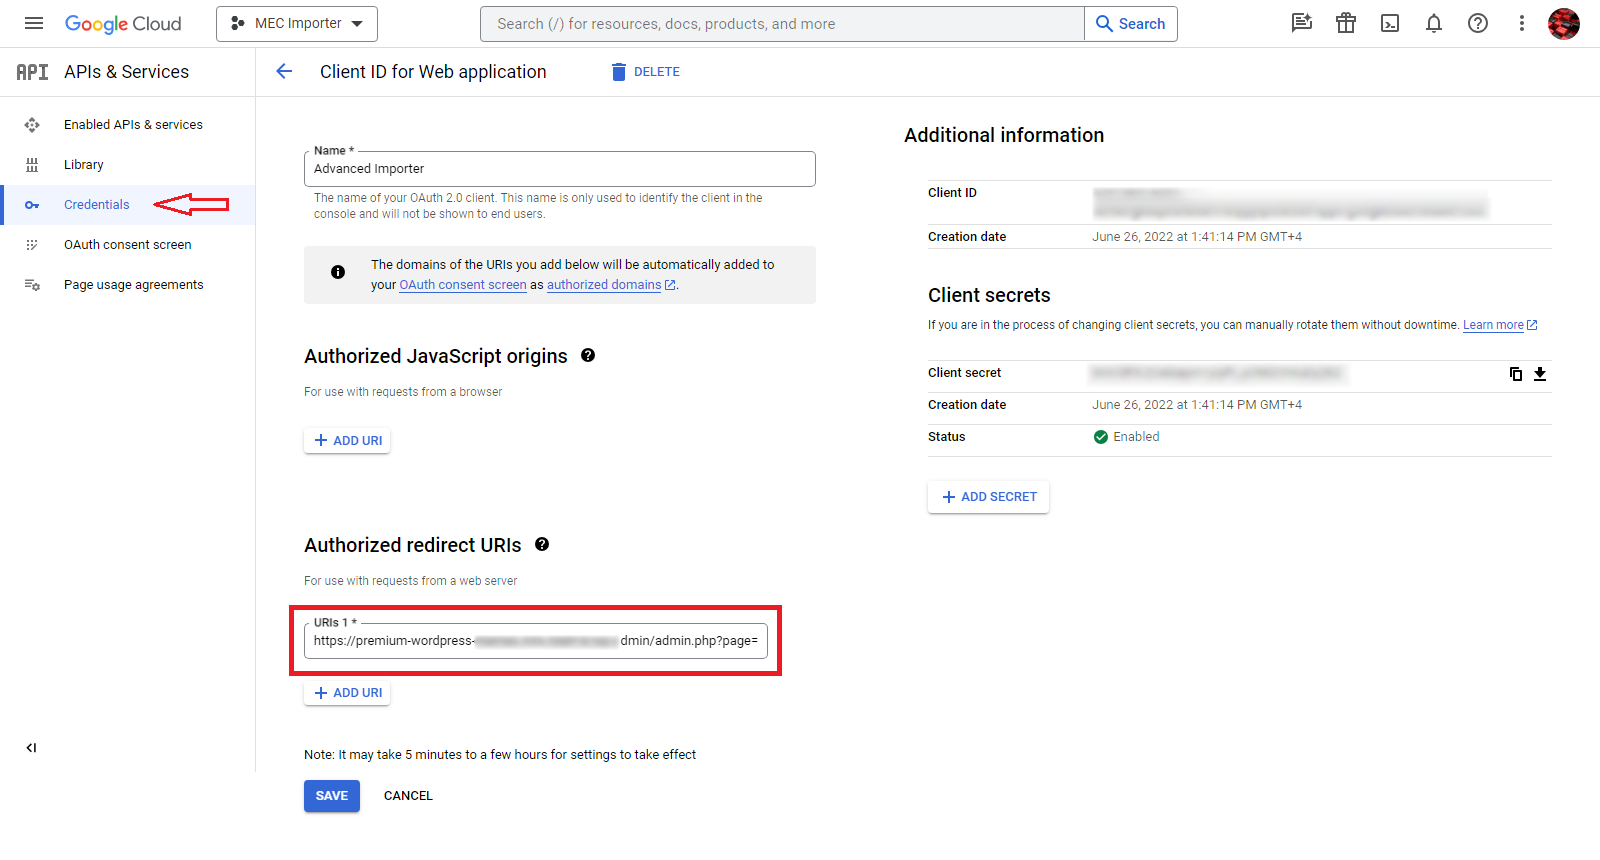
Now, fill in the information fields in the Advanced Importer Addon settings.
MEC API Settings
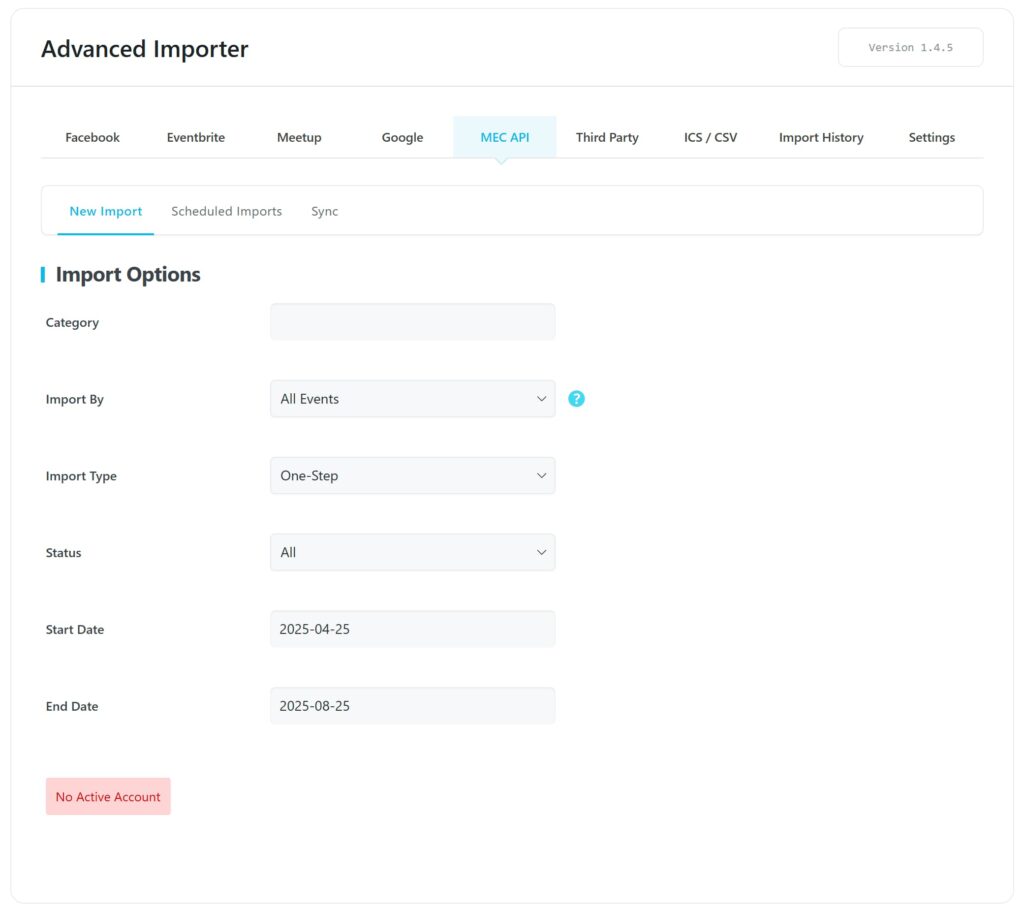
Please navigate to the source website and copy the dedicated URL. Then, go to the Advanced Importer Addon menu on the target website. Begin by inputting the API Key into the relevant field, followed by entering the URL of your website in the designated area.
With these steps completed, the setup is now ready for operation.
General Settings
You can set the number of events shown on each Page Table. This option helps you in the event-choosing process.
If you need more than 50 events, we suggest checking out your system configuration and ensuring it can handle such a load of information because fetching too many events requires an appropriate resource. For example, it should not be timed out, etc.
By default, six events are displayed on each Page Table.
Advanced Importer Customization
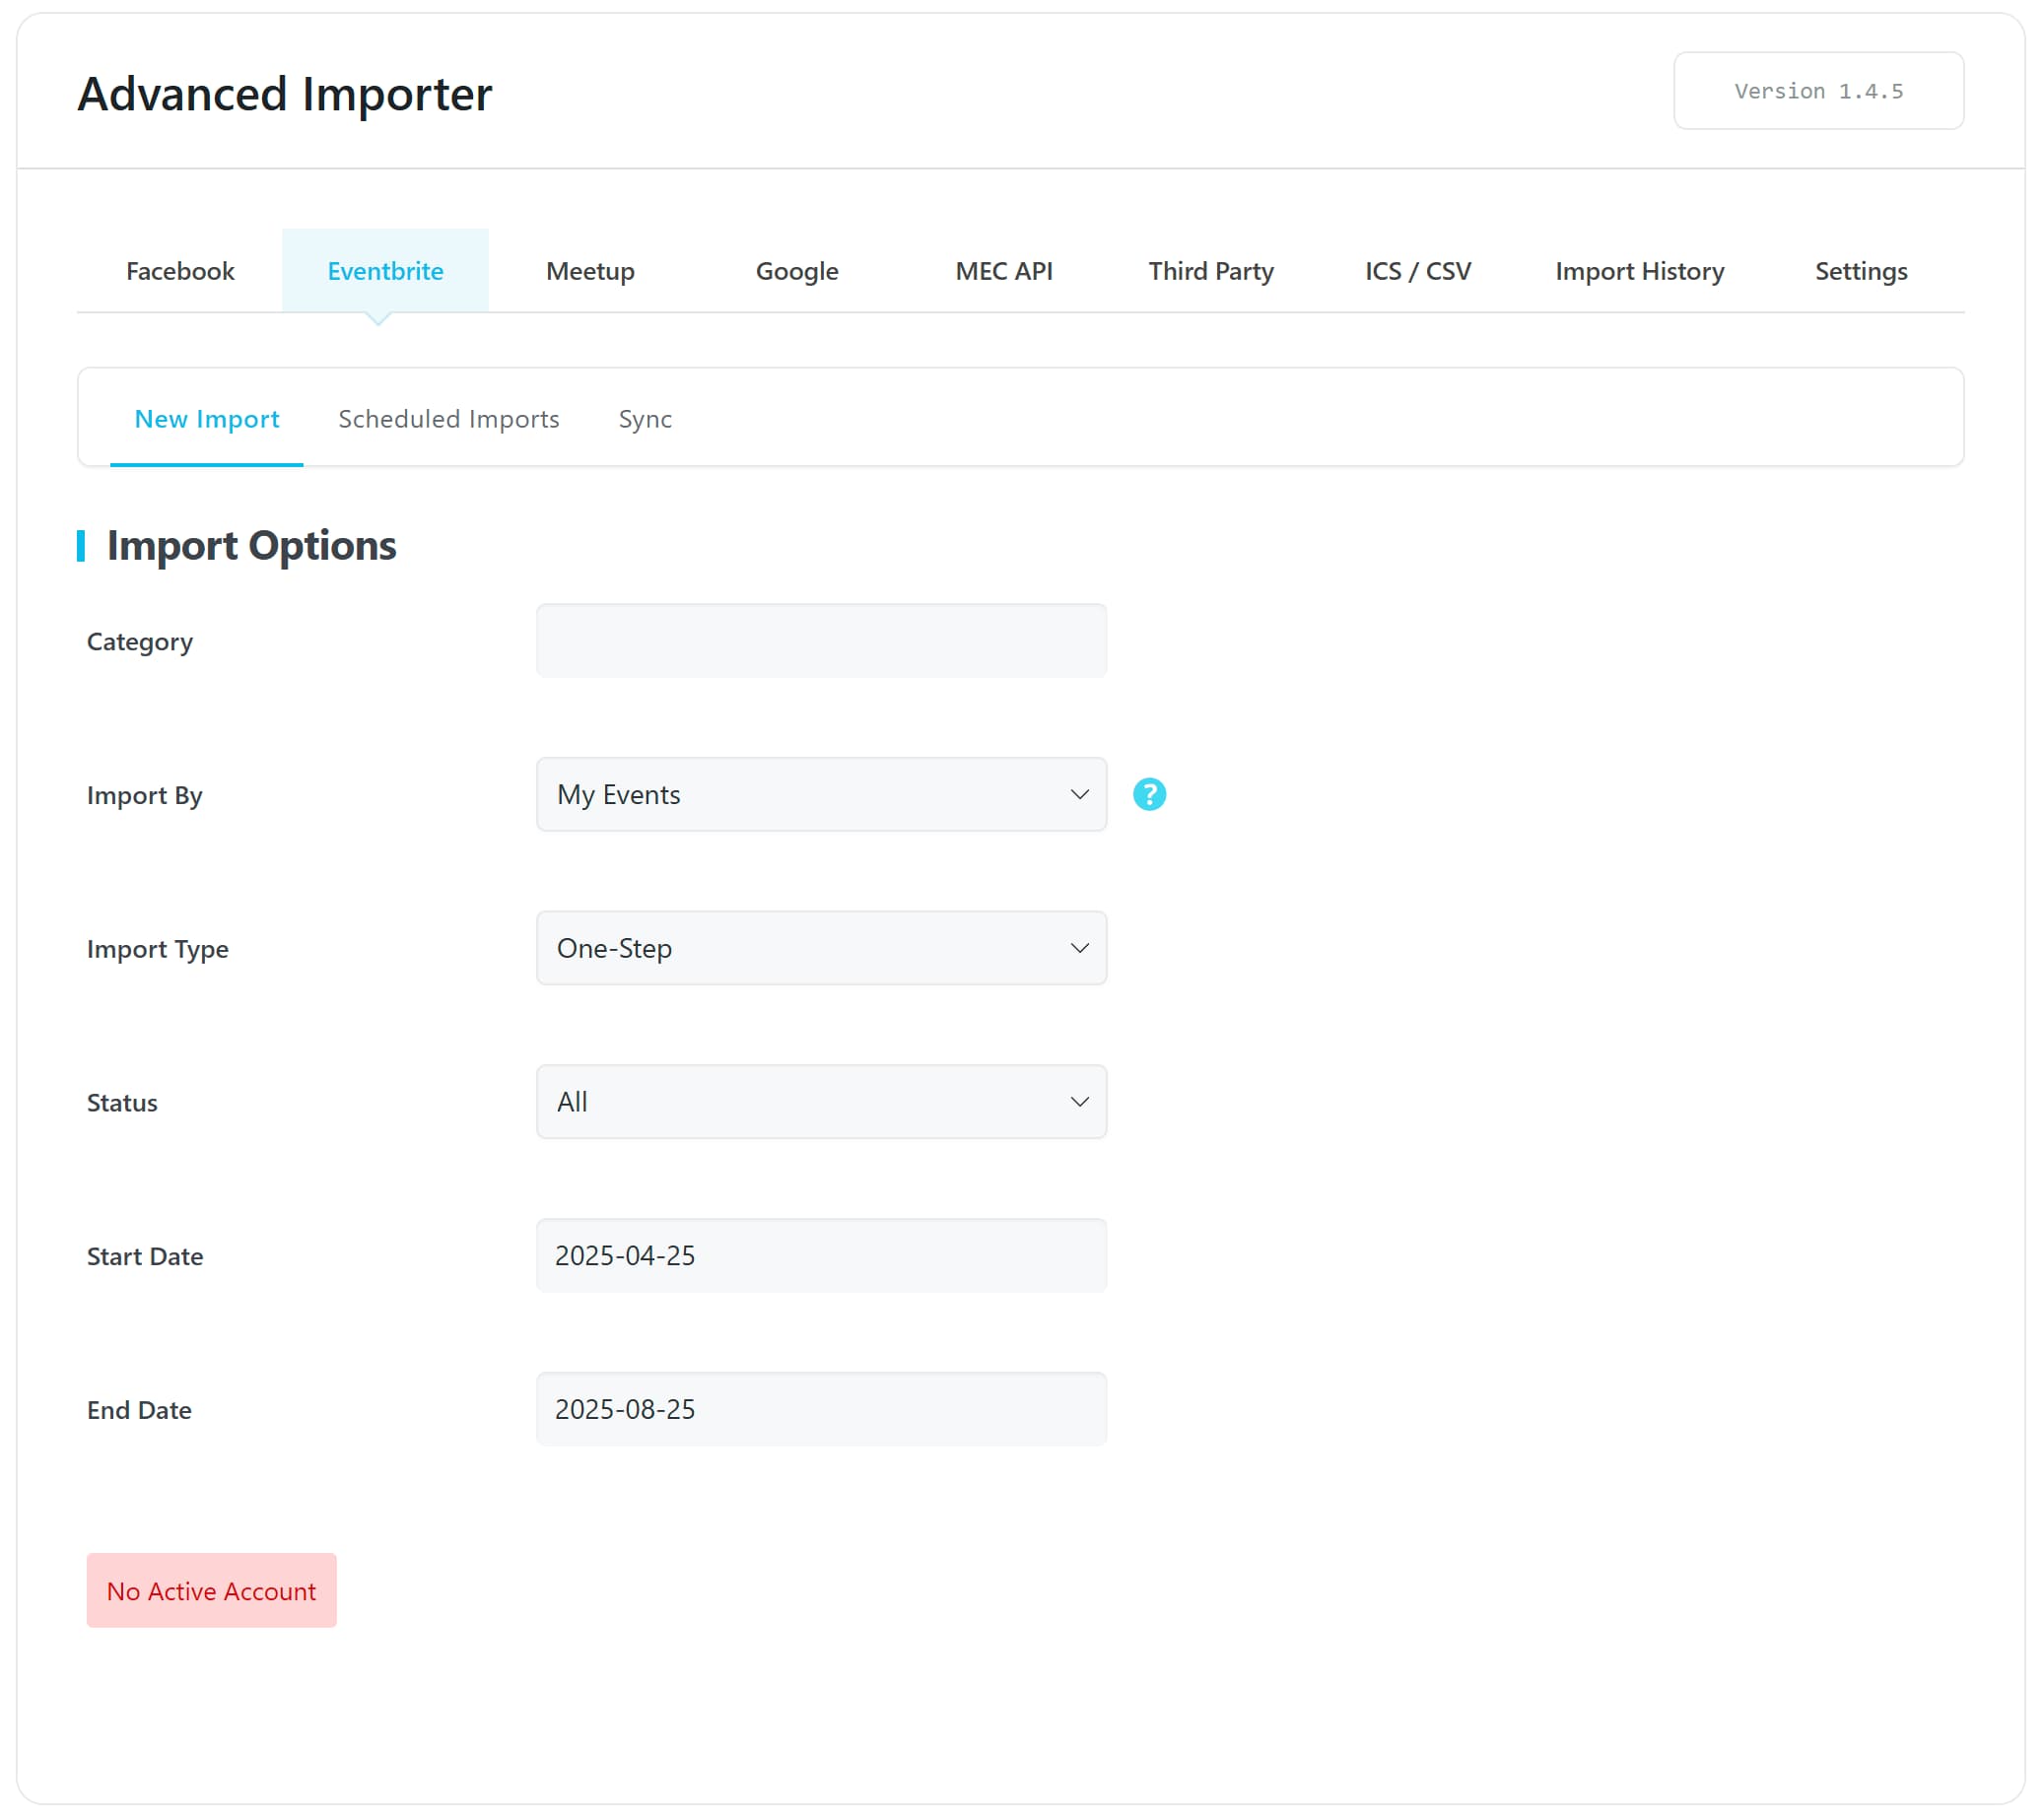
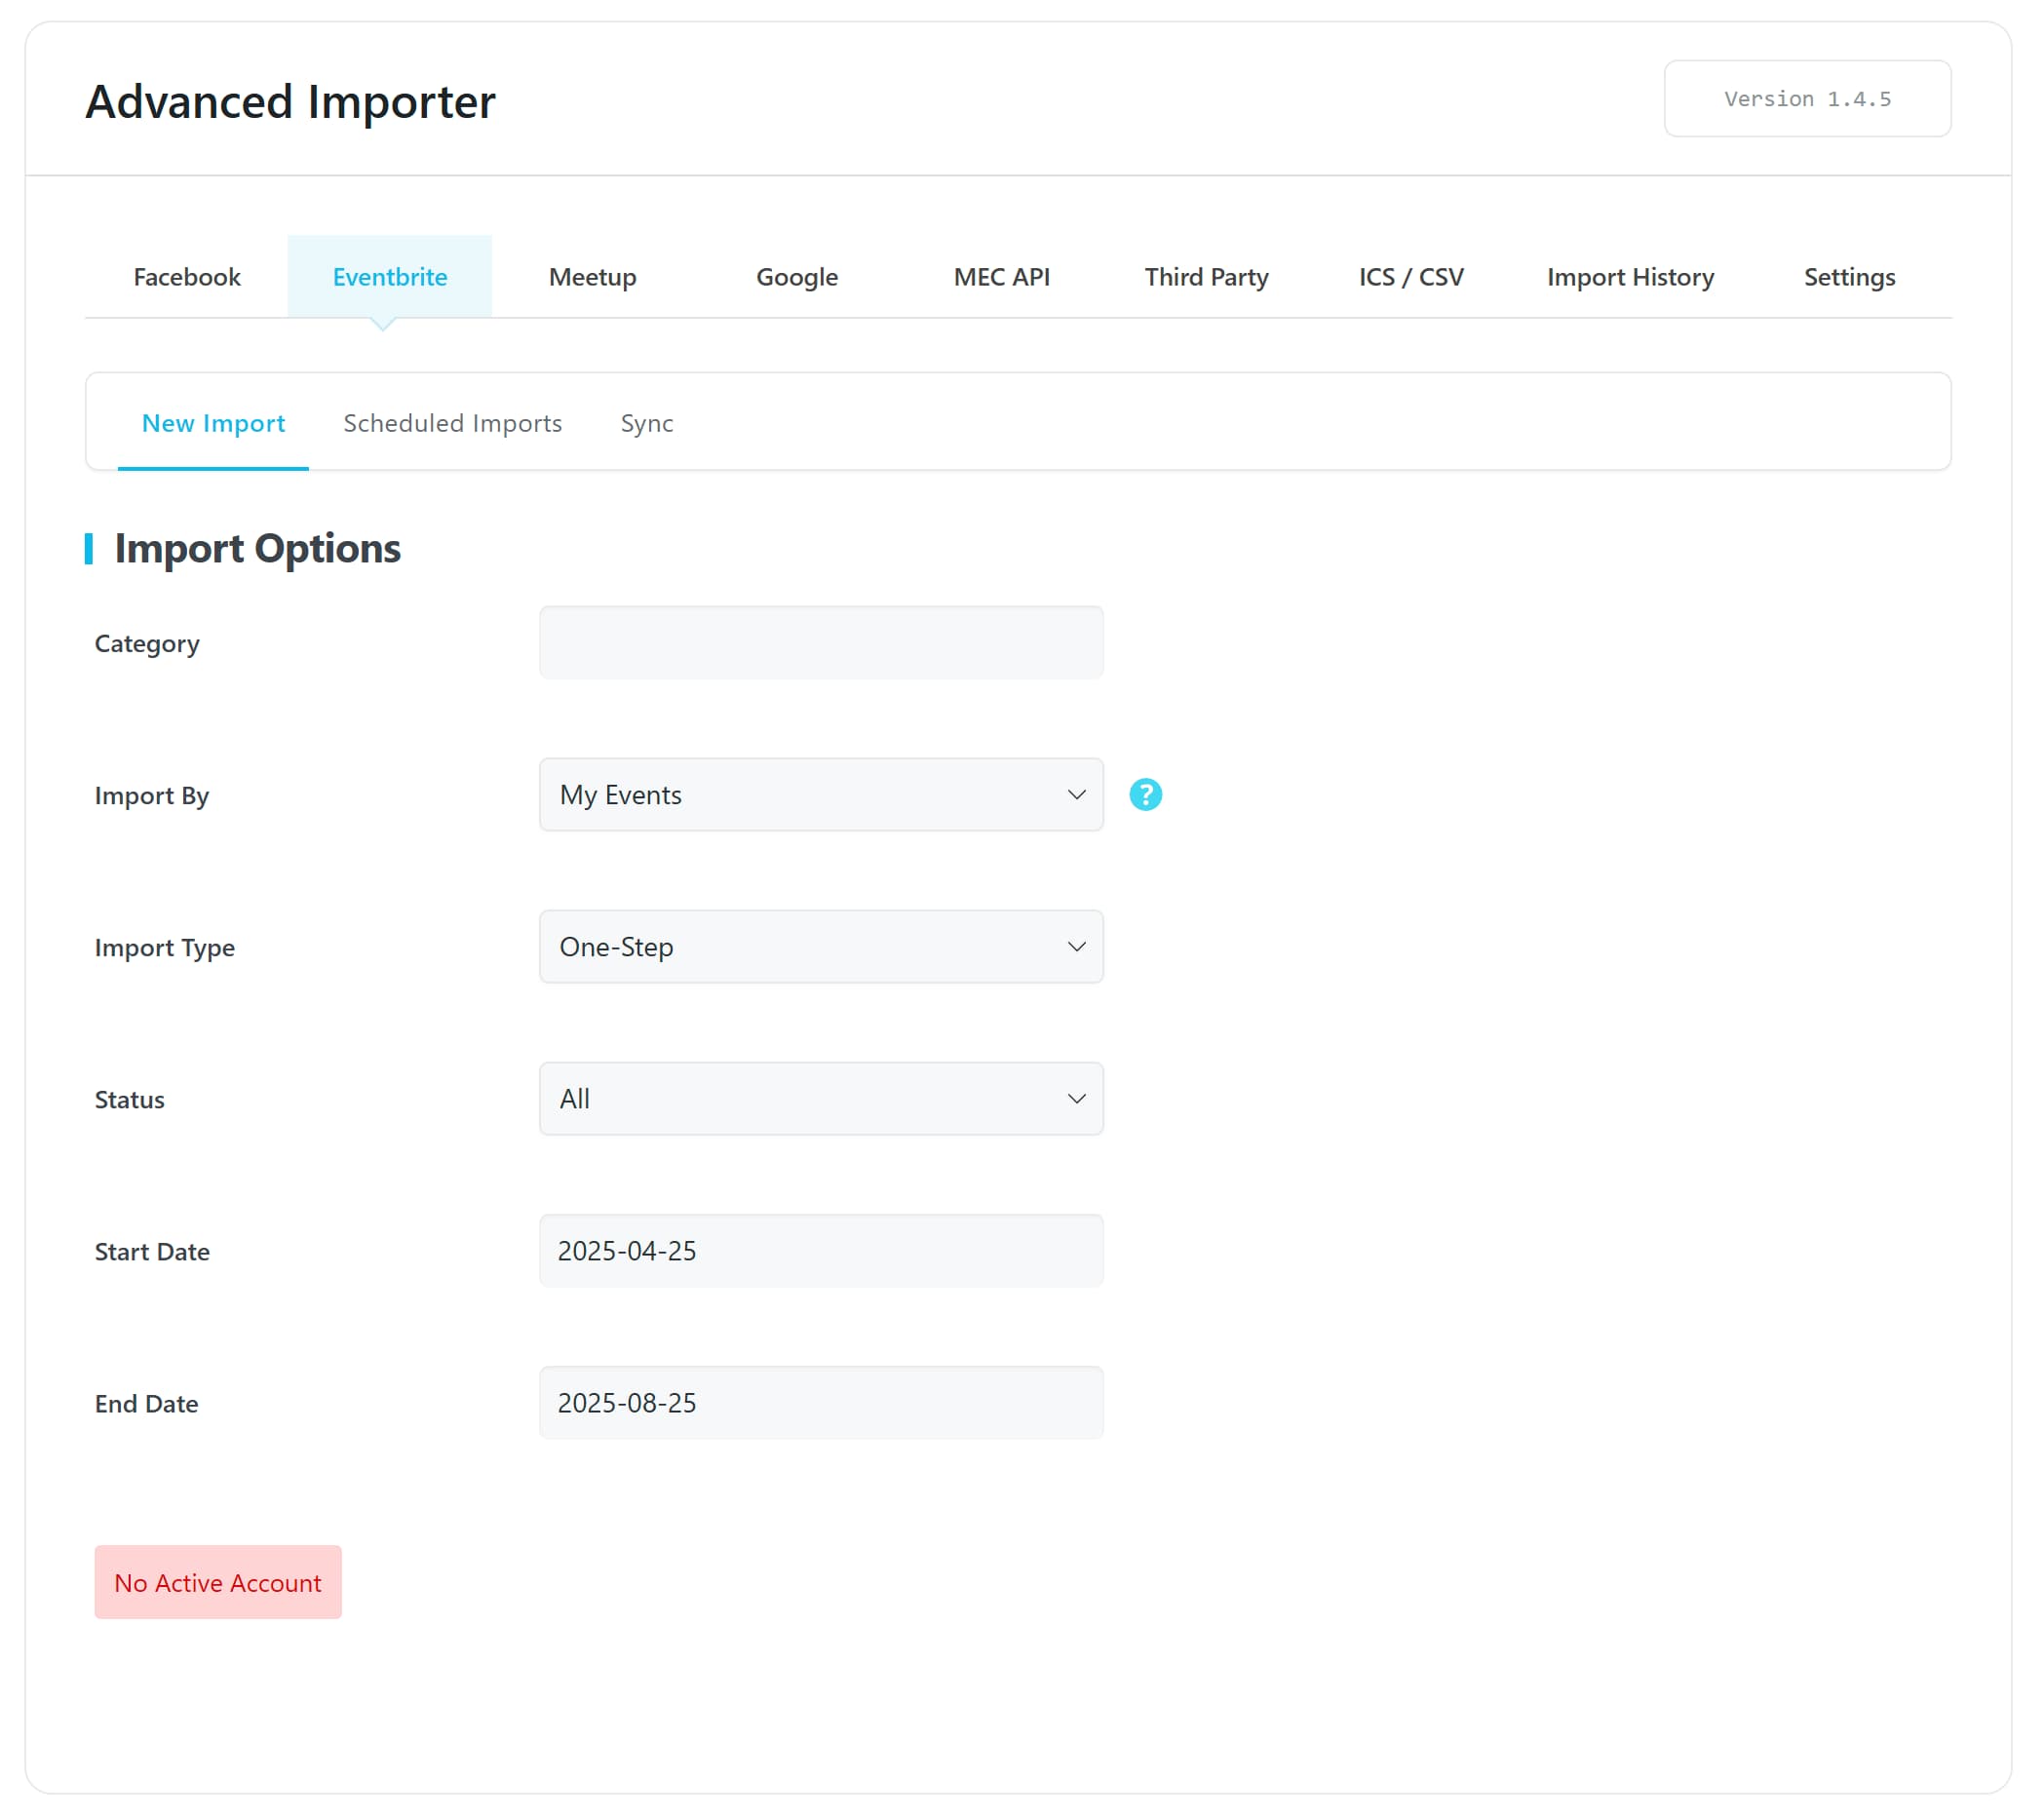
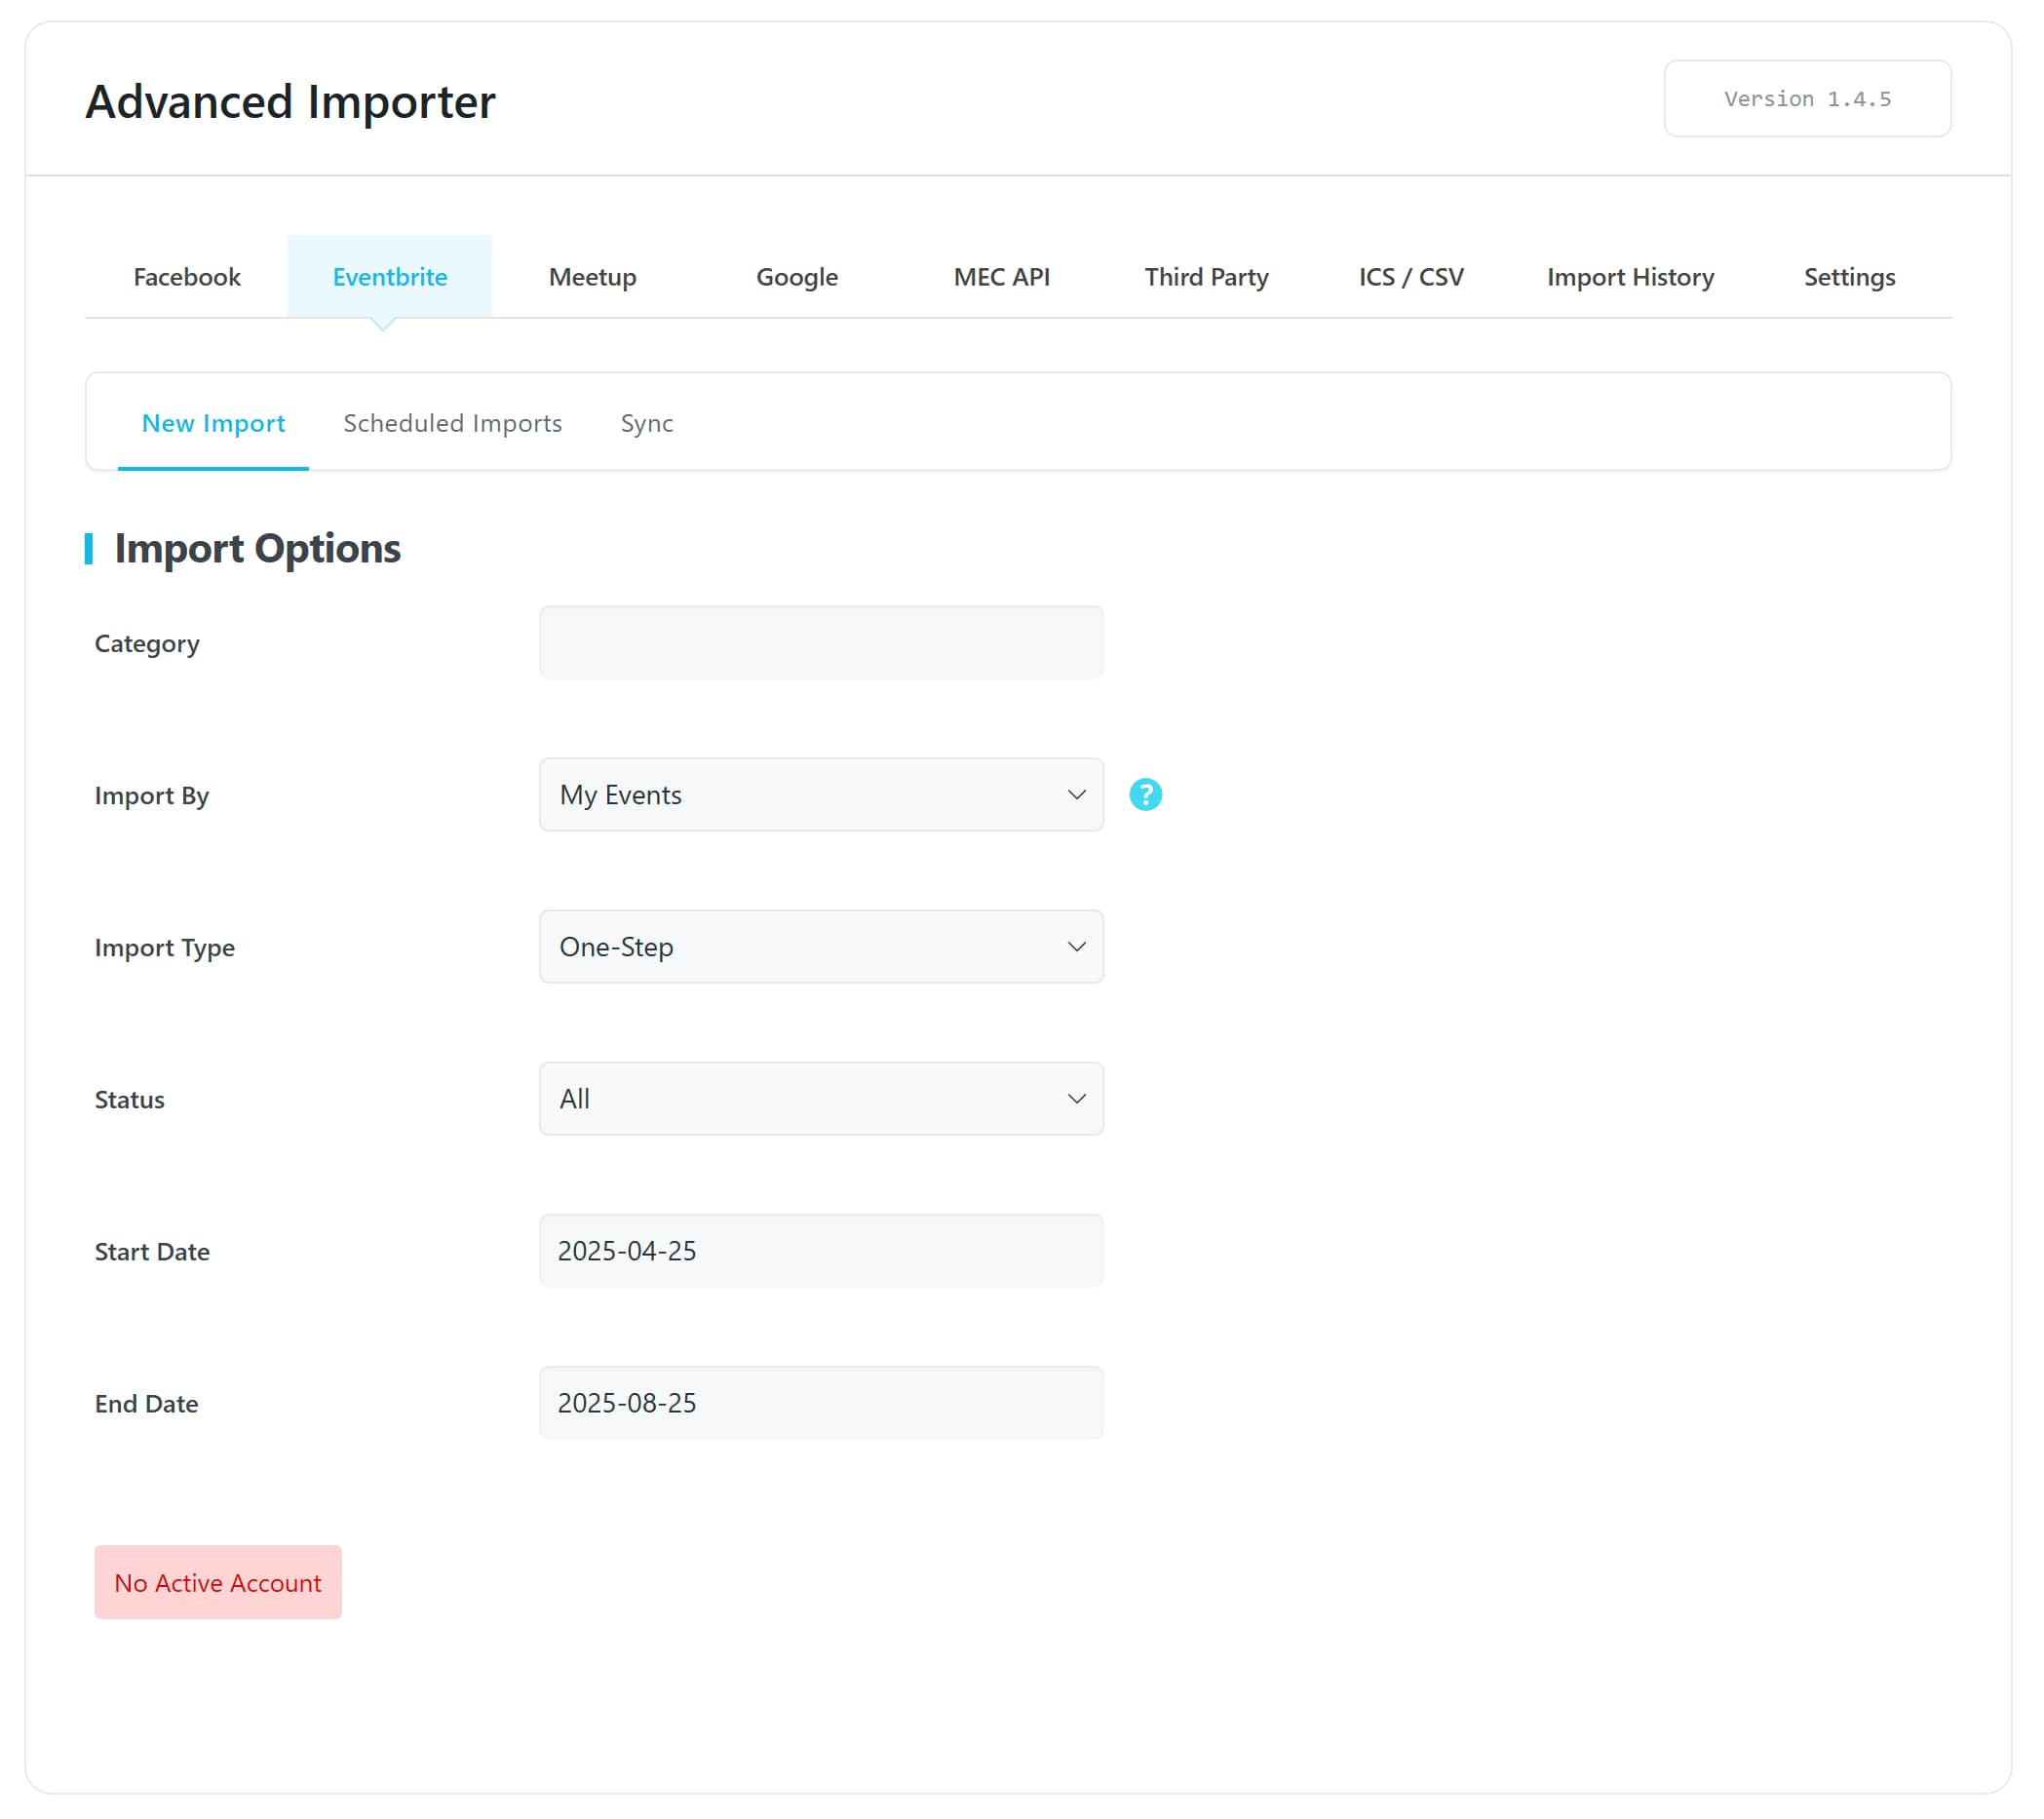
Eventbrite
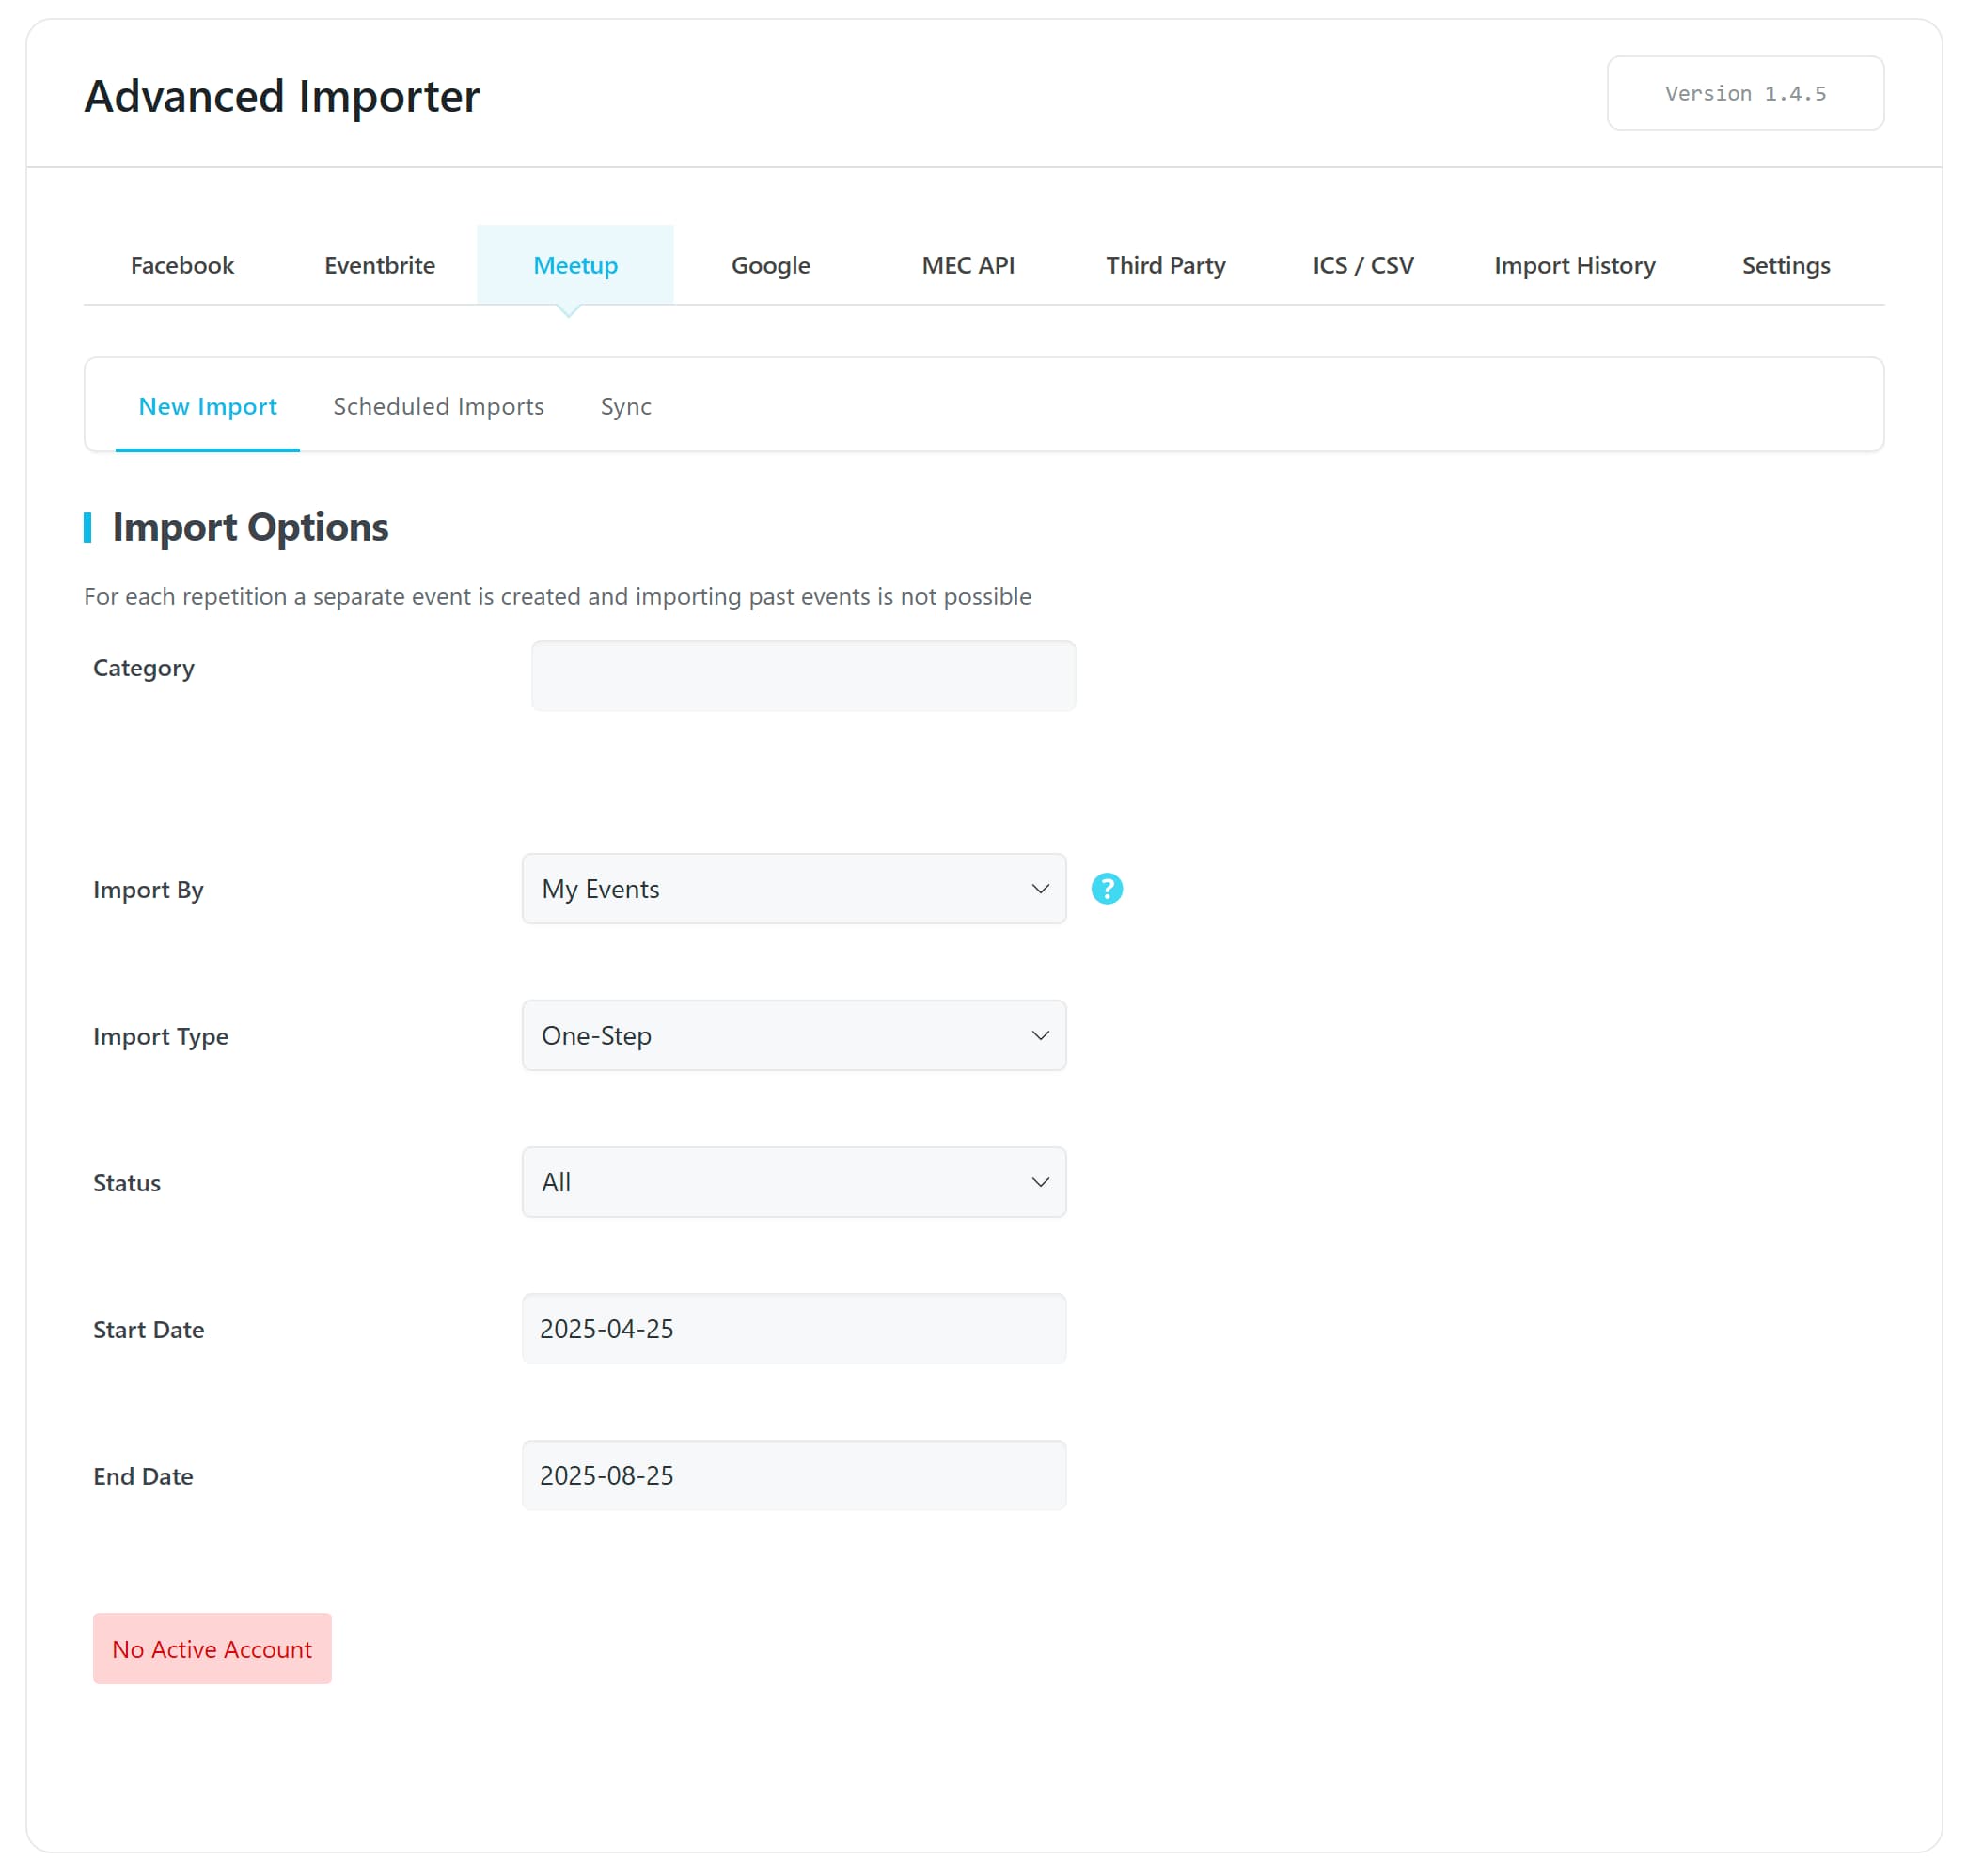
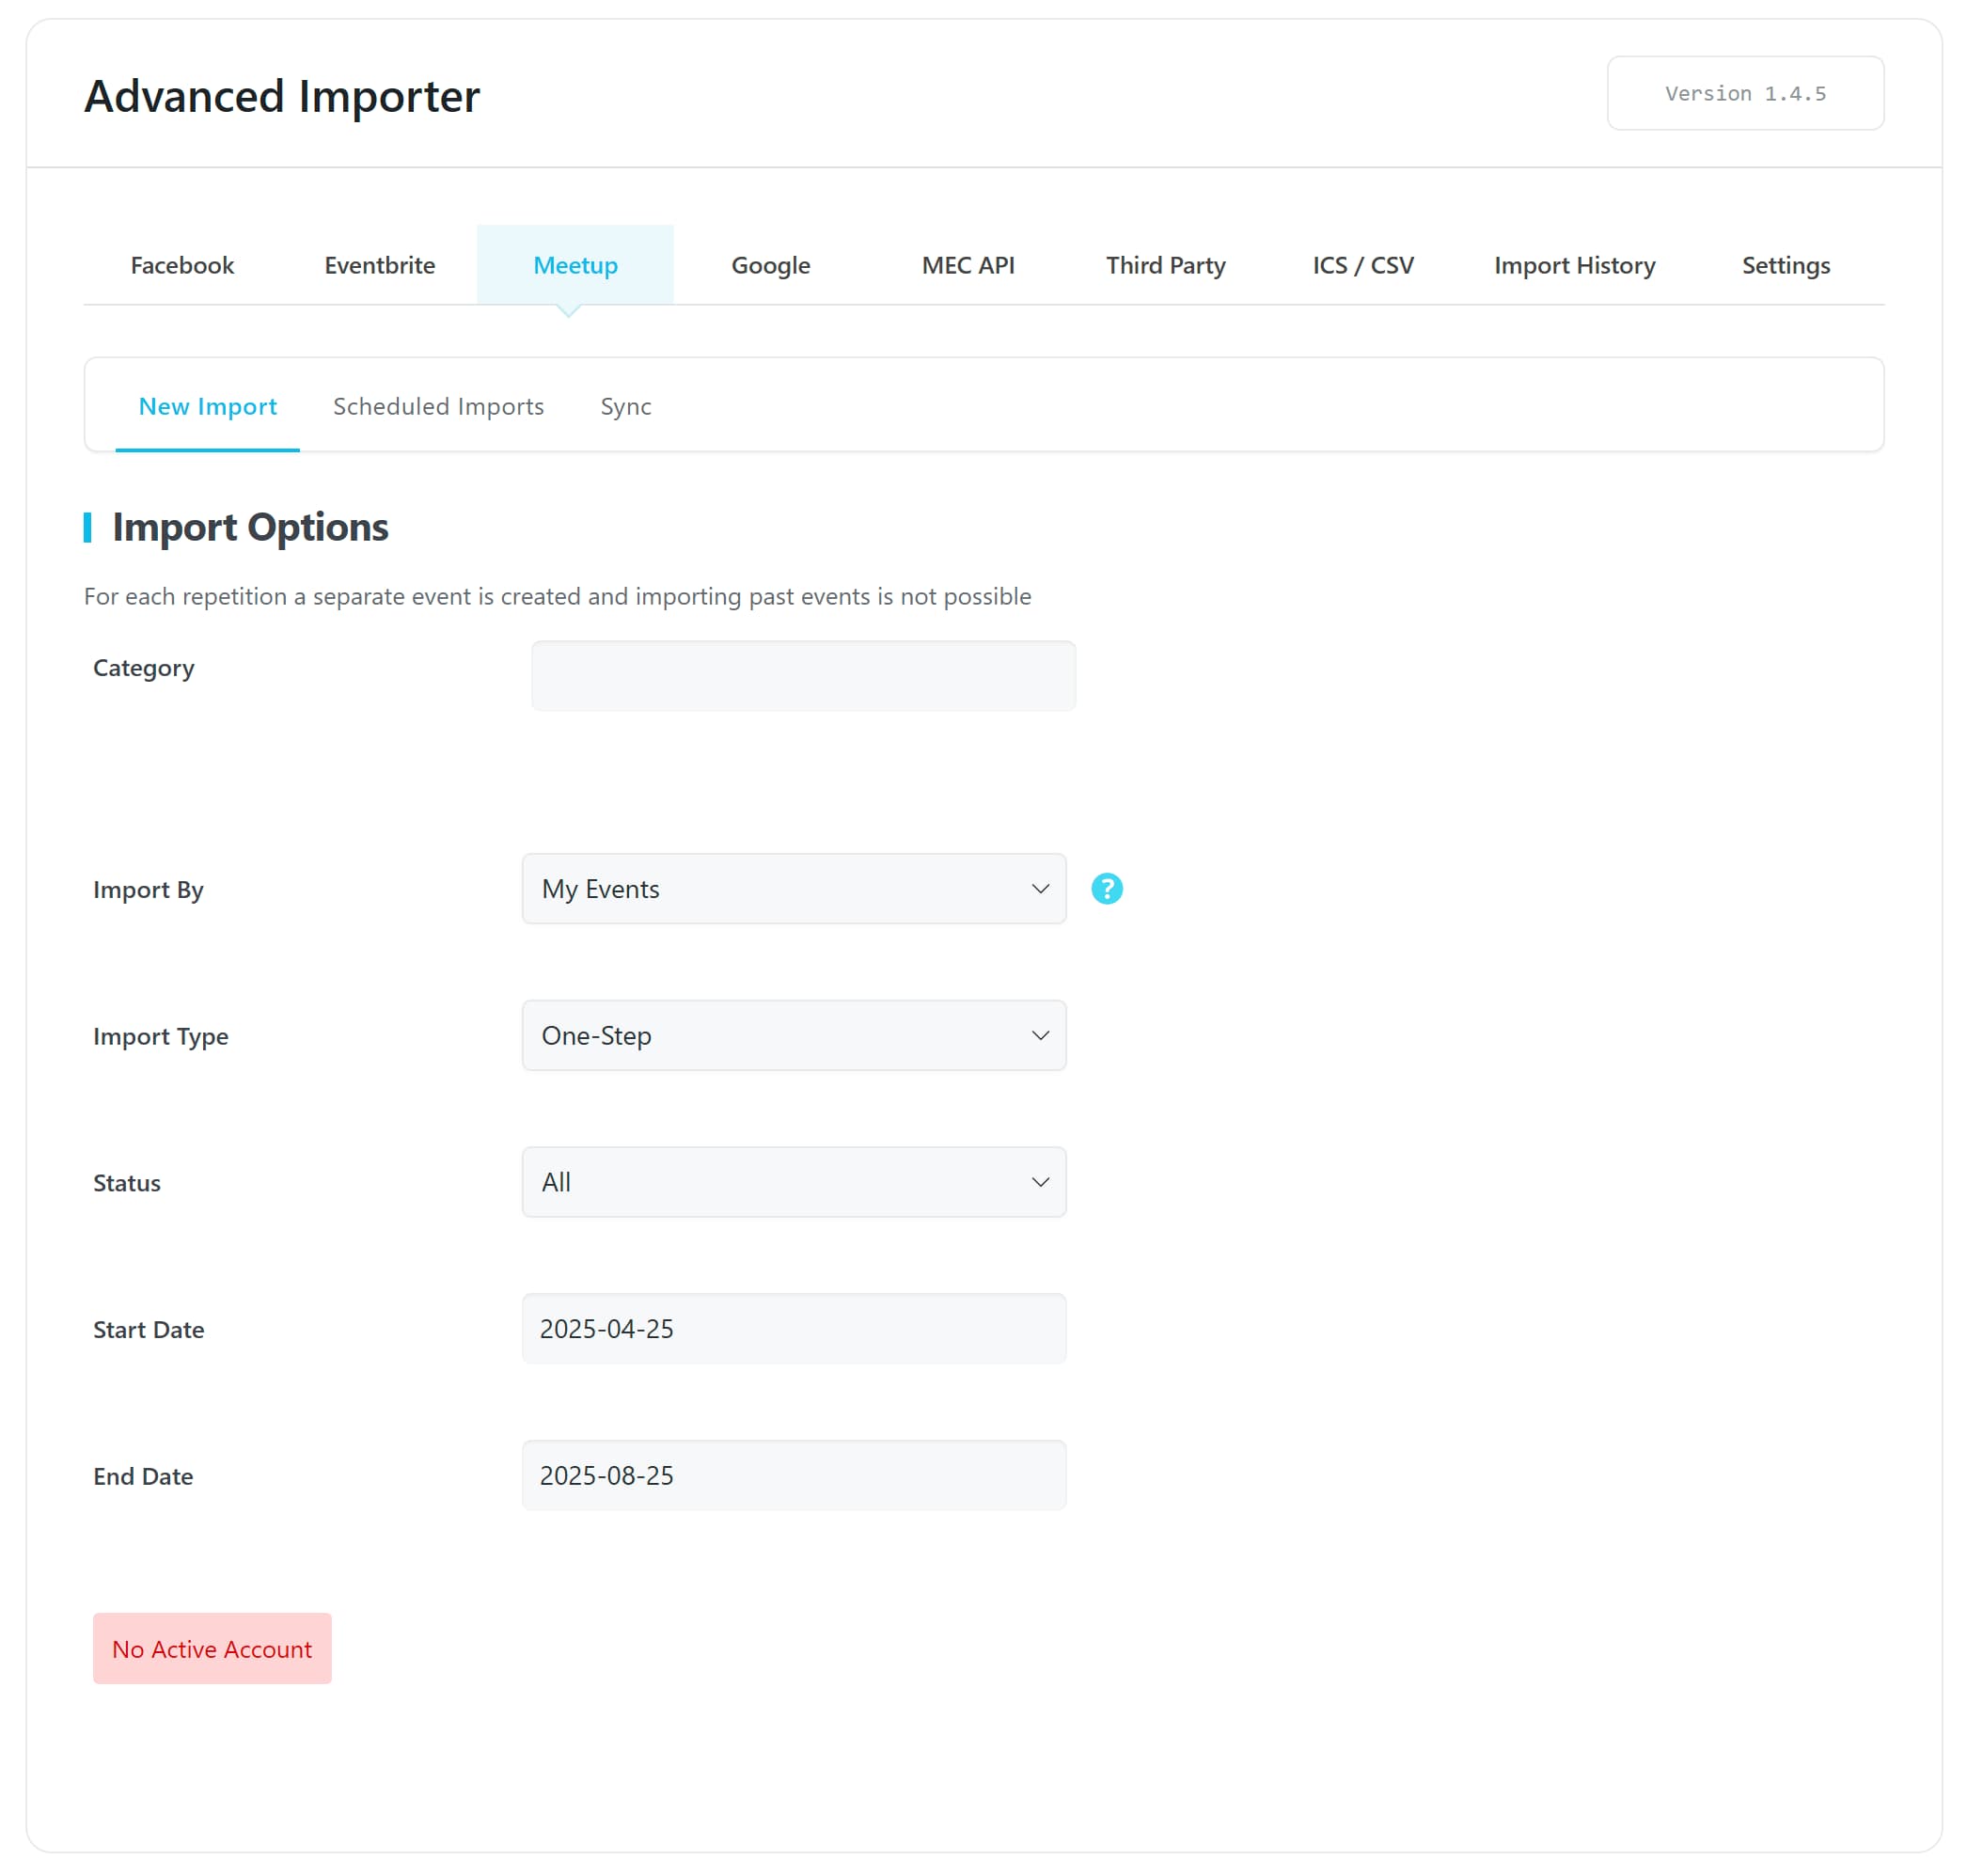
Meetup
MEC API
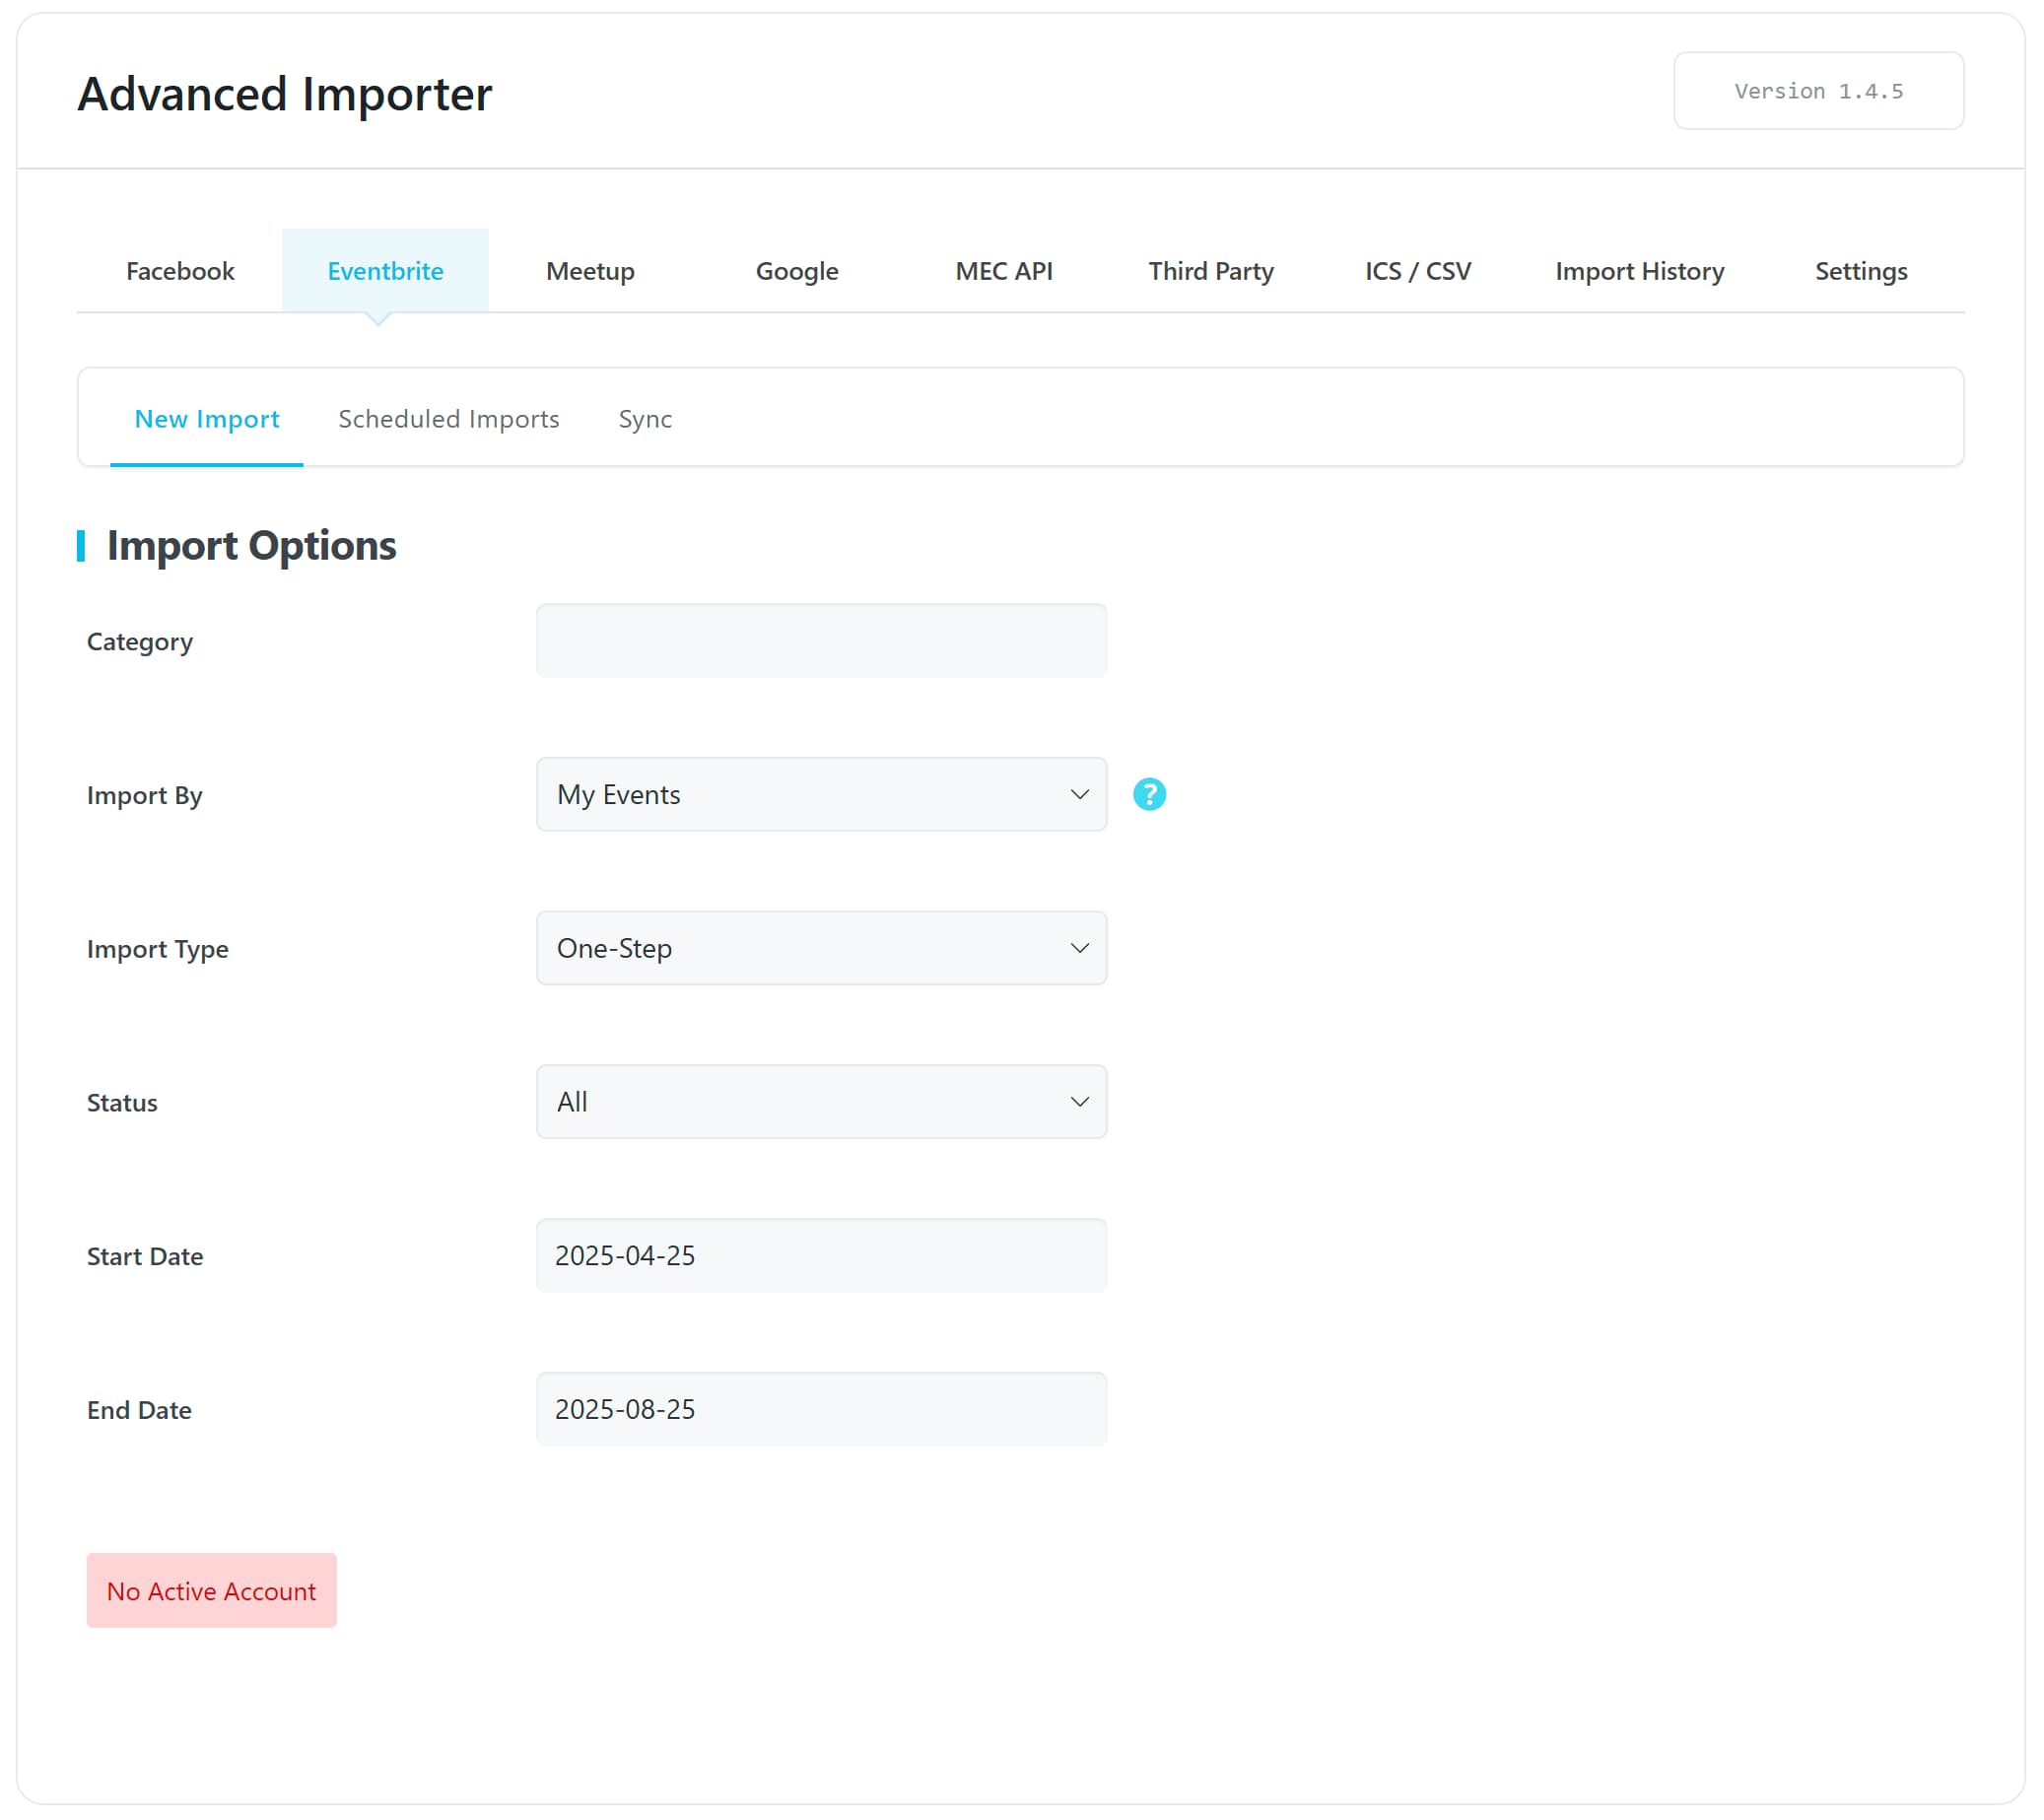
After adding your account, you should find your username at the bottom of the settings tab of each platform (they should be activated) and click on Need Authentication.
A new window opens, and you should log in to your account once or give access to the events. You should log out of settings and return to the main menu. After choosing the platform, choose the account from which you want to import.
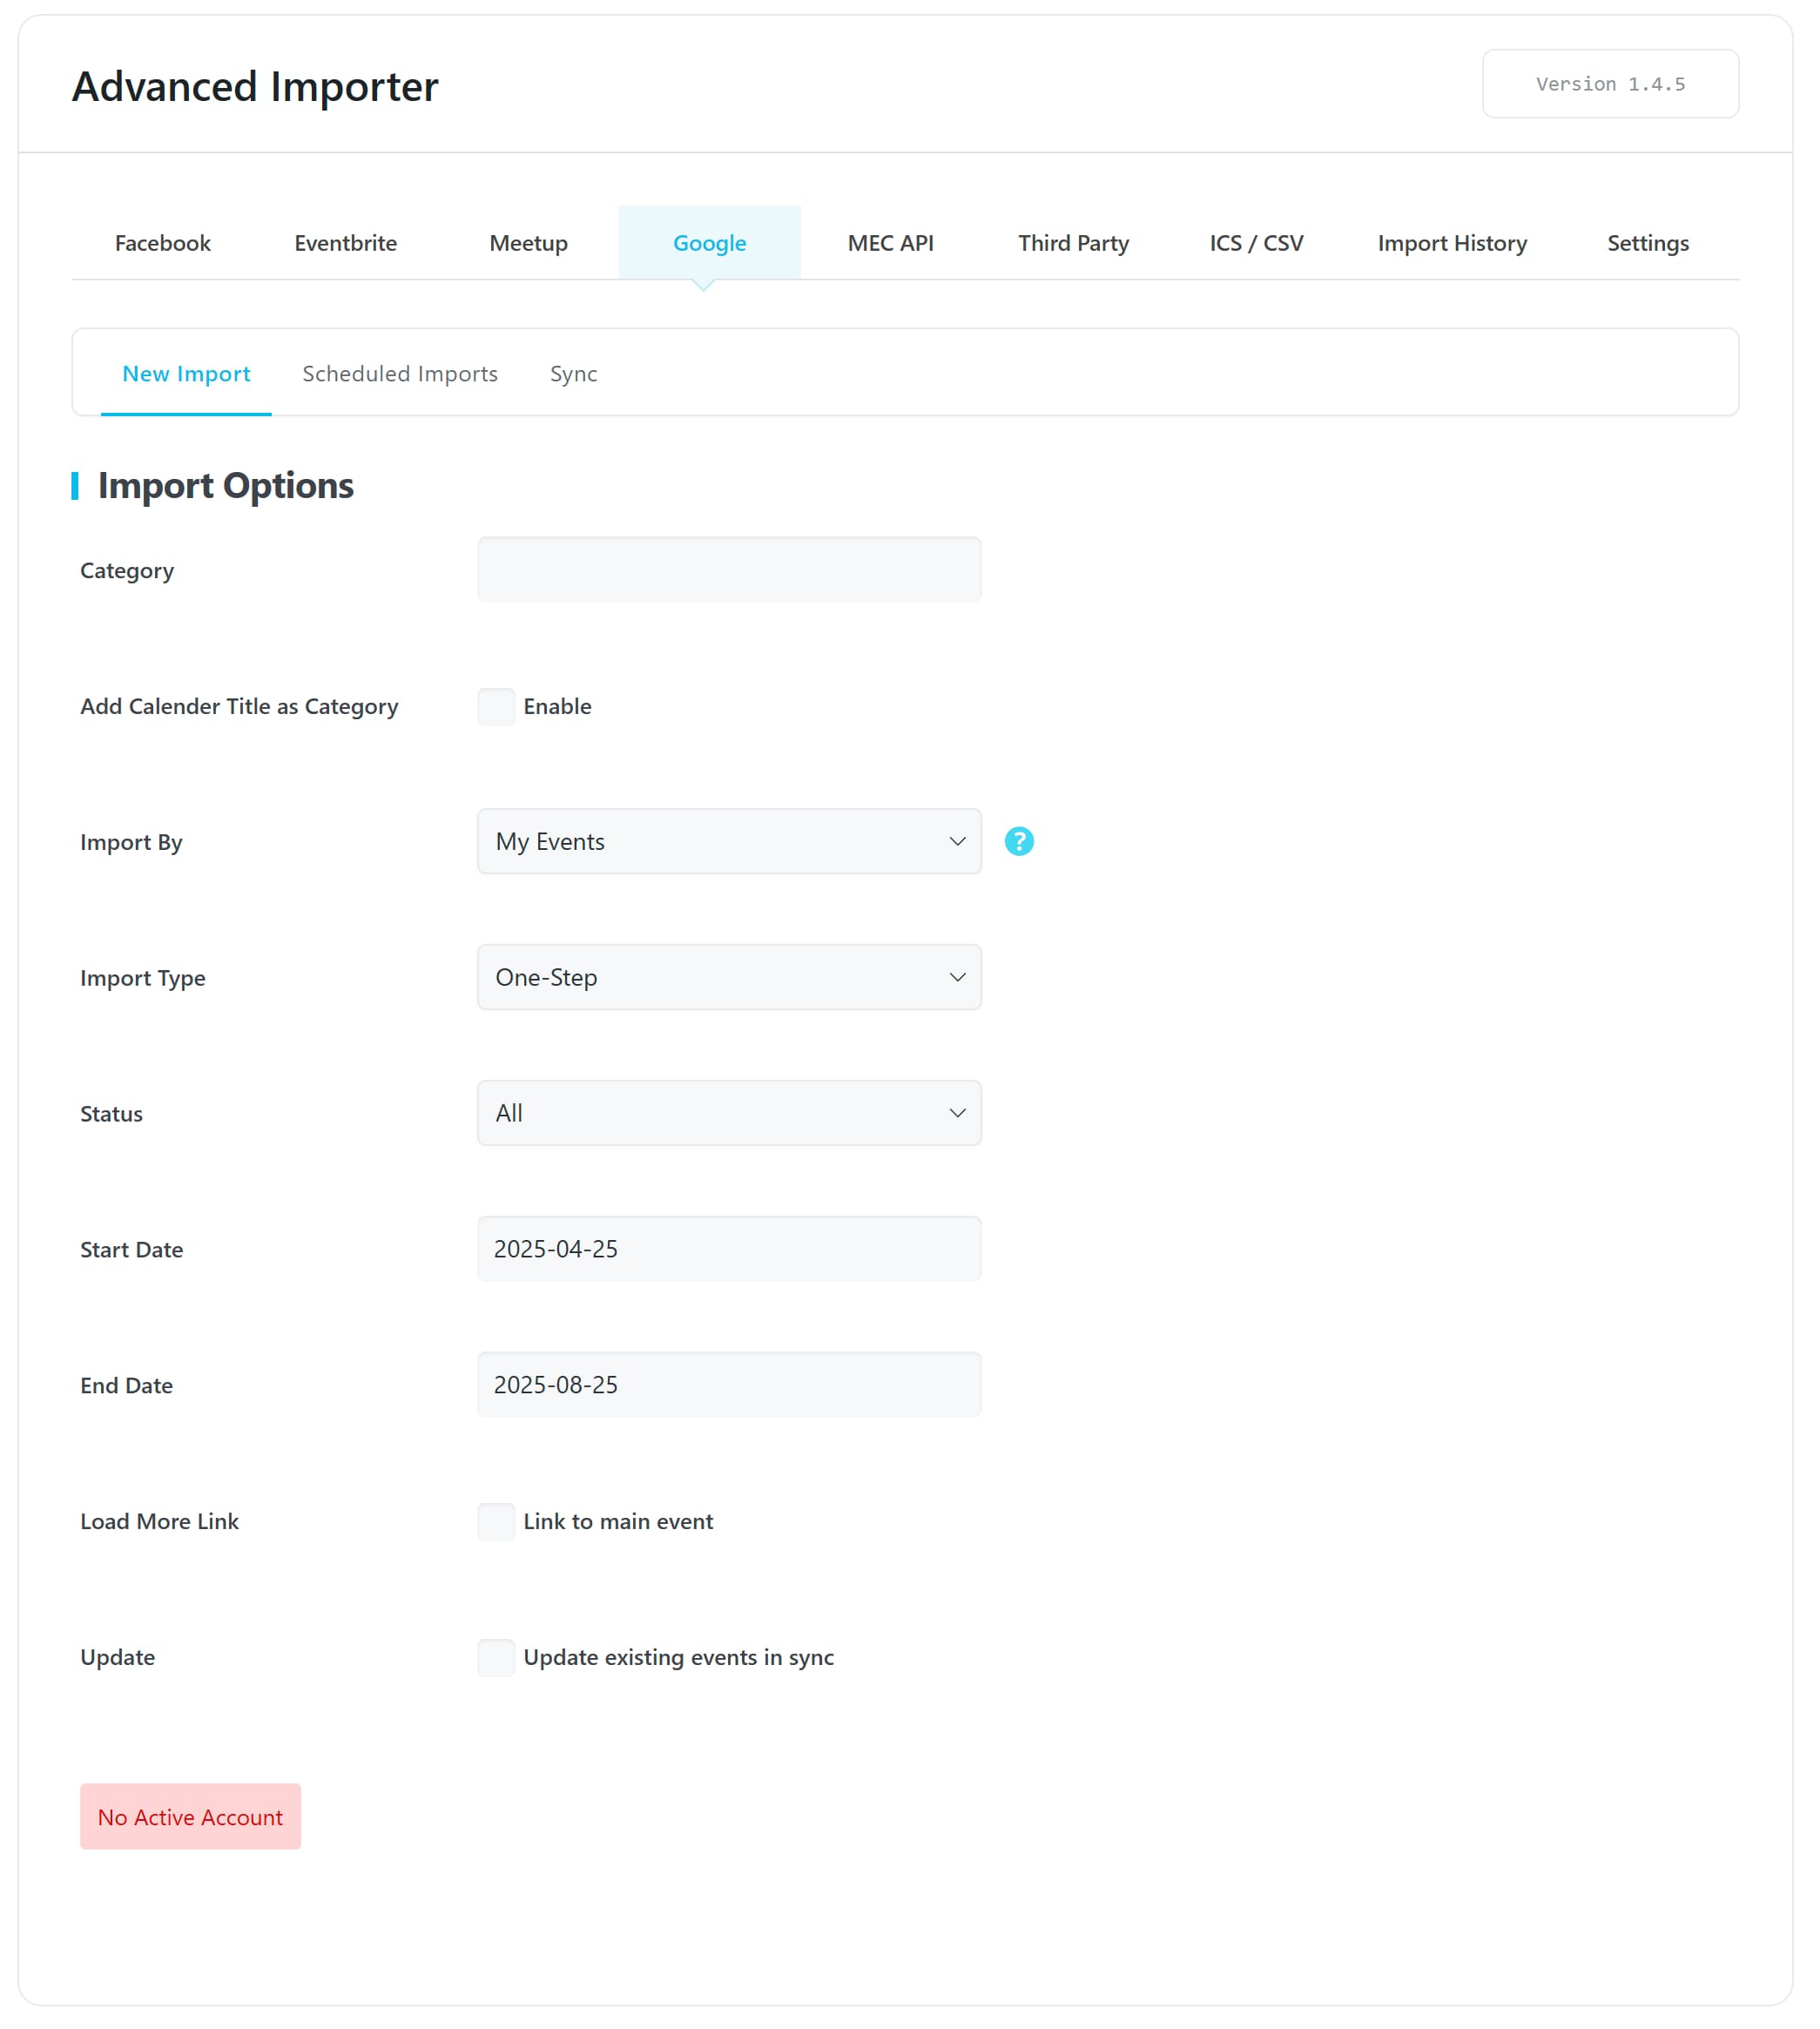
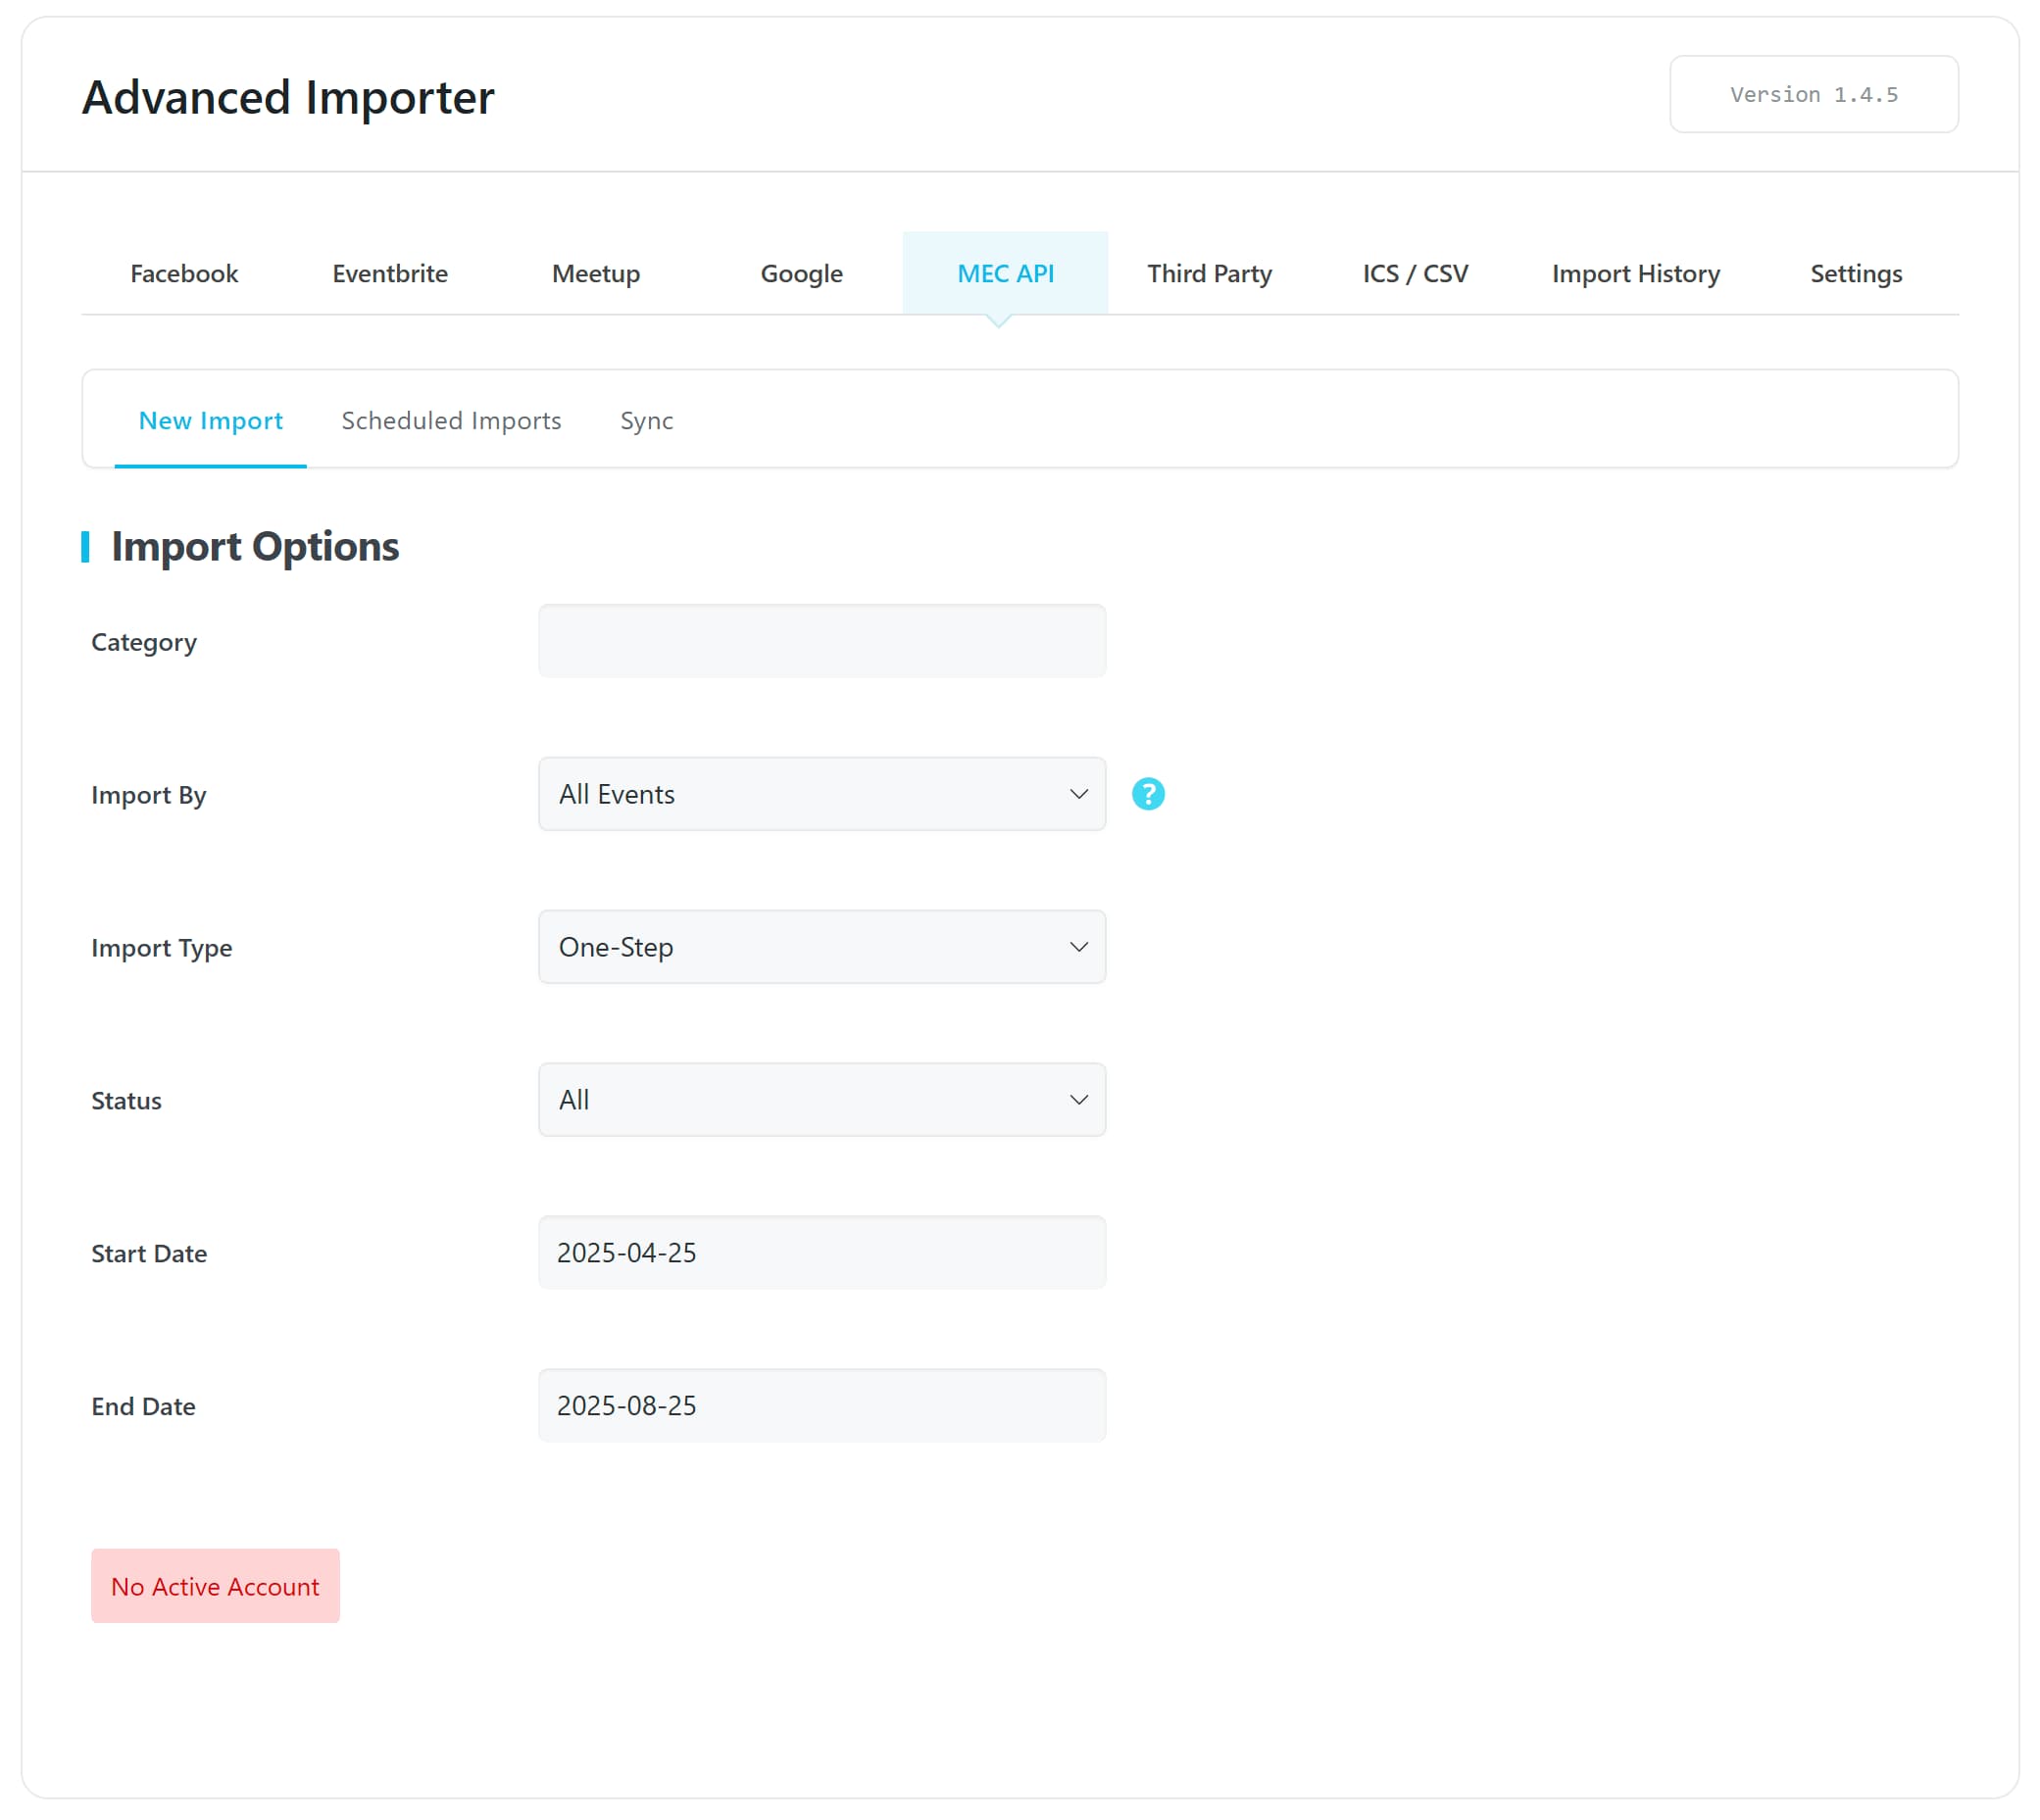
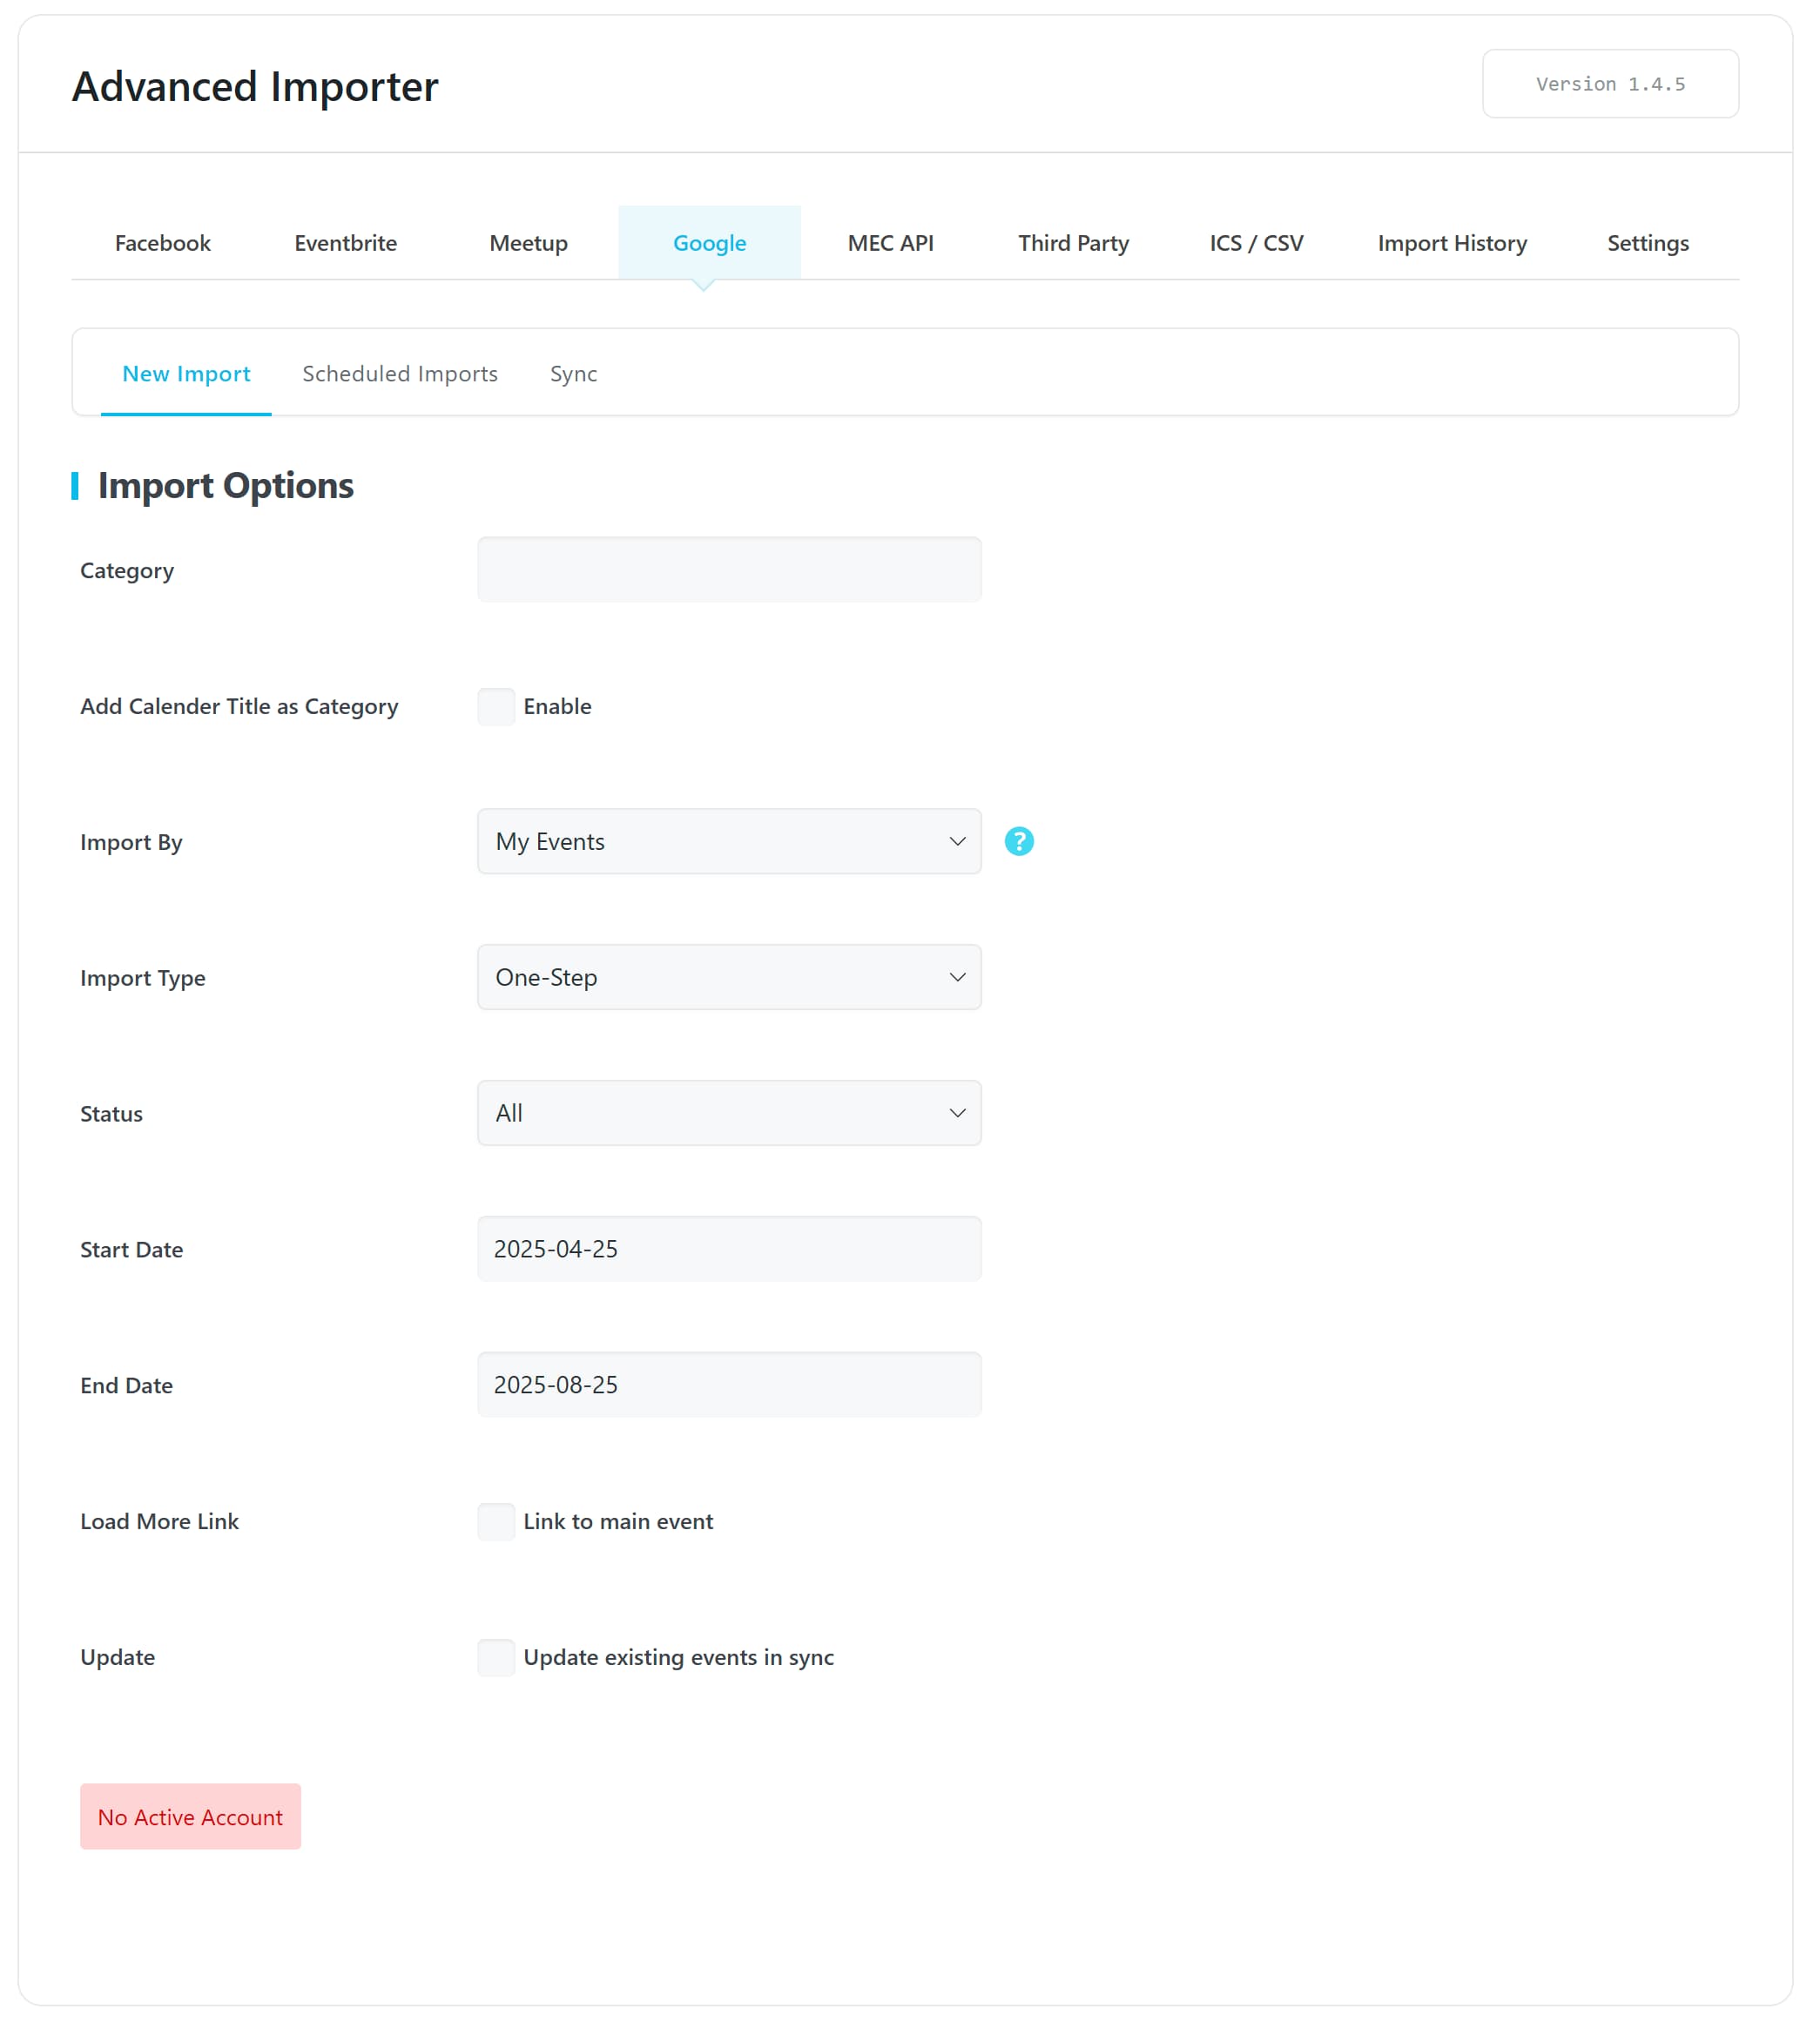
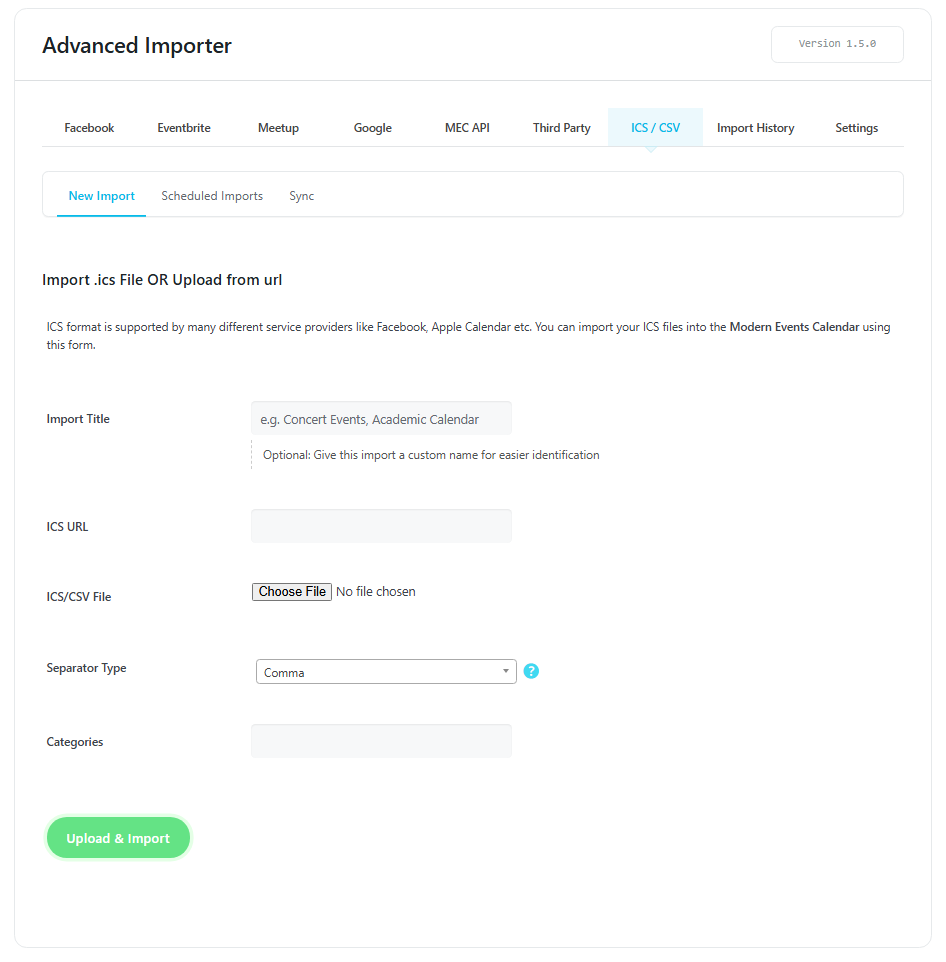
For example, go to the Facebook tab to import from Facebook events. If you want to put the import into a specific category, go to New Import > Import Option and choose one.
In the next field, you can determine from where the import should happen.
For instance, if you want to import several specific events, use event ID. Then, you should set the import type. You will see two items in this step.
One step means that you make the import right then.
Scheduling means that the import process should be done at a specific time.
Opting for ‘Scheduled’ for Import Type grants you a selection of time frames ranging from Once Hourly to Once a Month, allowing you the flexibility to tailor the import timing to your specific requirements.

It is important to note that upon completion of a Scheduled import, you can view and manage the designated schedule under the Scheduled Imports tab, ensuring that you are always aware of your planned imports.
In the next two fields, set the start date and end date. Finally, click the Get All Events From button to fetch the information.
For Google, first, you will see a number of calendars. Click on Get Calendar to see the number of events. Click on Get Events to see the events list.
Choose some events or click on Download All Events to import them. You can also see your events on other pages.
Note 1: Regarding Google, you may need to go through the authentication process every 30 minutes.
Note 2: You may have made some changes to your Google Calendar and not see the changes. If so, clear your browser cache or wait 30 minutes to authenticate again.
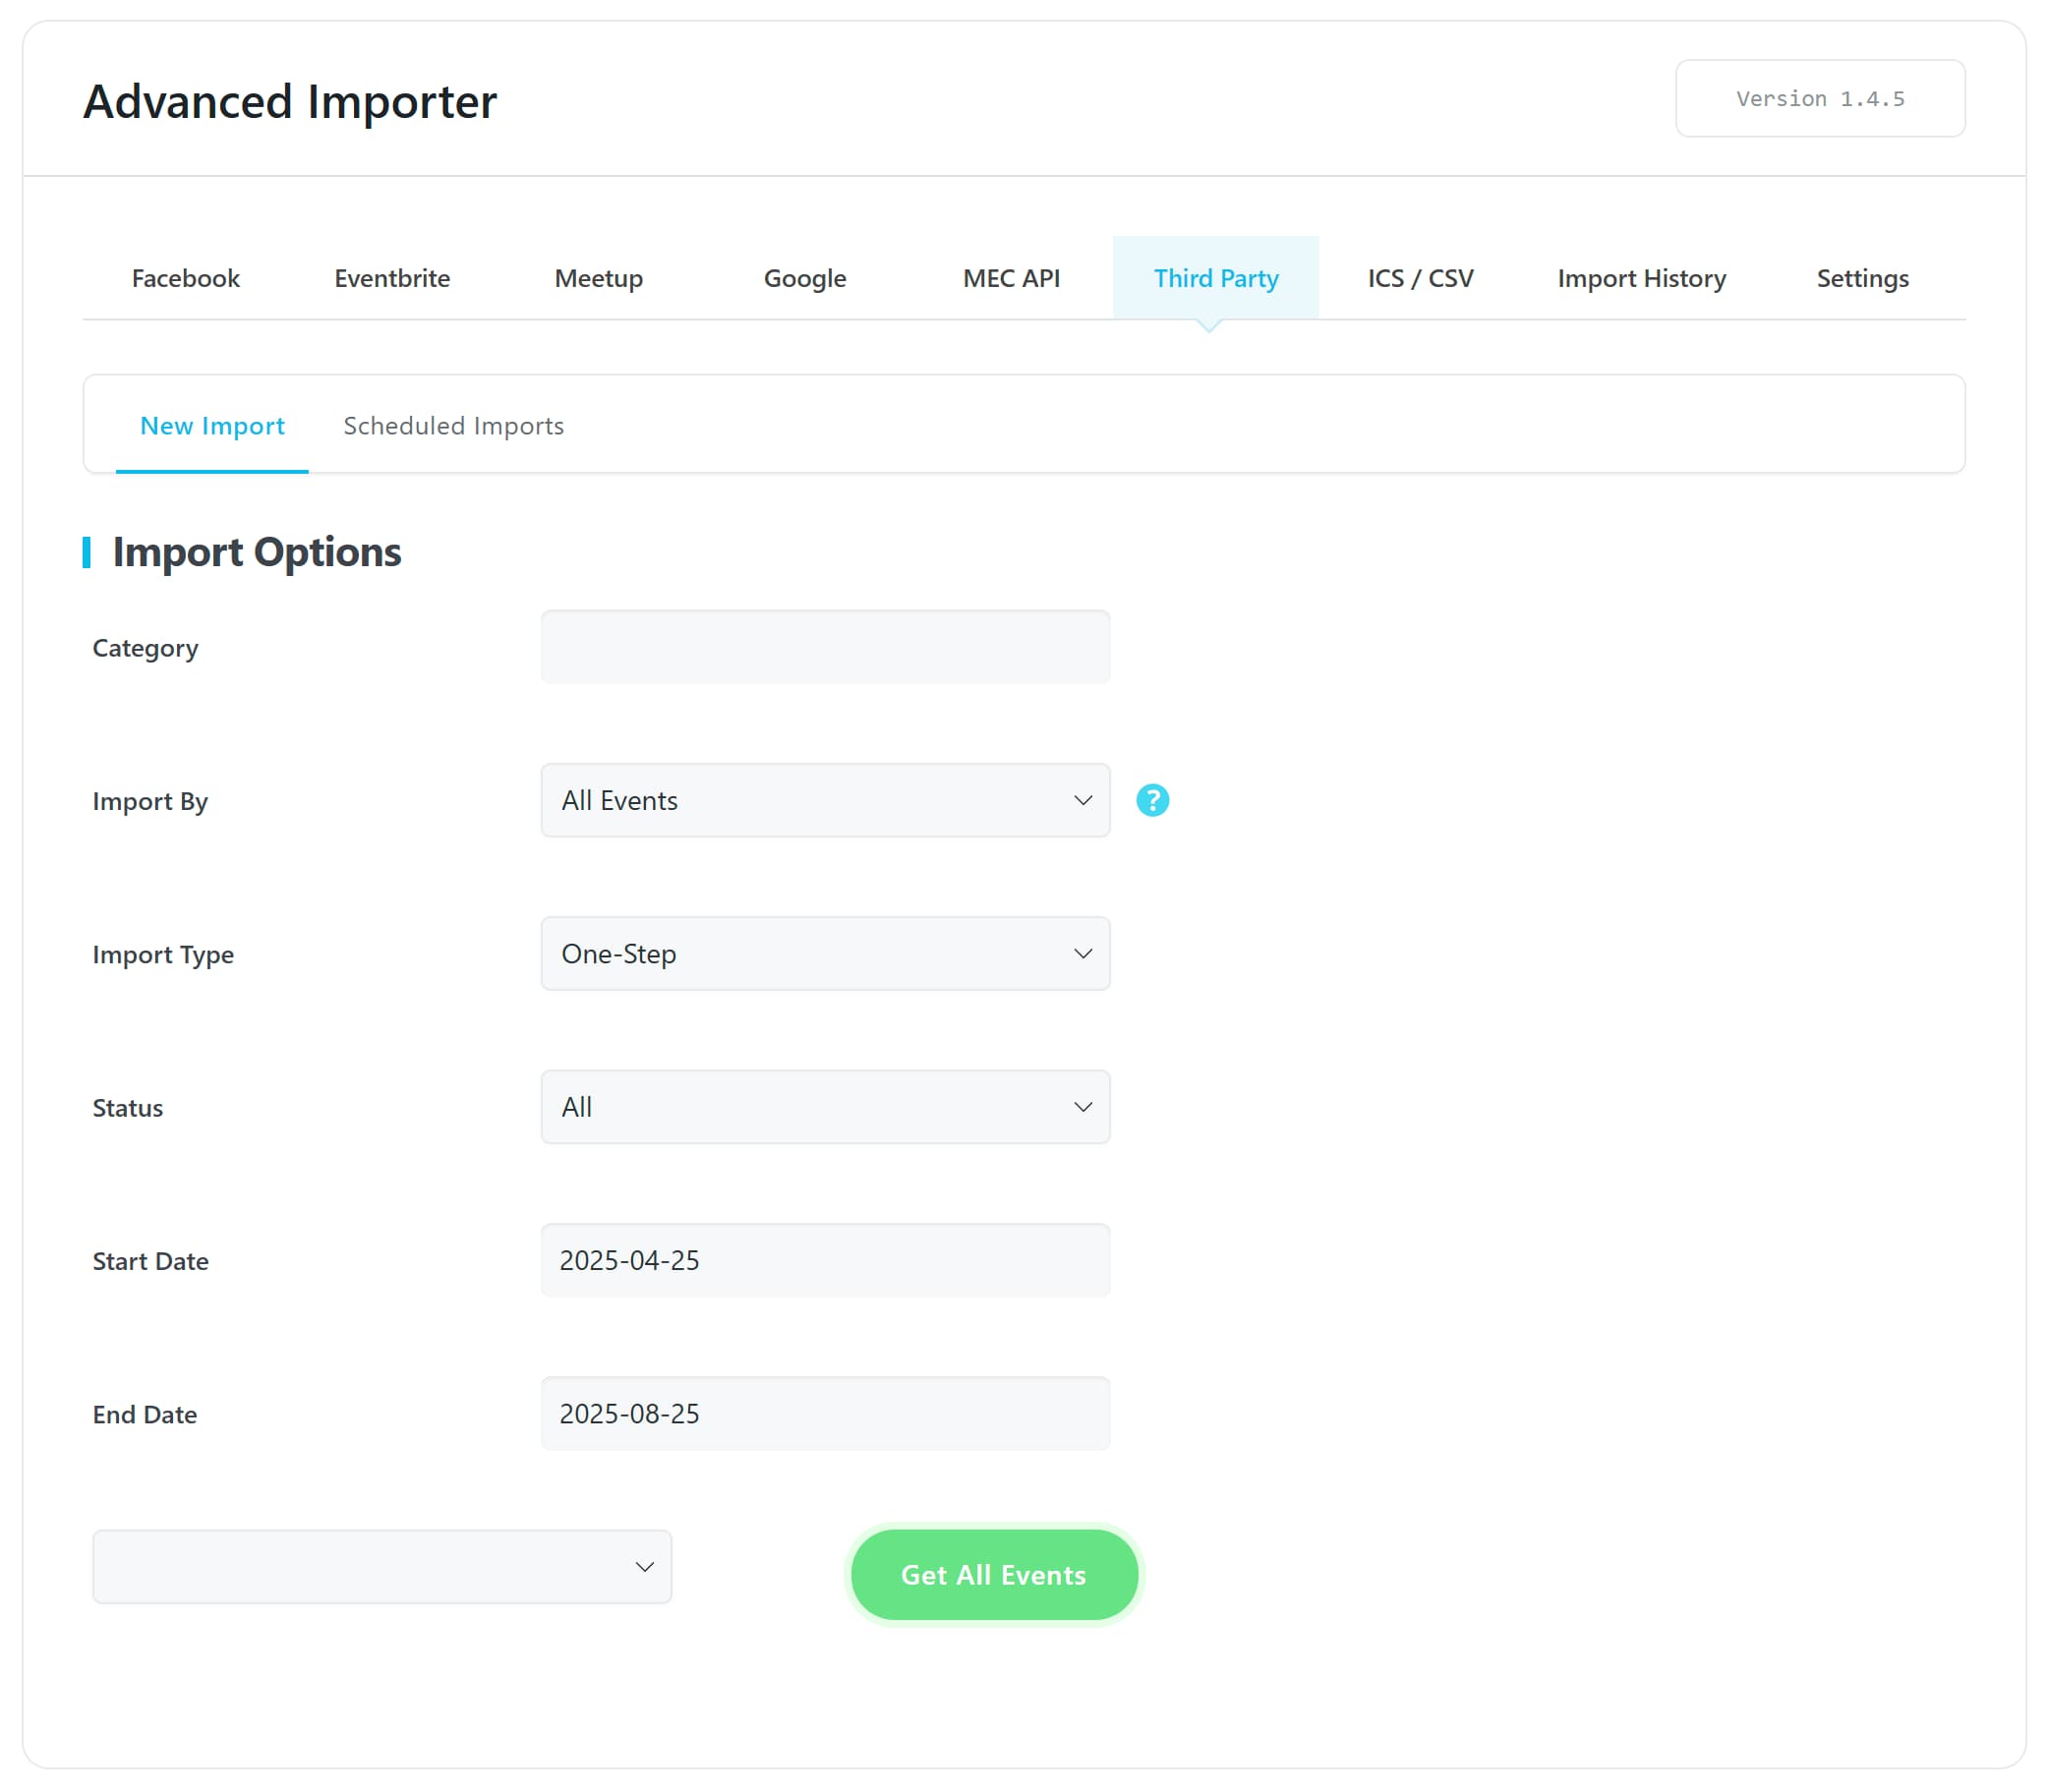
Importing from Third-Party Plugins
If you use one of the Event Organiser, My Calendar, or Eventum plugins and you want to migrate to MEC, we suggest keeping them active. Using this menu, choose your plugin and then proceed with the import.
Please be advised that it is not necessary to maintain the plugins in an active state post-import. Once the import process has been successfully concluded, you can continue with MEC without further reliance on these plugins.
Importing by CSV / ICS
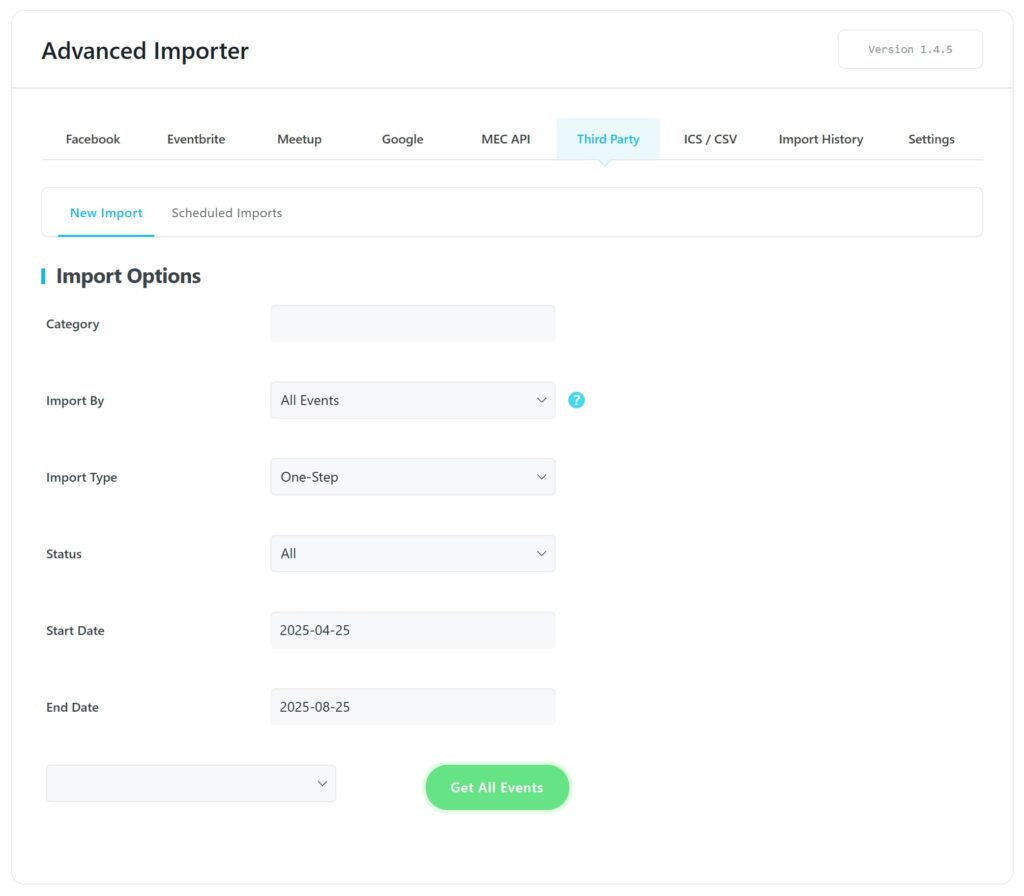
If you have a file in ICS or CSV format, you can import it directly to MEC.
Moreover, if you have a URL corresponding to a file in ICS format, we recommend using that URL to facilitate the download process.
Additionally, for organizational purposes and to enhance searchability, you are provided with the option to select a specific category to classify your imported events effectively. This will streamline the management of your calendar and will aid in maintaining structured event records.
When adding external ICS feeds, you can assign a custom Title to each feed. This title is used internally to help you identify and organize your imported calendars more easily. Instead of relying on the ICS URL alone, you can label feeds (e.g., Concert Events or Academic Calendar) for better clarity, especially when managing multiple sources.
Please note that the Scheduled Imports and Sync features are only available for ICS URLs and are not supported for CSV files.
Import History
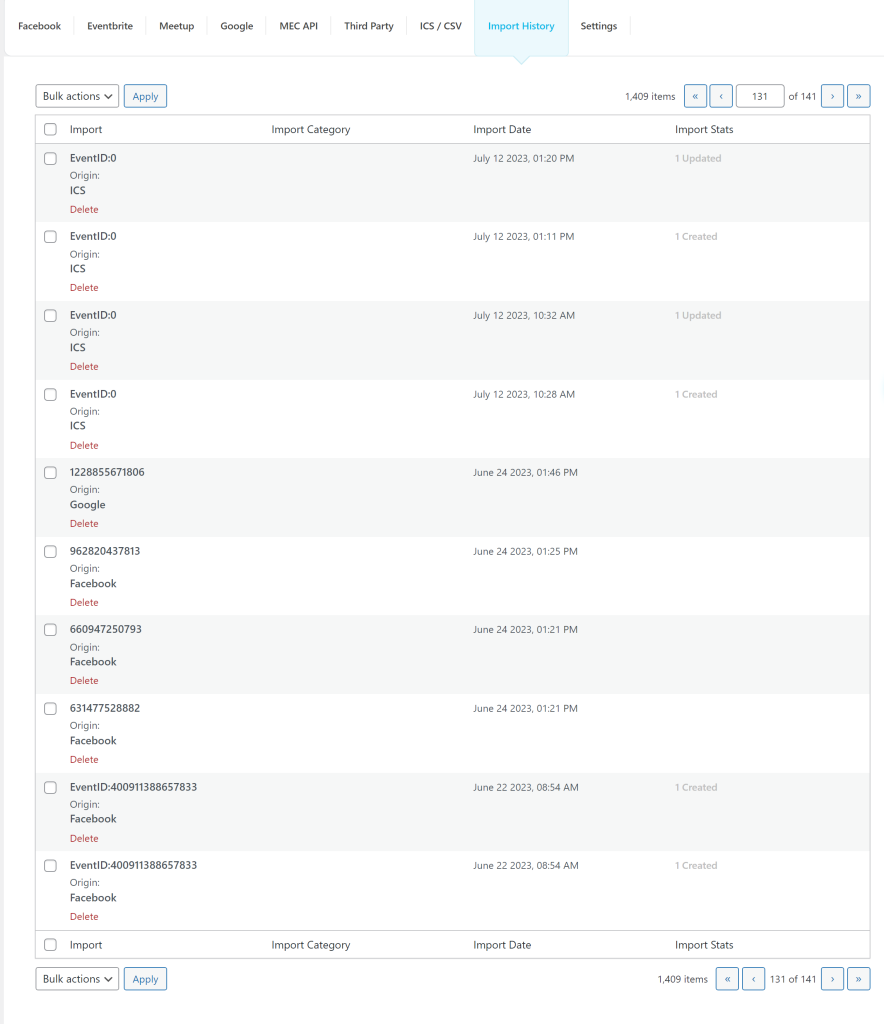
Within this interface, you can view a complete list of all imported events.
You have the option to not only delete events, but also to see the categories assigned to them, as well as verify the date of import and current import status.
For more information about the Advanced Importer Addon, please visit this link.
FAQ
How do I install and activate the Advanced Importer Addon for MEC?
Ensure that both the Modern Events Calendar and the Advanced Importer Addon are installed and activated on your WordPress site. After activation, a new menu labeled “Advanced Importer” will appear under the M.E. Calendar section. Clicking on this menu will redirect you to the import page.
Which platforms can I import events from using the Advanced Importer Addon?
The addon supports importing events from Facebook, Google Calendar, Meetup, and Eventbrite. You can connect multiple accounts from these platforms for unlimited imports.
How do I authenticate my Facebook account to import events?
To authenticate your Facebook account, follow these steps:
1. Create a Facebook App through the Facebook Developers portal.
2. Generate a User Access Token with the necessary permissions.
3. Enter the Access Token in the Advanced Importer settings under the Facebook section.
Detailed instructions are available in the MEC documentation.
How do I connect my Google Calendar to import events?
To connect your Google Calendar:
1. Create a project in the Google Developers Console.
2. Enable the Google Calendar API for your project.
3. Obtain the necessary API credentials.
4. Enter these credentials in the Google settings of the Advanced Importer Addon.
Detailed instructions are provided in the MEC documentation.
What information is required to connect my Eventbrite account?
To connect your Eventbrite account, you’ll need to obtain an API Key by:
1. Logging into your Eventbrite account.
2. Navigate to the API Key section.
3. Generating a new API Key.
Once obtained, enter this API Key in the Eventbrite settings of the Advanced Importer Addon.
How do I obtain the necessary credentials to connect my Meetup account?
To connect your Meetup account:
1. Visit the Meetup OAuth Clients page.
2. Create a new OAuth Client to receive your Client ID and Client Secret.
3. Enter these credentials in the Meetup settings of the Advanced Importer Addon.
Note that the activation process may take up to an hour.
How can I schedule automatic imports for my events?
The Advanced Importer Addon allows you to schedule imports by selecting the “Scheduled” option under Import Type. You can set the frequency to Once Hourly, Twice Daily, Daily, Weekly, or Monthly, depending on your requirements.
What should I do if I encounter issues during the import process?
If you experience problems during import:
– Verify that all account credentials (API Keys, Access Tokens) are correctly entered.
– Ensure that the necessary permissions are granted for each platform.
– Check your server’s performance capabilities, especially when importing a large number of events.
For further assistance, consult the MEC documentation or contact support.
Is it possible to import events from other WordPress event plugins into MEC using the Advanced Importer?
Yes, the Advanced Importer Addon allows you to import events from Event Organiser, My Calendar, or Eventum plugins. You can deactivate those plugins after the import is complete.
What is the MEC API setting in Advanced Importer?
The MEC API setting allows you to import events from another website that is using the Advanced Importer. You need to copy the URL from the source website and paste it into the target website’s Advanced Importer settings along with the API Key.
How can I set the number of events displayed during the import process?
In the General Settings of the Advanced Importer, you can adjust the number of events shown on each page table to suit your needs. The default is six, but you can increase it. Adjust this number based on your system’s performance capabilities.
How does the authentication process work for each platform?
After adding your account for a specific platform, you’ll see it listed at the bottom of its settings. Click ‘Need Authentication’ to open a new window to log in or give access to your events.
Can I import events into a specific category?
Yes, when creating a new import, you can choose a specific category from among the categories available in MEC for the imported events.
How can I view and manage the history of imported events?
You can view a list of imported events in the “Import History” interface, where you can also delete events, check their categories, import dates, and status.
Can I import events using CSV or ICS files?
Yes, you can import events directly using CSV or ICS files, and you can also use a URL for an ICS file.
What should I do if I want to import events only from a specific time range?
The Advanced Importer Addon allows you to filter events by specifying the desired time range, ensuring that only events within that range are imported.
What should I do if I make changes to my Google Calendar and they are not reflected in the import?
If changes you’ve made to your Google Calendar are not reflected in the import, you should clear your browser cache or wait 30 minutes to allow for re-authentication.
If you schedule an import, can you view and manage the scheduled import, and where can you access this information?
Yes, if you schedule an import, you can view and manage the designated schedule under the Scheduled Imports tab. This allows you to monitor and keep track of your planned imports.
When importing events, is there an option to import all events at once, and how does this option work for Google Calendar?
Yes, when importing events from Google Calendar, there is an option to download all events. First, you will see the number of calendars, and after clicking “Get Calendar”, you will see the number of events. Then, clicking “Get Events” allows you to see a list of the events. From there, you can either choose some events or click “Download All Events” to import all of them.
Report Out Dated Content
If you think the content of this page does not reflect updated information, please let us know.
